
In the previous recipes, we have looked at different calculations such as string, arithmetic, and date calculations. In this section, we will focus on the Logic statements. These are typically IF….ELSE statements or CASE statements.
Imagine having to conditionally format your data to highlight products having actual sales less than the target value. In order to address this requirement, we need to make use of Logic statements. These logic statements will execute a certain expression once a condition is met or else it will execute another expression.
Let's get started with Logic statements in Tableau.
Let's take an example where we will try to conditionally color code/highlight the product Sub-Categories that are having Sales less than 100K. We will use the fields from the Orders sheet of Sample - Superstore.xlsx data and as usual, continue working in our existing workbook. Let's see how we can achieve the previously stated objective.
- Let us create a new sheet by pressing Ctrl + M and rename it
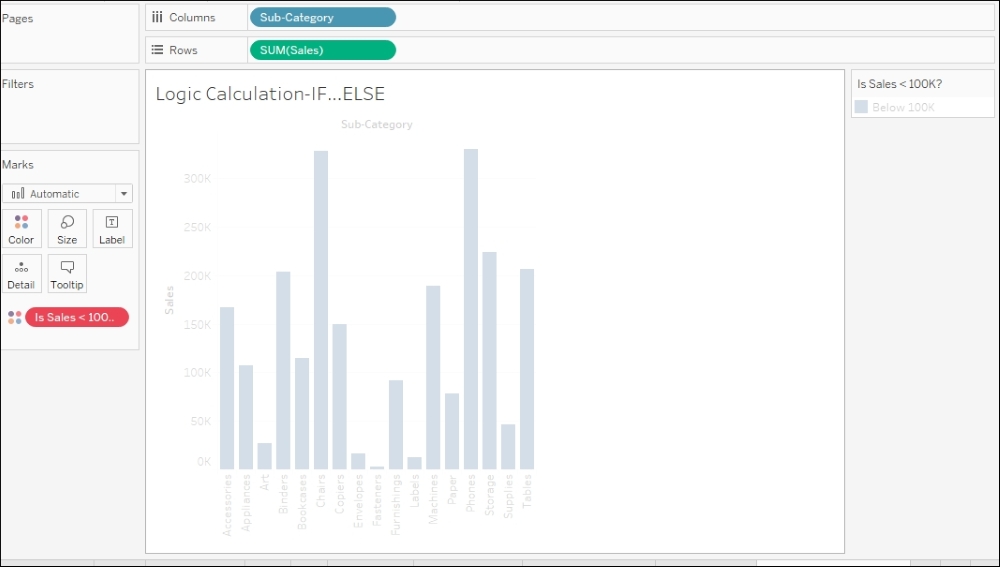
Logic Calculation-IF…ELSE. - We will first drag and drop the Sub-Category field into the Columns shelf, followed by dragging and dropping the Sales field into the Rows shelf. This will result in a vertical bar chart, as shown in the following screenshot:

- Now, for conditionally highlighting Sub-Categories having Sales below 100K, we will create a new calculated field called Is Sales < 100K? and we will type the following formula: IF [Sales] < 100000 THEN 'Below 100K' ELSE 'Above 100K' END.
- Let us then click on OK. This new calculated field can now be found in the Dimensions pane. Now, in order to color code the bars, we will get this new field in the Color shelf in the Marks card and once we do that, we will get the following view:

- The view looks the same as it was earlier. However, if we notice closely, we will see a color legend that says Below 100K. This is strange as we can clearly see that there are plenty of Sub-Categories having Sales above 100K. For example, Accessories, Appliances, Binders, Bookcases, Chairs, and so on. Clearly, there is something amiss. So, let us revisit our calculation by right clicking on the Is Sales < 100K? calculation in the Dimensions pane and selecting the Edit… option.
- Once we do that, we will see that our calculation says IF [Sales] < 100000 THEN 'Below 100K' ELSE 'Above 100K' END. However, if we look at our Y axis, by referring to the Rows shelf, then we will see that it is showing SUM(Sales). This is exactly what we had seen earlier, that is, difference between Sales and SUM(Sales) or difference between disaggregated and aggregated fields. Thus, when we say Sales, we are referring to the transactional Sales and if we look at our raw data, we will see that each transactional Sale is less than 100K. So, let us quickly modify our formula and change it to IF SUM([Sales]) < 100000 THEN 'Below 100K' ELSE 'Above 100K' END.
- Refer to the following screenshot:

- Once we click OK, we will see that our view is faded out. Refer to the following screenshot:
- This is because we have changed the properties of our calculation. The calculation was previously a Dimension, but since we are aggregating the calculation by using SUM, it becomes a Measure. Thus, let us drag the Is Sales < 100K? field from the Measures pane and drop it into the Color shelf. Once we do that, we get the view, as shown in the following screenshot:

- So, in the current view, all the orange bars are Sub-Categories having Sales below 100K and all the blue bars are Sub-Categories having Sales above 100K.
- In the preceding calculation, we had only two conditions and hence an IF…ELSE function worked. However, in case we have multiple conditions then the IF…ELSE function will have to be extended to an IF…ELSEIF function. Let us quickly look at one example of an IF…ELSEIF function by duplicating the existing sheet and renaming it Logic Calculation-IF...ELSEIF.
- Let us then create a new calculated field called Sales bins and the formula will be as follows:
IF SUM([Sales])<100000 THEN '<100K'
ELSEIF SUM([Sales])>=100000 AND SUM([Sales])<=200000  THEN '100K-200K'
ELSE '>200K'
END
- Let us click OK and then get this field into the color shelf. Our view will then update, as shown in the following screenshot:

In the preceding recipe, we saw how to use the IF…ELSE function as well as the IF…ELSEIF function. An important point to remember is the difference between ELSEIF and ELSE IF. In the latter case, another IF statement will be computed within the first IF statement.
Another important point to remember is that every IF function that we use needs to be terminated using an END function and hence, in the latter case, there will be two END functions as we are starting another IF statement within the first.
Also, when we used the IF…ELSEIF function, we used an AND operator. Some of the other operators that can be used are OR, NOT, and so on.
To know more about the Operators, please refer to http://onlinehelp.tableau.com/current/pro/desktop/en-us/functions_operators.html.
To know more about Logical functions, please refer to http://onlinehelp.tableau.com/current/pro/desktop/en-us/functions_functions_logical.html.