
There are times when we would want to access more information about data that maybe hosted outside our data source. This information could either be on a web page, file, or other web-based resources that are outside of Tableau. To access these from our Tableau workbook, we will need to create hyperlinks. These hyperlinks can be created using a URL action. Thus, a URL action is a hyperlink that points to a web page, file, or other web-based resources that are outside of Tableau.
Further, we can pass values and replace the field values in the URL to make the link more relevant to our data. Let us follow the recipe that is given here, to understand the URL action better.
For this recipe, we will first create a new dashboard which has a map that shows state-level information. We will then embed a web page which will be a Wikipedia page and try to pass values from our Tableau view to show the relevant information on the web page. Let's get started.
- Let us create a new dashboard and name it
Dashboard for URL action. Make sure that you select the Automatic option as we did in one of the previous recipes to resize the dashboard and avoid scroll bars. - Then we will drag and drop the
Sales distribution by Statesheet. Refer to the following screenshot:
- Before we embed a web page onto this dashboard, let us first remove the size and color legend by clicking on the cross which appears on the grey border of the legend when we select it. Then let us drag and drop the Web Page object from the left-hand side onto the dashboard. When we do that, we will get a small pop up box for typing the URL. Refer to the following screenshot:
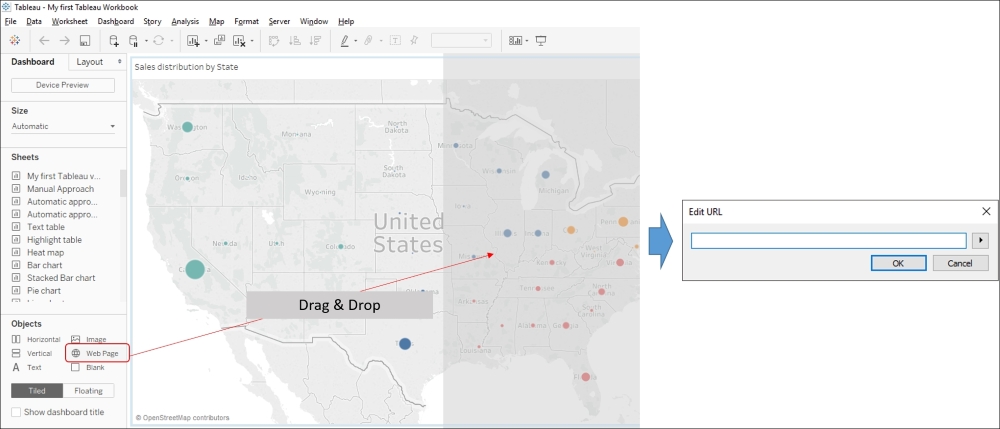
- Enter the following as the URL: http://en.wikipedia.org/wiki/Wikipedia.
- Click OK and return to the dashboard which will now be updated to show the following view:
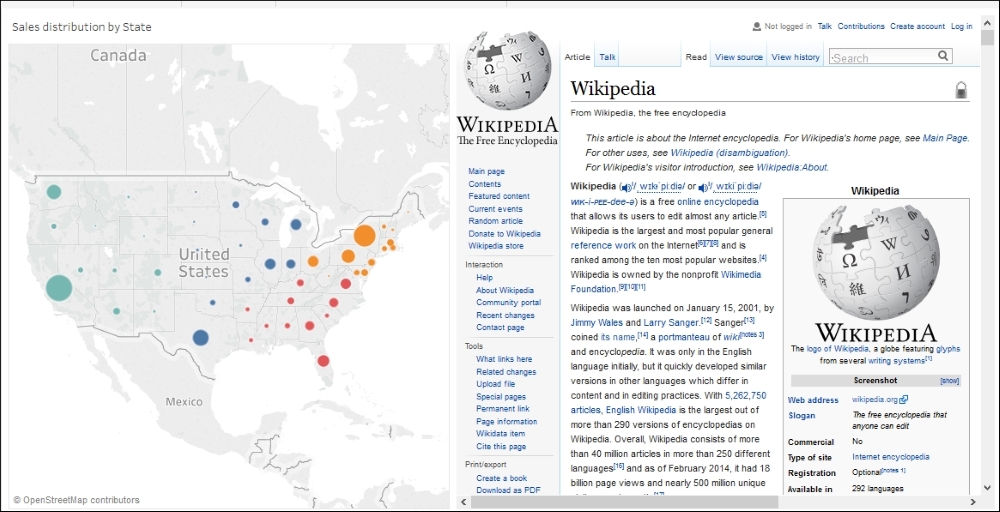
- Now, what we want to do is that when we click on a particular State in the map, the adjacent Wikipedia page should give us information about the selected State. For this, we will first go to our web browser and see how the Wikipedia URL works. So, for example, if we look for California on a Wikipedia page, then our URL will update to http://en.wikipedia.org/wiki/California. For Texas, it will be http://en.wikipedia.org/wiki/Texas, and so on. The point is that, we need to make the last section of our URL dynamic and in order to do that, we will create a URL action from the Map to the web page.
- In order to create a URL action, select Dashboard | Actions….
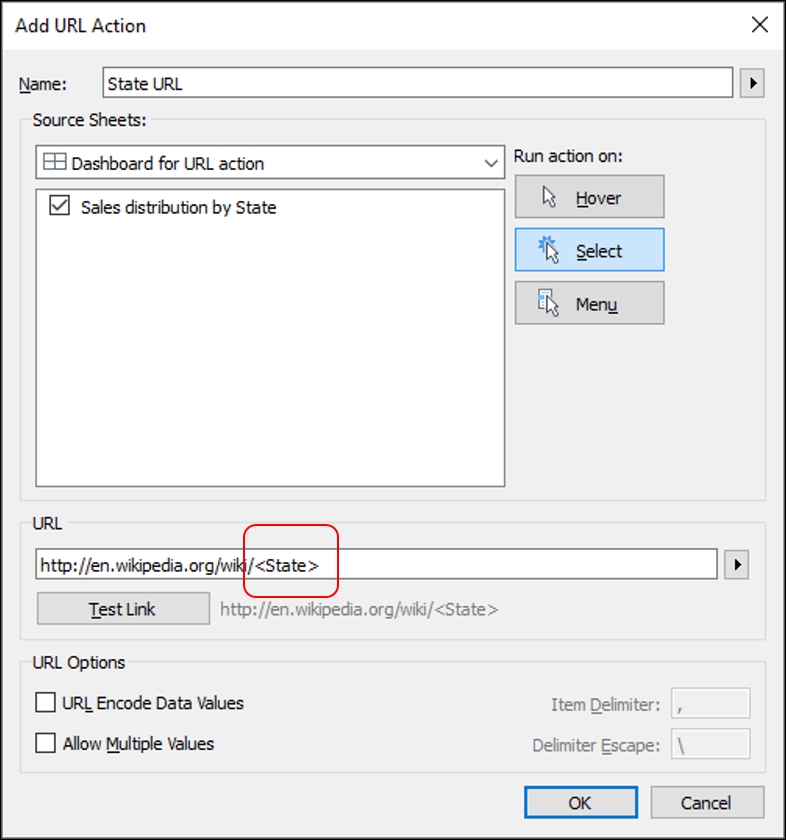
- From the Add Action > button, select the URL… option and once we do that, we will get the view shown in the following screenshot:

- Name this action State URL. We will keep all the default selections the same except change the Run action on: from Menu to Select. We will also enter our Wikipedia URL in the URL section. The URL is as follows. http://en.wikipedia.org/wiki/Wikipedia.
- Refer to the following screenshot to see the updated action:

- Now, in order to dynamically pass the State names, we will have to replace the last section of the URL which reads Wikipedia with the State field which is available when we click on the arrow on the URL section. Refer to the following screenshot:

- Our action will be updated as shown in the following screenshot:
- Click OK and test our action by selecting California in the Map to see the Wikipedia page update accordingly. Refer to the following screenshot:

We have to be very careful when working with URLs as even a slight change in a spelling may not give us the desired output.
Also, since we are working with URLs, it is a good practice to make sure that the Internet connectivity is stable.
Now, when specifying the URL, there is a section which reads URL options. This section contains two options which are as follows:
- URL Encode Data Values: If our data contains values that use characters that are not usually allowed in a URL, then we need to make sure to select this option. For example, if one of our data values contains an ampersand, such as Profit & Marketing, then the ampersand will have to be translated into characters that our browsers will understand. In other words, if we want to include this value in the URL, then it needs to be URL encoded.
- Allow Multiple Values: If we are linking to a web page that can take lists of values, then we need to select this option. However, when we allow multiple values, we must also define the delimiter. A delimiter could be a comma or a tab and is basically a character that separates each item in a list. Once we have defined the delimiter, we will also have to define the delimiter escape.
Read more about URL actions by referring the following link:
http://onlinehelp.tableau.com/current/pro/desktop/en-us/actions_url.html.
What we saw in the above recipes was how to create a dashboard and combine multiple visualizations on it and enable interactivity. One small but important point to remember about dashboards is that when we are done with our dashboards, as good practice, we should hide all the individual sheets that are part of the dashboard. This way, we minimize the number of tabs that will be visible to the end user. This could be the case when we may want to hide worksheets and just share the dashboard and not show the supporting worksheets. In order to do so, we need to right-click on the individual worksheet tab and select Hide Sheet or right-click on Dashboard and select the Hide All Sheets options. Refer to the following screenshots:

To show a hidden worksheet, we will have to right-click on the sheet name from the left-hand side panel on the dashboard and uncheck the Hide Sheet option. Refer to the following screenshot:

Note
In order to know more about all the three actions, refer to the following blog:
https://public.tableau.com/s/blog/2015/06/chronicles-red-devils-highlight-filter-and-url-action.