
In the last chapter, we used our whitebox level to determine which of our simple shapes would be the first to be turned into a 3D asset. Having settled on turning the cubes in our cargo hold into crates, we used Blender to create our 3D game asset and UV unwrap it for use in Unreal. But how do we get it from Blender to Unreal? For that, we have to go through the process of exporting our object from Blender as an FBX file and importing it into Unreal. Then we can connect the newly imported static mesh to a material, add collision primitives, and add it into our level as a usable object. This process is called the art pipeline. In this chapter, we will cover the following topics:
- Exporting our object from Blender
- What is FBX?
- Importing our object into Unreal
- Setting up and using our new 3D game asset
We modeled and UV unwrapped it in Blender.
Unreal is now ready to receive our creation.
Before we export our model from Blender, there are a few things we can do to make sure everything comes out perfect. Unreal can get finicky when it comes to importing objects, and with just a few steps we can minimize any potential issues.
Let's get started by applying scaling:
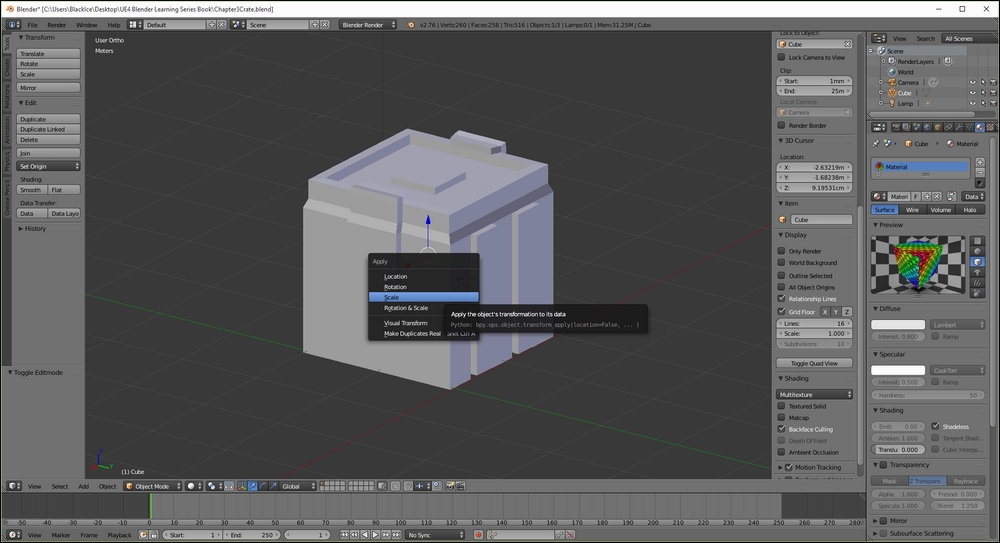
Applying scaling to our object
During the process of setting up our scene, we scaled the default cube so we could use it as a starting point when building our crate. To ensure we do not have any problems during the exporting process, we need to apply our scaling to the object; this essentially tells Blender that the object is no longer scaled but is really that size:
- Make sure you are in Object mode.
- Press Ctrl + A, this will open the Apply menu.
- Select Scale.
With our scaling applied, we can move on the next important step in prepping our object for export, setting our pivot point:

Setting the pivot point by moving our object so that the origin is at the corner of our crate
When an object is used in Unreal, it has a pivot point which acts as an anchor to the grid and as a point of reference for scaling and rotation. When creating game assets, we want to give some thought to how they will be used. For example, walls need to line up with their neighbors, so we would make sure that their measurements were even and that the pivot point was set to a corner. For something like a light fixture, we might place the pivot point so that the object would sit flat against the wall for easy placement. For our crate, we need to be able to line up the object so that it is flush with the floor. For that reason we need to move the pivot to a corner of the object that sits on the ground.
So how does Unreal decide where the pivot point of the object should be? When an object is imported into Unreal, the software takes a look at where the world origin is (0, 0, 0 in your modeling software's grid system) and places the pivot point there. In Blender, that point is set to the center of your starting cube by default. We want to change where that pivot point is placed so that it is on the floor and in the corner of our object:
- Press N to open the Scene Properties pane if it is not already open.
- Raise our crate so that it is sitting on top of the grid plane. You can be exact by finding Location: in the Transform section of the Scene Properties pane. There you can see the X, Y, and Z axes of our object is set to 0, 0, 0. Change the Z value so that the runners on the underside of our crate are flush with the grid plane. Mine is set at
1.06m. - Change the X value to
-1m. - Change the Y value to
-1m.
All set! The pivot point will be set as the lower corner for our crate. There is one more thing we have to do with our crate in Blender before we move to exporting and that is to decide what part of our crate is the front:

Rotating the crate so that Unreal recognizes the front of the crate as the front
Unreal determines what the front of an object is by checking to see which portion of the object is facing in the positive X-axis direction. This is less important for our crate, but can be very important for other game assets such as characters, vehicles, and weapons.
By completing this step in Blender, we can save ourselves a lot of time rotating our objects in Unreal after being exported:
- Referring back to our sketch of the crate, the sides had the two large latches, so our object needs to be rotated.
- Press R or select rotate from the Tools pane.
- Press Z to lock the rotation around the Z-axis.
- Type in
90and press Enter.
We are all set. We should not have any problems bringing our object into Unreal. Time to export our object out of Blender. This is done with the FBX Exporter.