To begin building our object, we need to break our design down into its individual pieces and decide on a primitive shape to start building each part. The bottom section looks like a cylinder. The lid looks like the top portion of a sphere split in two. The gears and pistons that make up the locking mechanism definitely look like cylinders and the legs could start that way too.
Tip
Don't forget to set up your file with the appropriate settings like we did in Chapter 3, It's Time to Customize!
Now, let's start with a cylinder:

Starting with a cylinder
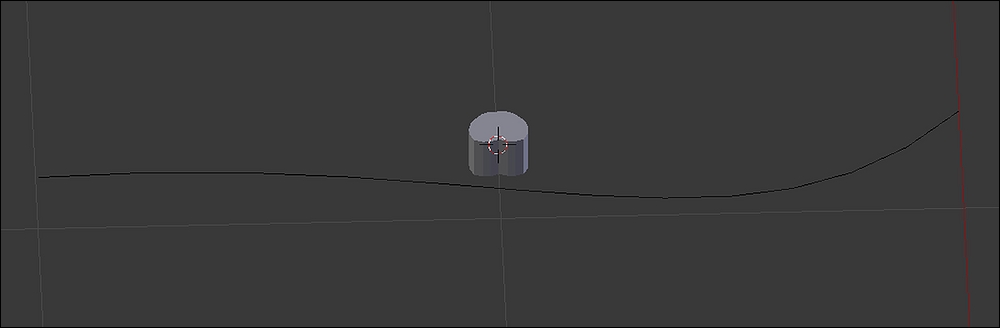
Let's start the build with the bottom of the object:
- Delete the starting objects from the scene, if you have them. Go to the Add menu located at the bottom of the 3D viewport, go to Mesh, and select Cylinder from the options. In the bottom of the Tools pane, you can see the options for our newly created Cylinder. Set the Sides to
24(using just enough sides to stay round), set the Radius to60, and the Depth to60. Remember that these are based on the measurements we took of our whitebox prop in Unreal. - Now move our newly created object up so that it looks like it's sitting on the grip. This will give our Artifact a good pivot point in Unreal:
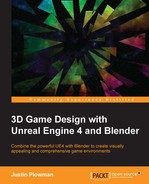
Inset the top
- Time to start shaping this thing. Press Tab to go to Edit mode. Select the top polygon and use the Inset tool to start giving it an inside. I set my Inset value to about
7.10:
Use the Extrude to create the inside of the Artifact
- Next, take the new polygon created by the Inset and Extrude it down into the base. Not too much; we want to give the illusion that it has a lot of space inside, but we don't want to push the polygon through the bottom.
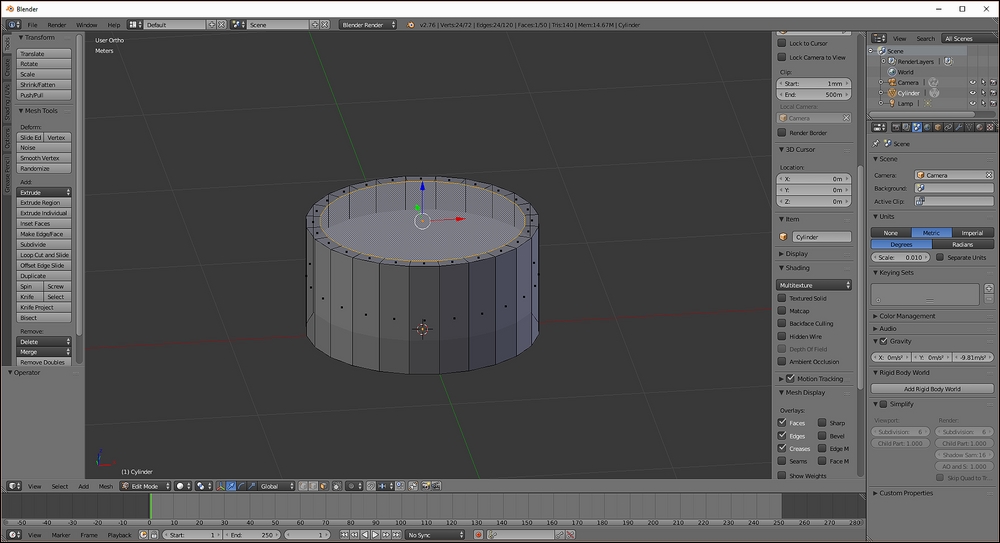
- Now let's taper the bottom a bit. Grab the bottom polygon of our cylinder and Scale it down a bit. Be careful not to let the inside polygon poke through the sides. I scaled it by
0.75. - But wait! We still need a flat section for the locking mechanisms and legs to connect to! We can achieve this effect by creating a new edge loop around the middle section and scaling it back out:
Creating the flat section for the legs
- Change your selection to Line mode and select all the lines around the middle. This can be achieved by pressing B to do a window selection, rotating your view, and doing another window selection until you have selected all of the lines. With them selected, click on the Subdivide tool in the Tools pane. This will create our new loop. Now select all the lines that make up that loop and Scale it outward to again flatten out the upper part of our base:

Beveling the edges
- Let's round it out. Unlike the crate we created earlier, the shapes we are creating now are more rounded and organic. Select the lines that make up the inside and outside edges of the top of our Artifact. Press W to open up the Specials Menu and select Bevel. Using Bevel on an edge splits it into two edges. By using it on those two edge loops we can create a rounded element to our shape:

Bevel once again to round out the shape
Remember to be careful when using Bevel, we don't want the shape to turn itself inside out!
- One more Bevel and we can call this part done. Select the edge loop we created in Step 6 and give it a Bevel. This will give the bottom portion a good round shape as well. What you should have now should look like the beginnings of a flower pot, a very sinister flower pot.
- Looking at our sketch, the top portion looks similar to the bottom. We can save ourselves some time by duplicating the bottom piece and flipping it over:

Duplicate the bottom to create our starting shape for the top
- In Object mode, select the bottom piece and click Duplicate, or press Shift + D. This will create a copy, but it will start moving it in all directions and we want to keep our pieces aligned. Press Z to lock the movement to the Z-axis and move the copy up a bit. Now use the Rotate tool and press X to lock the rotation to around the X-axis. Finally, type in
180and press Enter to flip it over:
Elongating the top of the Artifact
- Rounding out the top will give us the egg shape we are looking for. Grab the top polygon of our new lid and Extrude it out some more. Then Scale the new top polygon down a bit. It will start to look more rounded. Repeat this step once or twice more until you get the shape you desire.
The Artifact now has a bottom and a top section and is beginning to look a bit like our design drawing:

Starting the gear section with a cylinder
In the next few steps, we will build the first part of the lock, a gear that holds a talisman in its claws:
- We need a basic shape to start this piece off with. Since a gear essentially has a round, flat shape, a cylinder should start us off quite nicely. In Object mode, click on the Add menu at the bottom of the 3D viewport, select Mesh, and choose Cylinder from the list. I created mine with
16Vertices, a15cmRadius, and a10cmof Depth. Move it into position on the model and rotate it 90 degrees to sit it flat against the bottom portion of the Artifact. Part of the gear will be inside the Artifact. - Now that things are getting more complicated, let's use the Scene Outliner to name our objects and hide the ones we aren't working on. Click on the bottom portion of the Artifact. You will see in the Scene Outliner that it is named Cylinder and everything after that is Cylinder.001, and so on. If we double-click the name, we can rename the object whatever we wish. I have named my components
Bottom,Top, andGear. Names aren't super important here, but you should name them something you can recognize. You may also notice that each object in the Scene Outliner has an eye next to it. Clicking on this eye will cause it to close and will hide that object in the 3D viewport. This is a great way to work on different sections of a complex game asset without the other pieces getting in your way. - Now let's do an Inset:

Using Inset to add detail to the gear
- Heading into Edit mode, we can start shaping this cylinder into the gear we need. Hide the top and bottom portions of the Artifact so you can only see the piece we are working on. Select the front polygon and press I to Inset it. I did an Inset of
5cm. Then we are going to Inset it another5cm. Once that is done, do the same thing to the back polygon:
Delete the middle ring of polygons on both sides
- Select the middle ring of polygons we just created and press Delete. When it asks what to delete, select Faces from the menu. Just as before, do the same for the back side:

Use Bridge Edge Loops to create more detail
- Time to use the Bridge Edge Loops tool! Starting at the 12 o'clock position, select the first line on the inner polygon and its corresponding line on the outer polygon. Press W and select Bridge Edge Loops tool. Look at that nice new polygon! Now do the same for every other line all the way around the circle. As before, do the same on the back side of the gear. In the next step, we will build the inside polygons of the gear:

Using Bridge Edge Loops to create the inside portion of the gear shape
- Adding the inside polygons to the arms of the gear is a four-step process. We need to use the Bridge Edge Loops tool to create four polygons in each hole to seal up the inside of the piece:

Extrude and scale to create more detail in the center of the gear
- The center of the gear is meant to look like it is holding a medallion or talisman and is another multi-part operation done in small amounts. Select the center polygon on the front of the gear and Extrude it out. Next, scale it down a little bit to start creating a lip for the hole that it will sit in:

Extrude and bevel the center to finish out the details
- Now, Inset the polygon to create the top part of the lip. Create the rest of the lip by extruding the polygon inward a bit and Scaling it down. Finally, Extrude out and Bevel the polygon to finish the shape:

Add the gear teeth using extrude individual
- What is a gear without teeth? To create the teeth, we Extrude the polygons around the outside of the gear that line up with the arms on the inside. We can select all of the polygons at once and select Extrude Individual from the Tools pane. This allows us to extrude each polygon so that the gear teeth are equal. After that, just Scale each polygon on the end of the teeth down a bit. I scaled each one by
0.75: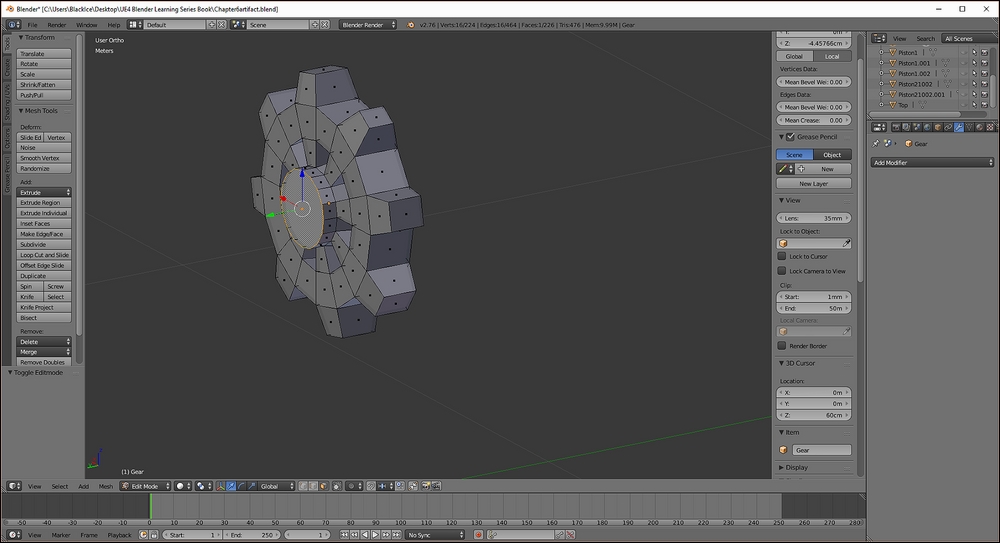
Extrude the back polygon out a bit to create a place for the gear to attach to the Artifact
- Time for the finishing touch! Select the back polygon and Extrude it out to create a post on which the gear can spin. This will create a good contact point for the gear to mount on the bottom section of the Artifact.
To open, the Artifact uses pistons to raise the lid. The design calls for seven of them spaced around the bottom section of the object. We're going to cheat a little bit on this one and create just one piston, which we can just copy to create the other six.
Since the piston itself is round, we once again start with our old friend the cylinder. Let's get started!
- Create yourself a new cylinder. I set mine to
32Vertices,3.75cmRadius, and a Depth of15cm:
Start with a cylinder and use Loop, Cut, and Slide to add two new edge loops
- To create a wider middle section, select all of the middle polygons and use the Loop, Cut, and Slide tool to add two new edge loops around the center. Click again to finalize the cut. Now click the Extrude dropdown in the Tools pane and select Region (Vertex Normals). This will extrude all of the polygons out from the center evenly.
- Let's round off the bottom. Extrude the bottom polygon of the piston and then use the Bevel tool on it. This should give us a nice rounded end:

Adding a lip to the piston
- For an added touch, give the top of the piston a lip, just like we did for the front of the gear. Extrude the top polygon just a little bit, then Inset it a little, and finally Extrude the polygon back down into the piston:

Create a new cylinder and position it so that it looks like it extends out from the bottom piston piece
- Now the piston has to extend to raise the lid far enough so that whatever sinister thing is inside can get out. We can do this by creating a telescoping portion that lifts the lid. Now you may think that sounds difficult, but remember, work smarter not harder. We can create this portion by creating a second cylinder to extend out of the first part. Create a cylinder that is of
32Vertices,3cmof Radius, and13cmof Depth. Line this up with the bottom portion of our piston. You can switch to a wireframe view by pressing Z to get a better view. Press Z again to go back to the solid view:
The finished piston
- To raise it up high enough, we need to add a few more sections to the piston. Take the first portion and Duplicate it. Then move it upward to line up with the top of the last section. Finally scale it down to
0.75. To make the next section, rinse and repeat. What you get is three sections that, when moved down, fit neatly inside one another. When we animate the Artifact opening and closing, we will expand and compress the sections to give the illusion that it telescopes out. - To finish off the piston, Duplicate the first piece we created and make that the top:

Duplicate the piston around the Artifact so that there are seven in total
- With the piston pieces all completed, grab your finished piston and Duplicate it around the Artifact at equal intervals, similar to what is in the image.
That's it for the pistons! There is only one major set of pieces left to complete and in my opinion they are the most fun: the tentacles! The design calls for the tentacles to be used as handles and legs to give the Artifact an otherworldly feel. To make these weird creations, we will use a combination of a Bezier Curve and some modifiers to copy a section of tentacle along a path. This also has the added bonus of making them flexible and easily posed.
On to the next step! The tentacle begins with a basic cube:

Begin the tentacle with a cube
It's tentacle time! Let's finish the last piece of our creation:
- Start the tentacle by creating a Cube with a
5cmRadius; I know it's not a cylinder but bear with me. Select the four lines through the center of the cube and click Subdivide to cut the cube in half. - Select all the polygons on the right side of the cube and delete them. Now add the Mirror modifier by clicking the wrench icon in the Properties pane to open up the Modifier menu. Click on the Add Modifier dropdown and select Mirror. Unlike in Chapter 2, Starting Our First Project, we are going to leave this on for the moment before we apply it:

Bevel the cube, then use the Mirror modifier to make it symmetrical
- Now we are going to make our tentacle by beveling the corners of our cube. Use the Bevel tool to apply some rounding to the individual corners until it looks more organic. Yours may look a bit different than mine and that's ok! I used about eight to ten bevels.
- Time to apply the Mirror modifier. Head back to Object mode and click Apply:
Create a Bezier Curve. Our tentacle piece will be duplicated along the curve to create the final form
- Bezier Curves are curves that have handles which can be moved around to create graceful bends and curves. This provides structure for our tentacle. Head over to Object mode and use the Add menu, select Curves, and choose Bezier. Use the Move and Rotate tools to move it alongside your tentacle piece.
- All the rest of the fun is in the Modifiers menu. On the tentacle object, add an Array modifier. Array allows us to create multiple copies of an object, usually in a shape or line. In this case, we will use it to create more tentacle sections along the Bezier Curve. In the modifier, change the Fit Type to Fit Curve and choose the Bezier Curve in the next box. Also click the checkbox next to Merge and First Last; this will improve our result. If your tentacle pieces copy in a weird direction like mine did, change the X, Y, Z numbers under Relative Offset until you get the result you want.
- To finish the tentacle, add a Curve modifier. In the Object portion of its settings, choose our Bezier Curve. The tentacle is now complete! Click on the Bezier Curve and head to Edit mode. Stretch the two points and see that the tentacle grows as you move them. In the Scene Properties panel, changing the Radius option under Transform can taper the end of your tentacle. Lastly, if you need more control over your tentacle, select the two points on the Bezier Curve and click Subdivide. This will add another point that can be moved around to better bend and curve your shape:

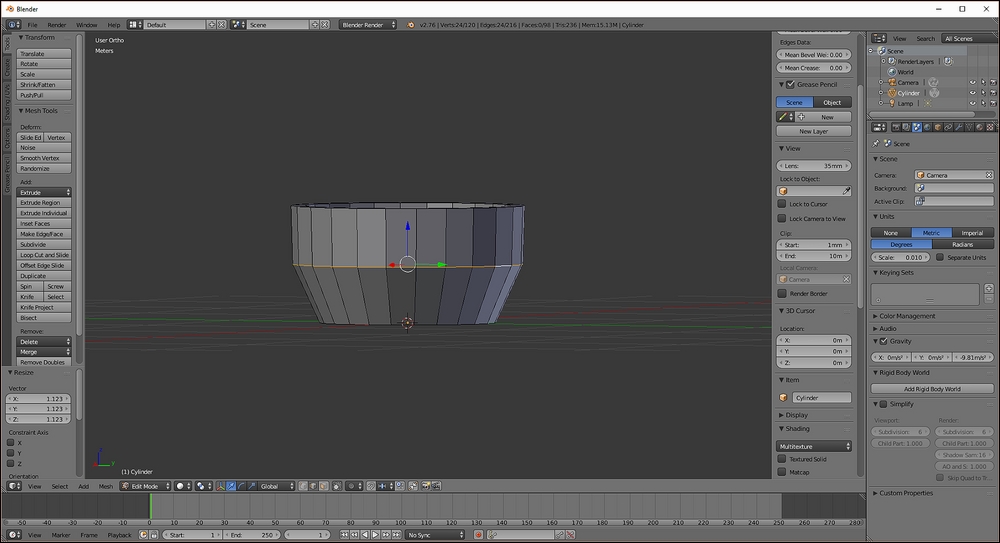
Duplicate the finished tentacle to give the Artifact legs!
- Finally, use your tentacles to create the legs of the Artifact. Move the first Bezier Curve point into contact with our bottom piece. Then move the other points into the shape you want. I used four points per curve. Remember, to duplicate a tentacle you need to copy both the tentacle piece and the Bezier Curve.
How is it looking? If you are having problems adjusting the Bezier Curve points don't give up! They can be hard to work with at first but the results are worth all the trouble:

The Artifact has over 7,000 tris!
As we put these great touches on our game asset, there are a couple of things we need to keep track of; luckily Blender does it for us. At the top of the 3D viewport, Blender keeps a count of the total number of Faces (polygons) and Tris our asset has. This is important because game engines have to work harder to display our level the more Tris our assets have. Currently, the Tri limit in Unreal for a single static mesh is 10,000, and that would be a character or weapon, something the player looks at closely. Some of our pieces have pretty high tri counts. In the next chapter, we will take a look at ways to optimize each piece of the Artifact before we UV Unwrap it.