The Artifact has come a long way. What started out as an idea on a piece of drawing paper has become a full 3D model, complete with textures. However, we are not finished bringing this forgotten relic to full hellish life. If you will recall in the original design for this game asset, the Artifact has to be able to open at the touch of the player, making them an unwitting accomplice to its destructive purpose. For that, we need animation! Blender has a complete suite of animation tools that is more than up to the task. Using keyframes, we will create a simple open animation and prepare the Artifact for export into our space station level. In this chapter, we will cover the following topics:
- How does Blender handle animation?
- Rigging and using keyframes
- Using Blender's suite of animation tools
You might remember back in Chapter 2, Starting Our First Project, that we touched very briefly on keyframes, those little recorded points in time that we use to animate objects. Blender uses tools that are very similar to using Timeline and Matinee in UE4, so let's spend a little bit of time building on that knowledge. Remember that keyframes represent important positions in time in our animations. In the case of our door, it was the open and closed positions. For our elevator, it was the up and down positions.
Those keyframes help Unreal and Blender to create what are called Tweens—all those little minor movements in between major points. Along with the keyframes, 30 of them make up one second of animation. Back in the heyday of Bugs Bunny, Road Runner, and the Flintstones, animation houses had Senior Animators, who would create all the keyframes. They would then turn those over to Junior Animators who would draw all of the tween frames by hand. This process used to be very long and labor intensive. Now that we have computers to calculate all the in-between frames for us, the process can be done quite easily.
So what can a keyframe record?

The Insert Keyframes Menu
At first glance, the Insert Keyframe Menu gives us several options. However, upon closer inspection, we can see that all of the options are variations on the same three things: Location, Rotation, and Scale. Location will be the option that we will use the most, to record the locations of our various piston pieces as they move the lid of the Artifact. We will also use Rotation to rotate our gear as part of the locking mechanism.
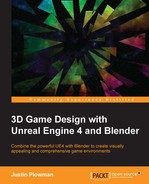
There is one more technique we can use during our animation that can make our lives a lot easier. A Dummy object, or what Blender calls an Empty, is a simple object that is not counted as part of the scene when we export, but can be a huge help when animating. Think of them like the strings on a puppet. Nobody is going to see them, but they will make controlling our animation much easier.
Let's look at the Empty menu:
An Empty can be used to make animation easier
Empty objects come in a variety of shapes, from the simple axis shown in the previous picture, to arrows, spheres, and even cones. Objects in the scene we wish to animate can be linked to these objects so that we only have to move the Empty, essentially creating a handle. They can also be used as a target for an animation constraint.