In this chapter, we will look at the process of creating machines to create our test lab architecture foundation. We will discuss the following topics:
- Building the machines
- Selecting network connections
- Choosing range components
This chapter will provide us with a solid foundation as we explore how to build environments to support the testing types that we have to perform.
Now that we have planned and prepared our testing work, it is time to look at the building of the machines. We briefly covered this in Chapter 3, Planning a Range, but now we will focus on building an environment for our pen testing lab.
There are a number of ways to build a testing architecture, and we will build the labs in accordance with the following diagram:
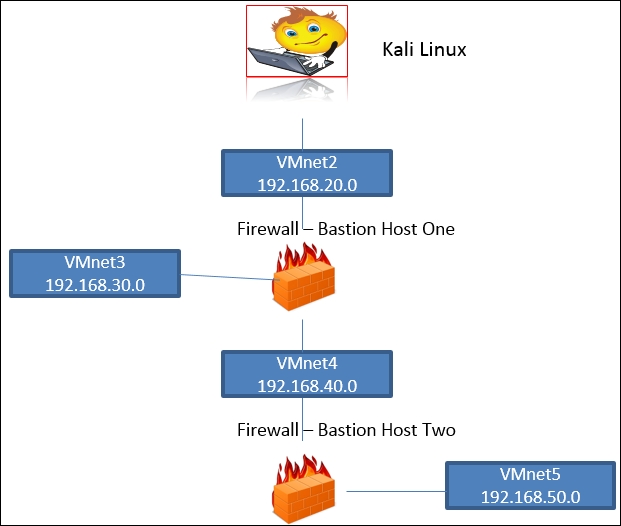
The previous diagram shows an architecture that provides us with multiple layers of defense; using this as our reference point going forward will enable us to carry out a wide variety of testing techniques. Furthermore, we can add machines and connect to the virtual switches in the architecture in the order that we need for our testing. The diagram provides us with the capability to emulate virtually any environment that you may encounter in your pen testing travels.
Note the Bastion Host(s); these are the boxes that will function as our firewalls of the architecture. We can install pretty much any software-based firewall and use it in the testing. An important point to note is that in most cases, the internal network will use Network Address Translation (NAT), and in a normal external testing scenario, we will not be able to route packets into the internal network. To do this, we would require client interaction, and this will be covered as we progress through the different techniques of pen testing. For now, we have the diagram and the information we need, so it is time to build it!
As we showed in Chapter 3, Planning a Range, there are a number of products we can use as our virtualization platform, and you are free to use any; consequently, the first stages of the lab setup may differ from what we show here in the book. It really does not matter which solution you use; once the machine is built, they all are pretty much the same when you boot them.
For our purpose, we will use the VMware Workstation tool. We have three choices with the tool when it comes to creating machines. We will discuss the three choices in the following sections.
Building new machines has been covered, and it provides us with the choice of booting from an ISO image as we did in Chapter 3, Planning a Range. Alternatively, it provides us with the choice of using the installation media, mounting it, and then working through the installation process in the same way as if you were installing the OS on a dedicated machine. Note the fact that the VMware Workstation tool provides us with an easy install wizard, and if it recognizes the OS that you are creating for the machine, then it will create, build, and install the OS for the most part unattended.
One word of caution: when you create the virtual machine, make sure that you create a machine with the version that you will need. That is, if you are using the latest version, which is 12 at the time of writing, when you create a machine, it will by default make it a version 12. If you move it to a platform that is prior to this version, the VM will not work. This has happened on more than one occasion, so ensure that you consider the environment your virtual machines may be used in when you are creating them. If you find yourself in this situation, you can try to convert or downgrade the machine to the appropriate hardware.
This is another option that we briefly covered in Chapter 2, Choosing the Virtual Environment. We looked at converting a physical machine to a virtual one, or P2V as it is referred to; consequently, there is nothing new to cover here.
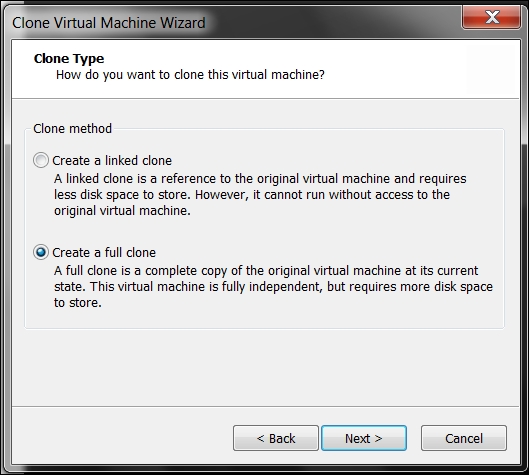
Until now, we have not discussed the concept of cloning our virtual machines. This is a valuable method to use to build our environments. It is a little bit more involved than the next technique we will discuss, which is snapshot. With cloning, we have two choices; we can create a linked clone that will be linked to the original machine. By selecting a linked clone, we are assuming that there will be access to the original machine at all times because it is required to start the virtual machine. An advantage of a linked clone is that it takes less space for storage. The other option and the one that is more common is to create a full clone; this is a complete copy of the original machine in its current state. As it is completely independent, it requires more disk space for storage.
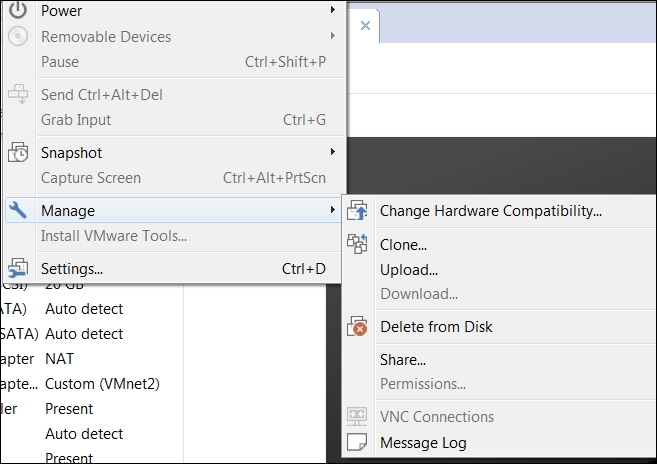
The advantage and power of cloning is that once we have a machine built that we use for our testing labs, we just clone it and make changes to the configuration without having to build another one. We will do this now. Start the VMware Workstation, and once the program opens up open a virtual machine of your choice; you can use the one we created in Chapter 3, Planning a Range, or create a new one, and navigate to VM | Manage. This will bring up the menu, as shown in the following screenshot:
Click on Clone in the window that comes up and then click on Next. In the Clone Source selection window, accept the default setting of the current state in the virtual machine and click on Next. This will bring up the window to select the clone type; select Create a full clone and click on Next, as shown in the following screenshot:
In the next window, it is time to select a name for the clone and also a location to store it. This is another way to create the clone and then store it across a shared device or even to a removable drive. These are all options we might want to consider when creating our machine. Enter a name of your choice or accept the default name, and if you want to store the clone in another location, browse to it. Once you have entered the required information, click on Finish.
If all goes well, your cloning operation should start once you click on Finish, and in a short amount of time, you should see the message that the cloning operation is Done, as shown in the following screenshot:
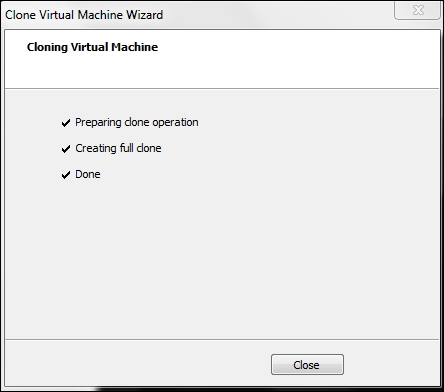
That's it! You now have a full clone of the virtual machine that will operate independently of the original. This is a powerful way to build our lab machines. It allows us to create as many machines as we need for our pen testing labs. Click on Close and your cloned virtual machine will open up in a new window. From this point, you can start the virtual machine or do anything you want, just like with the original machine.
The last concept we want to talk about is snapshots. As cloning can create an entire machine, it is sometimes advantageous to just create a snapshot of a machine. A snapshot is exactly as it sounds: a snapshot of the machine at that point of time. We like to liberally use snapshots during development; this is in keeping with the concept in engineering that you always leave yourself a way back to the initial state. This is critical when it comes to building our machines. Before you write any new code, program, or anything that has a potential to cause a problem, ensure that you take a snapshot of the machine at its current state so that you can get back to a normal state if something goes wrong. This is a practice I wish the vendors would use with their software updates.
It is very frustrating to get a new patch, and when you install it, the message says that you cannot revert to the original state once the patch is installed! This violates all best practices of engineering, and moreover, programming design! We always need to have a path back to the original. The process for snapshots is best explained with an example. One of the challenges we have when we build our own open source tools is finding the right versions for all of the dependencies required for the software we are running. Therefore, it is imperative that we take snapshots before we install or update any software on a system. This will allow us to always return to our original state.