
Make sure that your project's pom.xml has the following Maven dependency added:
<dependency>
 <groupId>org.springframework.cloud</groupId>
 <artifactId>spring-cloud-starter-vault-config</artifactId>
 <version>2.0.0.RELEASE</version>
</dependency>
When the Spring Boot project starts, it will pick the default Vault configuration if the Vault server is running on port 8200. If you want to customize these properties, you can specify bootstrap.yml or bootstrap.properties. In our example, we will explicitly set the bootstrap.yml file with the following content:
spring:
  application:
      name: movie-application
spring.cloud.vault:
  host: localhost # hostname of vault server
  port: 8200  # vault server port
  scheme: http # connection scheme http or https
  uri: http://localhost:8200 # vault endpoint
  connection-timeout: 10000 # connection timeout in milliseconds
  read-timeout: 5000  # read timeout in milliseconds
  config:
      order: -10  # order for property source
  token: ee60f275-7b16-48ea-0e74-dc48b4b3729c
health.vault.enabled: true  # health endpoint enabled using spring actuator
We will be using the HTTP scheme, as we started Vault in plain text mode. If you would like to use HTTPS, it's quite easy to do so, as most things are done through scripts already provided. This is the default scheme in which Vault runs, and this is how it has to be in the production setup. Let's understand this concept first before going into a bit more depth when you implement the actual use case.
If you would like to run Vault in the HTTPS scheme, Spring Cloud Vault has a number of scripts available in its source code under src/test/bash (https://github.com/spring-cloud/spring-cloud-vault/tree/master/src/test/bash) that can be used to create the necessary certificates and then run Vault in this scheme. To keep this section concise, we won't be covering this aspect in much more detail here.
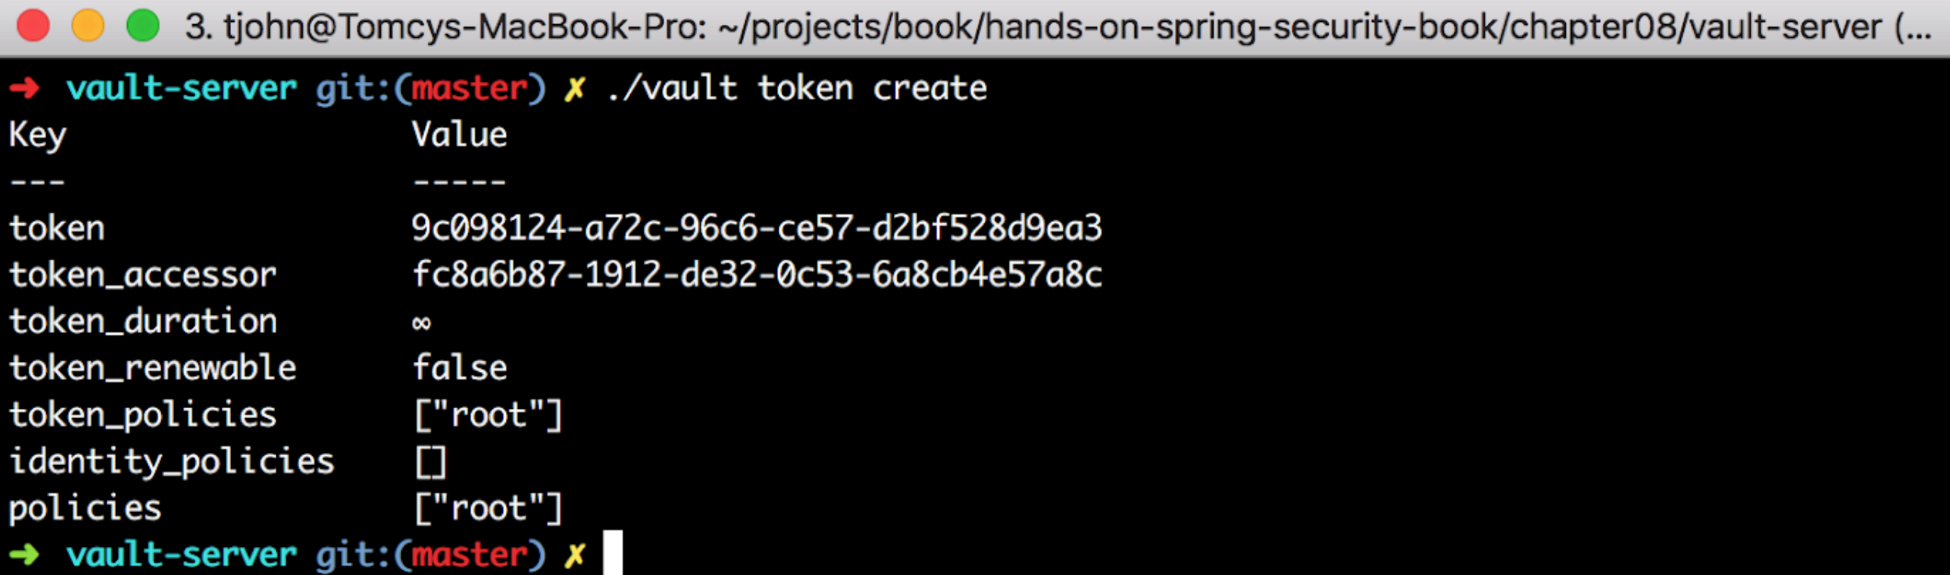
In the .yml file, we have used the root token that was created as part of the initialization of Vault. If you need to, you can get a new token by executing the following command:
./vault token create
The following screenshot shows the successful execution of the token create command:
In your Spring Boot project, add the following code snippet in your application run class, SpringBootSpringCloudVaultApplication:
@Value("${password}")
String password;

@PostConstruct
private void postConstruct() {
 System.out.println("Secret in Movie application password is: " + password);
}
In this code, the password field will be filled by Spring Cloud Vault, and if you run the application (using command mvn spring-boot:run), you should see that Spring Cloud Vault connects to the running Vault (using the configuration in the bootstrap.yml file) and retrieves the value that we wrote to Vault for movie-application.
This concludes our look at a base application using Spring Boot and Spring Cloud Vault. You can see the full source in the book's GitHub page in the project under this chapter, named spring-boot-spring-cloud-vault.