
When any request reaches an application that is secured using Spring Security, there is a gate the request goes through. This interceptor does all the magic and if things don't look good, it errors out and goes back to the caller, as shown in the following figure:
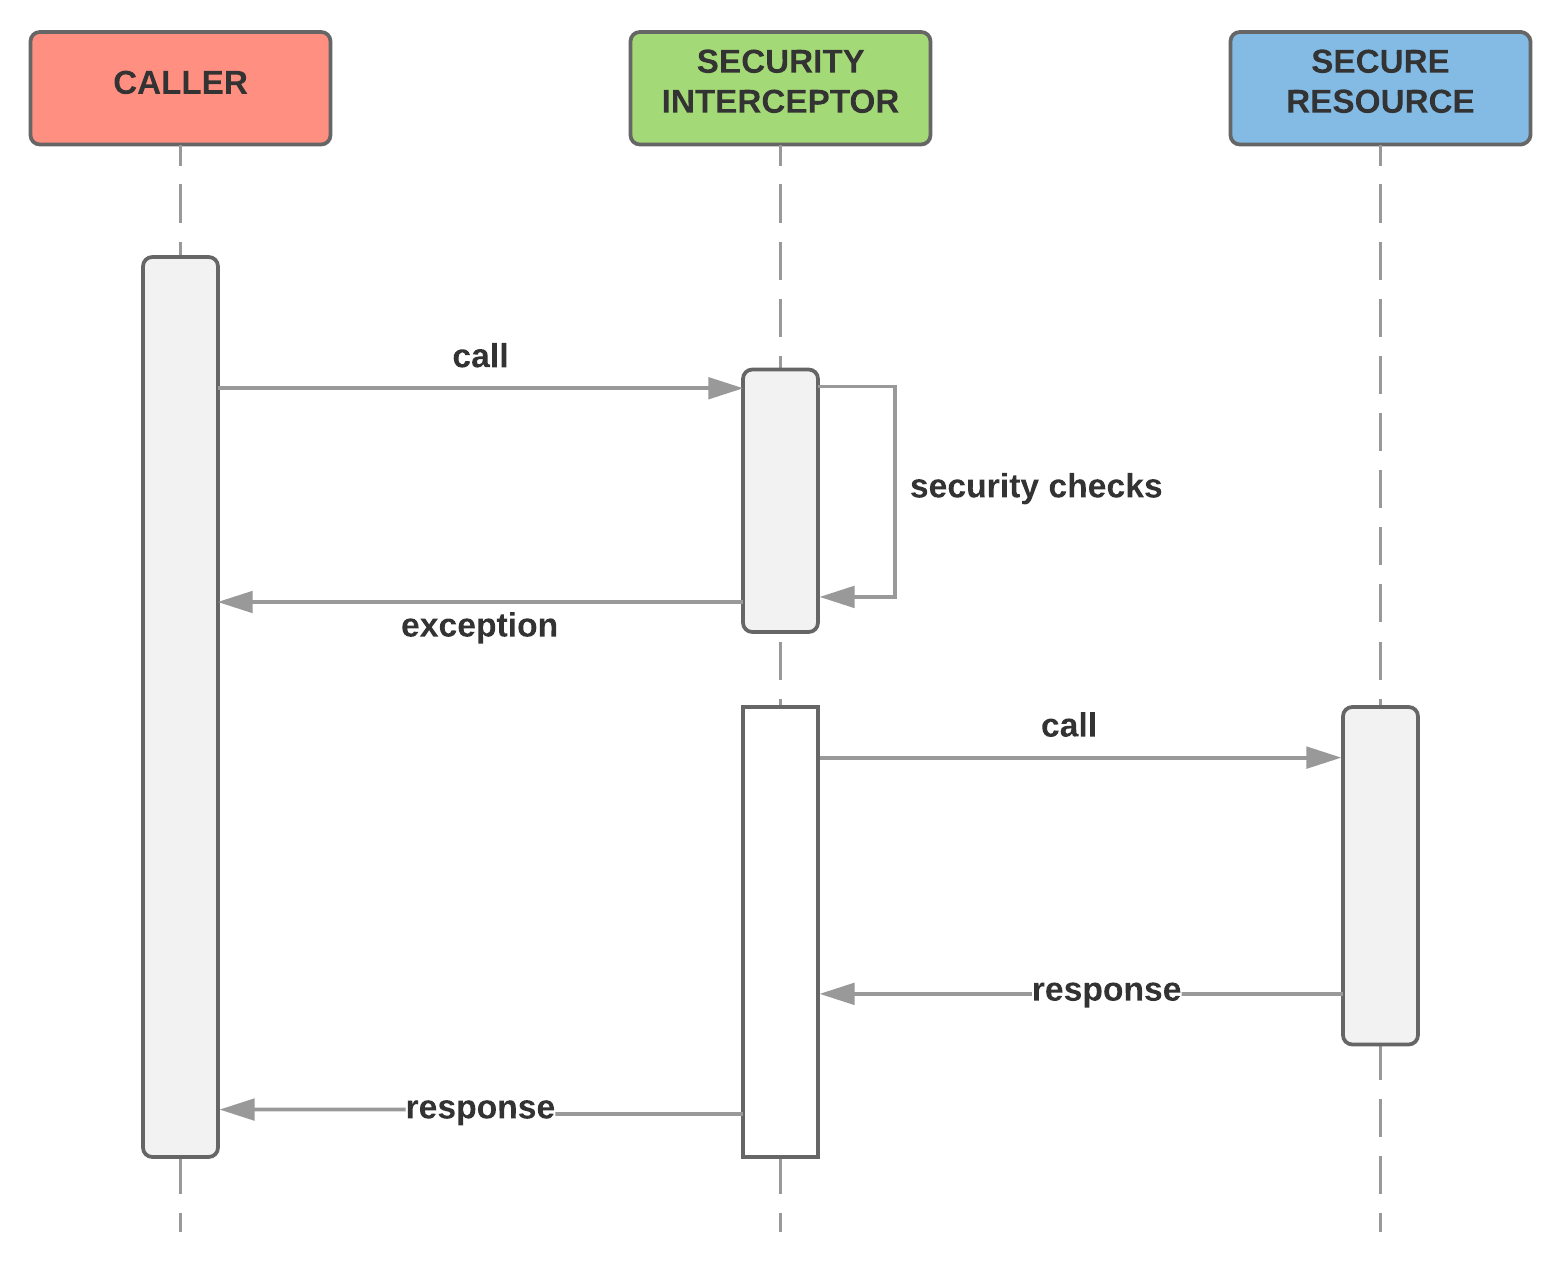
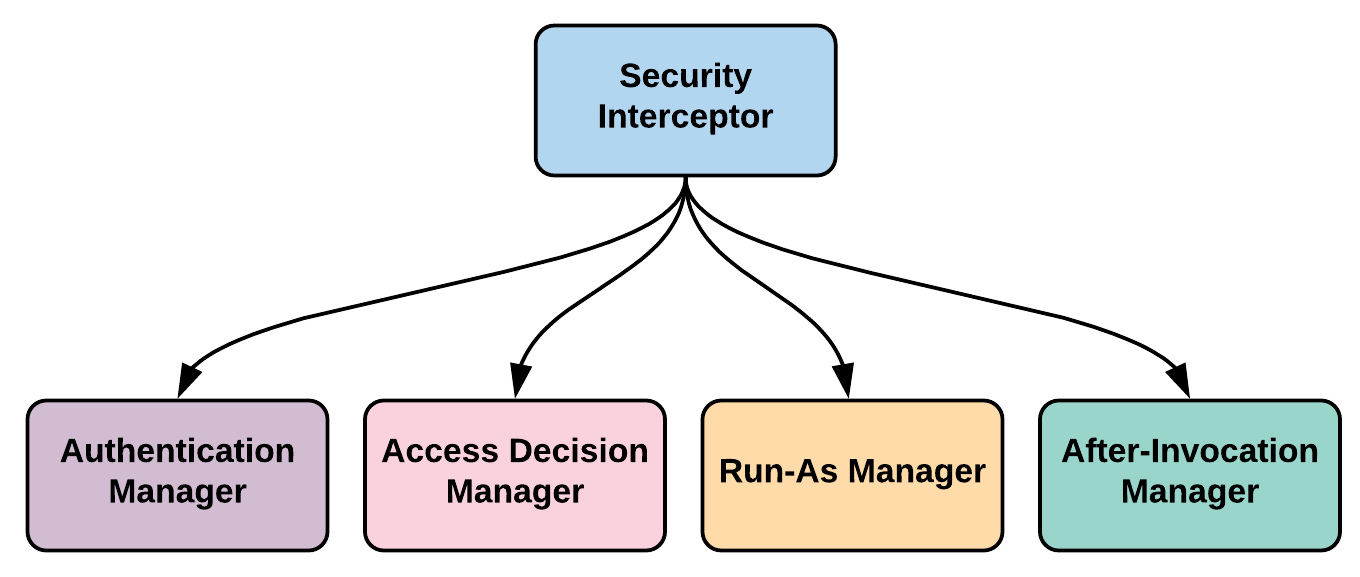
The Security Interceptor makes sure that, according to various security configurations set up for your application, it delegates the work to appropriate parties and makes sure that everyone is happy before actually reaching the resource requested by the caller. To do the actual job, the Security Interceptor employs a number of managers, each entrusted to do a single job. The following figure lists some of the important managers the Security Interceptor works with to perform the function:
In Spring Security, the Security Interceptor is accomplished by DelegatingFilterProxy. For any request that reaches the web application, this proxy makes sure to delegate the request to Spring Security, and when things go well, it makes sure that the request is taken to the right resource within the web application.
DelegatingFilterProxy is a Servlet Filter that has to be configured in your web.xml file, which then delegates to a Spring-managed bean (@Bean) that implements a ServletFilter interface.
The following code snippet shows how to configure DelegatingProxyFilter in web.xml:
<?xml version="1.0" encoding="UTF-8"?>
 <web-app>
    <filter>
        <filter-name>springSecurityFilterChain</filter-name>
        <filter-class>
            org.springframework.web.filter.DelegatingFilterProxy
        </filter-class>
    </filter>

    <filter-mapping>
        <filter-name>springSecurityFilterChain</filter-name>
        <url-pattern>/*</url-pattern>
    </filter-mapping>
 </web-app>
In the preceding code, all the requests to the web application (/* mapping) would go through the DelegatingProxyFilter filter. It's important to note that the name of this filter should be springSecurityFilterChain as Spring Security looks for this default filter name to configure itself. The proxy filter just passes/delegates the control to a bean named springSecuirtyFilterChain. If you are using the default Spring Security setup, the request would then be received by FilterChainProxy. FilterChainProxy is responsible for passing the request through the various Servlet Filters configured as part of Spring Security. The springSecuirtyFilterChain bean need not be explicitly declared, instead, it is taken care of by the framework which is transparent to the developer.
Now that we've looked at all the core concepts of Spring Security, let's come back to the working of Spring Security as pictorially represented in the following diagram. It contains two important security aspects –Authentication and Authorization:

The request from the caller reaches DelegatingFilterProxy, which delegates to FilterChainProxy (Spring Bean), which in turn passes the request through a number of filters, and after successful execution, grants access to the secured resource the caller has asked for.
For the complete list of Servlet Filters and their functions, I urge you to go through the Spring Security reference: https://docs.spring.io/spring-security/site/docs/current/reference/html/security-filter-chain.html.
With all these details, the following figure sums up how Spring Security takes care of Authentication and Authorization for your web application:
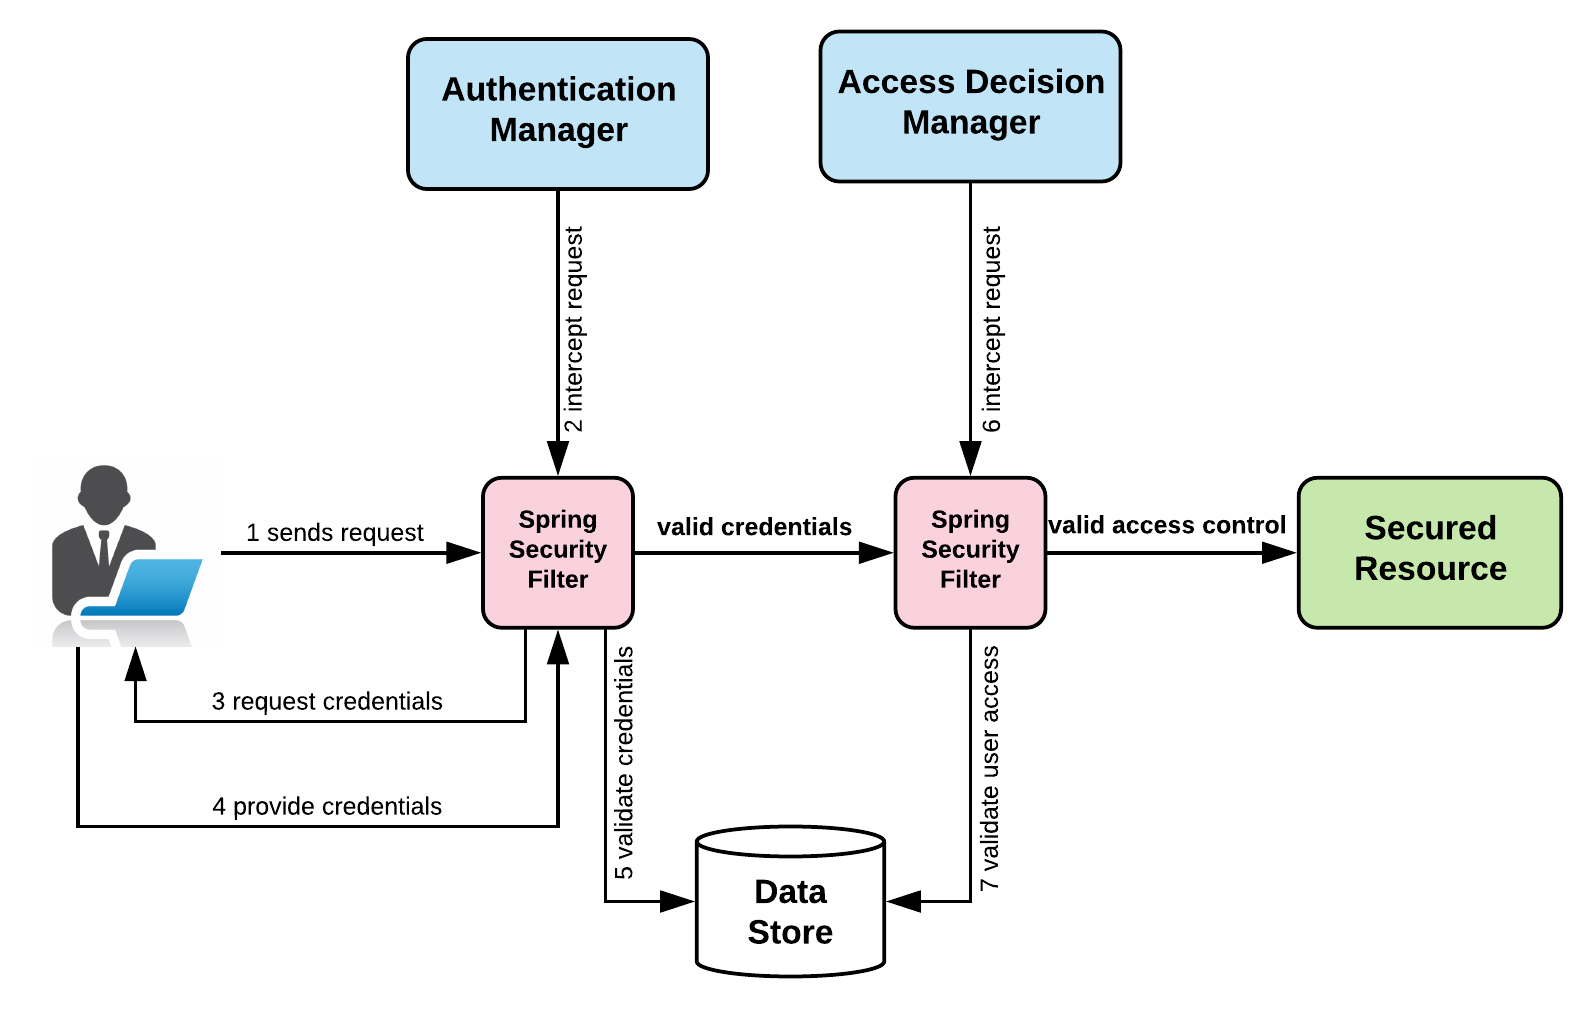
When a caller sends a request to a web application protected by Spring Security, it first goes through the Security Interceptor managers, such as Authentication Manager (responsible for authentication) and Access Decision Manager (responsible for authorization), and after executing these successfully, gives the caller access to the secured resource.
For reactive applications, these concepts are all valid. There are equivalent reactive classes and the way we code is the only thing that changes. These are easy to understand and implement.
In Chapter 2, Deep Diving into Spring Security, we will cover Authentication, and in Chapter 3, Authentication Using SAML, LDAP, and OAuth/OIDC, we will cover Authorization in detail and delve a bit more deeply into its internals.