
Now that your Raspberry Pi is up and operating, let's start giving your projects some basic functionality. You'll use this functionality in later chapters as you build wheeled robots, tracked robots, robots that can walk, and even sail or fly. We're going to start with speech; it is a good basic project and offers several examples of adding capability in both hardware and software. So, buckle up and get ready to learn the basics of interfacing with our board by facilitating speech.
You'll be adding a microphone and speaker to your Raspberry Pi. You'll also be adding functionality so the robot can recognize voice commands and respond via the speaker. Additionally, you'll be able to issue voice commands and make the robot respond with an action. When you're free from typing in commands, you can interact with your robotic projects in an impressive way. This project will require adding both hardware and software.
Interfacing with your projects via speech is more fun than typing in commands, and it allows interaction with your project without using a keyboard or mouse. Besides, which self-respecting robot wants to carry around a keyboard? No, you want to interact in natural ways with your projects, and this chapter will teach you how. Interfacing via speech also helps you find your way around the board, learn how to use available free functionality, and become familiar with the community of open source developers. This chapter covers the capabilities needed before you can see or move the project.
In this chapter, we'll specifically cover the following points:
- Hooking up the hardware to make and input sound
- Using Espeak to allow your projects to respond in a robot voice
- Using PocketSphinx to interpret your commands
- Providing the capability to interpret your commands and having your robot initiate action
Before beginning this project, you'll need a working Raspberry Pi that has power connection and a LAN connection (refer to Chapter 1, Getting Started with Raspberry Pi, for instructions). Additionally, this project requires a USB microphone or speaker adapter. The board itself has an audio out but does not have an audio in. The HDMI output does support audio, but most of your robotics projects will not be connected to HDMI monitors with speaker capability.
You'll need the following three pieces of hardware:
- A USB device that supports microphone in and speaker out.

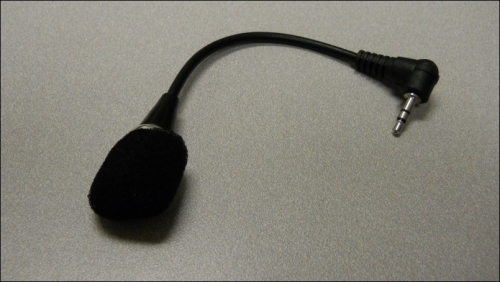
- A microphone that can plug into the USB device.
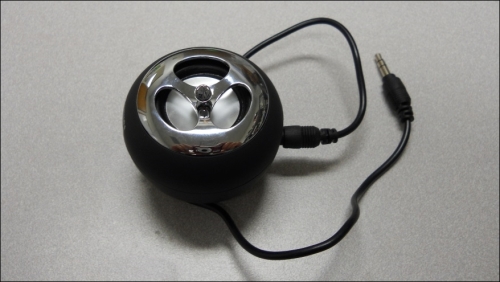
- A powered speaker that can plug into the USB device.
Fortunately, these devices are very inexpensive and widely available. Make sure the speaker is powered because your board will generally not be able to drive a passive speaker with enough power for your applications. The speaker can use either internal battery power or an externally powered USB hub. Many of your robotics projects will require a powered USB hub, so it's a good investment.
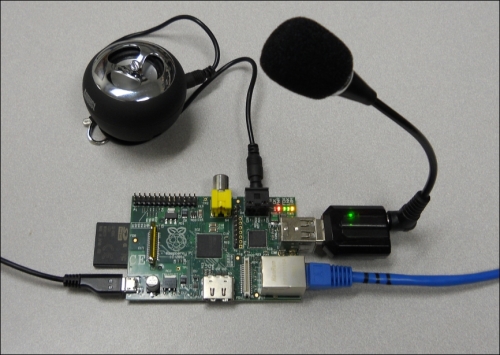
For this task, we are going to hook up our hardware so that we can record and play sound. To do this, reassemble your Raspberry Pi. Plug in the LAN cable. Connect the powered USB hub and plug in the microphone or speaker USB device. Also, plug in your speakers and the microphone. The entire system should look like the following image:
Plug in the power. You can execute all of the following instructions in one of the following ways:
- If you are still connected to the display, keyboard, and mouse, log into the system and use the Windows system by opening an LXTerminal window.
- If you are only connected via LAN, you can do all of this using an SSH terminal window; so as soon as your board flashes that it has power, open up an SSH terminal window using PuTTY or some similar terminal emulator. Once the terminal window comes up, log in with your username and password. Now, type in
cat /proc/asound/cards. You should see the response, as shown in the following screenshot: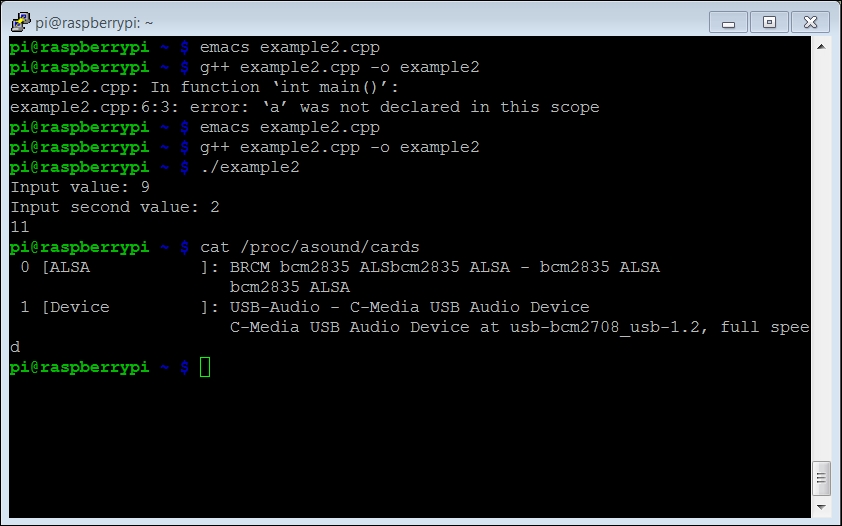
Notice that the system thinks there are two possible audio devices. The first is the internal Raspberry Pi audio connected to the audio port and the second is your USB audio plugin. Although you could use the USB audio plugin to record sound and the Raspberry Pi audio out to play the sound, it is easier to just use the USB audio plugin to both create and record sound.
First, let's play some music to test if the USB sound device is working. You'll need to configure your system to look for your USB audio plugin and use it as the default plugin to play and record sound. To do this, you'll need to add a couple of libraries to your system. The first of these are some ALSA libraries. ALSA stands for Advanced Linux Sound Architecture. It will enable your sound system on Raspberry Pi by performing the following steps:
- Firstly, install two libraries associated with ALSA by typing
sudo apt-get install alsa-base alsa-utils. - Then, install some files that help provide the sound library by typing
sudo apt-get install libasound2-dev.
If your system already contains these libraries, Linux will simply tell you that they are already installed or that they are up to date. After installing both libraries, reboot your Raspberry Pi. It takes time, but the system needs a reboot after new libraries or hardware is installed.
Now we'll use an application named alsamixer to control the volume of both the input and the output of our USB sound card. To do this, perform the following steps:
- Type
alsamixeron the prompt. You should see a screen that looks as follows:
- Press F6 and select your USB sound device using the arrow keys. For example, refer to the following screenshot:
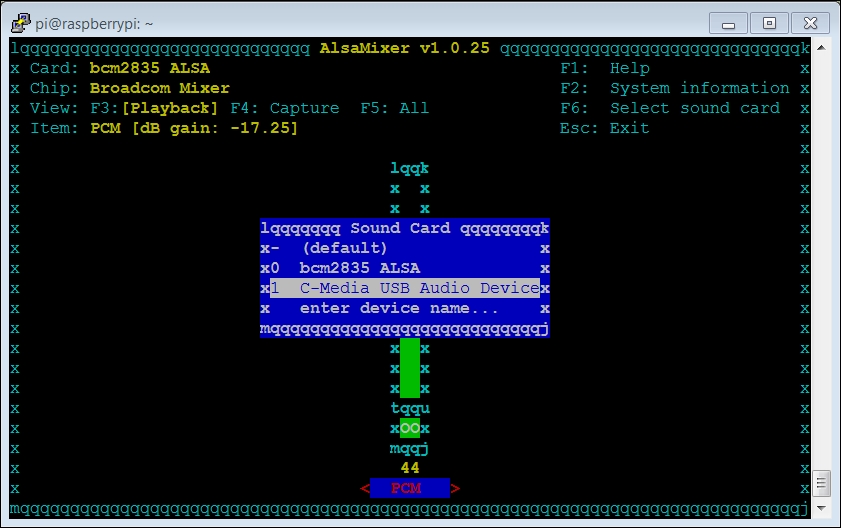
- C-Media USB Audio Device is my USB audio device. You should now see a screen that looks like the following screenshot:
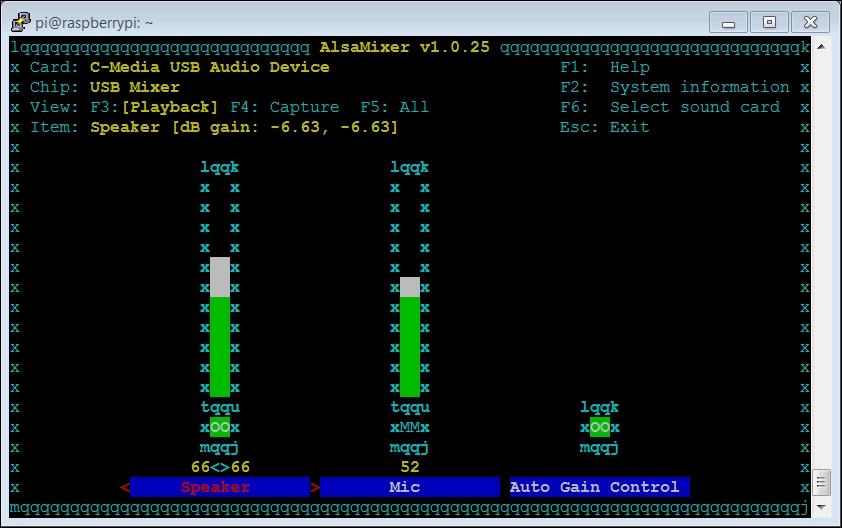
- You can use the arrow keys to set the volume for both, the speakers and the microphone. Use the M key to unmute the microphone. In the preceding screenshot, MM is mute and ∞ is unmute.
- Let's make sure our system knows about our USB sound device. On the prompt, type
aplay –l. You should now see the following screenshot: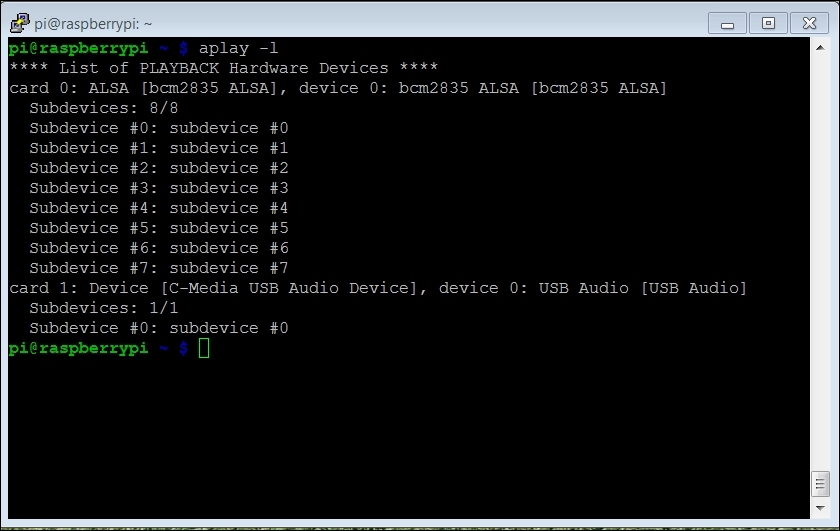
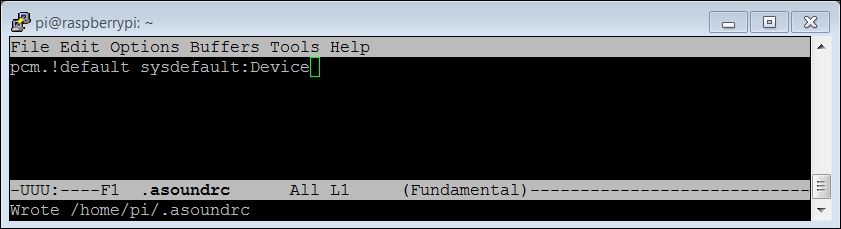
If this did not work, try sudo aplay –l. Once you have added the libraries, you'll need to add a file. You are going to add a file in your home directory with the name .asoundrc. This will be read by your system and used to set your default configuration. To do this, perform the following steps:
- Open the file named
.asoundrcusing your favorite editor. - Type in
pcm.!default sysdefault:Device. - Save the file.
The file should look as follows:
This will tell the system to use your USB device as a default. Once you have completed this, reboot your system again.
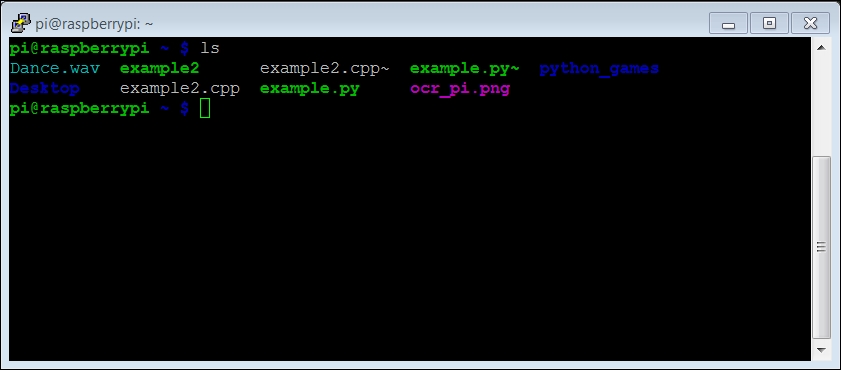
Now we'll play some music. To do this, you need a sound file and a device to play it. I used WinSCP from my Windows machine to transfer a simple .wav file to my Raspberry Pi. If you are using a Linux machine as your host, you can also use scp from the command line to transfer the file. You could also just download some music to Raspberry Pi using a web browser if you have a keyboard, mouse, and display connected. You can use an application named aplay to play your sound. You should see the music file by simply typing ls, which stands for
list short, as shown in the following screenshot:
Now, type aplay Dance.wav to see if you can play music using the aplay music player. You will see the result (and hopefully hear it) as shown in the following screenshot:
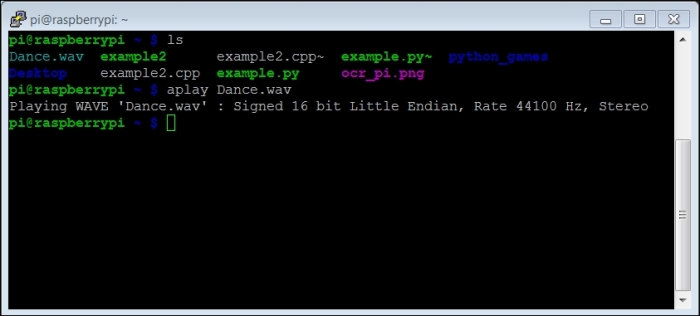
If you aren't hearing any music, check the volume you set with alsamixer and the power of your speaker. Also, aplay can be a bit finicky about the type of files it accepts, so you may have to try different .wav files until
aplay accepts one. One more thing to try if the system doesn't seem to know about the program is to type sudo aplay Dance.wav.
Now that we can play sound, let's record some sound. To do this, we're going to use the arecord program. On the prompt, type arecord -d 5 -r 48000 test.wav. This will record the sound at a sample rate of 48000 Hz per 5 seconds. Once you have typed the command, either speak into the microphone or make some other recognizable sound. You should see the following output in the terminal:
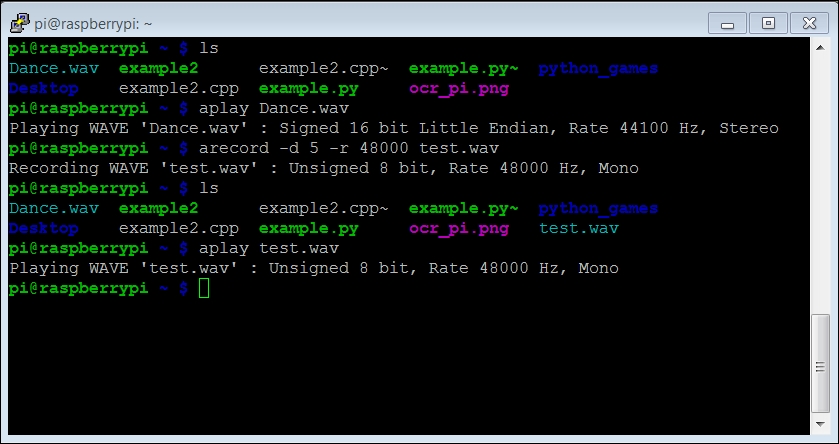
Once you have created the file, play it with aplay. Type aplay test.wav and you should hear the recording. If you can't hear your recording, check alsamixer to make sure your speakers and microphone are both unmuted.
Now you can play music or other sound files using your Raspberry Pi. You can change the volume of your speaker and record your voice or other sounds on the system. You're now ready for the next step.