You now have a very usable Debian computer system. You can use it to access the Internet, write riveting novels, balance your accounts—just about anything you could do with a standard personal computer. However, this is not your purpose; you want to use your embedded system to power our delightfully inventive projects. In most cases, you wouldn't want to connect a keyboard, mouse, and display to your projects. However, you still need to communicate with your device, program it, and have it tell you what is going on and when things don't work right. We'll spend some time in this section establishing remote access to our device.
The following are three ways by which we are going to access our system from our external PC:
- Through a terminal interface called SSH.
- Using a program called vncserver. This allows you to open a graphical user interface, which mirrors the graphical user interface on Raspberry Pi remotely.
- If you are using Microsoft Windows on your remote computer, I'll show how you can transfer files via a program called WinSCP, which is custom-made for this purpose. You can also use WinSCP to transfer a file in Linux; I'll show you how to do this as well.
So, first make sure your basic system is up and working. Open a terminal window and check the IP address of your unit. You're going to need this no matter how you want to communicate with the system. Do this by issuing the
ifconfig command. It should look like the following screenshot:

You'll need inet addr, shown on the second line, to contact your board via LAN. You'll also need an SSH terminal program running on your remote computer. An SSH terminal is a Secure Shell Hypterminal (SSH) connection, which simply means you'll be able to access your board and type in commands at the prompt, just like you have done previously. If you are running Microsoft Windows, you can download such an application. My personal favorite is PuTTY. It is free and does a very good job of allowing us to save our configuration so we don't have to type configurations each time. Type putty in a search window and you'll soon come to a page that supports a download, or you can go to www.putty.org.
Download PuTTY to your Microsoft Windows machine. Then run putty.exe. You should see a configuration window, which will look something like the following screenshot:

Type inet addr from the previous page in the Host Name space and make sure the SSH selection is selected. I save this configuration under Raspberry Pi so I can load it every time.
When you click on Open, the system will try to open a terminal window onto your Raspberry Pi via the LAN connection. The first time you do this, you will get a warning about an RSA key, as the two computers don't know about each other, so Windows is complaining that a computer that it doesn't know is about to be connected in a fairly intimate way. Simply click on OK, and you should get a terminal with a login prompt as shown in the following screenshot:

Now, you can log in and issue commands to your Raspberry Pi. If you'd like to do this from a Linux machine, the process is even simpler. Bring up a terminal window and then type sshpi157.201.194.187 –p 22. This will then bring you to the login screen of your Raspberry Pi, which should look similar to the previous screenshot.
SSH is a really useful tool to communicate with your Raspberry Pi. However, sometimes you need a graphical look at your system, and you don't necessarily want to connect a display. You can get this on your remote computer using an application called vncserver. You'll need to install a version of this on your Raspberry Pi by typing sudoapt-getinstall tightvncserverin in a terminal window on your Raspberry Pi. By the way, this is a perfect opportunity to use SSH.
TightVNC is an application that will allow you to remotely view your complete Windows system. Once you have it installed, you'll need to start the server by typing vncserver in a terminal window on Raspberry Pi. You will then be prompted for a password, be prompted to verify it, and then asked if you'd like to have a view-only password. Remember the password you entered; you'll need it to remotely log in via a VNC Viewer.
You'll need a VNC Viewer application for your remote computer. On my Windows system, I use an application called Real VNC. When I start the application, it gives me the following screenshot:

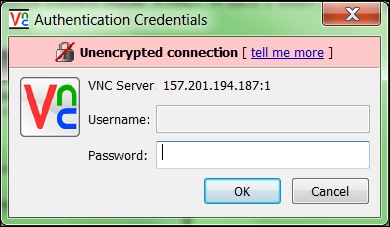
Enter the VNC Server address, which is the IP address of your Raspberry Pi, and click on Connect. You will get this pop-up window:

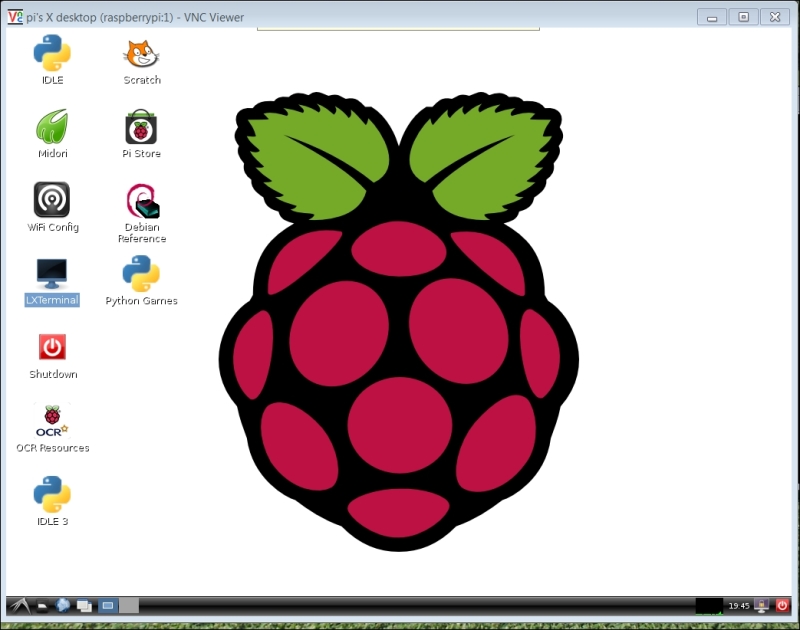
Type in the password you just entered while starting the vncserver; you should then get a graphical view of your Raspberry Pi that looks like the following screenshot:

You can now access all the capabilities of your system, albeit they may be slower if you are doing graphics-intense data transfer. Just a note: there are ways to make your vncserver start automatically on boot. I have not used them; I choose to type the command vncserver from an SSH application when I want the application running. This keeps your running applications to a minimum and, more importantly, ensures fewer security risks. If you'd like to start yours each time your system boots, there are several places on the Internet that will show you how to configure this. You can try http://www.havetheknowhow.com/Configure-the-server/Run-VNC-on-boot.html.
Vncserver is also available via Linux. You can use an application called Remote Desktop Viewer to view the remote Raspberry Pi Windows system. If you have not installed this application, install it using the update software application based on the type of Linux system you have. Once you have the software, run the application and you should see the following screenshot:

Make sure vncserver is running on Raspberry Pi; the easiest way to do this is to log in using SSH and run vncserver at the prompt. Now click on Connect on the Remote Desktop Viewer running in Linux, shown in the following screenshot:

Under the Protocol selection, choose VNC, as shown in the following screenshot:

Now enter the Host inet address, make sure you include a :1 at the end, and then click on Connect. You'll need to enter the vncserver password you set up, as shown in the following screenshot:

Now you should see your LXDE window that is running on Raspberry Pi, as shown in the following screenshot:

The final piece of software I like to use with my Windows system is a free application called WinSCP. To download and install this software, simply search the Web for WinSCP and follow the instructions. Once installed, run the program; it will open the following dialog box:

Click on New and you will get the following screenshot:

Here, fill in the IP address in Host name (pi in the user name) and the password (not the vncserver password) in the password space. Click on Login and you should see the following warning displayed:

The host computer, again, doesn't know the remote computer. Click on Yes and the application will display the following screenshot:

Now we can drag-and-drop files from one system to the other. You can also do similar things on Linux using the command line. To transfer a file to the remote Raspberry Pi, you can use the command scp [email protected]:path, where file is the filename and [email protected]:path is the location you want to copy. For example, if I want to copy the term robot.py from my Linux system to Raspberry Pi, I would type scp robot.py [email protected]:/home/pi/. Now the system will ask me for the remote password; this is the login for Raspberry Pi. Enter the password and the file should be transferred. Once we've completed this step, we can now access our system remotely without connecting a display, keyboard, and mouse. Now your system will look like the following image:

You need to connect the power and LAN. If you need to issue simple commands, you can connect via SSH. If you need a more complete set of graphical functionalities, you can access them via vncserver. Finally, if you are using a Windows system and want to transfer files back and forth, you need access to WinSCP. Now you have the toolkit to build your first set of capabilities.
One of the challenges of accessing the system remotely is that you need to know the IP address of your board. If you have the board connected to a keyboard and display, you can always just run ifconfig to get this info. But you're going to use the board in applications where you don't have this information. There is a way to discover this by using an IP scanner application. There are several available for free; on Windows, I use an application known as Advanced IP Scanner. When I start the program, it looks like the following screenshot:

Clicking on the Scan selector scans for all the devices connected to the network. You can also do this in Linux; one application for IP scanning in Linux is Nmap. To install Nmap, type sudo apt-get installnmap. To run Nmap, type sudonmap -sP 10.25.155.1/254, and the scanner will scan the addresses from 10.25.155.1 to 10.25.155.254.
These scanners let you know which addresses are being used; this should then let you find your Raspberry Pi address without typing ipconfig.
Your system has lots of capabilities. Feel free to play with the system; try to get an understanding of what is already there and what you'll want to add from a software perspective. One advanced possibility is to connect Raspberry Pi via a wireless LAN connection so that you don't have to connect a LAN connection when you want to communicate with it. There are several good tutorials on the Internet. Try http://learn.adafruit.com/adafruits-raspberry-pi-lesson-3-network-setup/setting-up-wifi-with-occidentalis or http://www.howtogeek.com/167425/how-to-setup-wi-fi-on-your-raspberry-pi-via-the-command-line/.
Remember, there is limited power on your USB port, so make sure you have a powered USB hub before trying this.
