
There is yet another way to sense the presence of objects: using a sonar sensor. But, before you add this capability to our system, here's a little tutorial on sonar sensors. This type of sensor uses ultrasonic sound to calculate the distance from an object.
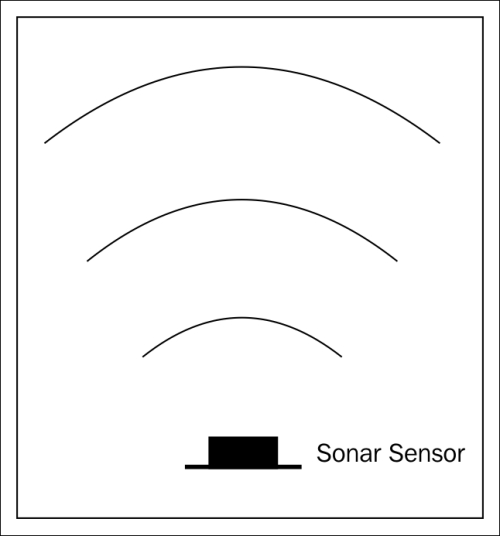
The sound wave travels out from the sensor as illustrated in the following diagram:
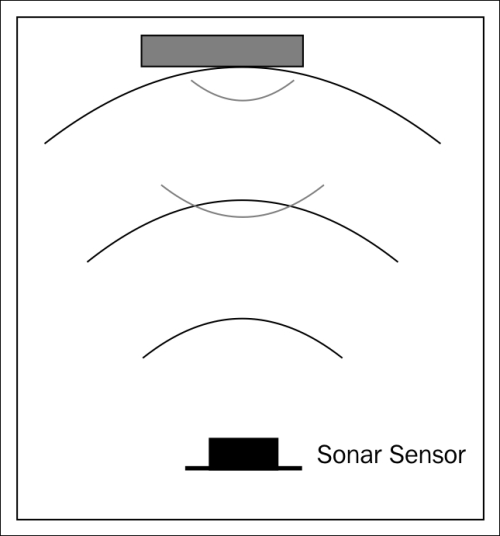
The device sends out a sound wave at the rate of 10 times per second. If an object is in the path of these waves, then the waves are reflected off the object, sending waves that return to the sensor, as shown in the following figure:
The sensor then measures any return waves. It uses the time difference between the sound wave that was sent out and the wave that was returned to measure the distance of the object.
The first thing you'll want to do is connect the USB sonar sensor to your PC, just to make sure everything works well. Perform the following steps to do so:
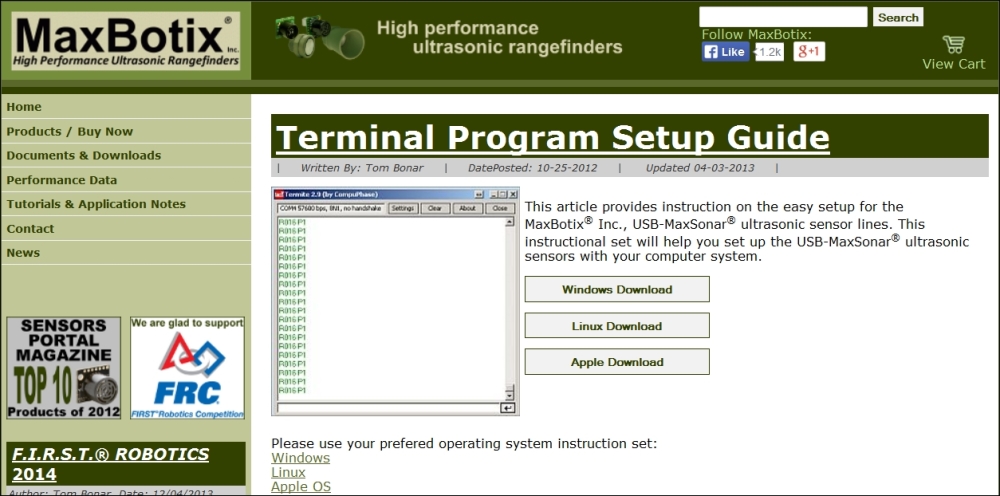
- First, download the terminal emulator software from http://www.maxbotix.com/articles/059.htm and click on the Windows Download button.
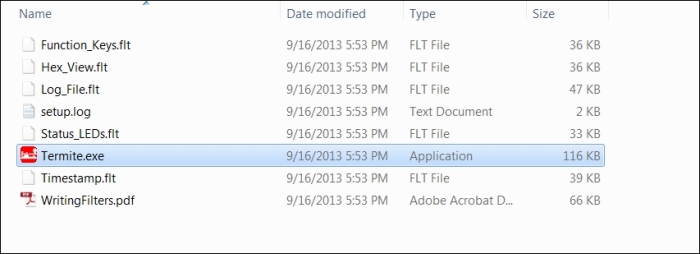
- Unzip this file. Then, plug the sensor into a USB port on your PC and open the terminal emulator file by selecting this file from the directory.
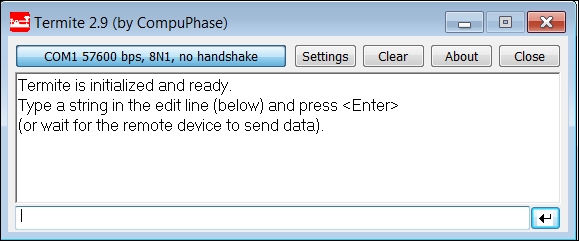
- The following application window should pop up:
- We'll need to change the setting in order to find the sensor. So, click on the Settings button and you should see the following screenshot:
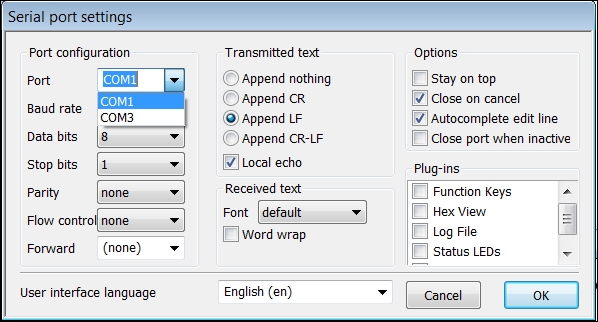
- Click on the Port menu and select the port that is connected to your sensor. In my case, I selected COM3, clicked on OK, and I saw the following screenshot on the main screen:

- Note the sensor readings. Now place an object in front of the sensor. You should now see something as shown in the following screenshot:
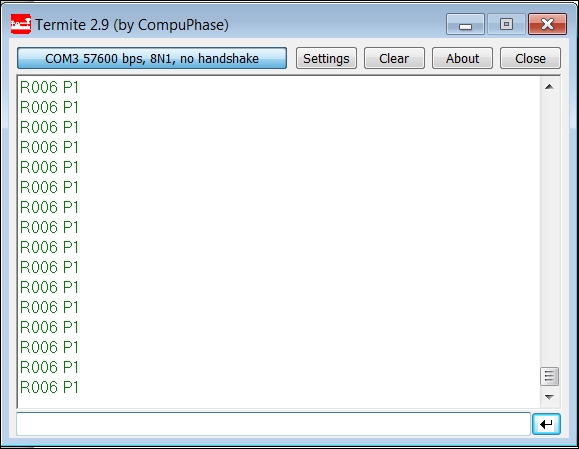
The readings have changed, specifically the values after R and P, indicating that an object is in front of the sensor. You'll need to read these values into your program and then you can avoid colliding with the object.
Now that you know how the unit works, you'll want to mount the USB sensor on your mobile platform. In this case, I am going to mount the USB sonar sensor on my quadruped robot.
Make sure you plug one end of the USB cable into the sensor and the other end into the USB hub connected to Raspberry Pi.
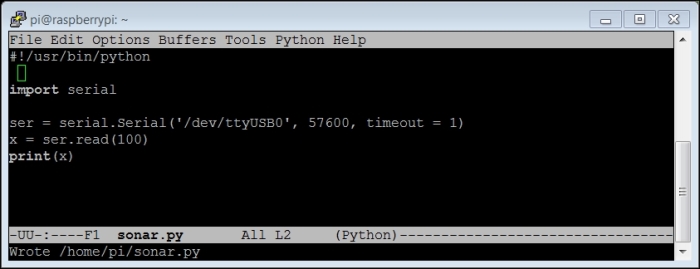
With the hardware all constructed and the sensor working, you can start talking to your USB sensor using Raspberry Pi. You are going to create a simple Python program that will read the values from the sensor. To do this using Emacs as an editor, type emacs sonar.py. A new file called sonar.py will be created. Then, type the code as shown in the following screenshot:
Let's go through the code to see what is happening:
#!/usr/bin/python– As explained earlier, the first line simply makes this file available for us to execute from the command line.import serial– Again, we import theseriallibrary. This will allow us to interface the USB sonar sensor.ser=serial.Serial('/dev/ttyUSB0', 57600, timeout = 1)– This command sets up the serial port to use the/dev/ttyUSB0device, which is the sonar sensor using a baud rate of57600and a timeout of1.x = ser.read(100)– The next command reads the next 100 values from the USB port.print(x)– The final command then prints out the value.
Once you have created this file, you can run the program and talk to the device. You can do this by typing ./sonar.py and the program will run. I have found that sometimes, the device returns no data for the first time, so don't be surprised if you print out no values the first time you run your program. The second time, you should receive a valid return string. The following screenshot is the result of running my program:
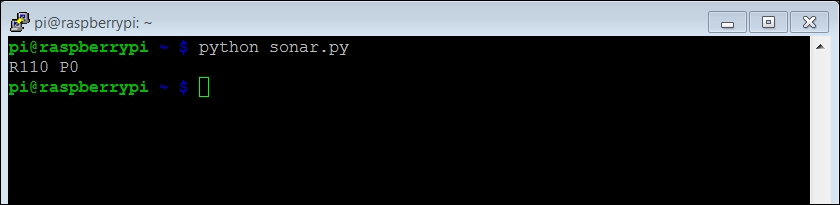
The sensor returns 110, which indicates the relative distance to a barrier in millimeters. If you place a good reflector at just a few inches in front of the sensor and run the program, you will get the following result:
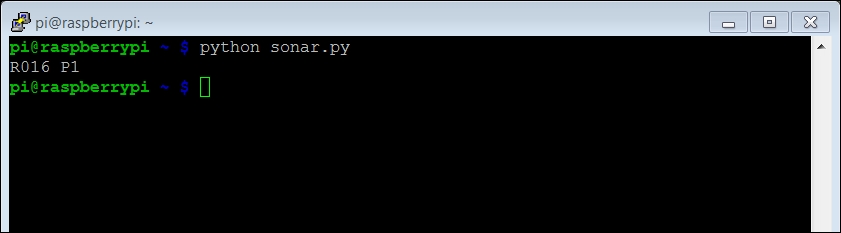
Now the robot can sense its environment so it can avoid bumping into walls and other barriers!