
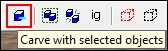
Now that we have a house with a door in one wall, let's put up a few windows so we can see the outside environment without actually walking outside. The Carve Tool works by overlapping two brushes and hitting the carve button on the toolbar. The selected brush will delete any sections of any brush it touches and make a group with the new brushes it has created.
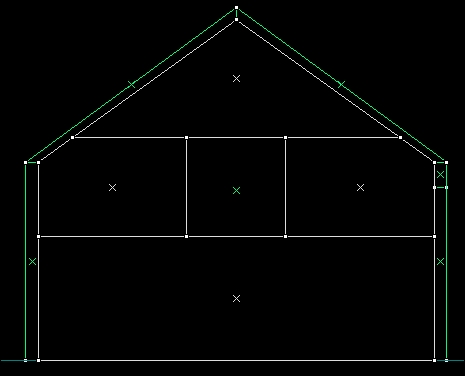
We're going to create a new brush to carve with this time around, so grab the Block Tool and make a 64 x 64 x 64 unit cube. Align the new cube brush with the center of one of the five sided walls on the short side of the house. With the cube selected, press the carve button located in the top toolbar.
After the carve operation is complete, delete the cube and marvel at the mess you have made. If you aligned the top of the cube to the top of one of the vertical sides, you got lucky and your brushwork will be clean. But if you placed the top of the cube above that threshold, you might have something that looks like the following:
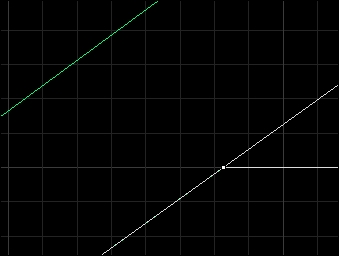
You're probably thinking "this doesn't look like a mess", but if you closely inspect the brushes that Hammer has automatically created you might think differently. Lower your grid size to one (the minimum) and check out the intersection of the horizontal line and the slant of the roof. The vertices are not on grid!
When the map compiles, all the off-grid vertices are rounded to the nearest unit. This can create some unwanted effects, and if the carved brush is meant to be a map-sealing brush, you could probably create a leak! It's good practice to only carve rectangles with rectangles. Carving is okay for windows, doors, and other rectangular objects, but the results get messy quickly when you have more than four sides in the equation. Take the following example of a twelve-sided cylinder carved into a square. Which group of brushes would you rather work with? Which group of brushes would you trust to be leak free?
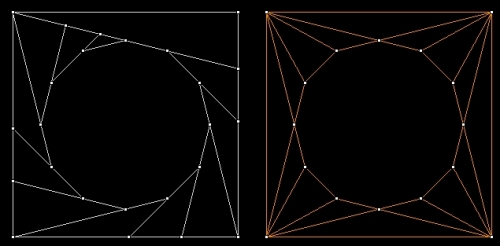
The group on the left was carved while the group on the right was vertex manipulated. Using Vertex Manipulation as we did in the preceding example will take some time and effort, but if your cylinders have an even number of sides, you will only have to do half of the work because you can copy half to the other side. Keeping your brushwork clean and on grid is one of the most important things you can do. If you spend some time now to keep things clean, you will save time in the long run, and your 2D views will be a lot less confusing.