I bet you're pretty tired of that generic brick floor texture. Let's change things up a bit while learning how to navigate the texture tool. We can also bring more detail into the world with decals, overlays, displacements, and props!
In this chapter, you will be learning the following:
- Texturing techniques
- Placing decals and overlays
- Creating terrain with displacements
- Learning about the different prop types
Let's go!
Using the Texture Application Tool gives you full control over the application of textures in the Source engine. You can select, apply, scale, rotate, and align textures all within this easy-to-use tool.
There are many ways to apply textures to brushes. Brushes, upon creation, are given the currently selected texture, but there is still much to learn!
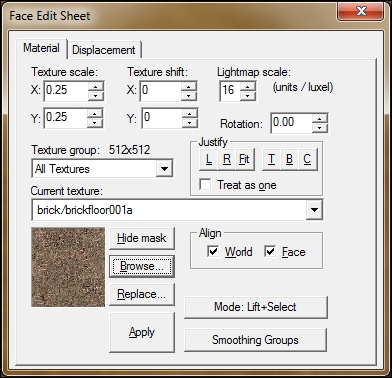
There are two main tabs in the Texture Application Tool. For now, let's focus on the Material tab. The first thing you'll probably notice about the Texture Application Tool is that the window title actually says Face Edit Sheet. Since the tool is named Texture Application Tool, that is what I'll be calling it throughout this chapter. The second thing you'll notice is the texture preview pane in the bottom-left corner. Just above this is the Current texture drop-down list that displays the current texture name and allows you to quickly select the last few textures you have used. Let's get acquainted with this tool by first selecting a new floor for us to walk on. Click on the Browse button to bring up the Texture browser.
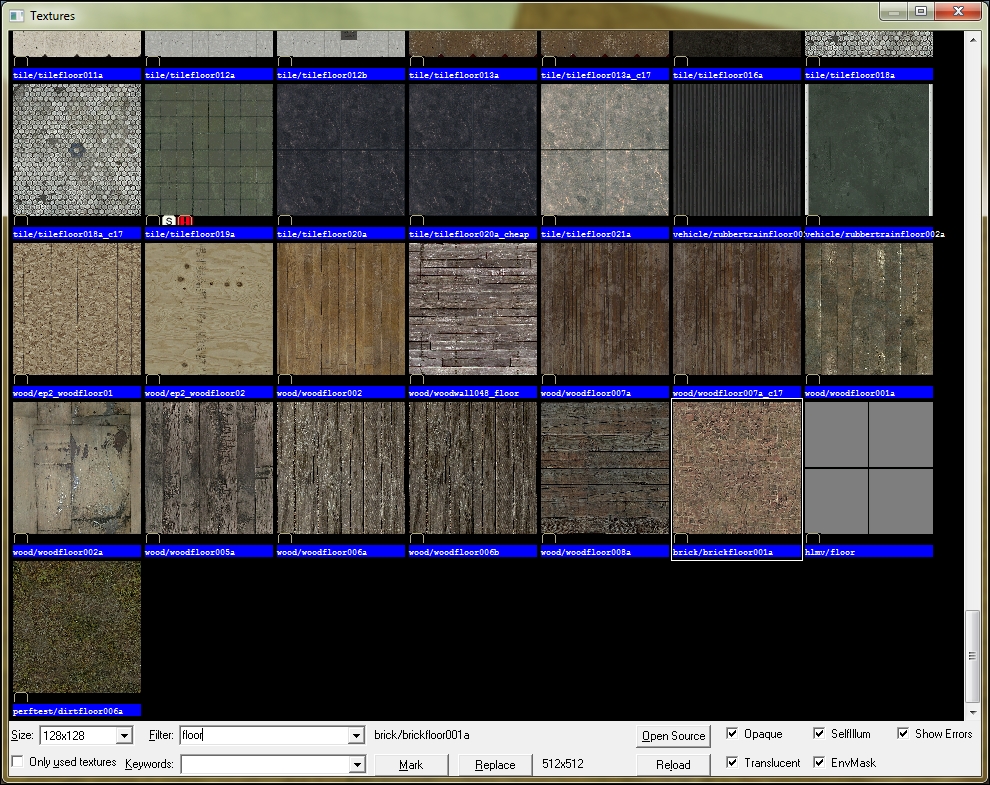
We're looking for a floor texture, so instead of scrolling through hundreds of images, we can just type in floor in the Filter field. The browser will update automatically as you type, so there's no need to hit Enter. If you do press Enter, you'll close the browser without selecting the texture you wanted. You'll notice that the texture preview size is relatively small. If you want to get a better look at the individual textures, you can change the display size in the the drop-down menu titled Size at the bottom-left corner. The checkbox under the size selector, Only used textures, will allow you to see only the textures currently used in our map; since we're browsing for a new texture, leave this unchecked. There are various other checkboxes in the bottom-right corner that filter for special material properties. We're looking for an opaque floor, so uncheck the rest of the checkboxes to make our search easier.
For the sake of following this tutorial, find the stone/stonefloor_inn01 texture and press Enter to set it as the current texture and return to the Texture Application Tool.
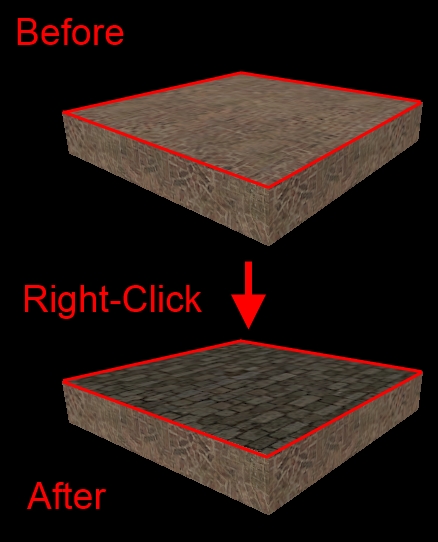
Textures are best applied in the 3D view; so, in the 3D viewport, right-click on the floor to apply our cobblestone texture to the top face of the floor brush.
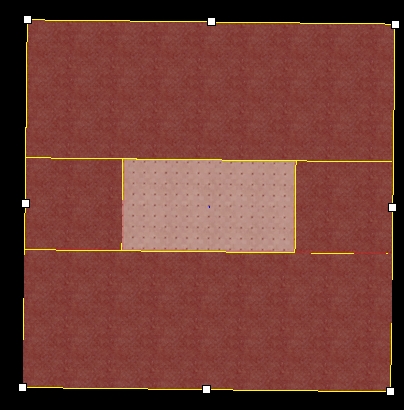
Each face can only have one texture applied to it at any time, so if you want another texture in the floor, we need to create another face to apply the texture to. Brushes cannot have more than one face on a single plane (or else you will get a nasty coplanar face error while compiling), so, if we want to detail the floor in the house, we need to clip the floor into multiple brushes.
Using the same technique used to make windows in The Clip Tool section of Chapter 3, Shaping Your World, clip the floor so that there's a middle section that aligns with the walls of the house. (You should end up with five brushes in total.)
Return to the Texture Application Tool, open the texture browser and find a tile texture to apply to the floor; tile/tilefloor011a should do this nicely. Right-click on the house floor to apply the texture.
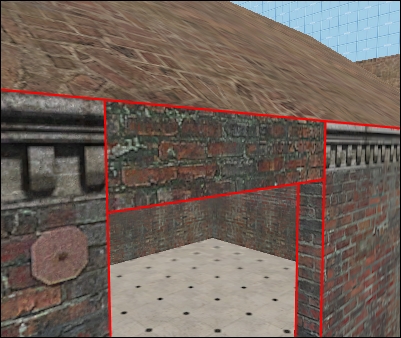
We could spend the next couple of minutes texturing each face individually, but you can also apply a texture to an entire brush or a group of brushes to save time. Exit the Texture Application Tool and select all the vertical walls of the house. Open the Texture Application Tool and then click on Browse to search for a wall texture. Find the texture titled brick/brickwall014l, select it, and press Enter to return to the Texture Application Tool. Click on the Apply button to apply the current texture to each face in the selection.
It's generally considered good practice to apply the tools/toolsnodraw texture, also known as Nodraw , to any brush face that will not be seen in the game. Faces with Nodraw applied to them will not be rendered in the game and will ease the load on the engine. To do this quickly, follow these steps:
- Select a brush.
- Open the Texture Application Tool.
- Deselect the visible faces.
- Apply Nodraw to the remaining faces.
The Justify section of the Texture Application Tool contains a few buttons to quickly align textures.
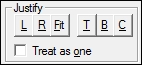
You'll notice that the textures aren't aligned nicely. That's where the Justify menu comes into play. With all your walls still selected, press the B button to align the bottom of the texture with the bottom of the brush.
Take a look at the brush on top of the doorway. Note that the textures are aligned to the bottom of the individual brushes. To remedy this situation, check the Treat as one checkbox and align the textures to the bottom again.
The Treat as one option tells Hammer to treat all the faces on the same plane as one large texture, and it will apply all changes to them as if they were one. You can probably guess that T aligns textures to the top edge, L aligns textures to the left edge, R aligns textures to the right edge, and C will center the texture on a face.
Let's check out the Fit functionality by creating a window. Open the texture browser and find the glass/glasswindow017a texture. Use the block tool to create a brush of the size and shape of one of the window openings. When you create a new block, the current texture will automatically be applied to the brush, so we don't have to apply it manually; we do, however, need to modify its appearance.
Open the texture tool and left-click on the outside face of the window to select only that face. The default texture scale is 0.25, but this doesn't work well for our window. Press the Fit button to stretch the texture across the entire face of the brush and calculate the X and Y texture scales.
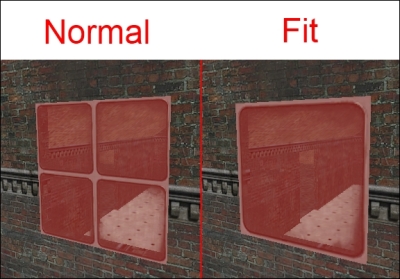
Fitting a texture to a brush can be a great technique. However, beware of larger texture values that will start to look stretched and blurry. Try using the Fit function on the tile floor inside of the house. It doesn't look too great, does it?
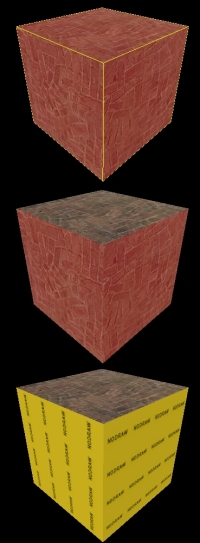
Let's experiment with the texture shift and rotation tools by texturing our roof. Find the metal/metalroof006 texture and apply it to the top and sides of the roof brushes. The new texture will inherit all the attributes of the old texture: scale, rotation, and alignment. When you apply the texture to the roof, it will be slightly stretched in the y direction because Hammer defaults to World texture projection. What this means is that the texture is projected onto the brush from the z axis. Since the roof is sloped against the z (vertical) axis, the texture will be stretched in one direction. If a face is parallel to the projection plane, the texture will be projected properly.
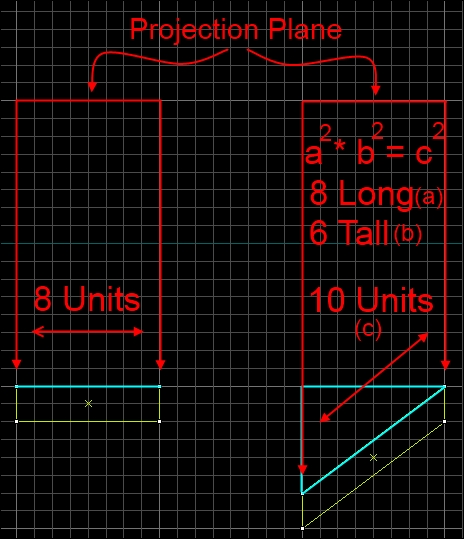
In the previous example, the projection plane is aligned perfectly on the left half of the page. But to the right, the texture plane is 20 percent larger than the projection plane. To eliminate this stretching effect, select the Face checkbox. This mode will ensure that the texture is always projected perpendicular to the face (as if you're staring straight at it)! So, after applying the metal roof texture to the roof, select both roof segments and click on the Face checkbox to ensure that the textures are projected properly.
Right-click on the sides of the roof brushes to apply the roof texture to them. Remember, the new texture will inherit all the attributes of the old texture, so the texture on the side of the roof brush will have vertical stripes.
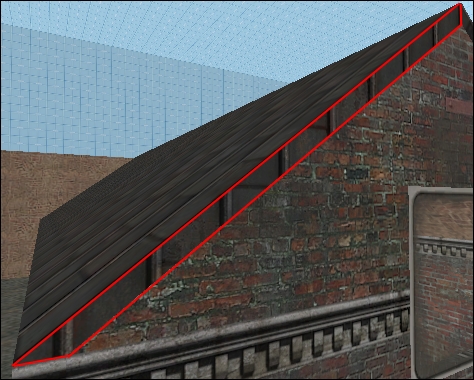
Select the side of the roof texture and keep increasing the Rotation property until those vertical stripes are aligned with the slope of the roof. If you have been following my examples closely, a rotation of about 54 degrees should work well. Once you are satisfied with the rotation angle, left- or right-align the texture to clean things up.
There's a much faster way to align textures between faces. This method does not have a specific name, but I call it the Alt + right-click method. With the Texture Application Tool active, select the top of the other roof brush. While holding Alt, right-click on the side of the roof brush to automatically wrap the texture around the brush edge onto the new face.
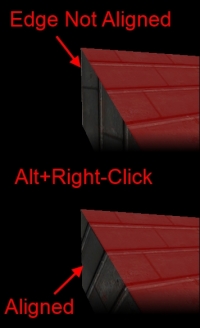
Voilà! This method of texturing is very useful and can save you hours of painstaking alignment and rotation.
So far, we have been using the default selection mode called Lift and Select. It's very useful for the Alt + right-click texturing method, and it's arguably the most flexible of the texture selection modes. With this tool, left-clicking on a face will set the face's texture to current as well as select the face. If you right-click on a face, the current texture will be applied to that face. There are other selection modes called Lift, Select, and Apply, but the Lift and Select tool contains all their functions. The Apply (texture only) tool will apply the current texture to the face that is clicked on, but the new texture will inherit the old texture's values. Conversely, the Apply (texture and values) tool will apply the current texture, scale, and rotation to the current face. There is a texture application mode called Align to view, which will rotate and skew the texture based on the camera's angle relative to the face; however, be careful with this mode because due to a bug in Hammer, you cannot undo a texture application.
If you have already tried all the alignment options, or if you want a bit more control over the position of the texture, you have the option of shifting a texture on the x or y axis. Both x and y default to zero, but you can change that in three ways. Use the ramping arrows next to the numerical entry and type in your own value, or you can use the arrow keys on your keyboard to shift the texture by an amount equal to the current grid size.
Texture lock, by default, is enabled. When you move an object with texture lock enabled, the texture applied to that object will follow it. If texture lock is off, the texture will stay in place while the brush moves.
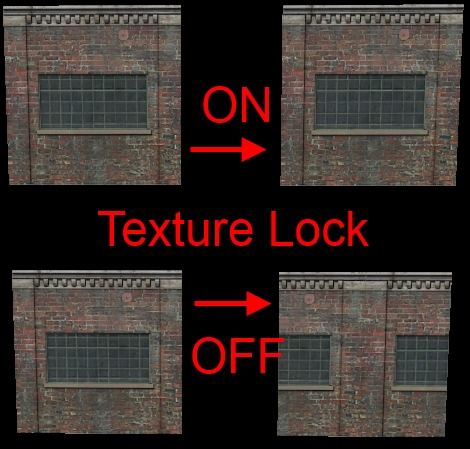
You can turn the texture lock on and off by clicking on the tl button in the menu bar on the top.