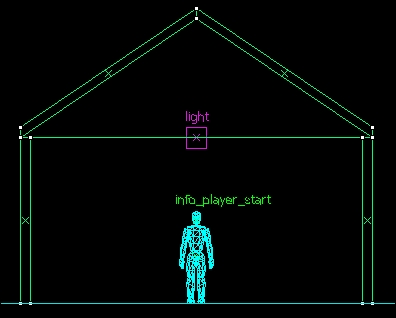
You've learned how to hollow out a cube, but that was just to whet your appetite. Let's create a little building in the center of our cube and learn some basic techniques along the way.
Let's make some walls for our building. Instead of using the Block Tool to specify an area, we can save some time and just copy and scale an existing brush to create another wall. We're going to select one of the walls of the cube we have just made. You'll notice that when you select one of the walls, all of them are selected. This is because when the Hollow Tool is used, it automatically groups the brushes it creates. To ungroup a group, you can click on the ungroup button in the top toolbar, or use the keyboard shortcut Ctrl + U.
Conversely, if you would like to group objects, click on the group button located to the left of the ungroup button, or you can use the keyboard shortcut Ctrl + G.
Now that our six walls are not grouped, you can select any individual wall. Select a vertical wall and while holding Shift, left-click on the wall and drag it to create a copy. If you release Shift too soon, the wall will just move and not copy, so make sure to release Shift only after you let go of the left-click mouse button.
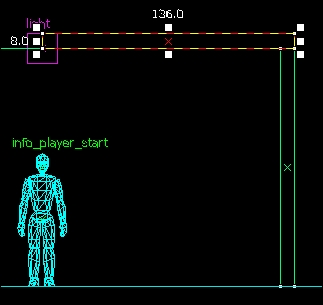
You'll notice that when you have a brush selected, there are eight white boxes next to the brush. These white boxes are called handles and they allow you to manipulate the brush based on which selection mode is active. The Scaling mode is the default manipulation mode when any object is selected. In the Scaling mode, the corner handles allow you to scale, or stretch, a brush in two dimensions. The handles in the middle of an edge allow you to scale in one direction, perpendicular to the edge. So if a handle next to a vertical edge is selected, you will be able to scale a brush horizontally; and a horizontal edge handle allows vertical Scaling.
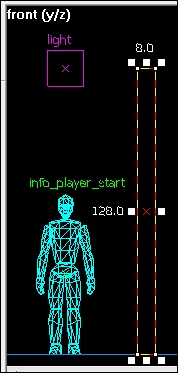
Select the brush you just copied, and in the front 2D viewport, scale it down to 128 units high and 8 units wide with the bottom of the brush touching the floor.
In the Half-Life 2 World, 128 units is the average wall height and 8 units thick is an acceptable wall thickness.
In the top or side view, stretch the brush so it's 512 units long. This is one of the long walls in our building. Now in the front viewport, Shift + copy the brush 256 units to the left to create two parallel walls that are 512 units long and 256 units apart.
To make the connecting walls of our building, we could clone and then scale them, but let's learn how to rotate objects. Make another copy of a brush, and while it is still selected, left-click on it to change the manipulation mode. The eight box handles will change to four hollow circle handles located at the corners. This means you are in the rotate mode.
This can be seen in the following screenshot:
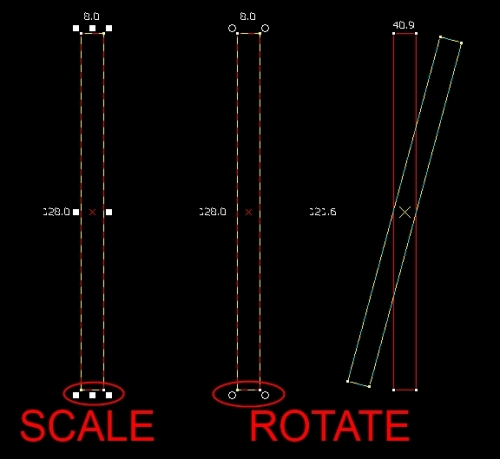
In the top view, rotate the brush by 90 degrees.
Tip
By default, Hammer is set up to snap up to 15 degree angles. If you would like more accuracy when rotating, hold the Alt key to disable the auto-snap function. The auto-snap amount can also be changed in the Hammer settings.
Keep in mind that the vertices of rotated objects will probably not align to the grid. You could end up with a leak if you use rotated brushes for world-sealing brushes.
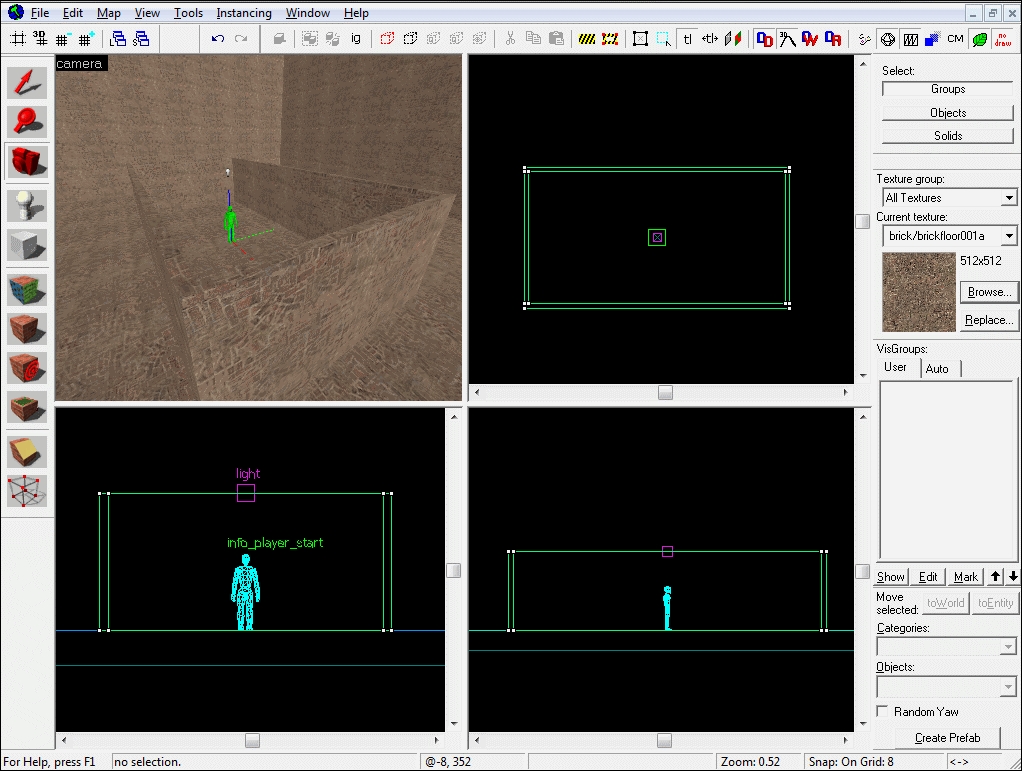
Now left-click on the brush until you're back in the Scale mode, (left-click twice or until the eight box handles appear) and scale the brush to fit inside our long walls. Place one wall at one end of the long walls, and clone that wall to the opposite side. Voila! You have now created four standard-issue walls. Your viewports should look something like the following:
No building is complete without a functioning roof. We could just throw a flat slab on top of the four walls and call it a day, but what's the fun in that? Let's create a classic pitched or slanted roof. In the front view, clone one of the long walls up, rotate it by 90 degrees, and scale it to make it half the width of the house. Align the bottom-right corner of the roof segment to the top-right edge of the house as seen in the following screenshot:
Now click on the object until four white handles appear on the sides of the brush. This brush is now in the Skew mode. Skewing an object moves a face parallel to its orientation and will turn a rectangle into a parallelogram. In the following example, the brush on the left was copied to the right and then the top edge was skewed to the right:
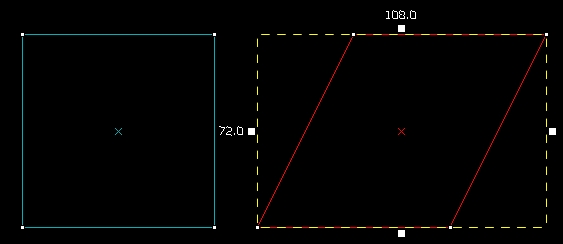
Skew the flat roof segment up from the left handle until the total height is around 100 units.
Now that we have one section of our roof built, we can copy and flip it to create the other half. Now clone the half roof to the other side of the house and press Ctrl + L. This will flip the object about the vertical axis, or left to right. You can also flip objects by going to Tools | Flip Objects. Once the second half of the roof is flipped, align it to the first half to complete your roof.