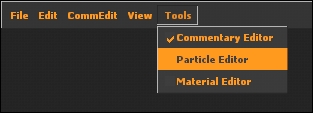
When you load the game you won't see the standard splash screen or background screen. Instead, you'll be greeted by a 3D window and a toolbar. Under the Tools tab, select Particle Editor to load Particle Editor tools:
Create a new particle system by clicking on File | New. You will see the view has now changed dramatically.
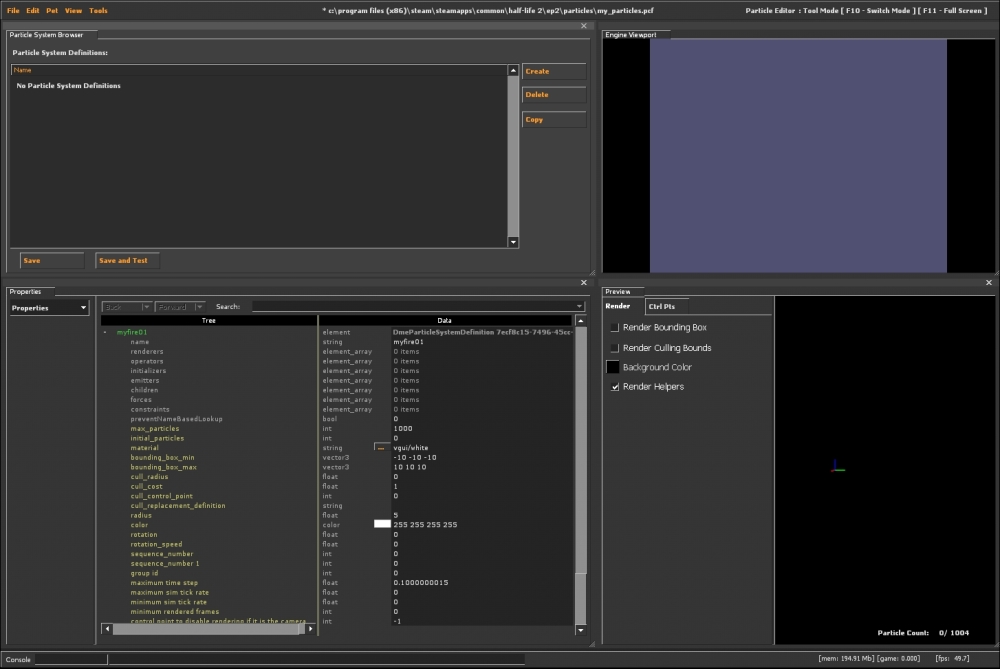
Welcome to Particle Editor! The top-left window lists all the particles within *.pcffile (the file that contains the particle scripts) and it also lets you create, copy, and delete particle systems. The top-right window is an engine preview. If you don't have a map loaded, you will not see anything. Press the F10 key to switch to the engine view, and then press F11 to make it full screen. You can now load any map you want. At any time, you can press F11 to minimize the window and then press F10 to go back into tools mode. The bottom-left window is where we'll be spending most of our time; it's where all the particle properties are set and tweaked. The bottom-right window will display a preview of the particle effect you're working on. Left-clicking in the preview window will rotate the view, while right-clicking will zoom in and out. Holding Shift and left-clicking will pan the view.
There are many options available to you in Particle Editor, but we'll get to see how each one works in the examples to come. Innumerable particle effects can be created with Particle Editor, but the first step towards the path of enlightenment starts with fire.
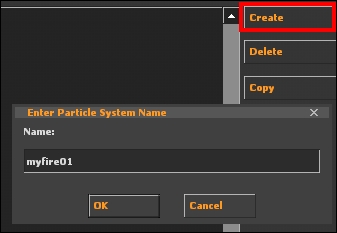
Click on Create and name the particle system myfire01. This is the name that Hammer will reference when compiling a map.
Before we continue, let's save the system. Name it my_particles and place it in the SteamAppscommonModparticles folder. For EP2, it would go here: SteamAppscommonHalf-Life 2ep2particles. The *.pcf file we just saved contains multiple different types of particles. Again, when referenced, Hammer will look for the particle system name, not the PCF filename, so keep this in mind while naming any future particles.
The first thing you will see upon creation of the particle is the Properties list. The default material applied to any new particle is vgui/white with a render color of white and a radius of five units. Let's leave this as default for now because it's much easier to simply get something rendered before we start tweaking our settings.
It's helpful to have an idea of what you want to create before you start. If you imagine how fire acts, the flames begin within a small area, rise up, and then fade out. New flames constantly take the place of the old ones. With this in mind, we can work on the initial creation of the particles.
In the Properties dropdown, select Emitter as shown in the following screenshot:
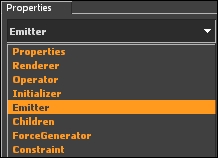
.
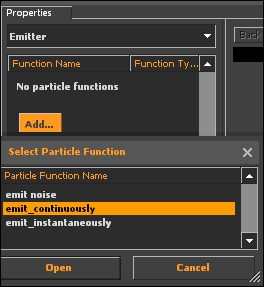
The Emitter tab controls how your particles are created or emitted. The two main options here are emit_continuously and emit_instantaneously. As you have probably guessed, emit_continuously will constantly emit particles and emit_instantaneously will emit a lot of particles all at once. Since we're making fire and fire constantly creates new flames, we want to use emit_continuously. Right-click in the blank list beneath the drop-down list and select Add... | emit_continuously.
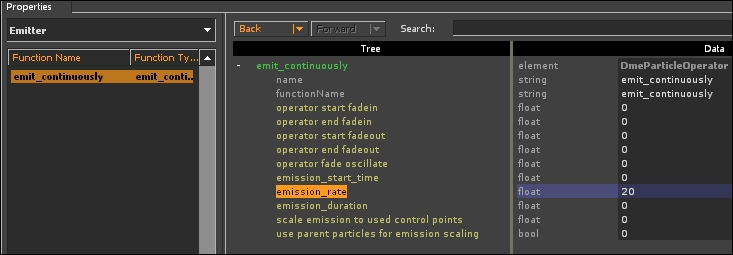
We can now see the data list that is attributed to the emit_continuously property. Our main concern right now is the emission rate, which is quantified in particles per second. The default value is 100, which will mean an emission rate of 100 particles per second. Our future changes will be easier to see if we slow this down to about 20, so change emission_rate to 20 to spawn 20 particles per second.
We can't see anything in the particle preview yet, but we're only on step one.
The next step is to select how we want our particles rendered. The default fire sprites have the ability to animate themselves. Therefore, we will select render_animated_sprites. This can also be used for particles without animations and is usually the default particle renderer.

Now that we have told the particle system how to display the sprite, we can see a preview! It's nothing special right now, just a white box, but it's a start! This white box is actually a collection of hundreds of sprites all rendered on top of one another. There's a default maximum particle amount of 1000, so older particles will be culled when the count reaches 1000. Fire doesn't start from a single point; it's usually spread across an area, so let's make that happen.
Each particle that is created has a multitude of different properties associated with it. Some examples of these properties are: alpha (transparency), lifetime, speed, and color. Each of these properties can be modified during or after particle creation. The properties that are set during creation are called initializers. Let's spread out the fire particles' origin to a set area. We can randomize the initial position of each particle within a certain area by adding the Position Within Box Random property under the Initializer tab:
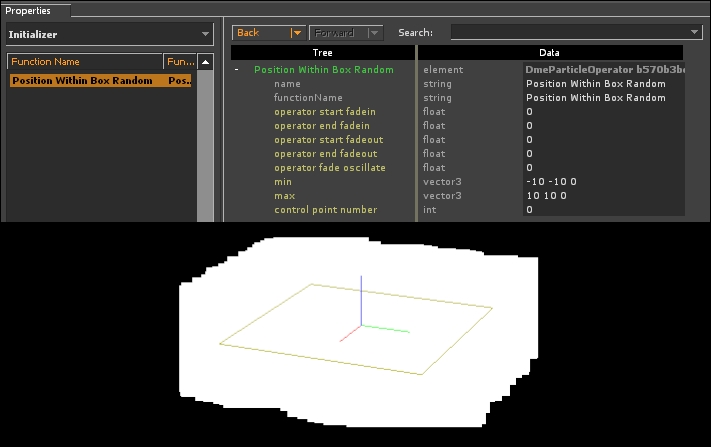
The two properties we want to change here are the min and max values. They hold values in an X Y Z format and by default are set to 0 0 0. Set min to -10 -10 0 and max to 10 10 0 to have the particles spawn within a 20 x 20 box centered about the origin. You can see the bounds of the spawn area depicted by a yellow outline and you will also see the particles randomly spawn within that area.
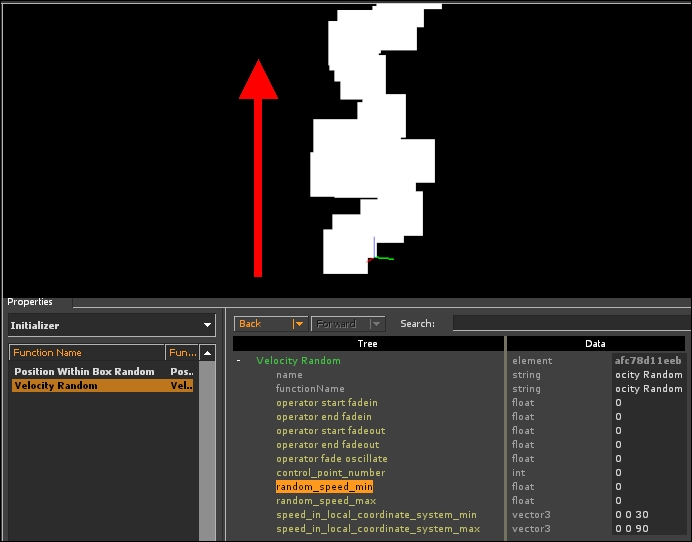
The next logical step is to give our particles some initial velocity so we can simulate the rise of the flames. Let's create a Velocity Random initializer so we can give some life to our white box flames. Again, we're dealing with random values, so we have to set minimum and maximum values. The values are named: speed_in_local_coordinate_system_min and speed_in_local_coordinate_system_max. Set them to 0 0 30 and 0 0 90 respectively; this will set a random vertical speed between 30 to 90 for each particle. The properties have long names but they do describe their functions clearly. As an example, if you rotate the particle system in Hammer by 45 degrees, the flames will travel at a 45 degree angle. The local direction of the particles is still set to a positive Z direction (straight up), but since the particle system itself has been rotated, the direction will change.
The properties in the operator give us control over the particles after they've been created. We gave our particles a random initial velocity but they're not moving yet. We need to actually enable movement in the operator group before the particles will move. In the operator tab, add a movement basic property. Once that's done, you will see the white boxes rise up.
Awesome! We have hundreds of little white boxes rising into the air. Now is a great time to choose our fire material. In the main drop-down menu, go to the Properties tab and find the material property. Click on the box with the ellipsis (...) to open the material browser.
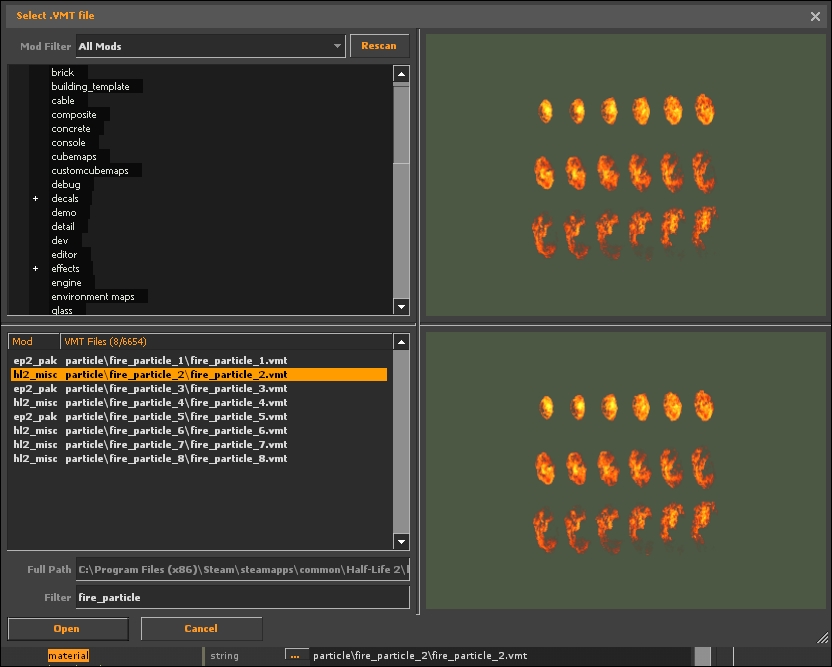
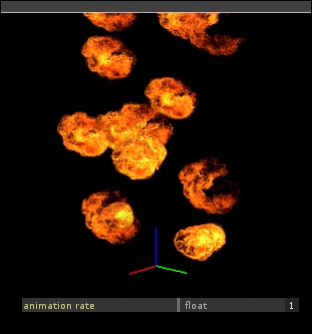
Filter for fire_particle and fire_particle_2 and click on Open. You should now see an orange puff of fire replace the white boxes in the preview window. The fire doesn't seem animated because the default animation rate is quite low. Go into the Renderer tab and change animation rate to 1. Your fire sprites are now animated as they rise up—neat!
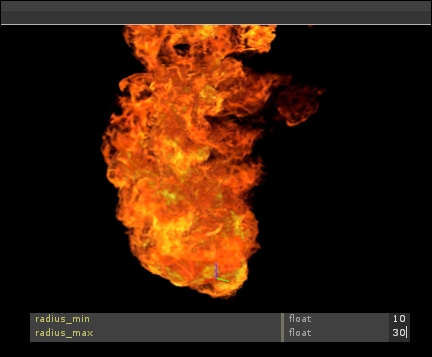
Our particle system is starting to take shape, but our effect isn't really convincing as our particles are rather thin now. We need to give it some more volume. It's hard to gauge the scale of the effect without anything else in the preview window, but remember that the default radius is five units and our particles are spawning in a 20 x 20 box. We can beef up the flames a bit with an initialization property called radius random. You can experiment with the radius_max and radius_min values to get the effect you want, but I've found that the effect produced by a minimum radius of 10 and a maximum radius of 30 looks quite nice.
Hey, it's actually starting to look like a fire! Note two things: the flames rise forever and never fade out, and all the fire particles are facing the same direction. This kills some of the realism but it's easily fixed with a few more properties.
In real life, flames have both a random transparency and a random lifetime. We have options for both of these in the Initializer group. Add a lifetime_random property with a minimum value of 0.5 (seconds) and a maximum value of 1. If you haven't guessed already, this will randomize the lifetime of each particle between the minimum and maximum values. However, the addition of the property won't do anything until we add in a lifespan decay operator property.
We have the flames lasting for random amounts of time, but to add another ounce of realism, we should be able to see through the fire. Remember, the alpha of an entity, (particle in this case) is the transparency ranging from 0 to 255. An alpha value of 0 is fully transparent and a value of 255 will render an entirely opaque entity. Add an alpha random initializer with a minimum value of 10 and a maximum value of 180. We can also make the flames fade out before they finally disappear. The alpha fade and decay operator properties will lower the alpha based off the time the particle exits. If we start the fadeout at 0.5 and end it at 1, the particle will begin fading out when half of its life has passed. It will be fully transparent when it is removed from the particle system.
There's one final property we can add to this fire to finish the effect. Add a rotation random initializer, keeping the default values to give the particles a random rotation upon spawning. In the end, we have a very neat-looking fire effect. Let's put it inside a level!