
We have created a roof, but there is still a gap that needs to be filled in between two of our walls. While we're at it, let's fix the ugly gap between the roof segments and the long walls. We can fix all of these issues easily with the Vertex Tool. This tool allows you to manipulate the vertices of brushes, and is also known as the Vertex Manipulation Tool or VM Tool. With the left roof segment selected, grab the VM Tool from the tools palette. The VM Tool looks like a gray wireframe cube with red vertices and can also be selected by pressing Ctrl + V. You'll notice that our selected roof segment now has eight square handles. There is a white handle on each vertex and a yellow handle on each edge. Clicking on the VM Tool icon (or pressing the keyboard shortcut Ctrl + V) will cycle through the VM modes. The standard mode allows both edges and vertices to be selected, but there are modes to manipulate only vertices and only edges.
Let's manipulate some vertices! Moving vertices is as simple as left-clicking on one and moving it. If you are looking straight down the side of a brush and select a white handle, you are selecting the entire edge because any vertex directly underneath your selection will also be selected. So it's not necessary to select both vertices, since the one beneath it is already selected. The same thing goes for the yellow handles. Selecting a yellow handle will select the whole face if there is another yellow handle directly beneath it.
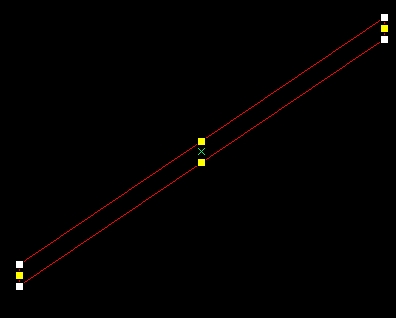
Move the lowest vertex on the left side to the inside top of the wall beneath it, and move the vertex above that to the outside edge of the wall.
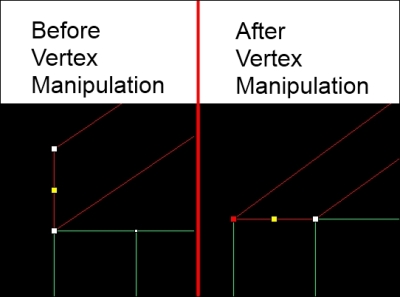
Now that our roof is aligned with the outside and inside of the house, it not only looks neater, but this also makes our lives easier when we go to raise the outer wall to the inside peak of the house. You can repeat this change to the other side of the house, or delete the other brush and then copy and flip the left brush over to the right side.
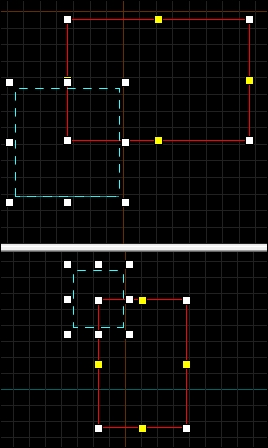
We can raise the outer walls up to the peak in a number of ways, but one of the quickest ways is to split the top face of the wall and bring the new edge up to the peak.
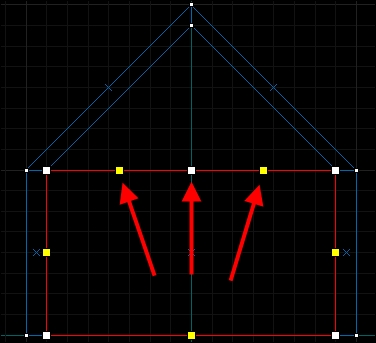
We can split faces easily with the Vertex Manipulation Tool. Select one of the walls under the peak, and with your VM Tool, select the top face of the brush by clicking on the yellow handle.
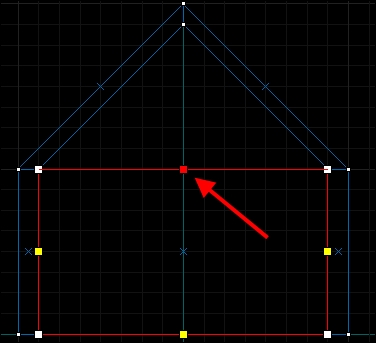
Press Ctrl + F to split the top face into two segments. You'll notice that the yellow handle has now turned into a white handle and two yellow handles have appeared on either side of the newly created middle white handle.
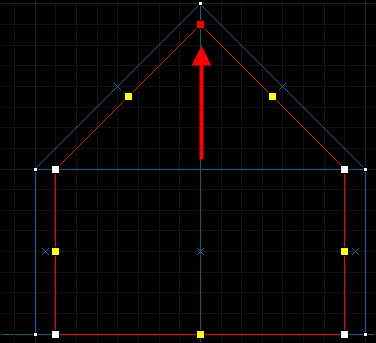
Select the newly created edge (middle white handle) and drag it up to the bottom of the roof peak.
Once you have mirrored the changes to the other brush, you're finished with your house! Now would be a good time for a test compilation.