So far, when we created brushes, we created blocks defined by an imaginary cube in 3D space. Hammer's default brush type is the block. But this can be changed by modifying the Objects property of the Object Toolbar.
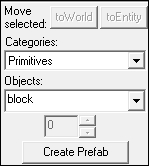
Click on the objects drop-down field to select either the arch, block, cylinder, torus (donut), sphere, spike, or a wedge object.
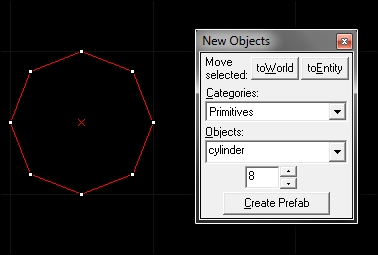
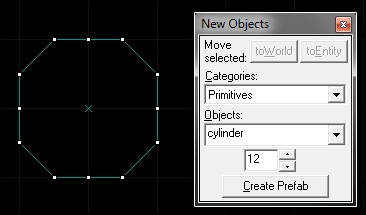
Cylinders are created by selecting cylinder from the Objects drop-down list. They're created just like boxes are except you specify how many sides you would like the cylinder to have.
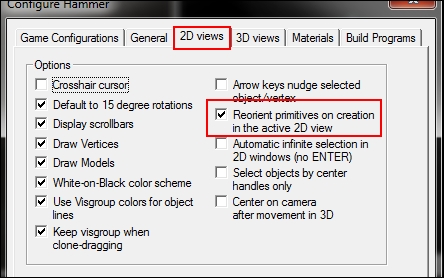
Upon creation, the top of the cylinder will face up, aligned with the z axis. This means that you will need to rotate the object to be in the final position you wanted. You can change which direction the object originally faces in the options menu. Navigate to Tools | Options | 2D Views and select the Reorient primitives on creation in the active 2D view option.
Cylinders, cones, arches, and tori will now face the active 2D view when created.
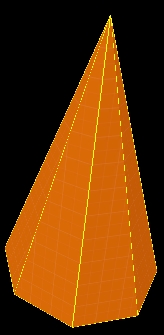
Spikes, or cones, are created with the spike object tool and resemble cylinders with the top face meeting at a point in the center. Their creation is exactly like that of cylinders. Select the number of sides you wish your spike to have, drag a creation box, and press Enter. And this is how the result will look:
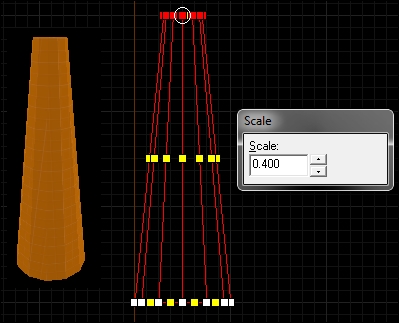
To create a truncated cone, or a cone with the top cut off, you can clip the top off a cone with the Clipping Tool or you can scale the vertices. To do this, start with a cylinder and select all the vertices on one end with the Vertex Tool.
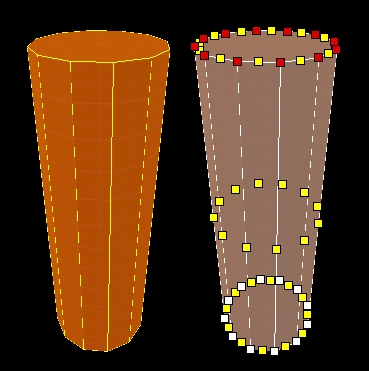
With the top side's vertices still selected, press Alt + E to bring up the Scale Tool. Use the up and down arrows to increase or decrease the scaling factor or type in any number you want.
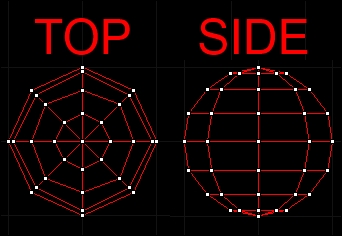
Spheres are created just like cylinders. Drag a creation box with sphere selected in the Objects toolbar and press Enter. Hammer will create a sphere within the box that has the number selected squared for faces. If you wanted a six-sided sphere, it will have 36 faces. If you selected an eight-sided sphere, it will have 64 faces. Keep in mind that these created primitives might be invalid structures. If so, they will not render properly in the game.
Make sure to check for problems, Alt + P, before doing a compile to make sure you are not creating any errors in your geometry. If the sphere is invalid, it will not render properly in the game and the compile time will increase dramatically. Check out the following screenshot to see how the sphere looks in the game with the mat_wireframe 3 command:

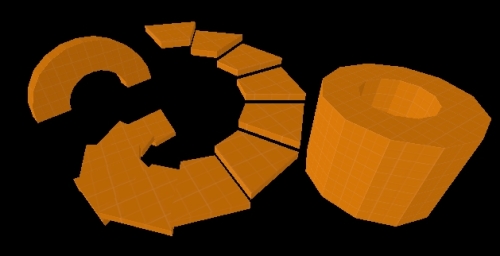
The tool used to create arches can be very useful. You can create standard arches, hollow cylinders, and even spiral staircases!
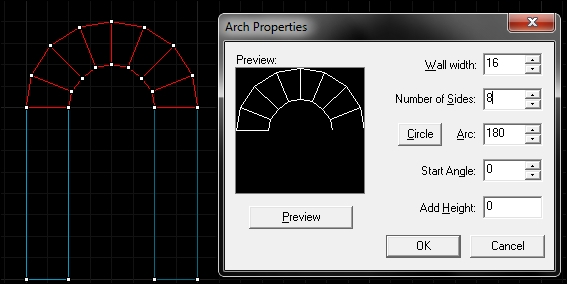
The box that controls the number of sides can be ignored as you will set more properties later. Select Arch from the drop-down list, drag a box, and press Enter to bring up the Arch Properties window:
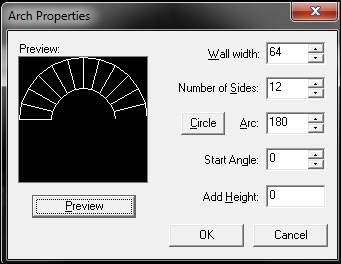
The Arch Properties window gives you five settings to play with as well as a preview window depicting the final outcome. At any point, click on the Preview button to update the preview window with your current values. Wall width controls how thick the arch walls will be upon creation. This value increases from the outer bounds toward the center of the arch. Number of Sides controls how many sides the arch has and Arc controls how far the arch spans. The Circle button will automatically fill the Arc property with a value of 360, creating a closed circle. The arch's Start Angle defaults to 0 with the zero point facing east. The angle will increase counter clockwise. The Add Height property will give additional height to each arch segment starting from the zero point. Manipulating this property will let you create spiral staircases.
A standard arch is created by setting the Arc field to 180 degrees and Start Angle to 0.. Set Wall width equal to your supported wall height, leave Add Height as 0, and click on OK to create an arch!
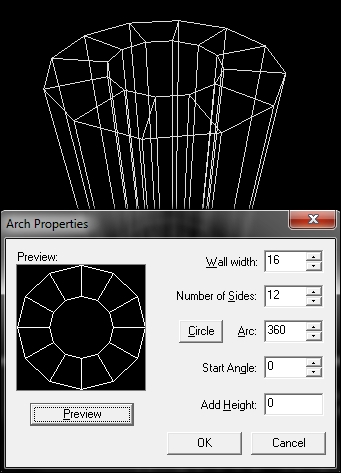
Hollow cylinders are relatively easy to make as they're just closed (circular) arches. Set the desired values in the Wall width and Number of Sides fields and click on the Circle button to force a closed arch. Click on OK to marvel at your results!
Spiral staircases would take a long time to create without the Arch Properties window. In this example, I will be creating a 180 degree stone staircase with 96 unit wide stairs and a step height of 12 units.

In order for our stairs to be created properly, the bounding box has to be square with each side at least twice as wide as our desired stair width. Start by creating a bounding box with the dimensions 256 x 256 x 12. Make sure to set the height of your bounding box equal to your step distance. Modifying the individual stairs after the staircase is created can take a long time.
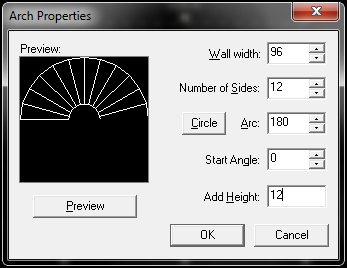
My Arch Properties are as follows: Wall width of 96, Number of Sides set to 12, Arc set to 180, Start Angle of 0, and Add Height set to 12. Remember, the Add Height field sets our step distance and not our stair height. The stair height is set by the original bounding box. Click on OK and check out your beautiful staircase!
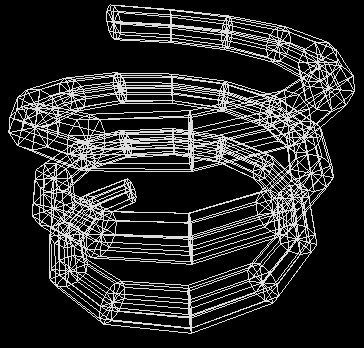
A torus can be thought of as a donut or inner tube. Source can very rarely create these objects without creating a slew of invalid solids, but they're a fun shape to play around with. Let's create a torus tunnel for our player to walk around in.
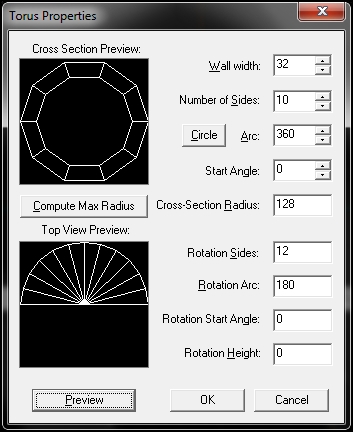
The Torus Properties window is very similar to the Arch Properties window, yet there are quite a few more values to edit. This tool can be considered an arch tool within an arch tool. It might be daunting at first glance, but you can break it down into two parts: Cross Section Preview and Top View Preview.
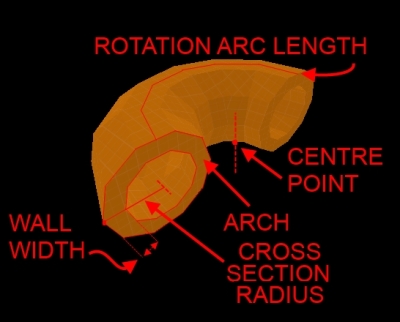
The Cross Section Preview is laid out almost exactly like the standard Arch Properties window. You specify the values for the Wall width, Number of Sides, Arc, and Start Angle fields just like Arch Properties. There is no Add Height option; however, there is something similar in the Top View Preview portion. Think of it as the cross section arch being revolved around a center point.
Again, just like the Cross Section Preview, there are properties for Rotation Sides, Rotation Arc, and Rotation Start Angle. But these apply to the revolution of the arch around the center point. If you want an open torus similar to a piece of elbow macaroni, choose a rotation angle of 180 degrees.