
There's an easier way to create materials. VTFEdit is a tool created by Nem (Ryan Greggs) that puts an easy-to-use GUI over the default SDK texture creation. You can grab it from http://nemesis.thewavelength.net/index.php?c=238#p238. You'll need Microsoft's .NET framework to run the program (also available at the previous web page) as well.
Using VTFEdit is much easier than typing your own commands and creating a folder network. Run VTFEdit and navigate to File | Import to choose an image to import.

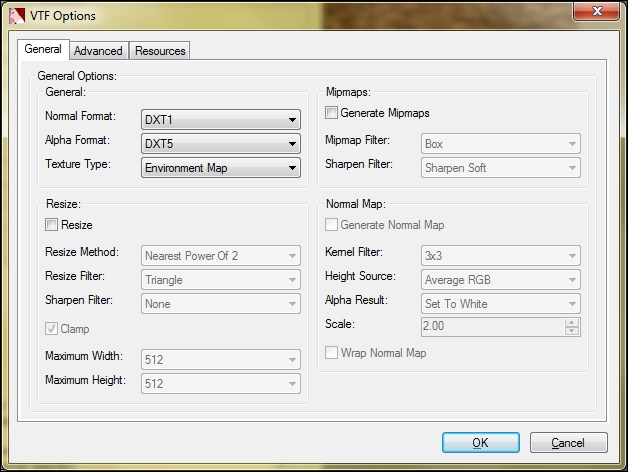
A great thing about VTFEdit is its ability to import multiple image types. As long as you conform to the size constraints, you can import bitmaps, PNGs, JPEGs, and many more. After choosing your file, you will see a prompt showing a slew of options. Click on OK to continue, as shown in the following screenshot, since the defaults will most likely suit your needs:
Once you have imported an image, navigate to File | Save to create a VTF based on your imported image, making sure you choose the mod/materials/mytextures folder. Wasn't that so much easier than before?
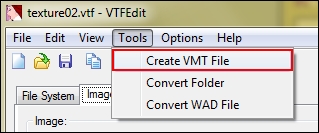
Now, we need to create the VMT text file. VTFEdit makes our lives easier once again. Instead of coding our own file, the program does it for us! To see how easy this is, navigate to Tools | Create VMT File:
We will be greeted with a window that will let us choose which VTF we want to create the material with. By default, the VTF we have just created will be at the top of our list.

Have a look at the preceding screenshot. The Base Texture 1 field will be filled in with the texture you have just created. In my example, this is mytextures/texture02. If you have a bump map created for your texture, you can add it to this material by clicking on the ellipsis (…) next to the Bump Map 1 field. Since this texture is a simple brick wall, we don't need a bump map. Let's move on to the Options tab to see some other options.

The Options tab gives us more control over the texture. This is where you can select the surface properties and some other special texture attributes. Again, instead of typing the code, VTFEdit makes our lives easier by allowing us to simply tick checkboxes to choose options. Since we are using a brick texture, select Brick for Surface 1. If you're not using a brick-like texture, select whichever material is closest; there are many to choose from. This is a standard texture, so we're not going to need any other special options here. Click on Create to continue and bring up a save prompt. Name your VMT something along the lines of brick01 or mytexture02 and save it in your mytextures folder.
That's it, you're done! You will now be able to see your texture in the texture browser within Hammer and in the game.