
Welcome to the world of lighting and compiling! It's generally accepted that lighting can make or break a map, and this chapter will show you how to avoid some common pitfalls while utilizing some of Source's most advanced lighting features to make your environment shine.
This chapter will cover the following topics:
- Using lights
- Emphasizing lights
- Modifying the Lightmap Grid
- Assigning Smoothing groups
- Compiling concepts
- Placing cubemaps
- Adding color correction
The best way to learn is to jump in, so let's get started!
There are a multitude of different types of lights available in Source. Learning how to use each type of light is very important in setting the mood in your maps. Every type of light entity has its own special properties that help define the look and feel of the map's lighting. However, most light entities have a common brightness parameter that controls not only the brightness but also the color.
The Brightness parameter contains four three-digit numbers separated by a space. The first three numbers specify the color in Red, Green, and Blue (RGB) format, while the last number specifies the light brightness. The default brightness is 255 255 255 200, which is a white light with a brightness of 200. Hammer has a built-in color picker, so you don't have to mess around with the raw RGB numbers, although it makes copying and pasting colors from outside applications easy. There is no specific unit for the brightness number. Higher values are brighter, whereas lower values are dimmer. Let's take a look at a specific light entities.
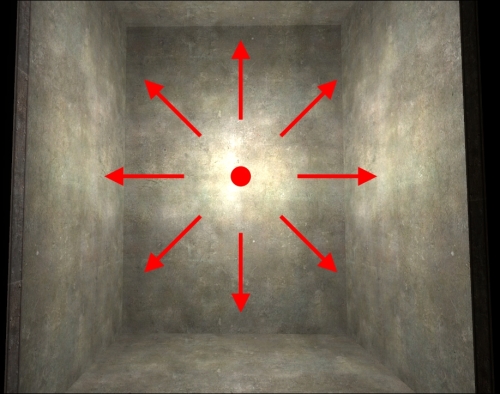
Point lights are the simplest of all lights available in the Source engine. Point lights emit light in all directions from a single point in space. You can think of a point light as a standard light bulb. However, instead of emitting light from a filament inside a glass bulb, the light comes from the direct center—just a single, invisible point in space. You cannot see where the light is coming from, just that there is light being cast in all directions.
The entity that point lights are created from is simply called light. We have used these before but we just skimmed the surface.
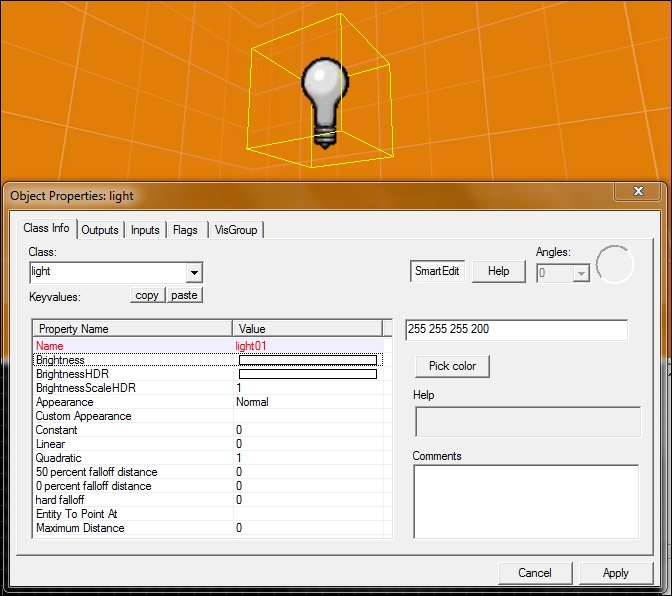
Have a look at the preceding screenshot. You will see a number of different parameters for light that are explained as follows:
- Name: This parameter gives your light a name if you would like to turn the light on and off. Lights will work fine without names, and they are set to the on state by default; however, you won't be able to turn them off.
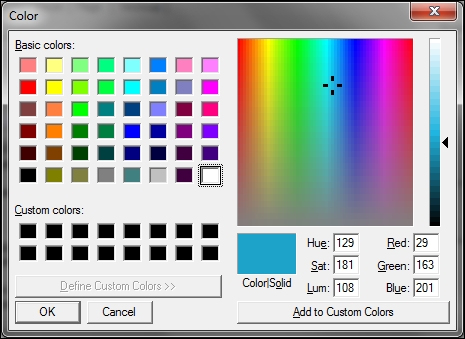
- Brightness: This parameter controls the color of the light. When you click on the Pick color button, a color picker will appear, which will automatically fill in the RGB (Red, Green, and Blue) values when you have chosen the color you want.
- BrightnessHDR: This setting will control the brightness of the light when the map is compiled with HDR. This parameter is set just like the regular brightness setting but will override the standard brightness when compiled in the HDR mode. A value of -1 -1 -1 1 will not change the light between modes and is set as default.
- BrightnessScaleHDR: This parameter scales the brightness when in the HDR mode to give the effect of increased or decreased light. A value of 1 (set as default) will not change the default brightness.
- Appearance: This parameter controls the dynamic brightness of your light. There are different presets you can choose from, such as fluorescent flicker or candle effects. The default is none and that should work just fine for most situations.
- Custom Appearance: This parameter allows you to enter a custom appearance for the light in the form of a string. You can enter the letters a-z in a long sequence with the letter a representing 100 percent of brightness and z representing zero percent brightness. Each letter in the string changes the brightness for one-tenth of a second.
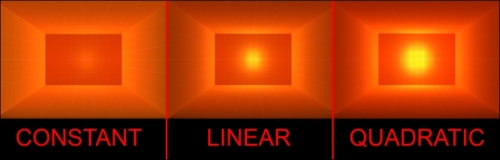
- Constant: Set this parameter to
1to force the light to have a constant brightness along the reach of the light. - Linear: Set this parameter to
1to force the light to have a linear falloff. The brightness decreases linearly with respect to the distance away from the light origin. The light is 1/64 times the brightness of the origin, which is 64 units away from the light. - Quadratic: Set this parameter to
1(default) to force the light to have a quadratic falloff. The brightness decrease is equal to the square of the distance away from the light origin. If you're 64 units away from the light, the brightness is 1/4096 (64*64) of the original. Unless you want some special lighting, keep this setting. - 50 percent falloff distance: This parameter sets the distance you want to one half of the light's brightness.
- 0 percent falloff distance: This parameter sets the distance you want to 1/256th of the light's brightness.
- Hard Falloff: This parameter forces the 0 percent falloff distance to have 0 percent light.
- Entity to Point At: This parameter has no effect on point lights.
- Maximum Distance: This parameter has no effect on point lights.
The following image gives some examples of the different light styles that all have the same brightness. Check out the CH6_falloff example map for even more examples.
Spot lights emit light from a central point, but their light emission is focused in a single direction controlled by two cones. There is a bright inner cone and a fading outer cone that control the angle of reach and the focus of the light. Spot lights are useful for ceiling lights, light posts, desk lamps, or any light source that will cast light in a specific direction.
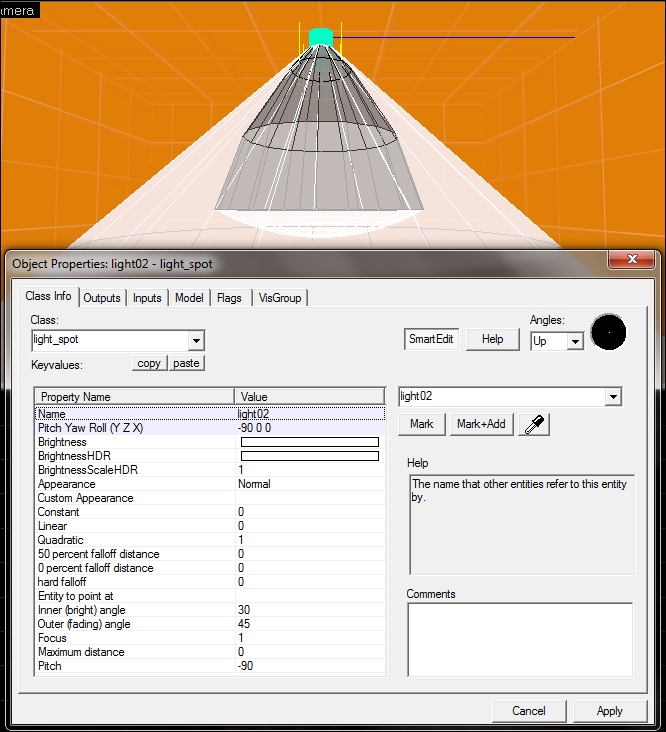
The properties of light_spot are very similar to the standard light; the only difference is an addition of Outer (fading) angle and Inner (bright) angle. Changing these angles allow you to control the width and brightness of the light. As you can see from the preceding image, the light is cast downward only because the pitch, or vertical angle, is set to -90. A value of 0 or 180 will cast light horizontally, while 90 or -90 will cast light vertically. There is no light emission outside the cone, so spotlights are often combined with dull point lights to convey a more realistic light emission around the source of the light_spot entity.
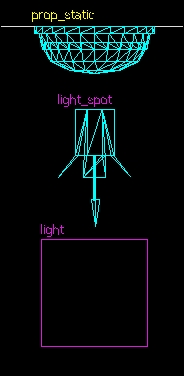
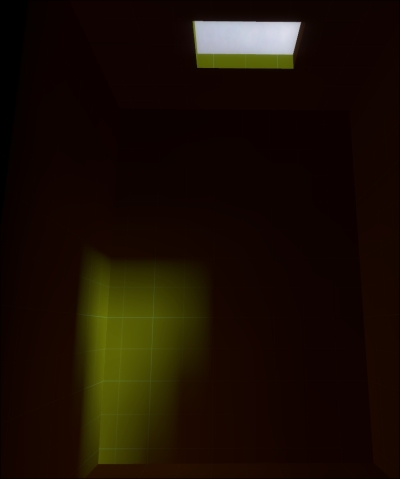
In-game, you'll be able to see the effectiveness of the combination of light_spot and light as shown in the preceding image. The following image shows the effect of combining spot lights and point lights:

The light_env emits light from the skybox texture. The brightness and angles are set just like a light_spot entity but there are no cone angles to specify. Light will always be cast at the same angle unless sun spread angle is specified to break up the light direction, as shown in the following screenshot:
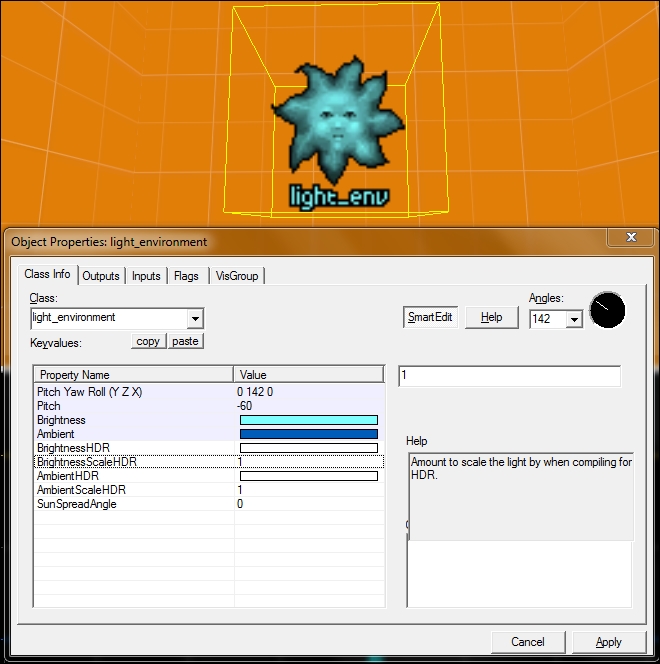
Brightness and BrightnessHDR are set like normal lights but there is also an ambient setting that defines the brightness of the darker areas of the map. Wherever a shadow is cast, the ambient light will be applied in that area.
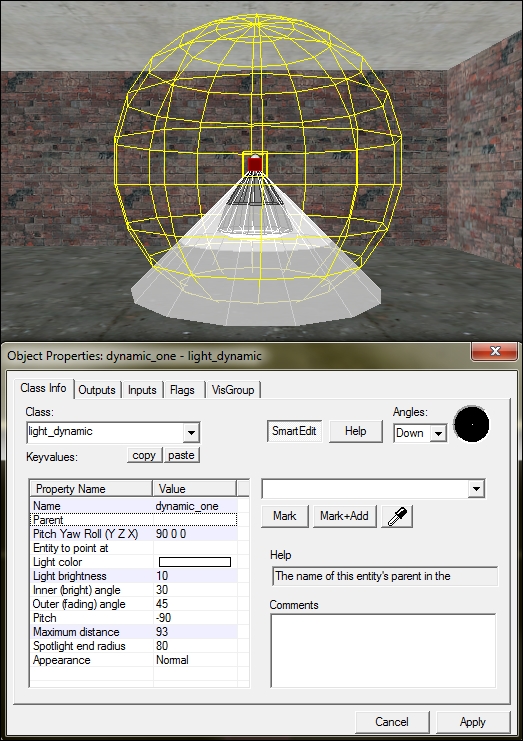
Dynamic lights and light_dynamic act similar to spot lights, but they are calculated in real time. The word dynamic means changing; dynamic lights can change color, brightness, and angle and can be used in a variety of situations. For example, you can parent a light_dynamic to a hanging light, and when shot, the light will move around with the swinging fixture. However, you should use dynamic lights sparingly in your maps because they take a lot of processing power to display due to the real-time light calculations.

You'll notice that the parameters are nearly the same as the light_spot entity. There are some key differences, however. The inner (bright) angle and outer (fading) angle parameters only affect models such as props, NPCs, and your weapon. The spotlight end radius entity affects how the world (brushes and displacements) is lit by making a circle of light on the ground with that radius. The Brightness parameter is not tied into the color setting like other lights, and it doesn't follow the same scale either. A brightness value of 5 is a good place to start with a light_dynamic entity. The Brightness parameter also doesn't affect how far the light is cast either; this is directly controlled with the maximum distance parameter, which needs to be set equal to or greater than the surfaces or models you want to light.
There's a way to light your map without the need of entities! Texture lights emit light from the surface of a material. The color and brightness of the emitted light are specified within the lights.rad file, which is located in your game folder. In the texture browser, you can't tell if a material will emit light, so you should check the lights.rad file before you compile.
The lights.rad file is a simple text file that is saved with a .rad extension. All it contains is a list of texture names and their associated brightness values with each texture residing on a separate line. For example, I want the metal/metalwall013a texture to emit a reddish-brown light with a brightness of 1500. My lights.rad file would look like the following:
metal/metalwall013a 153 69 13 1500
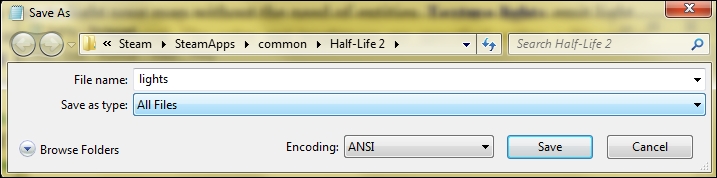
Simple enough, right? Now just save it in the base game folder. So, since I'm using Half-Life 2: Episode Two, I will save it at SteamSteamAppscommonHalf-Life 2. Make sure to select All Files next to the Save as Type description so it will save as a .rad file and not a .txt file.
When I compile my map, the log will show that it is using a texture from the lights.rad file by displaying [Reading texlights from 'lights.rad'][1 texlights parsed from 'lights.rad']. In-game, the texture will emit light from the surface! Texture lights tend to be pretty dull, so don't be afraid to crank your brightness values past 1500.
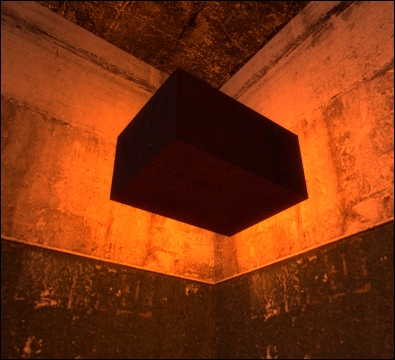
Texture lights are often used to emit light from light textures. Combining a texture light with a sprite (mentioned later in this chapter) provides a very convincing lighting effect.
Projected textures are not exactly lights but they cast a colored texture in a specific direction similar to light_spot, but instead of a cone-shaped emission, the project texture had a pyramid-shaped emission. Projected textures have the unique ability to cast shadows through alpha channels in textures. They're very useful for giving a dramatic back-lit effect through a grate or fence, but like dynamic lights, they take a lot of processing power to display.
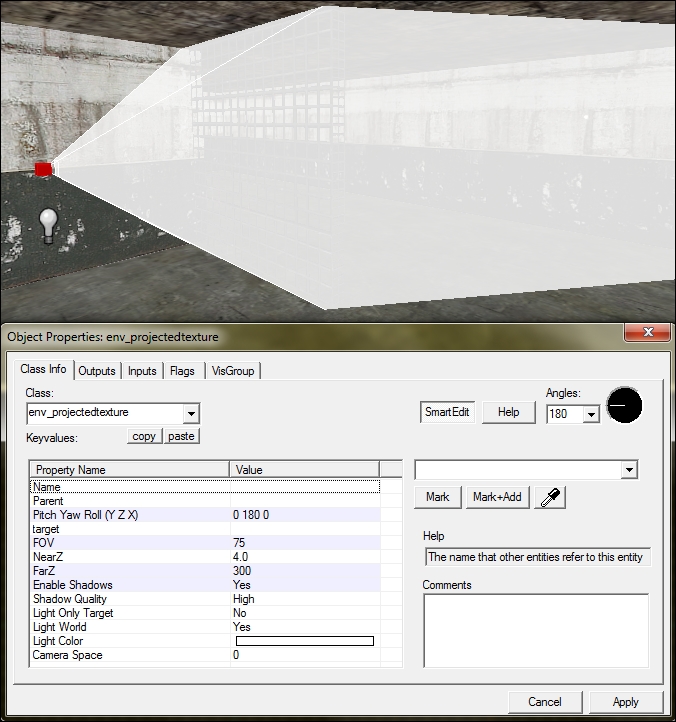
The entity used is env_projectedtexture, and the light color is set just like the Brightness parameter in any other light. However, Shadows have to be enabled manually. In this example, this projected texture is shining through a grate across a hallway. Shadows are enabled and the light color is left at the default white with a brightness value of 200. There is a dull point light in the nook with the projected texture just to give the illusion that there is light coming from behind the grate. I also placed the same grate with just a point light inside to show the difference in effect.
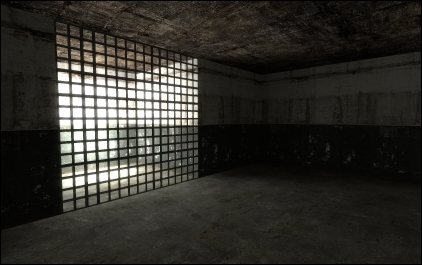
The light entity casts a standard light cone out from the inset in the hallway.
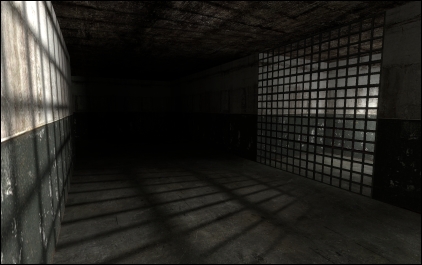
The env_projectedtexture entity casts shadows created with the texture's alpha channel.
Projected textures will also cast shadows of NPCs and models, but they will not cast shadows of the player because there is no player model in Half-Life 2.