
Up until now, we have just been doing normal compiles during our tests, and we haven't really paid much attention to any of the advanced features or what each specific option controls. Doing normal compiles is just fine for testing, but let's explore the different stages of the compile process and how to tweak the settings to our liking.
Before you even think about compiling a map, you should always check it for problems. In Hammer, press Alt + P to check the map for problems. If you're neat, organized, or just plain lucky, you will not have any problems, and a happy dialog box will appear as follows:
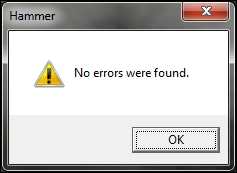
If you don't have any errors, great! You can go ahead and compile. However, if you do have errors, you will see a list of everything that's wrong in your map, as shown in the following screenshot:

A few common errors and their solutions are:
- Invalid solid structure
- Solution: Concave or other type of brush. Click on Fix to resolve or recreate the object.
- There is no player start
- Solution: Add an info_player_start entity.
- Entity (entity_type) has unused keyvalue "angles"
- Solution: Always appears with some entities. It can usually be ignored, but the Fix button will resolve it.
- Entity (entity_type) has bad I/O connections
- Solution: There is a bad reference in an I/O connection. Fixing it will delete the I/O reference.
Most of the time, the Fix button will resolve the error. If it doesn't, you can check the VDC website at https://developer.valvesoftware.com/wiki/Compile_Errors, and do a web search, or check a mapping community website such as twhl.info. Someone must have probably run into the same problem before, and most people would be glad to help you resolve it.
After checking your map for problems, press F9 to bring up the Run Map dialog box as follows:
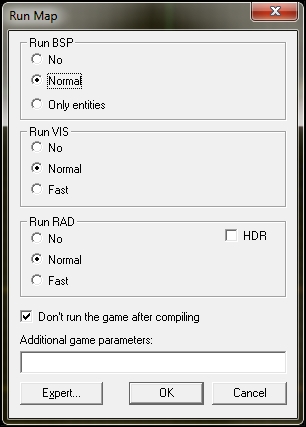
Without going into too much detail, the Binary Space Partition (BSP) part of the compile process takes all the world brushes, displacements, and models, and creates a playable .bsp (map) file with them. It is this process that actually creates the world out of the .vmf (map) file that you create with Hammer.
Other than the Normal option, there are two other selections for BSP: No and Only entities, as shown in the following screenshot:
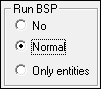
No will not run the BSP program meaning that all changes to your brushwork or displacements will not be updated when you compile. In order for your map to function properly, a previous compilation using BSP must have been made. The VIS and RAD programs will still run with BSP disabled, so this can shave off a few seconds your compile time if you want to just do a lighting check.
Only entities will update the location and function of any brush-based entities that were changed after the last compile. This setting is useful when used in conjunction with disabling VIS and RAD to check complex entity setups and scripts.
VIS tells the game engine which parts of your map are visible from any other point. The following screenshot shows the VIS portion of the compile prompt:

It does this by slicing empty space into areas known as visleafs. Without diving too deep into the actual function of a visleaf, just know that any object's visibility is controlled by the visleaf it occupies and any surrounding neighbors. If you can see a visleaf, everything inside it and any of its neighbors is rendered. VIS will create one or more visleafs between each brush, and it mostly prefers cubic shapes over angled geometry. In general, the lesser visleafs, the better.
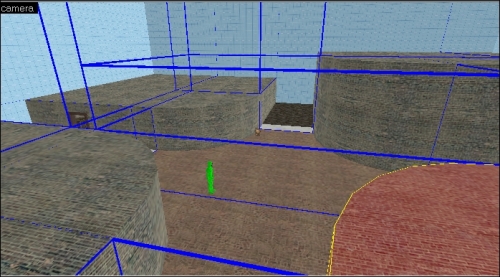
To see the visleafs created during the compile process, navigate to Map | Load Portal File after you have compiled one of your maps.
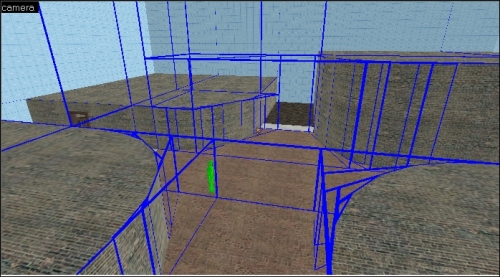
Angled world brushes cut square visleafs into wedge pieces, which can drastically increase the amount of visleafs in a map. The lesser the visleafs in a map, the faster the map compiles, and the faster it runs in-game. So, it's a good mapping practice to turn angled and complex geometry into func_detail entities because they do not cut visleafs!
Note the difference when the angled wall sections are turned into func_detail entities. Even in such a small, simple map, the percentage of leaves was reduced by around 27 percent (from 93 to 73)!
Don't go too crazy turning every piece of curved geometry into the func_detail entities; only world brushes seal the map from the void, and you may create a leak if you turn an exterior brush into func_detail!
If VIS is not calculated, the entire map will be visible at all times. If you have a beefy gaming rig, this won't be too much of a problem, but on larger maps, rendering everything at once will bring even the best machine to its knees. No map should ever be released or considered final without running VIS in the compile. Disabling VIS can be handy at times if you make good use of the cordon tool to limit your compile bounds, and you want to check out some entity setups.
RAD is short for radiosity, and it calculates lighting in your map. Each light source in the map gets analyzed to see how far the light is cast, and how many times the light bounces off each surface. Lights that turn on and off or have a flicker will have a separate RAD calculation for each brightness value. So, a light that can be turned on and off will have two RAD calculations, and a light that stays on all the time will have one RAD calculation. Lights, for example, that have a custom appearance of aaahhhmmmzzzz, will have four RAD calculations (one for each letter). So, if you're using a lot of flickering lights in your map, expect to wait a little bit for RAD to do its duty. The lighting calculations make up the majority of your compile time and will eat most of your computer's resources. If you're compiling a large or complex-lit map, it's best to leave your computer alone while the map compiles because it can take hours to complete.
Tip
If you try to multitask while compiling, you might freeze the process, and VIS or RAD might not respond. It's highly recommended to leave your computer alone while compiling a large map; especially, during a final compile. Take a nap, take a break, maybe get a cup of tea, and sit outside! Patience is the key.
If you disable RAD while compiling, your map will become what's known as full bright. There will be no lighting information in your map, and all the textures will be rendered at their native (100 percent bright) color.
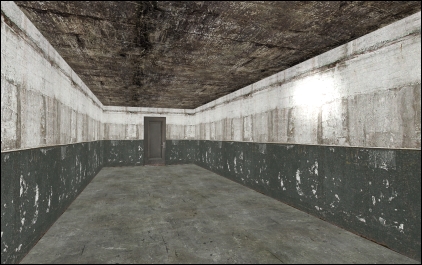
Full bright maps are very unattractive, but compiling without RAD can save a lot of time even over fast compiles. Running a map without RAD is very useful for testing entity setups because you're cutting over 50 percent of your compile time out.
Fast RAD compiles are quicker than normal RAD compiles. They don't look pretty, but running with fast RAD during the bulk of the development process will save you hours in the long run. Usually, while creating maps, lighting is tweaked in the end or else normal RAD compiles will eat your precious time for no reason.
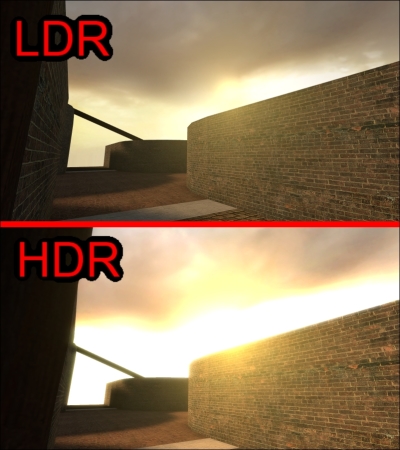
HDR stands for High Dynamic Range. HDR makes a map's visuals more attractive by mimicking the way a human's eye reacts to differences in brightness. HDR makes bright lights whiter, dark corners blacker, and simulates the glow or bloom of light oversaturation. If you then walk between different areas of brightness, your view will take a few seconds to adjust to the new area. As we can see in the following image, compiling with HDR when it is enabled will nearly double your compile time, but it's well worth it for the added effect:
You can turn on the expert compiling mode by clicking on the Expert button from the standard compiling menu.
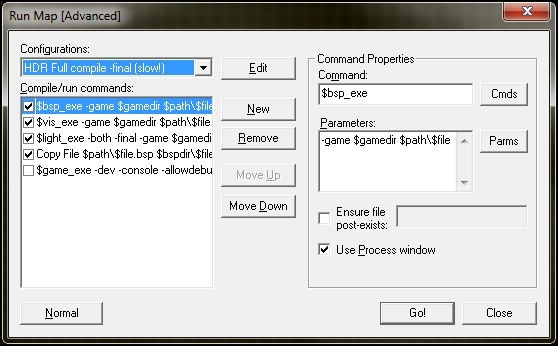
The expert mode allows you more control over the BSP, VIS, RAD, and other settings in your compile. When you enter the expert mode, you might be overwhelmed, but this just exposes the parameters that are passed to the individual compile programs. Have a look at the preceding screenshot. Source has a few precanned expert compile modes that are quite useful. The easiest way to do a final HDR compile is to pull down the Configurations selection box and select HDR Full compile –final. This will run BSP, VIS, and RAD at their maximum settings. This will take a very, very long time if your map is complex (a few hours). The results will be worth it though.
If you wish to modify any specific command parameters, select it from the Compile/run commands: area, and add other compile parameters in the right-hand side. The most useful parameters are -both and -final for the RAD program. The -both parameter compiles LDR (regular lighting) and HDR. The -final parameter should be used on the last compile of the map to make the lighting look the best it can.
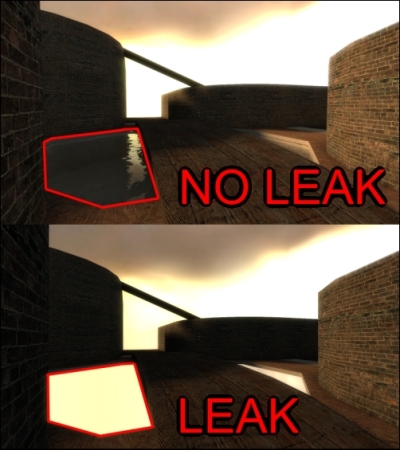
During the compile process, the map is also checked for leaks. If your map does not look correct in-game, or if it's taking a dreadfully long time to compile, you can check the compile log to see if you have a leak anywhere. An easy way to tell if your map has a leak is to look at water while you're in-game. You should be able to see right through it.
The compile log will be displayed at the end of a compile, but if you have closed it, a copy of the log is stored as <yourmapname>.txt inside the folder where your .vmf file is saved. Instead of reading through the entire log, search for the LEAK string.
You will see ****leaked**** wherever the compile tools detected a leak, as shown in the following screenshot:

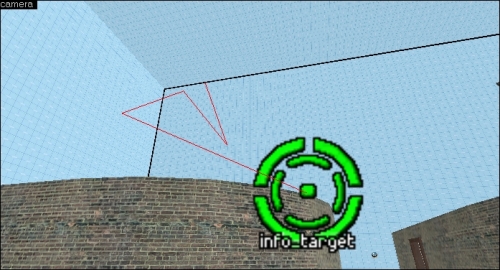
It can be a pain to track down the origin of a leak, but the compile tools make it a bit easier by creating a pointfile whenever it detects a leak. The pointfile traces the lighting path starting at a source entity and ending in the void. If your map has a leak, you can load the pointfile by navigating to Map | Load Pointfile. Look at the compile log to see where the source entity is, and trace the red pointfile entity line to the source of the leak. In this example, the info_target entity shows us the leak is coming from an unsealed skybox.
The compile log is useful for more than just leak checking; it will list other errors as well with hints on how to resolve them. Also listed in the compile log is the time it takes for each step to complete (BSP, VIS, and RAD), and based on what you would like to watch, the compile window will show you which step of the process it's on. The log also shows how full the map is. Since this is a computer game, and not real life, you have to work within limits. Check out the compile log to see how much space you have left for light data, entities, brush faces, and more.