
Chapter 4. Managing the view
| This chapter covers |
|
In Chapter 3, we created a project, the Places to take the kids! website, that will showcase features of Zend Framework over the course of this book, and will demonstrate how to integrate components into a proper web application. We have looked at the directory structure, creating a model and a controller for the home page, and also at how to test these. To complete the first stage of the website, we now need to create view scripts.
The view is the section of your application that the user interacts with, so it is important that you get it right. All but the smallest of websites have common display elements on all pages. Usually this includes the header, footer, and navigation elements, but it could also include advertising banners and other elements required by the site’s design. Zend Framework provides a suite of components that help make the visual part of your website both powerful and flexible and also easy to maintain in the long term.
We have already looked at the basics of Zend_View in Chapters 2 and 3. In this chapter, we will look in more detail at the more advanced view helpers supplied with the framework. We’ll also look at the Zend_Layout component, which provides for a Two Step View integrated with a Composite View system allowing for very flexible page displays. First, though, let’s look at what the Composite View design pattern is and why we would want to use it.
4.1. Introducing the Two Step View and Composite View Patterns
We need to ensure that the common display elements of our website are consistent across all pages, so we need a way to avoid copying and pasting the same HTML code across all view scripts. One way to do this is to add two includes to every view script, like this:
<?php include('header.phtml'),?>
<h1>page title</h1>
<p>body copy here</p>
<?php include('footer.phtml'),?>
The main problem with this approach is that we are repeating those two lines of code in every single view script. This clutters up the view script with code that is not relevant to the job in hand, and because it happens all the time, it is ripe for automation. A better solution is to separate out the common sections automatically. There are two design patterns that cover this area, Two Step View and Composite View.
The Two Step View pattern is documented by Martin Fowler like this:
Two Step View deals with this problem by splitting the transformation into two stages. The first transforms the model data into a logical presentation without any specific formatting; the second converts that logical presentation with the actual formatting needed. This way you can make a global change by altering the second stage, or you can support multiple output looks and feels with one second stage each.
—(From http://martinfowler.com/eaaCatalog/twoStepView.html)
Composite View is documented by Sun like this:
[Composite View] provides for the creation of a composite view based on the inclusion and substitution of modular dynamic and static template fragments. It promotes the reuse of atomic portions of the view by encouraging modular design. It is appropriate to use a composite view to generate pages containing display components that may be combined in a variety of ways.
—(From http://java.sun.com/blueprints/corej2eepatterns/Patterns/CompositeView.html)
In terms of building a website with Zend Framework, this means that the view script attached to the action should only contain the HTML related to that action. The rest of the page is built up independently, and the content of the controller action is placed into it. This is shown in figure 4.1, where we have a master template (layout.phtml) providing the overall layout and an action template containing the action-specific content.
Figure 4.1. Multiple templates are used to build up the complete page.

The layout script contains those parts of the page that are not directly related to the current action, such as the header, footer, and menu sections. The action view script contains the display code specific to the action being dispatched. The Zend_Layout component of Zend Framework is used to manage this process. Along with the ViewRenderer action helper and the action()_view helper, it provides a complete and very flexible composite display system.
The ViewRenderer expects that all action view scripts are stored in the views/scripts subdirectory (though this is configurable). They are further subdivided into separate subdirectories per controller. As we saw in Chapter 2, by default the template file is named after the action with an extension of .phtml. That is, if we have a controller called reviews, the index action’s view script is called index.phtml and resides in the reviews subdirectory. Zend_Layout adds to this by storing the layout templates in a central layouts directory. By default, this is the views/scripts/ directory, though it is usual to specify a separate directory, such as views/layouts.
4.2. View Handling with Zend_Layout
The Zend_Layout component manages rendering of a master layout script, which contains content placeholders for embedding content generated by actions or other view scripts. As with all Zend Framework components, Zend_Layout works with the minimum of configuration for most uses, but if your requirements are more specialized, it is very flexible.
When using Zend_Layout with the MVC components, the startMvc() method is used to initialize it. This is done in the bootstrap file like this:
Zend_Layout::startMvc(array('layoutPath' => '/path/to/layouts'));
As you can see, this is a static method, so you don’t need to create an instance of the Zend_Layout class first. Behind the scenes, startMvc() creates a Singleton instance of Zend_Layout and registers a front controller plug-in and an action helper that can then be interfaced with from the rest of the application. The front controller plug-in, Zend_Layout_Controller_Plugin_Layout, has a postDispatch() hook function that renders the layout template at the end of the last dispatched action. The action helper, Zend_Layout_Controller_Action_Helper_Layout, is used to provide easy access to the Zend_Layout object from within a controller.
The startMvc() function takes an array of options, but only layoutPath is required. This specifies the directory where the layout files are stored. By default, the layout.phtml file is rendered by Zend_Layout. However, you can easily change this in any controller method, such as init(), with this statement:
$this->_helper->layout->setLayout('layout2'),
This will cause layout2.phtml to be rendered instead.
4.3. Integrating Zend_Layout into Places
The functionality provided by Zend_Layout is very desirable, so let’s put it into our Places application.
4.3.1. Setup
To integrate Zend_Layout into the Places website, we need to start with the bootstrap class. Listing 4.1 shows the change we need to make to the runApp() function.
Listing 4.1. Starting Zend_Layout in application/bootstrap.php

As explained in section 4.1, we use the startMvc() method to set up the Zend_Layout object and also register the associated front controller plug-in and action helper. The default settings for Zend_Layout are acceptable for the Places site, except that we need to specify the directory for the layout scripts ![]() . We have chosen views/layouts in the application directory, as this separates the layout files from our script files.
. We have chosen views/layouts in the application directory, as this separates the layout files from our script files.
We also need to configure our view object with information about the current request and set up our initial CSS and output-encoding requirements. This could easily be done within the bootstrap class, but to keep that class simpler and to promote reusability, we will create a front controller plug-in to handle view setup. This class, Places_Controller_Plugin_ViewSetup, follows Zend Framework naming conventions and so is stored in lib/Places/Controller/Plugin/ViewSetup.php.
Initially, the work we need to do only needs to be done once, so we can use the dispatchLoopStartup() hook as shown in listing 4.2.
Listing 4.2. The Places_Controller_Plugin_ViewSetup front controller

In this method, we do four distinct things. First, we assign the module, controller, and action from the request object into
the view ![]() . Because the dispatch loop hasn’t started yet, these variables are the ones originally requested by the user via the URL
and will get overwritten if any other actions are dispatched during the request cycle.
. Because the dispatch loop hasn’t started yet, these variables are the ones originally requested by the user via the URL
and will get overwritten if any other actions are dispatched during the request cycle.
We then add support for an additional view helper directory, /lib/Places/View/ Helper, to provide a place where we can store
view helpers that are used across both the front and admin sections of the website ![]() . The class names of the view helpers stored within the lib/Places/View/Helper directory will be named Places_View_ Helper_{helper name}, so we also set the $prefix to this
. The class names of the view helpers stored within the lib/Places/View/Helper directory will be named Places_View_ Helper_{helper name}, so we also set the $prefix to this ![]() . Otherwise, the view would try to load a helper using the standard Zend_View_Helper prefix, which does not make sense for classes in the Places directory subtree.
. Otherwise, the view would try to load a helper using the standard Zend_View_Helper prefix, which does not make sense for classes in the Places directory subtree.
We then register the new plug-in with the front controller. This is done in the runApp() function of the Bootstrap class in application/bootstrap.php, immediately after setting the controller directory like this:
$frontController->registerPlugin(new Places_Controller_Plugin_ViewSetup()); Finally, Zend Framework provides a number of view helpers that help manage the <head> section of the web page. These view helpers are unusual, as they have two modes of operation, setting and rendering, where
most view helpers only render. We use the headMeta() view helper to set the content type of the page ![]() , but it can also be used for setting any of the meta fields in a web page, such as description and keywords. We use another
“head” view script, headLink(), to store the default CSS file for the page; site.css in this case
, but it can also be used for setting any of the meta fields in a web page, such as description and keywords. We use another
“head” view script, headLink(), to store the default CSS file for the page; site.css in this case ![]() . The headLink() helper allows us to add both a stylesheet and alternative stylesheets, should we wish to.
. The headLink() helper allows us to add both a stylesheet and alternative stylesheets, should we wish to.
Now that we have initialized the view system, we can look at the scripts that we require to build the website.
4.3.2. Layout Scripts
The master layout script is called layout.phtml and is stored in view/layouts/layout.phtml. This file serves as the holder for all the content to be displayed, so it only contains the fundamental structure of the page design and then delegates the rest of the content to other files. The master layout is shown in listing 4.3.
Listing 4.3. The master layout script: view/layouts/layout.phtml

We set up which doctype to use earlier, so when rendering we just call the doctype() view helper ![]() , and it will produce the correct doctype. This saves having to look it up in Google, as no one ever remembers them! The doctype() view helper supports all three HTML 4 and all three XHTML 1.0 document types, which covers pretty much all web pages at the moment. When HTML 5 is released and supported in browsers, we can expect that it will also be supported.
, and it will produce the correct doctype. This saves having to look it up in Google, as no one ever remembers them! The doctype() view helper supports all three HTML 4 and all three XHTML 1.0 document types, which covers pretty much all web pages at the moment. When HTML 5 is released and supported in browsers, we can expect that it will also be supported.
In the <head> section, we use the so-called head* view helpers. There are a number of these view helpers, and we make use of three of them
![]() . These were set initially in the Places_Controller_Plugin_ViewSetup front controller plug-in (listing 4.2), but they can be added to during the dispatch of the request in the action controller or another plug-in.
. These were set initially in the Places_Controller_Plugin_ViewSetup front controller plug-in (listing 4.2), but they can be added to during the dispatch of the request in the action controller or another plug-in.
The visible page is contained within the <body> tag, and we have further separated out the data to improve maintenance. The header and footer sections are stored in their
own view script files and are included in the layout using the partial() view helper for _header.phtml ![]() and _footer.phtml
and _footer.phtml ![]() . The partial() view helper renders another view script within a “sandbox,” where only passed-in variables are available. This limits the
scope of the variables to the one view script, so they are accessed directly using $this->variableName, and we are confident that they will not conflict with variables in another script.
. The partial() view helper renders another view script within a “sandbox,” where only passed-in variables are available. This limits the
scope of the variables to the one view script, so they are accessed directly using $this->variableName, and we are confident that they will not conflict with variables in another script.
The view script used within the partial() or partialLoop() view helpers does not have access to any of the variables that have been assigned to the view within the controller or other helpers and plug-ins. You need to pass all variables that you need for the view script as an array to the partial() call, like this:
<?php
echo $this->partial('myscript.phtml', array('var'=>$this->var));
?>
All the view helper functions are available, though, with no extra work.
The ViewRenderer action helper stores the content from the action’s view script into a named segment in the response. The
layout() view helper is then used to retrieve and render the content from the named segments within the response. This provides the
mechanism that enables display of the action view scripts within the master view script. The default response segment name
is content, so we can render the main action’s view script like this ![]() :
:
<?php echo $this->layout()->content; ?>
The placeholder name can be anything we like. For the Places website, we make use of two other placeholders: menu ![]() and advert
and advert ![]() , which provide the menu display and the advertisement respectively. We’ll look at how these placeholders are populated in
section 4.3.3.
, which provide the menu display and the advertisement respectively. We’ll look at how these placeholders are populated in
section 4.3.3.
We will continue our discussion of the master layout template from listing 4.3 by looking at separating out view scripts using “partials.”
Partial View Scripts
As we saw in listing 4.3. we use two view scripts within partial() view helpers to help maintenance. The two scripts, _header.phtml and _footer.phtml, simply keep the relevant HTML logically separate from our layout template and are shown in listings 4.4 and 4.6.
Listing 4.4. The header view script: view/layouts/_header.phtml
<a name="top" id="top"></a>
<div id="scrn-read" title="links to aid navigation for screen readers">
   [<a href="#content" accesskey="s">Skip to main content</a>]
</div>
<div id="header">
   <img id="first"
      src="<?php echo $this->baseUrl(); ?>/img/rollercoaster.jpg"
      title="" alt="header image of a roller coaster"/>
   <img src="<?php echo $this->baseUrl(); ?>/img/family2.jpg"
      title="" alt="header image of a family"/>
   <img src="<?php echo $this->baseUrl(); ?>/img/castle.jpg"
      title="" alt="header image of a castle"/>
   <img src="<?php echo $this->baseUrl(); ?>/img/family3.jpg"
      title="" alt="header image of a family"/>
</div>
The header essentially contains a couple of links for accessibility (hidden via CSS for most users) and then the main images
used at the top of the page. It is nicely contained within its own file so that if we did decide to change it for different
sections of the site, we would just need to change the call to partial() (listing 4.3 ![]() ).
).
In order to create the correct path to the image files, we need to refer to the website’s root URL. We could do this work directly in the view script, but this is a common requirement that lends itself to factoring into a view helper. We will call our view helper baseUrl(), so its class name is Places_View_Helper_BaseUrl and it is stored in library/Places/View/Helper/BaseUrl.php as shown in listing 4.5. This means that it is available from the earliest part of the dispatch process, when we add the Places/ View/helper directory to the view object within the ViewSetup front controller plug-in in listing 4.2.
Listing 4.5. The Places_View_Helper_BaseUrl view helper

The actual work of creating the correct path to the web server’s root URL is already done by the request object so the path is available from the front controller directly.
This means that the BaseUrl view helper has to retrieve it and return it to the view script. The front controller is easily accessible because it is
a Singleton, so we use the static getInstance() method ![]() and then simply return the result of the getBaseUrl() member function.
and then simply return the result of the getBaseUrl() member function.
By contrast, the footer view script, _footer.phtml, is very basic, as shown in listing 4.6.
Listing 4.6. The footer view script: views/layouts/_footer.phtml
<div id="footer-wrapper"> <div id="footer">Copyright ©2008 Rob Allen, Nick Lo & Steven Brown.</div> </div>
The footer script contains just the copyright notice now, but it may be extended later to include other items to round out the site’s functionality.
This completes our exploration of the view scripts required by our layout. We have looked at the HTML that’s used to build up the main outer template script. Now, we can move on and look at the actions that will be used to create the content for the menu and advert placeholders.
4.3.3. Common Actions Using Placeholders
It’s quite common to need to run code on every page—code that is relatively complex and doesn’t lend itself to being placed into a helper class. For Places, we need to create the menu and also the advertisement on the right side of the page. One of the more obvious ways to do this is to use actions, because these provide a mechanism for accessing models directly and have an associated view script to hold the HTML required.
We need to run these actions, and our initial solution is to use the _forward() method of the controller. This allows us to run another action at the end of our current action, so we could forward from the main action to the menu creation action, and from there to the advertisement creation action. The biggest problem is that we have to remember to write the _forward() call at the end of every other action in our application.
The developers of Zend Framework foresaw this problem, and the ActionStack front controller plug-in is provided to solve this problem. Its full name is Zend_Controller_Plugin_ActionStack, and it runs a list of actions that it holds internally. Actions can be easily added to it, and, as its name implies, it operates a stack-based system where the last action added is the first action run. This is known as Last In, First Out (LIFO), and it enables us to control the order in which the actions run, if we need to. The ActionStack plug-in has a postDispatch() hook that is used to add another action to the dispatch loop if no actions are currently being run.
In order to initially populate the ActionStack with the two actions that we need, we will create our own front controller plug-in called ActionSetup. This enables us to keep the setting up of the ActionStack separate from the bootstrap code, and as we only need to add two actions to the stack, we only need to hook into dispatchLoopStartup(). As ActionSetup is stored in the file lib/Places/Controller/Plugin/Action-Setup.php, the full class name is Places_Controller_Plugin_ActionSetup. The code is shown in listing 4.7.
Listing 4.7. The Places_Controller_Plugin_ActionSetup front controller plug-in

The ActionSetup front controller plug-in is very simple and starts by initializing the ActionStack plug-in if required ![]() . We use the hasPlugin() function to check that it hasn’t already been created, and if not, we instantiate it and add it to the end of the plug-in
stack so that it runs after pretty much all the other plug-ins (Zend_Layout and the ErrorHandler plug-ins come after it). This section of code is defensive, as we don’t expect that the ActionStack will have been created,
but if we introduce another third-party plug-in to our application, we do not want to have to edit this file again.
. We use the hasPlugin() function to check that it hasn’t already been created, and if not, we instantiate it and add it to the end of the plug-in
stack so that it runs after pretty much all the other plug-ins (Zend_Layout and the ErrorHandler plug-ins come after it). This section of code is defensive, as we don’t expect that the ActionStack will have been created,
but if we introduce another third-party plug-in to our application, we do not want to have to edit this file again.
As with the ViewSetup plug-in, we need to register the ActionSetup plug-in with the front controller. This is done in the runApp() function of the Bootstrap class, immediately after registering the ActionSetup plug-in like this:
$frontController->registerPlugin(
   new Places_Controller_Plugin_ActionSetup(), 98);
Note that we want the ActionSetup’s postDispatch() hook to run after all other plug-ins except Zend_Layout, so we explicitly set the position of the plug-in to 98. We choose 98 because 99 is already used by Zend_Layout and we want ViewSetup to run just before Zend_Layout renders the action’s view.
To add an action to the ActionStack, we clone the current request object to get a new copy of it, then alter it appropriately.
For the menu action ![]() we set the action name to menu and the controller name to index. Finally, we use the pushStack() method to add the action to the ActionStack. We then repeat the process for the advert action
we set the action name to menu and the controller name to index. Finally, we use the pushStack() method to add the action to the ActionStack. We then repeat the process for the advert action ![]() , except that we set a different action name within the request object. The net result is that the main action, as requested
by the user, will run, and then any subsequent forwards in that action will run. After that, due to the LIFO stack, the advert
action will run, then the menu action.
, except that we set a different action name within the request object. The net result is that the main action, as requested
by the user, will run, and then any subsequent forwards in that action will run. After that, due to the LIFO stack, the advert
action will run, then the menu action.
We have now successfully automated the running of the actions required to build the whole page. As Places is a simple application, the menu action is part of the Index-Controller, and the menu itself is hard coded. In a bigger application, it is likely that the menu would be built from a database. As it is part of IndexController, the menu-Action() function is stored in application/controllers/IndexController.php and is shown in listing 4.8.
Listing 4.8. The IndexController’s menuAction() function

As you can see, the bulk of the action code is creating the $mainMenu array and assigning it to view ![]() to be rendered. The layout script is expecting the menu to be in a placeholder called menu. To set this up, we access the ViewRenderer view helper using the _helper property of the Zend_Controller_Action class and call the setResponseSegment() method
to be rendered. The layout script is expecting the menu to be in a placeholder called menu. To set this up, we access the ViewRenderer view helper using the _helper property of the Zend_Controller_Action class and call the setResponseSegment() method ![]() . This means that the view script for this action (application/views/scripts/index/menu.phtml) will be rendered to the menu segment of the response object so that it can be collected by the layout script later.
. This means that the view script for this action (application/views/scripts/index/menu.phtml) will be rendered to the menu segment of the response object so that it can be collected by the layout script later.
The HTML that renders the menu is shown in listings 4.9 and 4.10.
Listing 4.9. The menu’s view script: application/views/scripts/index/menu.phtml
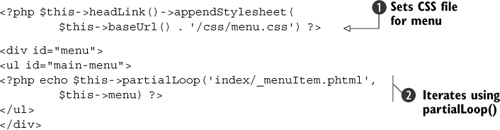
In the menu’s view script, we use the headLink() view helper to set an additional stylesheet in the header of the layout file ![]() . This is possible because the layout is rendered after all the actions have rendered, so we can affect the head section in
each action as it runs. In this case, we need to style the menu we are generating, and this is best achieved using a separate
CSS file, again using the baseUrl() view helper to retrieve the path to the website’s root.
. This is possible because the layout is rendered after all the actions have rendered, so we can affect the head section in
each action as it runs. In this case, we need to style the menu we are generating, and this is best achieved using a separate
CSS file, again using the baseUrl() view helper to retrieve the path to the website’s root.
The menu itself is quite simple, and as we are iterating over a record set, we can take advantage of the partialLoop() view helper, ![]() which will render the _menuItem.phtml view script for each item in the menu. This view script is stored in view/scripts/index/_menuItem.phtml
and is shown in listing 4.10.
which will render the _menuItem.phtml view script for each item in the menu. This view script is stored in view/scripts/index/_menuItem.phtml
and is shown in listing 4.10.
Listing 4.10. A partial menu item script

The template that is rendered for each menu item simply wraps the menu’s title in a link ![]() and places it within the <li> tag to create the list element. As usual, we use the escape() view helper to ensure that any unusual characters within the menu’s title are encoded.
and places it within the <li> tag to create the list element. As usual, we use the escape() view helper to ensure that any unusual characters within the menu’s title are encoded.
The other action that is run for every displayed page is the advert action. This works exactly the same way as the menu action, except that it renders to the placeholder called advert. There is no need for any other controller logic, as shown in listing 4.11.
Listing 4.11. The IndexController’s advertAction() function

We just have a graphic in the advertisement section, so the HTML is done entirely within the view script, views/scripts/index/advert.phtml, as shown in listing 4.12.
Listing 4.12. The advertAction() method’s view script: advert.phtml

As you can see, the advertisement we use is just an image with a link to the contact controller. The third parameter to the url() view helper is used to reset the assembly so that only those parameters in the array are used in the construction of the URL. If we did not do this, the current action would be used in the construction of the URL, which we do not want. Alternatively, we could set the action within the url() view helper itself.
This completes the creation of the master layout template, so we can now turn our attention to the view content of the controller action itself. As we discovered in Chapter 2, the view script for the current action is stored in the views/scripts/{controller name}/{action name}.phtml file. In Chapter 3 we implemented the home page action (the index action of the index controller), so we shall now implement the associated view script.
4.3.4. The Homepage View Script
The view script for the home page is stored in the views/scripts/index/index.phtml file and is shown in listing 4.13.
Listing 4.13. The home page’s view script: index.phtml

In the home page view script, we first add general content text at the top ![]() , which sets the stage for the website, and then we present a list of places that have been recently updated
, which sets the stage for the website, and then we present a list of places that have been recently updated ![]() . This list uses the $places member variable that was set in the controller’s indexAction() in Chapter 3 (listing 3.8). To iterate over the items in the places rowset, we again make use of the partialLoop view helper, which eliminates the need for a foreach() loop. Each item in the rowset is extracted into local variables within the _placeRow.phtml view script. Note that we use
the naming convention of a preceding underscore to indicate that _placeRow.phtml is a partial script used in conjunction with
another script. The _placeRow.phtml script is shown in listing 4.14.
. This list uses the $places member variable that was set in the controller’s indexAction() in Chapter 3 (listing 3.8). To iterate over the items in the places rowset, we again make use of the partialLoop view helper, which eliminates the need for a foreach() loop. Each item in the rowset is extracted into local variables within the _placeRow.phtml view script. Note that we use
the naming convention of a preceding underscore to indicate that _placeRow.phtml is a partial script used in conjunction with
another script. The _placeRow.phtml script is shown in listing 4.14.
Listing 4.14. A partial view script for the home page listing: _placeRow.phtml
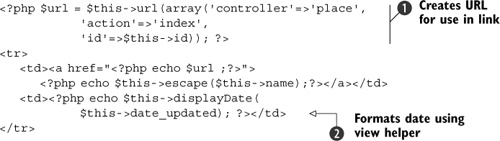
The _placeRow.phtml view script creates a single table row containing two columns: the name of the place, and the date that
the information about it was updated. As with all links, we again use the url() view helper to generate the link ![]() . This will ease maintenance if we decide to use custom routes, because the url() view helper will continue to generate the correct URLs.
. This will ease maintenance if we decide to use custom routes, because the url() view helper will continue to generate the correct URLs.
We also factor the date-formatting code into a view helper ![]() so we can reuse it on other pages. This view helper is stored in application/views/helpers/Display-Date.php, and the code
is shown in listing 4.15.
so we can reuse it on other pages. This view helper is stored in application/views/helpers/Display-Date.php, and the code
is shown in listing 4.15.
Listing 4.15. The DisplayDate view helper

One thing about creating view helpers is that you must get the case of the names correct. The filename must start with an uppercase letter to match the class name but the method name must start with a lowercase letter. This is a very common issue that can trip you up if you develop on a case-insensitive filesystem, such as Windows’ NTFS or Mac OS X’s HFS+ and then deploy to a case-sensitive filesystem on Linux or Solaris.
For displayDate(), we instantiate a Zend_Date object with the required timestamp and locale ![]() , and then use the get() member function to retrieve the data in the correct format
, and then use the get() member function to retrieve the data in the correct format ![]() . Zend_Date is a very useful component for handling dates and times, as it is locale-aware so that when we come to localize our application
into other languages, the date format will automatically change to a format that is correct for that locale.
. Zend_Date is a very useful component for handling dates and times, as it is locale-aware so that when we come to localize our application
into other languages, the date format will automatically change to a format that is correct for that locale.
We have now built the entire view for the home page using a composite approach. Zend_Layout is controlling the outer template that contains all the common elements for the site, so that the view script for each specific action is only concerned with the specific output related to the action.
Zend_View also provides a useful set of view helpers that we can use to make development faster. We have looked at some of these while integrating Zend_Layout into Places, but we will now look at each one in turn to see what it is used for and how to use it.
4.4. Advanced View Helpers
A variety of view helpers are provided as part of the Zend_View component to improve the development of view scripts. These view helpers allow for easier integration with controllers, management of view scripts, and creation of common HTML headers. We’ll start with the action() and url() view helpers, which help integrate view scripts with controllers.
4.4.1. Controller Integration
There are two supplied view helpers that interact with the controller. The action() view helper is used to run actions directly, and the url() view helper is able to generate URLs to controller actions.
The Action() View Helper
The action() view helper is used to run a controller action from within a view script. The result is returned and can be echoed. This is generally used in the same way as placeholders to render subsections of pages in a reusable manner.
For example, we could use action() to display the advertisement in layout.phtml. In listing 4.3. the following code was used to display the advertisement:
<div id="right" class="column">
   <?php echo $this->layout()->advert; ?>
</div>
As discussed in section 4.3.3, this code assumes that the IndexController::advert-Action() action has already been dispatched by the ActionStack, as shown in listing 4.7. As an alternative, we could use the action() view helper to dispatch the avertAction() directly within the layout.phtml file, like this:
<div id="right" class="column">
   <?php echo $this->action('advert', 'index'), ?>
</div>
The result that is displayed to the user in the browser is exactly the same in both cases, and the choice of whether to use the action() view helper or layout placeholders is entirely up to the developer. In general, it depends on how active you consider the view object should be in your application. Some developers see the view as very active and so use action(), and others treat it as more passive and ensure that the controller does the work using the ActionStack plug-in.
As it is fundamental to creating usable links within a template, let’s look at the url() view helper in a bit more detail.
The URL() View Helper
The url() view helper creates URL strings based on a named route. This is the method signature:
public function url($urlOptions = array(), $name = null, $reset = false,
                 $encode = true)
The parameters are shown in table 4.1.
Table 4.1. Parameters for the url() view helper
|
Parameter |
Description |
|---|---|
| $urlOptions | Array of options that are used to create the URL string. |
| $name | Name of the route to use to create the URL string. If null, the route name that originally matched the current page’s URL is used. |
| $reset | Set to true to reset all the parameters when creating the URL string. |
| $encode | Set to true to urlencode() all the parameter values in $urlOptions. |
When using the default route, you can pass in the action, module, controller, and other parameters required, and the correct URL will be generated. If you do not pass in some of these fields, it will use the current known ones. If we want to generate a URL to the browse action in the place controller, then we would use this line:
<?php echo $this->url(array('controller'=>'place', 'action'=>'browse')); ?>
However, if the current page is within the place controller, we can omit that part and use only this:
<?php echo $this->url(array('action'=>'browse')); ?>
To pass other parameters to the controller action, such as the page number of the list of places we wish to browse, we include them as additional keys in the array:
<?php echo $this->url(array('controller'=>'place', 'action'=>'browse',
         'page'=>'2')); ?>
This generates the URL /base-url/place/browse/page/2. One side effect is that if you then generate links using url(), all the URL strings created will have /page/2 included unless you override. Overriding can be done in two ways. First, you can set the parameter to null:
<?php echo $this->url(array('controller'=>'place', 'action'=>'browse',
         'page'=>null)); ?>
Alternatively, you can use the third parameter of the url() view helper, which is $reset. This parameter ensures that none of the known parameters are used when creating the URL. It is used like this:
<?php echo $this->url(array('controller'=>'place', 'action'=>'browse'),
         null, true); ?>
As you can see, url() is very powerful and allows for flexible and maintainable URL creation within view scripts.
The next set of provided view helpers make it easier to separate view scripts into separate files. The partial() and partialLoop() view helpers help us manage our view scripts and avoid having too much code in any one file.
4.4.2. View Script Management
It is not unusual to have multiple view scripts making up a single response. We have seen this already in listing 4.3. where the header and footer view scripts are linked into layout.phtml. There are two related view script management view helpers: partial() and partialLoop().
The Partial() View Helper
The partial() view helper renders a separate view script within its own scope. This means that none of the variables that have been assigned to the view are available in the targeted view script, and only the variables specifically passed in are there. If you need to render a separate view script within the same context as the current view script, the render() method of Zend_View would be used.
Standard usage of partial() is like this:
<?php echo $this->partial("menu.phtml",
      array('title'=>'home', 'url'=>'/')); ?>
This will render the menu.phtml view script, and the only two variables available within it are $this->title and $this->url. The parameters that you pass to a partial are known as the model and may be either arrays or objects. If an object is used, either the toArray() method or all the public variables are assigned to the view partial.
The partialLoop() view helper extends partial(), allowing the same view script to be called multiple times.
The Partialloop() View Helper
One common use-case of partial view scripts is iterating over a list of data like this:
<?php
foreach $this->menu as $menuItem) {
   echo $this->partial("menu.phtml", $menuItem);
}
?>
This is so common that the partialLoop() view helper is provided to simplify this code to this:
<?php echo $this->partialLoop('menu.phtml', $this->menu) ?>
Behind the scenes, partialLoop() calls partial(), so it works in exactly the same way.
By default, if you use a rowset with a partialLoop(), you will notice that the row object is turned into a set of member variables when used in the view script. If you want the object itself, then you can do this:
<?php echo $this->partialLoop()->setObjectKey('menu') ->partialLoop('menu.phtml', $this->menu) ?>
The variables are now available within the view script by using $this->menu->{variable name}.
Using partial() and partialLoop() can significantly improve the reusability of HTML view scripts in the same way that classes and functions allow reusability of PHP code.
We will now turn our attention to managing the header section of an HTML page with the many head*() view helpers.
4.4.3. HTML Header Helpers
Zend Framework provides a set of helpers to manage the <head> section of an HTML page. These helpers enable you to set up the information in advance and output it within the layout view script. There are a variety of helpers that mostly begin with the word head, and two, json() and doctype(), which are also used at the head of a document.
Json() Helper
The json() view helper is used when sending JSON data to the web browser, usually in response to an Ajax request. It does three things:
- Encodes the data into JSON format.
- Disables layout rendering.
- Sets the HTTP header content-type to application/json.
The usage is very simple. Given an array or object called data, it is encoded and sent to the browser using this code:
<?php echo $this->json($this->data)); ?>
This view helper uses the Zend_Json component to encode the data. This component will use the json PHP extension if it is available; otherwise it will fall back to a native PHP implementation.
All the other HTML head view helpers output text into the HTML page. Let’s start by looking at the doctype() view helper, as this one is used at the very top of the page.
Doctype() Helper
The doctype() view helper is a convenience helper for creating the doc type in the HTML file. It mainly solves the problem of having to look up the correct document type from the W3C website. As with all view helpers, you simply echo it out:
<?php echo $this->doctype('XHTML1_TRANSITIONAL'), ?>
The doctype() view helper understands all XHTML 1 and HTML 4 doctype declarations, and this also affects the rendering of the relevant head*() view helpers so that they are compliant with the doctype specified. You can also test for XHTML or not in other view scripts using the isXhtml() member function.
Tip
Some view helpers, especially the form-related ones, will output either HTML- or XHTML-compliant code, depending on the value passed into the doctype() view helper. For that reason, it’s best to set the doc type early in the dispatch process, such as in dispatchLoopStartup() of your ViewSetup front controller plug-in. You still need to echo it at the top of your (X)HTML output, but you don’t need to pass in the value again.
Headlink() Helper
HeadLink() manages <link> elements in the <head> section of the document. This includes CSS stylesheets, favicons, RSS feeds, and trackbacks. It aggregates the elements together while rendering each view script and is later used to render the elements into the layout.
We used this functionality in listing 4.9, the menu.phtml view script that specified a CSS file for the menu:
<?php $this->headLink()->appendStylesheet($this->baseUrl()
         . '/css/menu.css') ?>
There is also a prependStylesheet() member function for controlling the order of output, and for alternative stylesheets appendAlternate() and prependAlternate() can be used. We can also set the media for the stylesheet by setting the second parameter, so for a print stylesheet, the following code is used:
<?php $this->headLink()->appendStylesheet($this->baseUrl().
         '/css/menu.print.css', 'print') ?>
Favicons are attached in a similar way, only we use the generic headLink() member function, rather than the CSS-specific functions:
<?php $this->headLink()->headLink(array('rel' => 'favicon',
   'href' => $this->baseUrl().'/favicon.ico'))?>
All the links that have been specified are then rendered using this line:
<?php echo $this->headLink(); ?>
Headscript() Helper
Similar to the headLink() view helper, headScript() is used to manage JavaScript files. This allows us to add the relevant files to the helper as the views are rendered, and then to render the final output later. This is important for maintenance, as it means that the references to the JavaScript are within the correct action’s view script rather than being separate in the layout.
Adding JavaScript files is very similar to adding CSS files and is done like this:
$this->headScript()->appendScript($this->baseUrl().'/js/autocomplete.js'),
When all the scripts have been added, they are rendered by echoing the helper:
<?php echo $this->headScript(); ?>
One useful thing that headScript() does for us is ensure that we only include one reference to an external JavaScript file, even though we may have added it more than once. With an emphasis on ensuring minimum page-load times, this is a good optimization and means that we don’t have to manage it ourselves.
Headmeta() Helper
As you would expect, headMeta() is used to set all the <meta> tags in the <head> section of the page. There are two types of meta tags: name and http-equiv, so there are two sets of functions, as shown in table 4.2.
Table 4.2. The headMeta() view helper functions
|
Name version |
http-equiv version |
|---|---|
| appendName($keyValue, $content, $conditionalName) | appendHttpEquiv($keyValue, $content, $conditionalHttpEquiv) |
| prependName($keyValue, $content, $conditionalName) | prependHttpEquiv($keyValue, $content, $conditionalHttpEquiv) |
| setName($keyValue, $content, $modifiers) | setHttpEquiv ($keyValue, $content, $modifiers) |
| offsetSetName ($index, $keyValue, $content, $conditionalName) | offsetSetHttpEquiv($index, $keyValue, $content, $conditionalHttpEquiv) |
The $keyValue field sets either the name or the http-equiv key for the tag. The $content parameter is used for the value attribute of a name tag or the content attribute of an http-equiv tag, and the $modifiers parameter is an associative array that can contain the lang and scheme attributes if required.
Let’s look the keywords meta tag. Usually, this would be set in the action view script based on the content being rendered by the action. In Places, we set the keywords for each place during the index action of the place controller, as this is the controller that displays a page containing a single place. The keywords are stored in the database and so are assigned to the view along with all the other data about the place. The action view script then renders the information for the visitor, such as title and description, and also sets up the keywords meta tag using this code:
$this->headMeta()->appendName('keywords', $this->place->keywords);
We also want the browser to cache the page, but not for too long, because there will be new reviews added to it, so we also add the expires http-equiv meta tag using the code in listing 04.16.
Listing 4.16. Setting up the expires meta tag using Zend_Date

We have chosen to use an expiry time 3 hours into the future, and this is easily done using Zend_Date’s add() function ![]() , as it is very easy to add and subtract any amount of time from a Zend_Date object. The expires meta tag requires a date format of the type defined in RFC 1123, which is directly supported by Zend_Date’s get() function
, as it is very easy to add and subtract any amount of time from a Zend_Date object. The expires meta tag requires a date format of the type defined in RFC 1123, which is directly supported by Zend_Date’s get() function ![]() .
.
As we saw in listing 4.3, the layout.phtml file prints out the meta tags using this line:
<?php echo $this->headMeta(); ?>
This picks up all the meta tags that have been added over the course of rendering the page and formats them correctly for us.
Headtitle() Helper
The headTitle() helper sets the <title> tag within the <head> section. This helper allows you to build up a multi-section title while the front controller’s dispatch loop runs and displays it. Typical usage is to display the title of the page and the name of the website; for example: “London Zoo - Places to take the kids.”
In Places, we achieve this by adding to the Places_Controller_Plugin_ViewSetup front controller plug-in introduced in listing 4.2. To add the page title, we call the headTitle() view script directly in the action controller, so for the home page, we need to add the following code in indexAction() of the IndexController:
$this->view->headTitle('Welcome'),
We now need to add the website’s name to the end. This is done in the postDis-patch() function of Places_Controller_Plugin_ViewSetup, which runs after every dispatch. This function is shown in listing 4.17.
Listing 4.17. Adding a website name with the postDispatch() method

We want only the website’s name to be added to the title if this is the last action to be dispatched. This allows for other
actions to add additional information to the title if needed. We check this by looking at the request’s isDispatched() method and returning if it is false ![]() . We have already set in place the convention that the main <h1> tag for the page is filled with the value of the $view->title, so as a convenience, we check if the head title has been set, and if not, we use the page’s title
. We have already set in place the convention that the main <h1> tag for the page is filled with the value of the $view->title, so as a convenience, we check if the head title has been set, and if not, we use the page’s title ![]() . By default, there is no separator between each segment of the title, so we need to set one
. By default, there is no separator between each segment of the title, so we need to set one ![]() . For Places, we have chosen a hyphen, though you could also use a colon or a slash character. Finally, we add the website’s name
. For Places, we have chosen a hyphen, though you could also use a colon or a slash character. Finally, we add the website’s name ![]() . Again, we display the title in listing 4.3 using this code:
. Again, we display the title in listing 4.3 using this code:
<?php echo $this->headTitle(); ?>
We have now looked at all the commonly used head*() view helpers that are designed to bring management and maintainability to the <head> bt section of your web page. The most significant advantage of using the headLink() and headScript() view helpers is that you can keep the per-action CSS and JavaScript within the action’s view script while still rendering them in the correct place in the document.
There are numerous other view helpers provided by the framework that we have not covered here because they are appropriate for Zend_Form and Zend_Translate. They are covered in those chapters.
4.5. Summary
We have now looked at a complete application that uses Zend Frameworks MVC components to separate the code and ensure that it is maintainable. Concentrating on the view, we have seen that the Composite View design pattern is a powerful tool for ensuring that we have a consistent look and feel to the site. The Zend_Layout component helps to make implementing a layout script with content placeholders easy. The advanced view helpers ensure that the layout is as flexible as required, with the ability to call other controller actions directly. This separation ensures that each controller action has only one responsibility and thus is easier to maintain and develop.
Through Chapters 3 and 4, we have built the foundations of Places to take the kids! to make it into a fully working website. The accompanying source code for this book shows the full code that has been created. We are now ready to look at how Zend Framework can interact with Ajax.