
The entity is used in conjunction with an EntityManager to persist and otherwise ensure the state of the entity is consistent with the database. In this recipe we will examine the use of the PartsBeanFacade class.
To use the entity in a client we need to:
- Inject the session facade EJB into the client
- Use the methods of the facade
We will build upon the
EntityBeanApplicationapplication developed in the first recipe.
Add a package called servlet and a servlet called PartsServlet to the WAR module. The PartsBeanFacade class extends the AbstractFacade class as developed in the Creating an entity facade recipe. It is associated with a persistence unit through the use of the @PersistenceContext annotation. We will use this as a part of a servlet to manage the underlying PartsBean.
Within the PartsServlet servlet we will use two instances of the PartsBean and a single instance of the PartsBeanFacade to manage instances of the entity.
public class PartsServlet extends HttpServlet {
@EJB
PartsBeanFacade partsFacade;
PartsBean parts;
PartsBean otherParts;
Add a processRequest method to create a PartsBean and use the PartsBeanFacade class method to persist the entity. The servlet's doGet and doPost methods are not shown here.
protected void processRequest(HttpServletRequest request, HttpServletResponse response)
throws ServletException, IOException {
response.setContentType("text/html;charset=UTF-8");
PrintWriter out = response.getWriter();
try {
parts = new PartsBean();
parts.setName("Traverse Gear");
parts.setPartNumber(12345);
parts.setWeight(2.54f);
parts.setQuantity(2);
partsFacade.create(parts);
parts = new PartsBean();
parts.setName("Differential Axle");
parts.setPartNumber(90334);
parts.setWeight(12.35f);
parts.setQuantity(1);
partsFacade.create(parts);
otherParts = partsFacade.find(parts.getId());
out.println("<html>");
out.println("<head>");
out.println("<title>Servlet PartsServlet</title>");
out.println("</head>");
out.println("<body>");
out.println("<h1>Servlet PartsServlet at " + otherParts.getName() + " id: " + otherParts.getId()+ "</h1>");
out.println("</body>");
out.println("</html>");
} finally {
out.close();
}
}
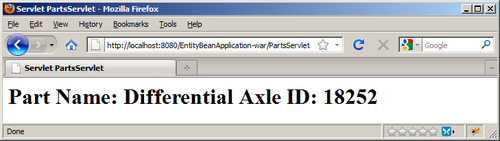
Execute the PartsServlet using the URL shown in the following screenshot:
The PartsBeanFacade was injected using the @EJB annotation. Notice since the PartsBeanFacade did not implement an interface we used the no-interface client view which is new in EJB 3.1.
Two PartsBean reference variables were declared: parts and otherParts. The parts variable was used to create two PartsBean and assign values to its fields. The PartsFacade class's create method was used to persist the two entities.
To verify a part had actually been created in the database, the find method retrieved the last part created and displayed its name and ID using otherParts.
There is a lot that's going on in this servlet. When we use the create method, JPA is using the PartsBean we created and persisting it to some data store. In this case, it is persisted to a database (Derby if you are using NetBeans) represented by persistence unit EntityBeanApplication-ejbPU we created in the Creating an entity facade recipe. A table within the database representing the entity was updated using a Java DataBase Connectivity (JDBC) driver.