
The easiest way of handling transactions is to let the EJB container manage transactions. This is facilitated through the use of the @TransactionManagement annotation. When Container Managed Transactions (CMT) are used, the developer can select the appropriate transaction attributes for the class and/or methods.
The use of CMT is effected by:
- Using the @TransactionManagement annotation for the class
- Using the TransactionManagementType.CONTAINER element, as part of the previous annotation, to specify that CMT is being used
- Using the @TransactionAttribute annotation at the class or method level to specify the scope of the transaction
By default, classes and methods use CMT. This means that the above annotations are not strictly needed but it is a good practice to include them so as to convey explicitly the intent of the code.
Next, the class and/or its methods should be annotated with a @TransactionAttribute annotation along with a TransactionAttributeType element. The TransactionAttributeType element is assigned one of six possible values as detailed in the There's more section.
The default TransactionAttributeType element is REQUIRED. The transaction type can be applied to the entire class and/or overridden at the method level. The transaction type effectively determines the scope of the transaction and how a method of another class invoked from a transaction sequence is handled. In some situations, it may be necessary to explicitly rollback the transaction.
We will use a PopulationManager session bean to demonstrate the use of CMTs. If the EJB using transactions is a stateful bean, then it is possible for the bean to receive messages relating to the state of the transaction. We will make this EJB a stateful bean to explore the usefulness of accessing state information in the Using the SessionSynchronization interface with session beans recipe.
Add a stateful session bean called PopulationManager to the packt package and add the @TransactionManagement annotation specifying CMT. Use dependency injection to add references to the CityFacade. Also, add a default constructor to the class along with utility methods addCity and updatePopulation.
@Stateful
@TransactionManagement(TransactionManagementType.CONTAINER)
public class PopulationManager {
@EJB
CityFacade cityFacade;
public PopulationManager() {
}
public void addCity(String cityName, String county, long population) {
City city = new City(cityName, county, population);
cityFacade.create(city);
}
public void updatePopulation(String cityName, long count) {
cityFacade.changePopulation(cityName, count);
}
To test these methods, we need to modify the PopulationServlet. Use the @EJB annotation to inject the following references to the CityFacade and PopulationManager classes.
@EJB
CityFacade cityFacade;
@EJB
PopulationManager populationManager;
In order to simplify the demonstrations of transactions, it is convenient if the tables are always in the same initial state. This can be achieved by removing all of their contents and then add just those entities we want to affect. To remove all of the records in the tables, add the clearTables method to the PopulationServlet.
private void clearTables() {
List<City> cities = cityFacade.findAll();
for (City c : cities) {
cityFacade.remove(c);
}
}
We can demonstrate an initial use of transactions using the addCity method and then update the city's population. Replace the body of the processRequest method's try block with the following code sequence:
clearTables();
populationManager.addCity("Tokyo", "Japan", 32450000);
populationManager.updatePopulation("Tokyo", 1000);
cities = cityFacade.findAll();
out.println("<html>");
out.println("<head>");
out.println("<title>Servlet PopulationServlet</title>");
out.println("</head>");
out.println("<body>");
for(City c : cities) {
out.println("<h5>" + c.getName() + " - " + c.getPopulation() + "</h5>");
}
out.println("</body>");
out.println("</html>");
Execute the PopulationServlet and you should get output as shown in the following screenshot:
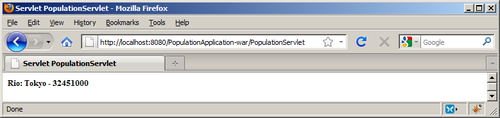
When the servlet was executed, the clearTables method removed the entries in the City table. A new city was added using the addCity method and then its population was updated using the updatePopulation method. A list of all of the cities was then displayed. In this case, only one city was added.
Notice while CMT has been explicitly specified, there is no visible indication that a transaction has been performed. We will use the SessionSynchronization interface in the next recipe to show the execution of a transaction. Also notice we did not explicitly use the @TransactionAttribute annotation for any method. This is automatically added as explained in the next section.
The TransactionAttributeType element is used with the @TransactionAttribute annotation. It can be assigned one of six possible values:
- REQUIRED Must always be part of a transaction
- REQUIRES_NEW Requires the creation of a new transaction
- SUPPORTS Becomes part of another transaction if present
- MANDATORY Must be used as part of another transaction
- NOT_SUPPORTED May not be used as part of a transaction
- NEVER Similar to NOT_SUPPORTED but will result in an
EJBExceptionbeing thrown
A Message Driven Bean (MDB) only supports the REQUIRED and NOT_SUPPORTED values. These attributes determine whether and which transactions should be used with a specific method. The @TransactionAttribute annotation is used with a method or at the class level. Here, a changePopulation method uses the REQUIRES_NEW attribute.
@TransactionAttribute(TransactionAttributeType.REQUIRES_NEW)
public void changePopulation(String cityName, long count)
These attributes require further explanation. However, instead of providing the explanation here, we will postpone discussion of their exact meanings to the Understanding how the TransactionAttributeType affects transactions recipe.