Chapter 7: Expanding Your Reach with Paid Ads Managed on HubSpot
As we discussed in the previous chapter, your target audience is spending time on social media. Therefore, every company needs to ensure it has a presence on social media in one form or another. However, if you've noticed lately that your posts are not getting a lot of traction and engagement rates are low, it is because social platforms prefer you to pay to play. So, advertising on social media has become an essential part of every marketer's strategy.
It is important to note that social media advertising is not a replacement for SEO or organic social media posting. On the contrary, social media advertising needs to be a complementary action to an organic strategy.
When thinking about which social media channel to use for advertising, it is best to start with the channel where you already perform relatively well organically or where you know for sure your target audience is hanging out.
In this chapter, you will learn about the following:
- How the HubSpot ads tool works
- How to connect LinkedIn Ads to HubSpot
- How to connect Facebook ads to HubSpot
- How to connect Google Ads to HubSpot
- How to create retargeting ads for contacts within HubSpot
- How to create audiences from your database within HubSpot that can be targeted in the ad platforms
- Tips for optimizing the ROI from your ad campaigns
- How to analyze ad reports in HubSpot
By the end of this chapter, you will be able to successfully set up a paid campaign and use it to generate and convert relevant leads.
Technical requirements
To get the most out of this chapter, you will need the following:
- HubSpot Marketing Professional
- Super admin access to your HubSpot portal
- Admin access to each of your business's social media ad platforms (LinkedIn, Facebook, and Google AdWords)
Getting to know how the HubSpot ads tool works
Managing your social ads can be difficult when using different platforms and analytics tools to get insights or manage your media budget for various campaigns. Having the ability to manage all your campaigns in one platform can give you better insights as you are able to compare the performance of different ads across different platforms, as well as cross-checking different ads within different campaigns and platforms.
With HubSpot's Ads tool, you are able to achieve this cross-comparison of your ads' performance across LinkedIn, Google, and Facebook ads in order to achieve the insights to understand how to optimize your campaigns for better results. The integration of your ads with HubSpot's Ads tool allows you to do the following:
- Get a complete picture of your ads' performance.
- Sync contacts from your lead generation ads.
- See which contacts engaged with your ads.
- Create target audiences based on lists of contacts and website visitors with a simple installation of your ad accounts' tracking pixels.
To use HubSpot's Ads tool, you first need to connect your Linkedin, Facebook, and Google accounts. For every platform, the requirements are slightly different. In the following sections, we explain exactly how this is done.
Connecting your LinkedIn Ads account to HubSpot
The HubSpot user who connects the LinkedIn Ads account must have Publish access to the HubSpot ads tool and be an account manager in that LinkedIn Ads account.
Once the appropriate access is acquired, follow these steps to connect LinkedIn to HubSpot:
- Navigate, from the top menu, to Settings | Marketing | Ads | Connect account, as shown in the following screenshot:

Figure 7.1 – Connecting an Ads account to HubSpot
- Then, choose the desired platform from the popup. In this case, select LinkedIn.
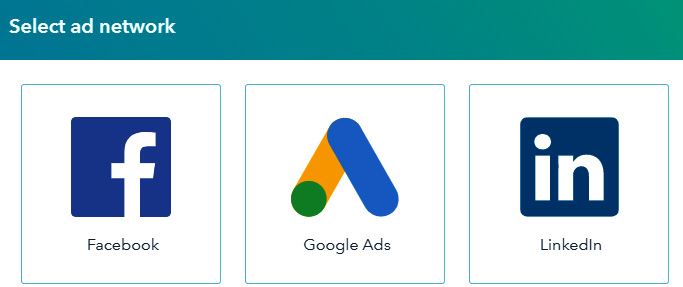
Figure 7.2 – Ads platforms to connect in HubSpot
- After selecting LinkedIn, a popup will appear prompting you to sign into your personal LinkedIn account. It does not take information from your personal account but simply uses it as a conduit to get to your company's Ads account.

Figure 7.3 – LinkedIn connection
- Once you have signed in, you will then be asked to select the LinkedIn Ads account to connect to HubSpot. If you want to track contacts that interact with your ads, leave autotracking on, as seen in Figure 7.4. This will apply HubSpot tracking to your LinkedIn ads. Click Connect.

Figure 7.4 – HubSpot Ads autotracking switch on
Once these steps are completed, your LinkedIn Ads account is connected and you will be ready to launch and track your existing and future ads on LinkedIn. Next, let's see how we connect Facebook ads to HubSpot.
Connecting your Facebook Ads account to HubSpot
The HubSpot user who connects the Facebook ads account must have Publish access to the HubSpot ads tool and be an admin of the ad account in Facebook's Business Manager account.
In order to connect Facebook to HubSpot, follow the instructions shown in the previous section, the same as connecting a LinkedIn Ads account. When prompted to select an ad account, you will choose Facebook instead of LinkedIn at Step 2 and proceed.
Alternatively, you can also connect your company page and ad account from Facebook so the lead ad forms used in Facebook ads will appear as one of the form options in HubSpot, allowing you to easily sync the leads that complete the form. To complete this integration between HubSpot and Facebook lead ad forms, follow these steps:

Figure 7.5 – Facebook company page publishing tool

Figure 7.6 – Lead setup page on Facebook
- Click the Search CRM providers field and search for HubSpot. Then, select the corresponding entry in the dropdown when it appears.

Figure 7.7 – Searching for HubSpot
- Next to HubSpot, click Connect from Website. You will then be redirected to log in to your HubSpot portal.

Figure 7.8 – Connecting HubSpot to the website
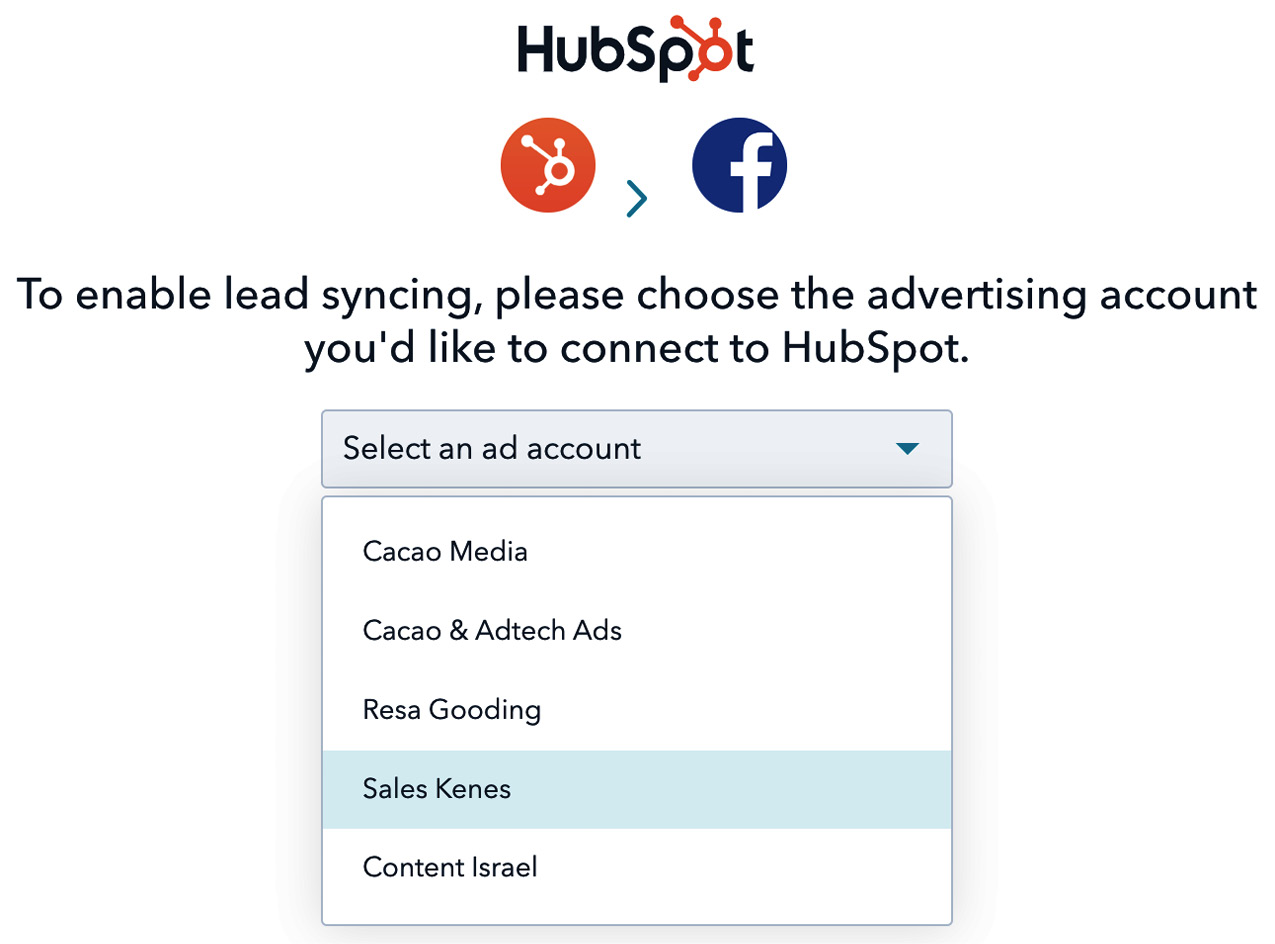
Figure 7.9 – Selecting the relevant Facebook ad account to connect to HubSpot
- Then, click Connect ad account. A message will then appear confirming that leads from your Facebook ad account will sync to HubSpot, and HubSpot will also apply tracking to the ads in your Facebook ad account.
Figure 7.10 – Facebook lead setup connection on HubSpot
Now that our Facebook ads and lead forms are connected, our next step is to connect Google Ads to HubSpot.
Connecting your Google Ads account to HubSpot
The HubSpot user who connects the Google Ads account must have Publish access to the HubSpot ads tool and admin access to the Google Ads account.
Tip
Only individual Google Ads accounts can be connected to HubSpot. Google Ad Manager accounts cannot be connected to HubSpot. So, any Google Ads account that is managed in a manager account should be connected to HubSpot individually.
In order to connect a Google Ads account to HubSpot, the following steps must be completed:
- Navigate, from the top HubSpot menu, to Settings | Marketing | Ads | Connect account.
- In the popup, select Google Ads.

Figure 7.11 – Connecting a Google Ads account to HubSpot
- In the dialog box that opens, log in to your Google account using the email address associated with your Google Ads account.
- Then, click Allow.
- Select the Google account you wish to connect to HubSpot and click Connect.

Figure 7.12 – Selecting the relevant Google Ads account
Once the connection is successful, you'll be redirected to the Ads dashboard in HubSpot, where existing ad information will be synced to the HubSpot Ads section. This allows HubSpot to track advertising performance across users' ad accounts.
Installing the pixel tracking code
After connecting the paid ad accounts (Facebook, Linkedin, and Google) to HubSpot, you can install a pixel from an external ad network, such as the Facebook pixel, Google conversion tracking tag, and LinkedIn Insight Tag, on all your HubSpot-hosted pages or external pages where your tracking code is installed.
The pixel tracking code will help you create a website visitors' audience directly in the HubSpot ads tool instead of the social media networks. You can just use HubSpot's tracking code and it will still work and attribute contacts to your ads, but the social media pixel will give you more information in a smoother way.
In order to install the pixel tracking code, follow these steps:
- Navigate to Settings | Marketing | Ads.
- On the top menu, click on Pixels.

Figure 7.13 – Google pixel tracking code
- Click on Add pixel.
- Choose the pixel you would like to install from the drop-down menu that opens.
- Click Add pixel.

Figure 7.14 – Selecting pixel code from HubSpot
The Facebook pixel will automatically be added to HubSpot pages such as landing pages, blog pages, and web pages or to external pages that contain your HubSpot tracking code.
Building an ad audience
Now that the technical part of connecting the ad accounts is completed, it is time to create your ad audience.
Your ad audience will affect the entire ad. You decide how wide or narrow to make this audience in your Facebook, Google, and LinkedIn ads. HubSpot gives you three ways to create your audience based on your website visitors, HubSpot contacts, and existing audiences.
Before you start creating the ad audience, it's important to understand the different requirements each platform has.
The criteria for Google Ads audiences are as follows:
- For Google Search Network, the audience should be at least 1,000 visitors within the last 30 days.
- For Google Display Network, the audience should be at least 100 visitors within the last 30 days.
- For Facebook ads, the audience needs to contain at least 20 users.
- For LinkedIn Ads, the audience needs to contain at least 300 users.
The advantage of creating an audience in HubSpot instead of the ads platform is that first, you get to use your own data if you already have contacts in HubSpot, and additionally, you can create audiences over time that match certain criteria you wish to focus on and target just these contacts in your ads.
Creating a website visitor's audience in your HubSpot account
Sometimes, you would like to set up a retargeting campaign for contacts who visit your website. This will allow them to see your ads as they browse through their social media platforms, allowing you to gain additional opportunities to convert them to a lead or move them through the funnel to become an opportunity. The following steps show you how to create such an audience:

Figure 7.15 – Creating an audience for ads on HubSpot

Figure 7.16 – Creating an ad audience by website visitors
- Under Source pixel, click Select a pixel. A drop-down menu will appear.
- Select your Facebook, Google Ads, and/or LinkedIn Ads pixel.
- To add a new pixel, click Add a pixel.
- Segment the audience based on the pages they are visiting based on ad time estimation of the visits.
- Give the audience a name and click Create audience.

Figure 7.17 – Create website traffic audience
HubSpot makes it easy for its customers by creating an audience to include visitors to all website pages. However, if you have a Marketing Hub Starter, Professional, or Enterprise account, you can choose specific website pages that you want to include the audience from.
You can also create a contact list audience, not based on the pages they visited but based on the contacts themselves. Let's have a quick rundown of how that is done.
Creating an audience list
In order to create an audience list that contains specific contacts from your database, the following steps are necessary:
- Click on Marketing | Ads | Create audience | Contacts list.

Figure 7.18 – Creating a website audience based on contact
- Check the This contact list was not purchased, rented, appended, or provided by a third party checkbox.
- Choose the ad account you'd like to use this audience for.
- Give this list a name and click on Create audience.

Figure 7.19 – Creating a contacts list
Once this contact list is created, it then appears in the relevant social media platform that was chosen and these contacts can then be targeted in future campaigns.
Now, let's look at how to create these ads for these campaigns.
Creating ads
After you've connected the ad accounts and created audiences, it's time to create the ads:

Figure 7.20 – Ads option in HubSpot
- Click on Create ad campaign in the top-right corner of the page and choose the social media platform you want.

Figure 7.21 – Create ad campaign
- After selecting the platform to advertise on, insert all the needed information.
- In the Ad tab of the LinkedIn campaign page, fill in the ad account with the required information, such as an image or video, body text, a headline, and a call to action (CTA) from the drop-down options, as well as a Linkedin lead gen form.

Figure 7.22 – Ad creation page in HubSpot
- On the Targeting tab, fill in the Remarketing and lookalike audiences, Location, and Interests/Behaviors/Demographic lists.

Figure 7.23 – Targeting section in ad creation
- On the Budget & Schedule tab, fill in the budget and the dates the ads will run.
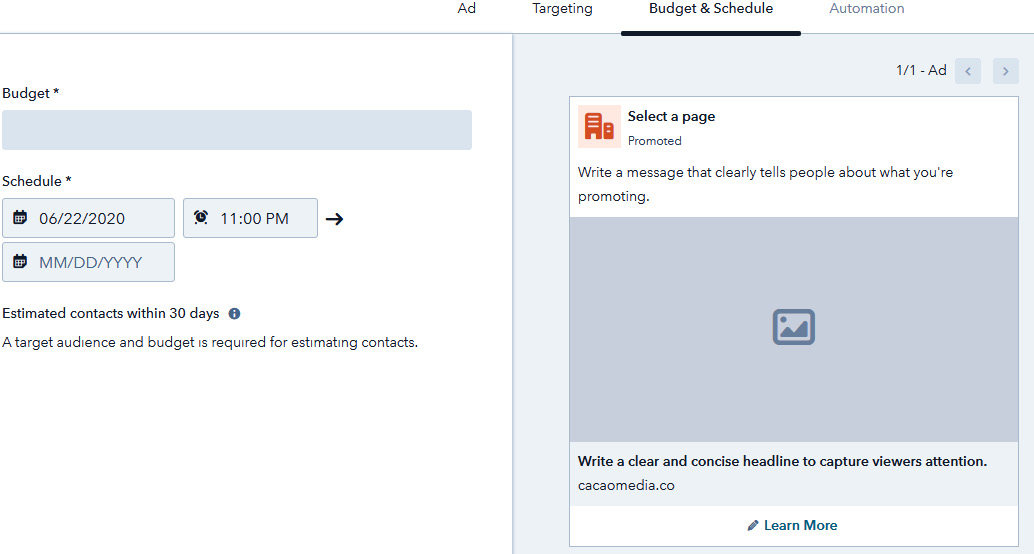
Figure 7.24 – Budget & Schedule section in ad creation
Now that you have connected the ad accounts to HubSpot and created your first ad campaign, it's time to review how you can use the HubSpot paid ads tool for your business.
Tips for optimizing the ROI from your ad campaigns
Companies spend thousands of dollars on Pay-per-Click (PPC) campaigns in order to generate a substantial number of leads to kickstart their lead-generation efforts. However, due to the wide-casting net that is permitted when deciding on the target audience, these ads can often generate a significant number of unqualified leads.
Research also shows that the number of bounced contacts increases when a user is required to leave the platform they are currently in to get to your offer. One tip to reduce the number of bounced contacts is to use social media internal forms and not redirect the user to a landing page. This allows your prospect to first fill out the form within LinkedIn or Facebook and then access your offer directly within the platform, improving your conversions and Click-Through Rate (CTR).
Another advantage of generating leads directly on Facebook or LinkedIn through their lead-generation forms is that you will also generate more leads at a lower cost per lead. In addition, once these contacts are directly synced to HubSpot, you are able to better analyze their characteristics to determine whether they are indeed qualified and then adjust your campaign, targeting where necessary to better align with your buyer persona.
Using other HubSpot tools to optimize your ad campaigns
Apart from the features available in the HubSpot ads tool, HubSpot provides many other tools to help you improve your process for generating quality leads from your PPC campaigns. In the following subsections, we cover a few of them.
UTM tracking
Conversion rates are important but you need to also make sure you are converting the right leads. To do this, you will need to track more elements in the campaign. The data from URL tracking allows you to determine which campaign and platform a lead came from, the keyword they searched for, the device they were on, and so on.
One of the best ways to accomplish this is by using UTM links. The UTM is built with special parameters. These parameters append to the end of your landing page URLs. They look something like this: www.yourpagelink.com/?utm_source=linkedin&utm_medium=ad&utm_cmapign=name.
There are six parameters that you can add to your URL:

Figure 7.25 – URL parameters
The three main parameters are the source, medium, and campaign.
Targeting relevant keywords
Keywords are not only essential for SEO and the generation of organic traffic to your website, but they're also the essence of every paid search campaign (mostly relevant for Google advertising).
The first step in keyword creation is to identify the most focused and relevant keywords. Then, you need to segment your campaigns and search for keyword ideas within each segment. There are a lot of excellent keyword research tools that you can use to find the best ones, such as Google Keyword Planner, Google Trends, Keyword Tool.io, or Ubersuggest.
In order to reach the quality contacts that are at the bottom of the funnel, you have to start thinking like your customers. When planning the campaign, you can see the list size, and with this, you can also decide how narrowed and focused you would like to make this campaign. The more assets you connect to the campaign, such as keywords, ads, and landing pages, the better your leads will be.
Additionally, in your text, you can use long-tail keywords, which consist of four or more words. You can search these keywords directly in Google, or try and use different tools. In Google, you can find the related keywords by searching for a relevant keyword, scrolling to the bottom of the search page, and looking at Related search.
Removing irrelevant keywords
Create a report for all the used keywords to determine whether you are getting any irrelevant clicks and leads from your ads. If you find any, remove these keywords by adding them to your negative keywords list. This will tell the search engine not to show your ads for any of these keywords.
With this action, you'll create a list of keywords that have produced opportunities (and customers) for your company. For these keywords, you can search for new, related long-tail keywords to increase exposure, increase the bids so your ads' rank at the top of search results, and use these ones on a new campaign that is more targeted and relevant for these customers.
Generating a pre-qualify ad copy
With your ad copy, you should pre-qualify visitors so that the traffic you get will be a lot more relevant and targeted to your company and not focused solely on increasing the CTR. You can do this by adding the following elements to your ad copy:
- Target persona: Create segmentation in your ad copy for pre-qualifying your ad traffic and even personalizing your ads. You can do this with text such as Report guide for CTO or All the analysis that a CMO of start-ups will need.
- Business size: Reflect your intention and target business size in your ad copy. For example, if you want to target small businesses, you can add "start-ups" to your ads and create copy such as "start-ups" plan for analyzing real-time information."
- Industry: Focus all your effort on the specific industries that are relevant to you instead of advertising to all the industries there are.
- Pricing: It's not very common to see ads with a price on them, but this is a good way to weed out contacts who may not have the budget for your solution. You can do this by adding text such as "Starting at $999/month."
- Determine which offers drive the most results: Create A/B tests for every ad campaign. Different people prefer different ads. A/B tests will enable you to see which ad and which campaign gets the most traction and gives you better results. Make sure you're not analyzing just the CTR, but you also check which offers are producing the most conversions and eventually opportunities.
It's a good place for you to test all types of campaigns from free trials and scheduling a demo to a webinar invitation and content download. But most importantly, when creating the A/B test, remember to change and test only one single object at a time to isolate the effect of that element on performance. Some elements you should test on include the following:
- Headline: Test different versions of your main point or offer.
- Call to action (CTA): You can try different copy, colors, sizes, and placements.
- Images: Test different images or videos for your header or background.
Determining ROI
Calculating ROI shows how much money you are getting from the ads. This will show you whether you should invest more money in paid ad campaigns or rethink and change your strategic plan. The HubSpot paid ads tool helps you to analyze the ROI.

Figure 7.26 – ROI chart from paid ads
In the preceding chart, you can clearly see that a media budget spent of $124,844 resulted in an ROI of 1,695% since the revenue generated from 17 customers that originated from paid ads sources greatly exceeded the budget spent.
Running buyer persona targeting
On Facebook, there is a feature to build an audience based on a look-alike list of people. This allows you to specifically find more people that fit the criteria of the existing contacts in your database. The goal is to expand your reach to find more people based on the characteristics you have already identified as relevant to your target audience. Since you're connecting your HubSpot to your Facebook ad account, you can build these look-a-like audiences inside HubSpot to expand your ads' reach even more.
To do this, you first create lists of leads or of people who fit your buyer persona in HubSpot. This is a quick and easy way to get started with look-a-like audiences. You can use the Facebook Ads Manager for more look-a-like features.
By using the look-a-like list, you'll broaden your paid reach while also staying hyper-focused on tight targeting and your buyer personas.
Creating retargeting ads for contacts within HubSpot
Retargeting refers to advertising to people based on their previous internet actions. Retargeting ads are therefore generally promoted to contacts who already visited your website or are even part of your database.
Advertising to people who already have an interest in you and your product or service usually gives better results and is a better investment of your money. The HubSpot paid ads tool can also be used to create retargeting ads for contacts in the middle and bottom of the funnel. The contacts generated from these campaigns often tend to be of higher quality with a low cost attached to them, but the overall number of conversions will be lower compared to other ad campaigns.
To ensure your retargeting ad campaigns are effective, it is important to install a tracking code on your website. You can create retargeting campaigns based on audience segmentation if you have a sufficient volume of traffic to your website. Unlike remarketing, which focuses on sales or marketing emails sent to re-engage customers, retargeting focuses on pulling in new audiences or customers through ads on social media, email, or other platforms.
There are many great tools for retargeting, such as Perfect Audience, AdRoll, ReTargeter, and Bizo. You can also use Facebook for retargeting, which allows you to launch ads to a large pool of mirror audiences with a number of ad objectives.
In order to create a retargeting campaign on Facebook, you need to carry out three steps:
- Create a list of existing contacts: In HubSpot, create a list based on their life cycle stage and their interests based on the topic of their most recent download. When this list is sufficiently large, move to the next step. If it's not, rethink your segmentation and/or type of retargeting to implement.
- Add list to Facebook's Audience Manager: After the number of contacts in the list is sufficient, export the list to a CSV file and import it to the Facebook's Custom Audience manager to match up email addresses with Facebook profiles. (There are other third-party platforms that also sync these lists on social media and across the web, so feel free to pick which upload/sync option works best for your company.)
- Determine your destination URL: To create a new campaign on Facebook, enter your Ad Manager area, then hit the green Create button in the top-left corner of the ad platform home screen.

Figure 7.27 – Ad creation on Facebook
Facebook gives you the option to choose the type of campaign you want to create from three different types of campaigns: awareness, consideration, and conversion.
On Facebook, you can use an internal form or add a UTM tracking URL that will help you track the people that come from this campaign and eventually the success of your campaigns.
If using an external URL, the next step is to give your campaign a name, which will be inserted underneath the URL textbox. Keep your campaign names simple and clear. After naming, add your ad segmentation in order to reach specific audiences. Finally, set the budget for this campaign, and you're done.
Analysis of ad campaigns
With HubSpot's Ads tool, you have the ability to track the following metrics:
You can then choose to deep dive and understand exactly which ads are performing better than others and exactly how many contacts each ad is generating across each platform.

Figure 7.28 – Ad analysis
On the ad screen, you can see all the information, but you can also make changes, such as extending the budget, schedule, and creative assets.

Figure 7.29 – Editing ad sets
Clicking on the Edit button opens a new pop-up page with all the metrics you can edit.

Figure 7.30 – Different ad metrics to edit
Analyzing the ads report
Your ads are running great; you are doing A/B tests and you made sure to invest your money in the right places, but in order to justify your promotions and money spent, it's important to analyze the report.
You have a few ways to analyze the information. To view your ad campaign data, navigate on the top menu to Marketing | Ads. In the first Campaigns tab, you'll see all the information about your campaigns from impressions, clicks to total contacts, and even the number of customers you got from these campaigns.
The page is built with a few parts. The first report is a high-level report and the table beneath it is a breakdown of the information per campaign. On the Analyze tab, you get more detailed dashboards.
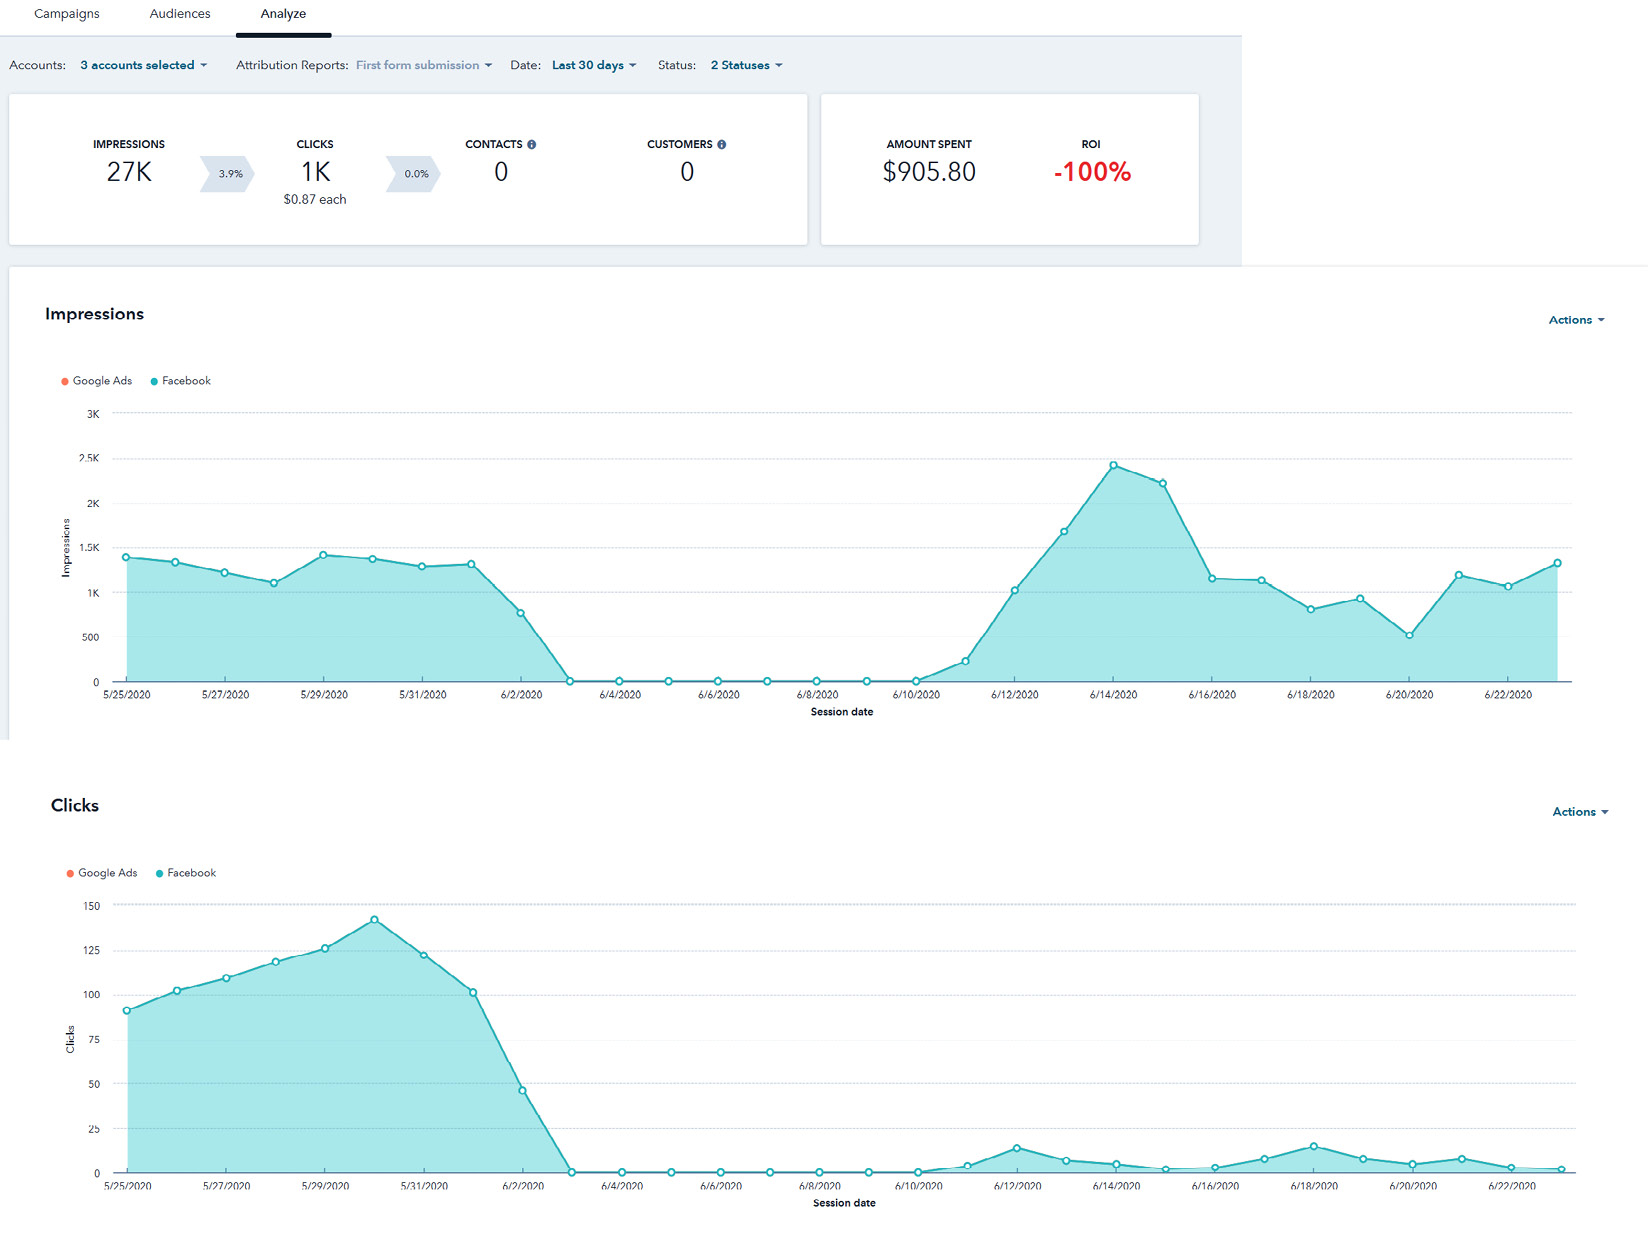
Figure 7.31 – Ad campaign reports
Analyzing the results of your campaigns is critical to the success of investing in paid ads. With HubSpot, this becomes much easier as you can clearly see the number of contacts generated from each campaign and the quality. You can see how they progress through the funnel from lead to marketing qualified lead, sales qualified lead, opportunity, and customer.
Summary
With the competition that companies have today, they must think and plan their paid ads strategy in order to have an edge and be ahead of the competition. SEO and organic contacts are a good and essential part of the strategy, but it's not enough. In this chapter, we covered all the information you need in order to create a strategic plan and paid campaigns on social media for your business. We focused specifically on how the HubSpot ads tool can help you be more effective and efficient in managing and implementing your paid ad campaigns. Remember to start with connecting your accounts to HubSpot, create an audience, create the campaigns (A/B tests), and, of course, analyze the information to ensure you get the highest possible returns on your investment.
In the next chapter, you'll understand the value of implementing live chat as well as a chatbot on your website and learn how easy it is to set up these features using HubSpot—no coding necessary!
Questions
To help you remember some key concepts and tips discussed in this chapter, here are a few review questions to consider:
- Which permission levels are necessary to connect an ad account to HubSpot?
- Can you connect a Google Ad Manager account to HubSpot?
- What must be the audience size when creating an audience in HubSpot to push to LinkedIn?
Further reading
- The Ultimate Guide to PPC Marketing: https://blog.hubspot.com/marketing/ppc
- How to Generate Quality Leads From Your PPC Campaigns: https://blog.hubspot.com/marketing/9-strategies-to-improve-lead-quality-b2b-ppc-campaigns
- How to Perfectly Manage a PPC Campaign [Template]: https://blog.hubspot.com/blog/tabid/6307/bid/33882/how-even-you-can-master-ppc-campaign-management-template.aspx