
This hands-on chapter introduces you to the basic graphics features of Allegro. In the early years of personal computers, at a time when 3D accelerators with 256 MB of DDR memory were inconceivable, vector graphics provided a solid solution to the underpowered PC. For most games, a scrolling background was not even remotely possible due to the painfully slow performance of the early PC. While competing systems from Atari, Amiga, Commodore, Apple, and others provided some of the best gaming available at the time, with performance that would not be matched in consoles for many years, these PCs fell to the wayside as the IBM PC (and its many clone manufacturers) gained market dominance—not without the help of Microsoft and Intel. It is a shame that Apple is really the only contender that survived the personal computer revolution of the 1980s and 1990s, but it was mainly that crucible that launched gaming forward with such force.
A more descriptive term for the subject of this chapter would be “programming graphics primitives.” A graphics primitive is a function that draws a simple geometric shape, such as a point, line, rectangle, or circle. This chapter covers the graphics primitives built into Allegro with complete sample programs for each function so you will have a solid understanding of how these functions work. I should point out also that these graphics primitives form the basis of all 3D graphics, past and present; after all, the mantra of the 3D card is the holy polygon. But above all, I want you to have some fun with this chapter. Whether you are a skilled programmer or a beginner, try to have some fun in everything you do. I believe even an old hand will find something of interest in this chapter.
Here is a breakdown of the major topics in this chapter:
Allow me to go off topic for a moment. I love role-playing games. I am especially fond of the old-school 2D RPGs that focus on strong character development, exploration, and questing as a solo adventurer. I am still amazed with the attention to detail in games such as Ultima VII: The Black Gate, which is now more than 13 years old. This game was absolutely amazing, and its legacy lives on today in the form of Ultima Online. The music in this game was so ominous that it actually affected most players on an emotional level, drawing them into the game with a desire to help the Avatar save Britannia. The open storyline and freedom to explore the world made it so engaging and engrossing that it completely suspended my sense of disbelief—that is, while playing, I tended to forget it was merely a game.
Tip
A modern version of the Ultima VII engine has been developed by a team of volunteers, called Exult. This open-source project includes a complete suite of editors you can use to modify the world of Ultima. You can learn more about the Exult project at http://exult.sourceforge.net.
Contrast that experience with modern games that are more focused on eye candy than exploring the imagination! It reminds me of the difference between a movie and a book; each has a certain appeal, but a book delights at a more personal level, opening the mind to new possibilities. I am drawn into a good game, such as Ultima VII, just as I am with a good book; on the other hand, even an all-time favorite movie usually fails to draw me into the story at a personal level. I am experiencing the imagination and vision of another person, and those impressions are completely different from my own. Teasing the imagination is what separates brilliance from idle entertainment, and it is the difference between a long remembered and beloved memory (found in a good book or a deeply engaging game) and a quickly forgotten one (such as in a typical movie).
It is a rare game that is able to enchant one's imagination while also providing eye candy. One such game is Baldur's Gate: Dark Alliance (a console implementation of the bestselling PC game). This game is intelligent, challenging, imaginative, enjoyable, engaging, and still manages to impress visually as well as audibly. The layout of this game is an overhead view, although it is rendered in 3D, giving it a 2D feel that resembles the orientation of Ultima VII and Diablo II. That someone is still building fantastic RPGs like this is a testament to the power of a good story and the joy of character development and leveling up. The pizzazz of highly detailed 3D graphics simply satisfies the picky gamers.
As you delve further into this chapter, try to keep in mind what your ideal game would be. What is your all-time favorite game? What genre does it represent? How would you improve upon the game, given the opportunity? I will continually encourage you to keep your ideal game design in mind while working through this book. I hope you will start to develop that game as you progress through each chapter. To that end and to form a basis for building your own game, I will walk you through the creation of a complete game—not just a sample or demonstration program, but a complete, full-featured game with all the bells and whistles! Although I would really enjoy building an RPG, that is far too ambitious for the goals of this book. RPGs are so enormous that even the simplest of RPGs is a huge undertaking, and there are so many prerequisites just to get started. For instance, will the hero be able to wield different weapons? Animating a single character can require more than 100 animation frames for a single sprite—and that is just with one weapon, one set of armor. What if you want your character to be equipped with different kinds of weapons and armor in the game (in my opinion, one of the best aspects of an RPG)? You could design the game with a fixed character image, but you are still looking at a huge investment in artwork.
My second choice is a strategy game, so that is the approach I have taken in this book. Strategy games are enormously entertaining while requiring a meager initial investment in artwork. In fact, in the spirit of the open-source tools used in this book, I will also be using a public domain sprite library called SpriteLib. This library was produced by Ari Feldman, a talented artist who was kind enough to allow me to use his fantastic high-quality artwork in this book. As you will see in the next two chapters, each great game idea starts with a basic prototype, so you will develop the first prototype version of this strategy game in Chapter 4, “Writing Your First Allegro Game.” Following that, each major chapter will include a short section on enhancing the game with the new information presented in that chapter. For instance, the first version of the strategy game will have a fixed background, but when I cover scrolling backgrounds I'll show you how to enhance the game to use that new feature. The same goes for animated sprites, sound effects, music, special effects, and so on.
This chapter is somewhat a lesson in progressive programming (starting with basic concepts that grow in complexity over time). Because we are learning about 2D graphics throughout this book, it is fitting that we should start at the beginning and cover vector graphics. The term vector describes the CRT (Cathode Ray Tube) monitors of the past and the vector graphics hardware built into the computers that used this early technology.
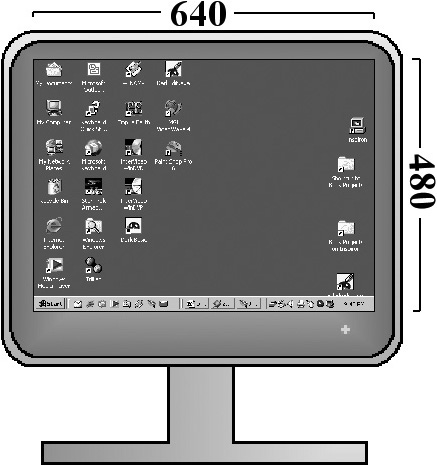
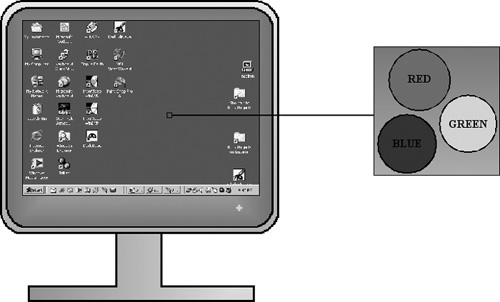
I don't know about you, but I was drawn to graphics programming before I became interested in actually writing games. The subject of computer graphics is absolutely fascinating and is at the forefront of computer technology. The high-end graphics accelerator cards featuring graphics processors with high-speed video memory, such as the nVidia GeForce and ATI Radeon families of GPUs, are built specifically to render graphics insanely fast. The silicon is not designed merely to satisfy a marketing initiative or to best the competition (although that would seem to be the case). The graphics chips are designed to render graphics with great efficiency using hardware-accelerated functions that were once calculated in software. I emphasize the word “graphics” because we often take it for granted after hearing it used so often. Figure 3.1 shows a typical monitor.
The fact of the matter is that video cards are not designed to render games; they are designed to render geometric primitives with special effects. As far as the video card is concerned, there is only one triangle on the screen. It is the programmer who tells the video card to move from one triangle to the next. The video card does this so quickly (on the order of 100 million or more polygons per second) that it fools the viewer into believing that the video card is rendering an entire scene on its own. The triangles are hidden away in the matrix of the scene (so to speak), and it is becoming more and more difficult to discern reality from virtual reality due to the advanced features built into the latest graphics chips (see Figure 3.2).
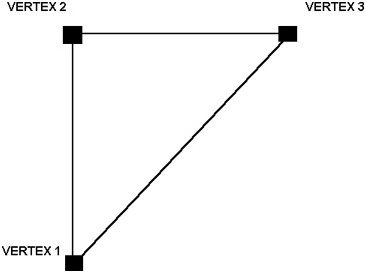
Taken a step closer, one would notice that each triangle is made up of three points, or vertices, which is really all the graphics chip cares about. Filling pixels between the three points and applying varying effects (such as lighting) are tasks that the graphics chip has been designed to do quickly and efficiently.
Years ago, when a new video card was produced, the manufacturer would hire a programmer to write the device driver software for the new hardware, usually for Windows and Linux. That device driver was required to provide a specific set of common functions to the operating system for the new video card to work correctly. The early graphics chips were very immature (so to speak); they were only willing to switch video modes and provide access to the video memory (or frame buffer), usually in banks—another issue of immaturity. As graphics chips improved, silicon designers began to incorporate some of the software's functionality right into the silicon, resulting in huge speed increases (orders of greater magnitude) over functions that had previously existed only in software.
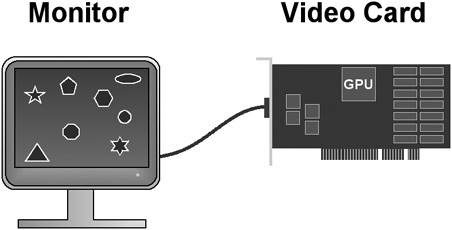
The earliest Windows accelerators, as they were known, produced for Windows 3.1 and Windows 95 provided hardware blitting. Blit is a term that means bit-block transfer, a method of transferring a chunk of memory from one place to another. In the case of a graphical blit, the process involves copying a chunk of data from system memory through the bus to the memory present on the video card. In the early years of the PC, video cards were lucky to have 1 MB of memory. My first VGA card had 256 KB (see Figure 3.3)!
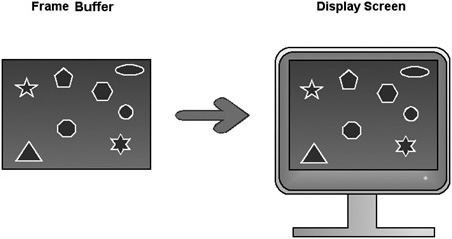
Contrast this with the latest 3D cards that have 256 MB of DDR (Double Data Rate) memory and are enhanced with direct access to the AGP bus! The latest DDR memory at the time of this writing is PC-4000, also called DDR-500. This type of memory comes on a 184-pin socket with a throughput of 4 gigabytes per second. Although the latest video cards don't use this type of high-speed memory yet, they are close, using DDR-533. The point is, this is insanely fast memory! It simply must be as fast as possible to keep feeding the ravenous graphics chip, which eats textures in video memory and spews them out into the frame buffer, which is sent directly to the screen (see Figure 3.4).
In a very real sense, the graphics card is a small computer on its own. When you consider that the typical high-end PC also has a high-performance sound processing card (such as the Sound Blaster Audigy 2 by Creative Labs) capable of Dolby DTS and Dolby Digital 5.1 surround sound, what we are really talking about here is a multi-processor system. If your first impression is to scoff at the idea or shrug it off like an old joke, think about it again. The typical $200 graphics card or sound card has more processing power than a Cray supercomputer had in the mid-1980s. Considering that a gaming rig has these two major subsystems in addition to an insanely fast central processor, is it unfounded to say that such a PC is a three-processor system? All three chips are sharing the bus and main memory and are running in parallel. The difference between this setup and a symmetric multiprocessing system (SMP) is that an SMP divides a single task between two or more processors, while the CPU, graphics chip, and sound chip work on different sets of data. The case made in this respect is valid, I think. If you want to put forth the argument that the motherboard chipset and memory controller are also processors, I would point out that these are logistical chips with a single task of providing low-level system communication. But consider a high-speed 3D game featuring multiplayer networking, advanced 3D rendering, and surround sound. This is a piece of software that uses multiple processors unlike any business application or web browser.
This short overview of computer graphics was interesting, but how does the information translate to writing a game? Read on . . ..
The basis of this entire chapter can be summarized in a single word: pixel. The word “pixel” is short for “picture element,” sort of the atomic element of the screen. The pixel is the smallest unit of measurement in a video system. But like the atom you know from physics, even the smallest building block is comprised of yet smaller things. In the case of a pixel, those quantum elements of the pixel are red, green, and blue electron streams that give each pixel a specific color. This is not mere theory or analogy; each pixel is comprised of three small streams of electrons of varying shades of red, green, and blue (see Figure 3.5).
Starting with this most basic building block, you can construct an entire game one pixel at a time (something you will do in the next chapter). Allegro creates a global screen pointer when you call allegro_init. This simple pointer is called screen, and you can pass it to all of the drawing functions in this chapter. A technique called double-buffering (which uses off-screen rendering for speed) works like this: Drawing routines must draw out to a memory bitmap, which is then blitted to the screen in a single function call. Until you start using a double buffer, you'll just work with the global screen object.
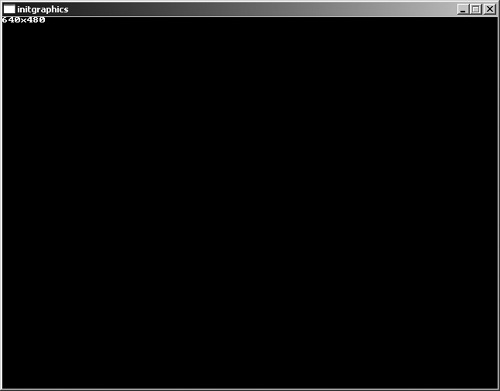
As you saw in the last chapter, Allegro is useful even for text-based output. But there is only so much you can do with a character-based game. You could fire up one of the two dozen or so text adventure games from the 1970s and 1980s. (Zork comes to mind.) But let's get started on the really useful stuff and stop fooling around with text mode, shall we? I have written a program called InitGraphics that simply shows how to initialize a full-screen video mode or window of a particular resolution. Figure 3.6 shows the program running.
The first function you'll learn about in this chapter is set_gfx_mode, which sets the graphics mode (or what I prefer to call “video mode”). This function is really loaded, although you would not know that just from calling it. What I mean is that set_gfx_mode does a lot of work when called—detecting the graphics card, identifying and initializing the graphics system, verifying or setting the color depth, entering full-screen or windowed mode, and setting the resolution. As you can see, it does a lot of work for you! A comparable DirectX initialization is 20 to 30 lines of code. This function has the following declaration:
int set_gfx_mode(int card, int w, int h, int v_w, int v_h)
If an error occurs setting a particular video mode, set_gfx_mode will return a non-zero value (where a return value of 0 means success) and store an error message in allegro_error, which you can then print out. For an example, try using an invalid resolution for a full-screen display, like this:
ret = set_gfx_mode(GFX_AUTODETECT_FULLSCREEN, 645, 485, 0, 0);
However, if you specify GFX_AUTODETECT and send an invalid width and height to set_gfx_mode, it will actually run in a window with the resolution you wanted! Running in windowed mode is a good idea when you are testing a game and you don't want it to jump into and out of full-screen mode every time you run the program.
The first parameter, int card, specifies the display mode (or the video card in a dual-card configuration) and will usually be GFX_AUTODETECT. If you want a full-screen display, you can use GFX_AUTODETECT_FULLSCREEN, while you can invoke a windowed display using GFX_AUTODETECT_WINDOWED. Both modes work equally well, but I find it easier to use windowed mode for demonstration purposes. A window is easier to handle when you are editing code, and some video cards really don't handle mode changes well. Depending on the quality of a video card, it can take several seconds to switch from full-screen back to the Windows desktop, but a windowed program does not have this problem.
The next two parameters, int w and int h, specify the desired resolution, such as 640 × 480, 800 × 600, or 1024 × 768. To maintain compatibility with as many systems as possible, I am using 640 × 480 for most of the sample programs in this book (with a few exceptions where demonstration is needed).
The final two parameters, int v_w and int v_h, specify the virtual resolution and are used to create a large virtual screen for hardware scrolling or page flipping.
After you have called set_gfx_mode to change the video mode, Allegro populates the variables SCREEN_W, SCREEN_H, VIRTUAL_W, and VIRTUAL_H with the appropriate values, which come in handy when you prefer not to hard-code the screen resolution in your programs.
The InitGraphics program source code listing follows. Several new functions in this program are included for convenience; I will go over them shortly. As is the case with most of the programs in this book, hit the Escape key to quit.
#include <stdlib.h>
#include "allegro.h"

int main(void)
{
    //initialize Allegro
    allegro_init();

    //initialize the keyboard
    install_keyboard();

    //initialize video mode to 640x480
    int ret = set_gfx_mode(GFX_AUTODETECT_WINDOWED, 640, 480, 0, 0);
    if (ret != 0) {
       allegro_message(allegro_error);
       return 1;
    }

    //display screen resolution
    textprintf(screen, font, 0, 0, makecol(255, 255, 255),
        "%dx%d", SCREEN_W, SCREEN_H);

    //wait for keypress
    while(!key[KEY_ESC]);

    //end program
    allegro_exit();
    return 0;
}
END_OF_MAIN()
In addition to the set_gfx_mode function, there are several more Allegro functions in this program that you probably noticed. Although they are self-explanatory, I will give you a brief overview of them.
The allegro_message function is handy when you want to display an error message in a pop-up dialog box (also called a message box). Usually you will not want to use this function in production code, although it is helpful when you are debugging (when you will want to run your program in windowed mode rather than full-screen mode). Note that some operating systems will simply output an allegro_message response to the console. It is fairly common to get stuck debugging a part of any game, especially when it has grown to a fair size and the source code has gotten rather long, so this function might prove handy.
You might also have noticed a variable called allegro_error in this program. This is one of the global variables created by Allegro when allegro_init is called, and it is populated with a string whenever an error occurs within Allegro. As a case in point for not using pop-ups, Allegro will not display any error messages. It's your job to deal with errors the way you see fit.
Another interesting function is textprintf, which, as you might have guessed, displays a message in any video mode. I will be going over all of the text output functions later in this chapter, but for now it is helpful to note how this one is called. Because this is one of the more complex functions, here is the declaration:
void textprintf(BITMAP *bmp, const FONT *f, int x, y, color,
          const char *fmt, . . .)
The first parameter specifies the destination, which can be the physical display screen or a memory bitmap. The next parameter specifies the font to be used for output. The x and y parameters specify where the text should be drawn on the screen, while color denotes the color used for the text. The last parameter is a string containing the text to display along with formatting information that is comparable to the formatting in the standard printf function (for instance, %s for string, %i for integer, and so on).
You might have noticed a function called makecol within the textprintf code line. This function creates an RGB color using the component colors passed to it. However, Allegro also specifies 16 default colors you can use, which is a real convenience for simple text output needs. If you want to define custom colors beyond these mere 16 default colors, you can create your own colors like this:
#define COLOR_BROWN makecol(174,123,0)
This is but one out of 16 million possible colors in a 32-bit graphics system. Table 3.1 displays the colors pre-defined for your use. I frequently use color #15 for example programs that output text.
Table 3.1. Standard Colors for Allegro Graphics
Color # | Color Name |
|---|---|
0 | Black |
1 | Dark Blue |
2 | Dark Green |
3 | Dark Cyan |
4 | Dark Red |
5 | Dark Magenta |
6 | Orange |
7 | Gray |
8 | Dark Gray |
9 | Blue |
10 | Green |
11 | Cyan |
12 | Red |
13 | Magenta |
14 | Yellow |
15 | White |
The last function that you should be aware of is allegro_exit, which shuts down the graphics system and destroys the memory used by Allegro. In theory, the destructors will take care of removing everything from memory, but it's a good idea to call this function explicitly. One very important reason why is for the benefit of restoring the video display. (Failure to call allegro_exit might leave the desktop in an altered resolution or color depth depending on the graphics card being used.)
All of the functions and variables presented in this program will become familiar to you in time because they are frequently used in the example programs in this book.
Now that you have an idea of how to initialize one of the graphics modes available in Allegro, you have the ability to draw on the screen (or in the main window of your program). But before I delve into some of the graphics primitives built into Allegro, I want to show you a simple program that loads a bitmap file (the supported formats are BMP, PCX, TGA, and LBM) and draws it to the screen using a method called bit-block transfer (or blit for short). This program will be a helpful introduction to the functions for initializing the graphics system—setting the video mode, color depth, and so on.
While I'm holding off on bitmap and sprite programming until part II, I believe you will appreciate the simplicity of this program, shown in Figure 3.7. It is always a significant first step to writing a game when you are able to load and display a bitmap image on the screen because that is the basis for sprite-based games. First, fire up your favorite text editor or C++ environment and create a new project so you can get started on the first of many exciting projects in the graphical realm.
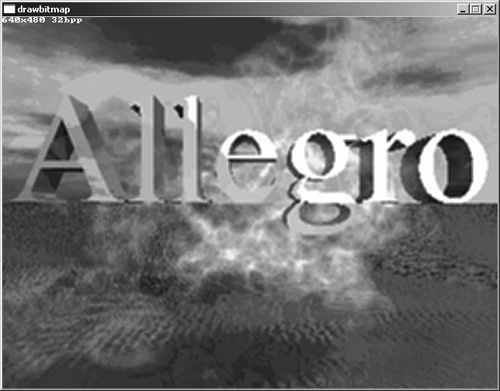
This new project is called DrawBitmap, and you may, if you prefer, load the project from the CD-ROM. Here is the source code for the program.
#include "allegro.h"

int main(void)
{
    char *filename = "allegro.pcx";
    BITMAP *image;
    int ret;

    allegro_init();
    install_keyboard();

    set_color_depth(16);
    ret = set_gfx_mode(GFX_AUTODETECT_WINDOWED, 640, 480, 0, 0);
    if (ret != 0) {
        allegro_message(allegro_error);
        return 1;
    }

    //load the image file
    image = load_bitmap(filename, NULL);
    if (!image) {
        allegro_message("Error loading %s", filename);
        return 1;
    }

    //display the image
    blit(image, screen, 0, 0, 0, 0, SCREEN_W, SCREEN_H);

    //done drawing-delete bitmap from memory
    destroy_bitmap(image);

    //display video mode information
    textprintf_ex(screen,font,0,0,1,-1,"%dx%d",SCREEN_W,SCREEN_H);

    //wait for keypress
    while (!keypressed());

    //exit program
    allegro_exit();
    return 0;
}
END_OF_MAIN()
As you can see from the source code for DrawBitmap, the program loads a file called allegro.pcx. Obviously you'll need a PCX file to run this program. However, you can just as easily use a BMP, PNG, GIF, or JPG for the graphics file if you want because Allegro supports all of these formats! That alone is reason enough to use a game library like Allegro! Do you know what a pain it is to write loaders for these file formats yourself? Even if you find code on the web somewhere, it is never quite satisfactory. Not only does Allegro support these file formats, it allows you to use them for storing sprites—and you can load different file formats all in the same program because Allegro does all the work for you. Feel free to substitute allegro.pcx with a file of your choosing; just be sure it has a resolution of 640 × 480! Allegro determines the file type from the extension and header information within the file. (Yeah, it's a pretty smart library.) You should also make sure the bitmap file is in the same folder as your project.
While the first two programs in this chapter might have only whet your appetite for graphics, this section will satisfy your hunger for more! Vector graphics are always fun, in my opinion, because you are able to see every pixel or line in a vector-based program. The term “vector” goes back to the early days of computer graphics, when primitive monitors were only able to display lines of varying sizes (where a vector represents a line segment from one point to another).
All of the graphics in a vector system are comprised of lines (including circles, rectangles, and arcs, which are made up of small lines). Vector displays are contrasted with bitmapped displays, in which the screen is a bitmap array (the video buffer). On the contrary, a vector system does not have a linear video buffer.
At any rate, that is what a vector system is as a useful comparison, but you have far more capabilities with Allegro. I always prefer to start at the beginning and work my way up into a subject of interest, and Allegro is definitely interesting. So I'm going to start with the vector-based graphics primitives built into Allegro and work up from there into bitmap- and sprite-based games in part III, beginning in Chapter 7.
The simplest graphics primitive is obviously the pixel-drawing function, and Allegro provides one:
void putpixel(BITMAP *bmp, int x, int y, int color)
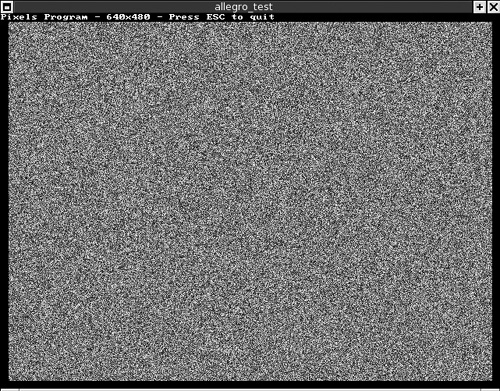
Figure 3.8 shows the output of the Pixels program, which draws random pixels on the screen using whatever video mode and resolution you prefer.
#include <stdlib.h>
#include "allegro.h"

int main(void)
{
    int x,y,x1,y1,x2,y2;
    int red, green, blue, color;

    //initialize Allegro
    allegro_init();

    //initialize the keyboard
    install_keyboard();

    //initialize the random number seed
    srand(time(NULL));

    //initialize video mode to 640x480
    int ret = set_gfx_mode(GFX_AUTODETECT_WINDOWED, 640, 480, 0, 0);
    if (ret != 0) {
         allegro_message(allegro_error);
         return 1;
   }

    //display screen resolution
    textprintf_ex(screen, font, 0, 0, 15, -1,
         "Pixels Program - %dx%d - Press ESC to quit",
         SCREEN_W, SCREEN_H);

    //wait for keypress
    while(!key[KEY_ESC])
    {
          //set a random location
          x = 10 + rand() % (SCREEN_W-20);
          y = 10 + rand() % (SCREEN_H-20);

          //set a random color
          red = rand() % 255;
          green = rand() % 255;
          blue = rand() % 255;
          color = makecol(red,green,blue);

          //draw the pixel
          putpixel(screen, x, y, color);
    }

    //end program
    allegro_exit();
    return 0;
}
END_OF_MAIN()
This program should be clear to you, although it uses a C function called srand to initialize the random-number seed. This program performs a while loop continually until the ESC key is pressed, during which time a pixel of random color and location is drawn using the putpixel function.
The next step up from the lowly pixel is the line, and Allegro provides several line-drawing functions. To keep things as efficient as possible, Allegro divides line drawing among three functions—one for horizontal lines, one for vertical lines, and a third for every other type of line. Drawing horizontal and vertical lines can be an extremely optimized process using a simple high-speed memory copy, but non-aligned lines must be drawn using an algorithm to fill in the pixels between two points specified for the line (see Figure 3.9).
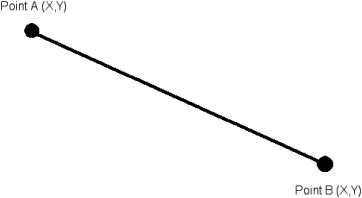
The horizontal line-drawing function is called hline:
void hline(BITMAP *bmp, int x1, int y, int x2, int color)
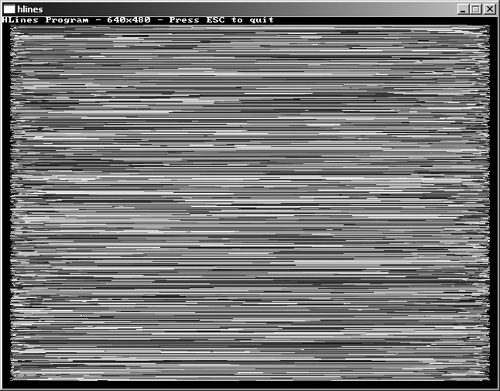
Because this is your first function for drawing lines, allow me to elaborate. The first parameter, BITMAP *bmp, is the destination bitmap for the line, which can be “screen” if you want to draw directly to the screen. The next three parameters, int x1, int y, and int x2, specify the two points on the single horizontal Y-axis where the line should be drawn. The HLines program (shown in Figure 3.10) demonstrates how to use this function.
#include <stdlib.h>
#include "allegro.h"

int main(void)
{
    int x,y,x1,y1,x2,y2;
    int red,green,blue,color;

    //initialize Allegro
    allegro_init();

    //initialize the keyboard
    install_keyboard();

    //initialize random seed
    srand(time(NULL));

    //initialize video mode to 640x480
    int ret = set_gfx_mode(GFX_AUTODETECT_WINDOWED, 640, 480, 0, 0);
    if (ret != 0) {
        allegro_message(allegro_error);
        return 1;
}

    //display screen resolution
    textprintf_ex(screen, font, 0, 0, 15, -1,
         "HLines Program - %dx%d - Press ESC to quit",
         SCREEN_W, SCREEN_H);

    //wait for keypress
    while(!key[KEY_ESC])
    {
     //set a random location
     x1 = 10 + rand() % (SCREEN_W-20);
     y = 10 + rand() % (SCREEN_H-20);
     x2 = 10 + rand() % (SCREEN_W-20);

     //set a random color
     red = rand() % 255;
     green = rand() % 255;
     blue = rand() % 255;
     color = makecol(red,green,blue);

     //draw the horizontal line
     hline(screen, x1,y,x2,color);
   }

   //end program
   allegro_exit();
   return 0;
}

END_OF_MAIN()
You have probably noticed that the HLines program is very similar to the Pixels program, with only a few lines that differ inside the while loop. I'll just show the differences from this point forward, rather than listing the entire source code for each program, because in most cases you simply need to replace a few lines inside main. It is pretty obvious that just a few lines inside the while loop need to be changed. The entire programs are available on the CD-ROM in complete form, but I will provide only partial listings where such changes are needed to demonstrate each of these graphics primitives.
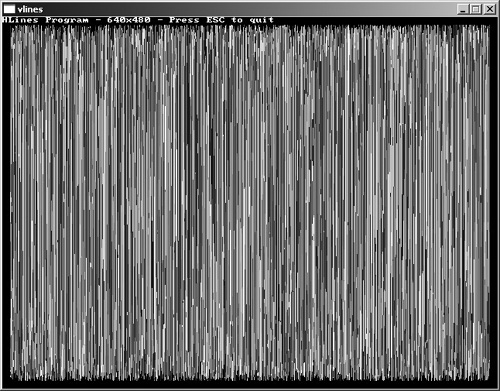
Vertical lines are drawn with the vline function:
void vline(BITMAP *bmp, int x, int y1, int y2, int color)
The VLines program (see Figure 3.11) is the same as the HLines program except for a single function call inside the while loop. Also note that this program uses a single X variable and two Y variables, y1 and y2. Here is the listing:
 //display screen resolution
 textprintf(screen, font, 0, 0, 15,
    "VLines Program - %dx%d - Press ESC to quit",
    SCREEN_W, SCREEN_H);

 //wait for keypress
 while(!key[KEY_ESC])
{
 //set a random location
 x = 10 + rand() % (SCREEN_W-20);
 y1 = 10 + rand() % (SCREEN_H-20);
 y2 = 10 + rand() % (SCREEN_H-20);

 //set a random color
 red = rand() % 255;
 green = rand() % 255;
 blue = rand() % 255;
 color = makecol(red,green,blue);

 //draw the vertical line
 vline(screen,x,y1,y2,color);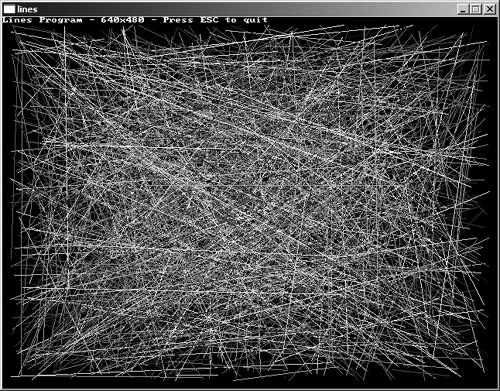
}The special-case functions for drawing horizontal and vertical lines are not used often. The following line function will simply call hline or vline if the slope of the line is perfectly horizontal or vertical. But if the line does have slope, then an algorithm must be used to draw the pixels that make up the line. That algorithm is called Bresenham's Line Algorithm, and it is used by the line function.
void line(BITMAP *bmp, int x1, int y1, int x2, int y2, int color)
The Lines program uses two complete sets of points—(x1,y1) and (x2,y2)—to draw an arbitrary line on the screen (see Figure 3.12). Here are the changes that you can make to the previous program to convert it to draw lines.
//display screen resolution
textprintf_ex(screen, font, 0, 0, 15, -1,
    "Lines Program - %dx%d - Press ESC to quit",
    SCREEN_W, SCREEN_H);

//wait for keypress
while(!key[KEY_ESC])
{
    //set a random location
    x1 = 10 + rand() % (SCREEN_W-20);
    y1 = 10 + rand() % (SCREEN_H-20);
    x2 = 10 + rand() % (SCREEN_W-20);
    y2 = 10 + rand() % (SCREEN_H-20);

    //set a random color
    red = rand() % 255;
    green = rand() % 255;
    blue = rand() % 255;
    color = makecol(red,green,blue);

    //draw the line
    line(screen, x1,y1,x2,y2,color);
}Yet again there is another logical step forward in geometry that is mimicked by a primitive graphics function. While a single pixel might be thought of as a geometric point with no mass, a line is a one-dimensional object that theoretically goes off in two directions toward infinity. Fortunately for us, computer graphics engineers are not as abstract as mathematicians. The next logical step is a two-dimensional object containing points in both the X-axis and the Y-axis. Although a triangle would be the next best thing, I believe the rectangle is easier to deal with at this stage because triangles carry with them the connotation of the mighty polygon, and we aren't quite there yet. Here is the rect function:
void rect(BITMAP *bmp, int x1, int y1, int x2, int y2, int color)
As you might have guessed, a rectangle is comprised strictly of two horizontal and two vertical lines; therefore, the rect function simply calls hline and vline to render its shape (see Figure 3.13).
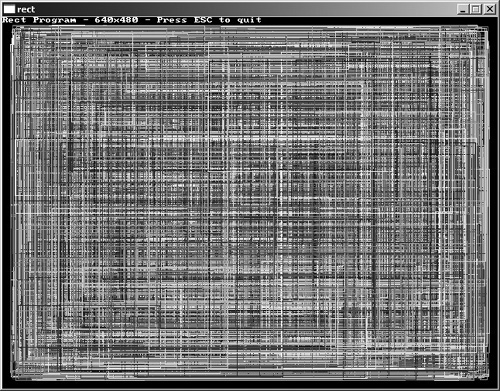
//display screen resolution
textprintf_ex(screen, font, 0, 0, 15, -1,
    "Rect Program - %dx%d - Press ESC to quit",
    SCREEN_W, SCREEN_H);

//wait for keypress
while(!key[KEY_ESC])
{
    //set a random location
    x1 = 10 + rand() % (SCREEN_W-20);
    y1 = 10 + rand() % (SCREEN_H-20);
    x2 = 10 + rand() % (SCREEN_W-20);
    y2 = 10 + rand() % (SCREEN_H-20);

    //set a random color
    red = rand() % 255;
    green = rand() % 255;
    blue = rand() % 255;
    color = makecol(red,green,blue);

    //draw the rectangle
    rect(screen,x1,y1,x2,y2,color);
}Outlined rectangles are boring, if you ask me. They are almost too thin to be noticed when drawn. On the other hand, a true rectangle is filled in with a specific color! That is where the rectfill function comes in handy:
void rectfill(BITMAP *bmp, int x1, int y1, int x2, int y2, int color)
This function draws a filled rectangle, but otherwise has the exact same parameters as rect. Figure 3.14 shows the output from the RectFill program.

//display screen resolution
 textprintf(screen, font, 0, 0, 15,
    "RectFill Program - %dx%d - Press ESC to quit",
    SCREEN_W, SCREEN_H);

//wait for keypress
while(!key[KEY_ESC])
{
    //set a random location
    x1 = 10 + rand() % (SCREEN_W-20);
    y1 = 10 + rand() % (SCREEN_H-20);
    x2 = 10 + rand() % (SCREEN_W-20);
    y2 = 10 + rand() % (SCREEN_H-20);

    //set a random color
    red = rand() % 255;
    green = rand() % 255;
    blue = rand() % 255;
    color = makecol(red,green,blue);

    //draw the filled rectangle
    rectfill(screen,x1,y1,x2,y2,color);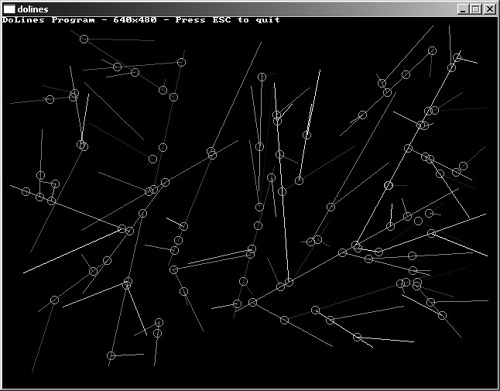
}Allegro provides a really fascinating feature in that it will draw an abstract line by firing off a call to a callback function of your making (in which, presumably, you would want to draw a pixel at the specified location, although it's up to you to do what you will with the coordinate). To use the callback function, you must call the do_line function, which looks like this:
void do_line(BITMAP *bmp, int x1, y1, x2, y2, int d, void (*proc))
The callback function (which you must include in the program) has this format:
void doline_callback(BITMAP *bmp, int x, int y, int d)
To use the callback, you want to call the do_line function like you would call the normal line function, with the addition of the callback pointer as the last parameter. To fully demonstrate how useful this can be, I wrote a short program that draws random lines on the screen. But before drawing each pixel of the line, a check is performed on the new position to determine whether a pixel is already present. This indicates an intersection or collision. When this occurs, the line is ended and a small circle is drawn to indicate the intersection. The result is shown in Figure 3.15.
#include <stdlib.h>
#include <allegro.h>

int stop = 0;

//doline is the callback function for do_line
void doline(BITMAP *bmp, int x, int y, int color)
{
    if (!stop)
    {
      if (getpixel(bmp,x,y) = = 0)
      {
        putpixel(bmp, x, y, color);
        rest(5);
      }
      else
      {
        stop = 1;
        circle(bmp, x, y, 5, 7);
      }
    }
}

int main(void)
{
    int x1,y1,x2,y2;
    int red,green,blue,color;
    long n;

    //initialize Allegro
    allegro_init();

    install_timer();
    srand(time(NULL));

    //initialize the keyboard
    install_keyboard();

    //initialize video mode to 640x480
    int ret = set_gfx_mode(GFX_AUTODETECT_WINDOWED, 640, 480, 0, 0);
    if (ret != 0) {
       allegro_message(allegro_error);
       return 1;
   }
  //display screen resolution
  textprintf_ex(screen, font, 0, 0, 15, -1,
      "DoLines Program - %dx%d - Press ESC to quit",
      SCREEN_W, SCREEN_H);

   //wait for keypress
   while(!key[KEY_ESC])
   {
      //set a random location
      x1 = 10 + rand() % (SCREEN_W-20);
      y1 = 10 + rand() % (SCREEN_H-20);
      x2 = 10 + rand() % (SCREEN_W-20);
      y2 = 10 + rand() % (SCREEN_H-20);

      //set a random color
      red = rand() % 255;
      green = rand() % 255;
      blue = rand() % 255;
      color = makecol(red,green,blue);

      //draw the line using the callback function
      stop = 0;
      do_line(screen,x1,y1,x2,y2,color,*doline);

      rest(200);
   }

 //end program
 allegro_exit();
 return 0;
}
END_OF_MAIN()
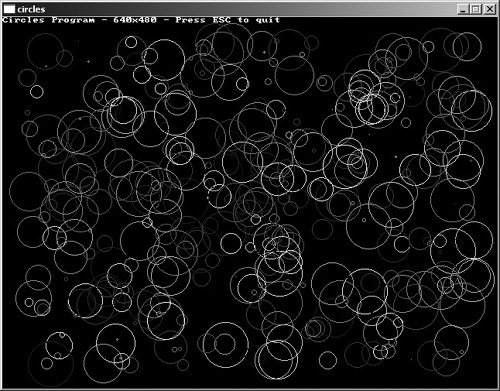
Allegro also provides functions for drawing circles and ellipses, as you will see. The circle-drawing function is called circle, surprisingly enough. This function takes a set of parameters very similar to those you have seen already—the destination bitmap, x, y, the radius, and the color.
The circle function has this declaration:
void circle(BITMAP *bmp, int x, int y, int radius, int color)
To demonstrate, the Circles program draws random circles on the screen, as shown in Figure 3.16.
#include <stdlib.h>
#include <allegro.h>

int main(void)
{
    int x,y,radius;
    int red,green,blue,color;

    //initialize some stuff
    allegro_init();
    install_keyboard();
    install_timer();
    srand(time(NULL));

    //initialize video mode to 640x480
    int ret = set_gfx_mode(GFX_AUTODETECT_WINDOWED, 640, 480, 0, 0);
    if (ret != 0) {
         allegro_message(allegro_error);
         return 1;
     }

    //display screen resolution
    textprintf_ex(screen, font, 0, 0, 15, -1,
        "Circles Program - %dx%d - Press ESC to quit",
        SCREEN_W, SCREEN_H);

      //wait for keypress
      while(!key[KEY_ESC])
     {
           //set a random location
           x = 30 + rand() % (SCREEN_W-60);
           y = 30 + rand() % (SCREEN_H-60);
           radius = rand() % 30;

          //set a random color
          red = rand() % 255;
          green = rand() % 255;
          blue = rand() % 255;
          color = makecol(red,green,blue);

          //draw the circle
          circle(screen, x, y, radius, color);

          rest(25);
     }

     //end program
     allegro_exit();
     return 0;
}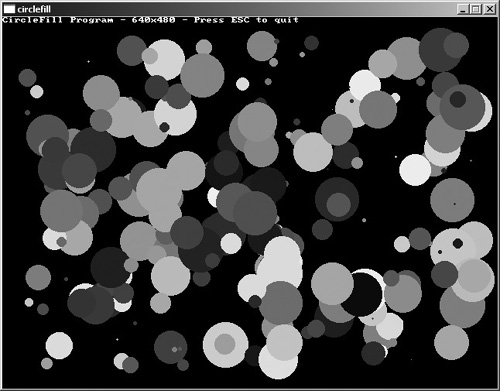
END_OF_MAIN()The hollow circle function is interesting, but really seeing the full effect of circles requires the circlefill function:
void circlefill(BITMAP *bmp, int x, int y, int radius, int color)
The following program (shown in Figure 3.17) demonstrates the solid-filled circle function.
//display screen resolution
textprintf_ex(screen, font, 0, 0, 15, -1,
    "CircleFill Program - %dx%d - Press ESC to quit",
    SCREEN_W, SCREEN_H);

//wait for keypress
while(!key[KEY_ESC])
{
    //set a random location
    x = 30 + rand() % (SCREEN_W-60);
    y = 30 + rand() % (SCREEN_H-60);
    radius = rand() % 30;

    //set a random color
    red = rand() % 255;
    green = rand() % 255;
    blue = rand() % 255;
    color = makecol(red,green,blue);

//draw the filled circle
circlefill(screen, x, y, radius, color);
   rest(25);
}
The ellipse function is similar to the circle function, although the radius is divided into two parameters—one for the horizontal and another for the vertical—as indicated:
void ellipse(BITMAP *bmp, int x, int y, int rx, int ry, int color)
The Ellipses program draws random ellipses on the screen using two parameters—radiusx and radiusy.
#include <stdlib.h>
#include "allegro.h"

int main(void)
{
    int x,y,radiusx,radiusy;
    int red,green,blue,color;

    //initialize everything
    allegro_init();
    install_keyboard();
    install_timer();
    srand(time(NULL));

    //initialize video mode to 640x480
    int ret = set_gfx_mode(GFX_AUTODETECT_WINDOWED, 640, 480, 0, 0);
    if (ret != 0) {
        allegro_message(allegro_error);
        return 1;
    }

  //display screen resolution
  textprintf_ex(screen, font, 0, 0, 15, -1,
      "Ellipses Program - %dx%d - Press ESC to quit",
      SCREEN_W, SCREEN_H);

    //wait for keypress
    while(!key[KEY_ESC])
    {
        //set a random location
        x = 30 + rand() % (SCREEN_W-60);
        y = 30 + rand() % (SCREEN_H-60);
        radiusx = rand() % 30;
        radiusy = rand() % 30;

        //set a random color
        red = rand() % 255;
        green = rand() % 255;
        blue = rand() % 255;
        color = makecol(red,green,blue);

        //draw the ellipse
        ellipse(screen, x, y, radiusx, radiusy, color);

        rest(25);
    }

    //end program
    allegro_exit();
    return 0;
}
END_OF_MAIN()You can draw filled ellipses using the ellipsefill function, which takes the same parameters as the ellipse function but simply renders each ellipse with a solid filled color:
void ellipsefill(BITMAP *bmp, int x, int y, int rx, int ry, int color)
Figure 3.18 shows the output from the EllipseFill program.

//display screen resolution
textprintf_ex(screen, font, 0, 0, 15, -1,
    "EllipseFill Program - %dx%d - Press ESC to quit",
    SCREEN_W, SCREEN_H);

//wait for keypress
while(!key[KEY_ESC])
{
    //set a random location
    x = 30 + rand() % (SCREEN_W-60);
    y = 30 + rand() % (SCREEN_H-60);
    radiusx = rand() % 30;
    radiusy = rand() % 30;

    //set a random color
    red = rand() % 255;
    green = rand() % 255;
    blue = rand() % 255;
    color = makecol(red,green,blue);

    //draw the filled ellipse
    ellipsefill(screen, x, y, radiusx, radiusy, color);

    rest(25);
}Surprisingly enough, Allegro provides a circle-drawing callback function just as it did with the line callback function. The only difference is, this one uses the do_circle function:
void do_circle(BITMAP *bmp, int x, int y, int radius, int d)
To use do_circle, you must declare a callback function with the format void docircle(BITMAP *bmp, int x, int y, int d) and pass a pointer to this function to do_circle, as the following sample program demonstrates.
#include <stdlib.h>
#include "allegro.h"

void docircle(BITMAP *bmp, int x, int y, int color)
{
   putpixel(bmp, x, y, color);
   putpixel(bmp, x+1, y+1, color);
   rest(1);
}

int main(void)
{
    int x,y,radius;
    int red,green,blue,color;

    //initialize Allegro
    allegro_init();

    //initialize the keyboard
    install_keyboard();
    install_timer();

    //initialize video mode to 640x480
    int ret = set_gfx_mode(GFX_AUTODETECT_WINDOWED, 640, 480, 0, 0);
    if (ret != 0) {
       allegro_message(allegro_error);
       return 1;
    }

    //display screen resolution
    textprintf_ex(screen, font, 0, 0, 15, -1,
        "DoCircles Program - %dx%d - Press ESC to quit",
        SCREEN_W, SCREEN_H);

    //wait for keypress
    while(!key[KEY_ESC])
    {
       //set a random location
       x = 40 + rand() % (SCREEN_W-80);
       y = 40 + rand() % (SCREEN_H-80);
       radius = rand() % 40;

       //set a random color
       red = rand() % 255;
       green = rand() % 255;
       blue = rand() % 255;
       color = makecol(red,green,blue);

     //draw the circle one pixel at a time
     do_circle(screen, x, y, radius, color, *docircle);
    }

  //end program
  allegro_exit();
  return 0;
}
END_OF_MAIN()I have now covered all of the basic graphics primitives built into Allegro except for three, which might be thought of as the most important ones, at least where a game is involved. The spline function is valuable for creating dynamic trajectories for objects in a game that need various curving paths. Triangles and other types of polygons are the basis for 3D graphics, so I will show you how to draw them.
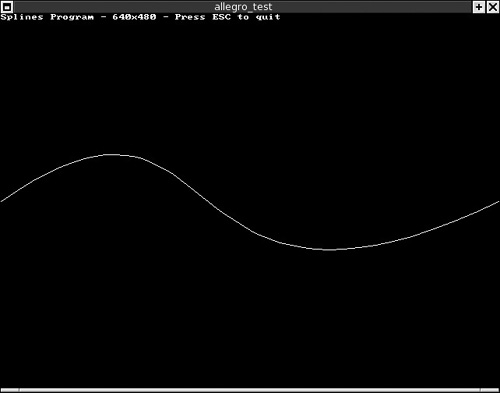
The spline function draws a set of curves based on a set of four input points stored in an array. The function calculates a smooth curve from the first set of points, through the second and third, toward the fourth point:
void spline(BITMAP *bmp, const int points[8], int color)
The Splines program draws an animated spline based on shifting points, as shown in Figure 3.19.
#include <stdlib.h>
#include <allegro.h>

int main(void)
{
    int red,green,blue,color;

    //initialize Allegro
    allegro_init();
    install_keyboard();
    install_timer();

    //initialize video mode to 640x480
    int ret = set_gfx_mode(GFX_AUTODETECT_WINDOWED, 640, 480, 0, 0);
    if (ret != 0) {
        allegro_message(allegro_error);
        return 1;
  }

    //display screen resolution
    textprintf_ex(screen, font, 0, 0, 15, -1,
        "Splines Program - %dx%d - Press ESC to quit",
        SCREEN_W, SCREEN_H);

    int points[8] = {0,240,300,0,200,0,639,240};
    int y1 = 0;
    int y2 = SCREEN_H;
    int dir1 = 10;
    int dir2 = -10;

    //wait for keypress
    while(!key[KEY_ESC])
    {
       //move the first spline point up and down
       y1 += dir1;
       if (y1 > SCREEN_H)
       {
           dir1 = -10;
       }
       if (y1 < 0)
           dir1 = 10;
       points [3] = y1;

       //move the second spline point up and down
       y2 += dir2;
       if (y2++ > SCREEN_H)

       {
          dir2 = -10;
       }
       if (y2 < 0)
           dir2 = 10;
      points[5] = y2;

      //draw the spline, pause, then erase it
      spline(screen, points, 15);
      rest(30);
      spline(screen, points, 0);
   }

   //end program
   allegro_exit();
   return 0;
}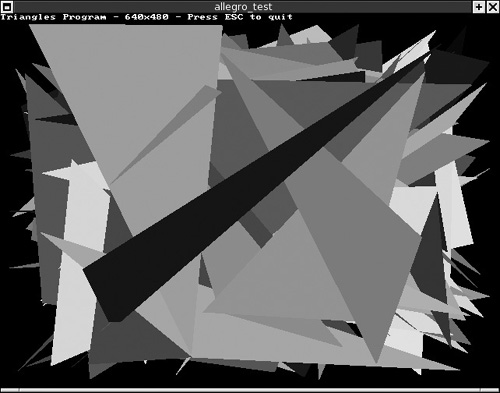
END_OF_MAIN()You can draw triangles using the triangle function, which takes three (x,y) points and a color parameter:
void triangle(BITMAP *bmp, int x1, y1, x2, y2, x3, y3, int color)
The Triangles program (shown in Figure 3.20) draws random triangles on the screen.
#include <allegro.h>

int main(void)
{
    int x1,y1,x2,y2,x3,y3;
    int red,green,blue,color;

    //initialize Allegro
    allegro_init();

    //initialize the keyboard
    install_keyboard();
    install_timer();

    //initialize video mode to 640x480
    int ret = set_gfx_mode(GFX_AUTODETECT_WINDOWED, 640, 480, 0, 0);
    if (ret != 0) {
        allegro_message(allegro_error);
        return 1;
    }

    //display screen resolution
    textprintf_ex(screen, font, 0, 0, 15, -1,
        "Triangles Program - %dx%d - Press ESC to quit",
        SCREEN_W, SCREEN_H);

    //wait for keypress
    while(!key[KEY_ESC])
    {
       //set a random location
       x1 = 10 + rand() % (SCREEN_W-20);
       y1 = 10 + rand() % (SCREEN_H-20);
       x2 = 10 + rand() % (SCREEN_W-20);
       y2 = 10 + rand() % (SCREEN_H-20);
       x3 = 10 + rand() % (SCREEN_W-20);
       y3 = 10 + rand() % (SCREEN_H-20);

       //set a random color
       red = rand() % 255;
       green = rand() % 255;
       blue = rand() % 255;
       color = makecol(red,green,blue);

       //draw the triangle
       triangle(screen,x1,y1,x2,y2,x3,y3,color);

       rest(100);
     }

     //end program
     allegro_exit();
     return 0;
}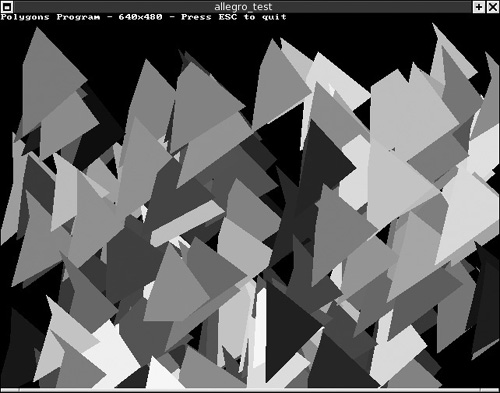
END_OF_MAIN()You have already seen polygons in action with the Triangles program, because any geometric shape with three or more points comprises a polygon. To draw polygons in Allegro, you use the polygon function with a pointer to an array of points:
void polygon(BITMAP *bmp, int vertices, const int *points, int color)
In most cases you will want to simply use the triangle function, but in unusual cases when you need to draw polygons with more than three points, this function can be helpful (although it is more difficult to set up because the points array must be set up prior to calling the polygon function). The best way to demonstrate this function is with a sample program that sets up the points array and calls the polygon function (see Figure 3.21).
There is more to the subject of polygon rendering than I have time for in this chapter. Rest assured, you will have several more opportunities in later chapters to exercise the polygon functions built into Allegro.
#include <stdlib.h>
#include <allegro.h>

int main(void)
{
    int vertices[8];
    int red,green,blue,color;
    //initialize everything
    allegro_init();
    install_keyboard();
    install_timer();
    srand(time(NULL));

    //initialize video mode to 640x480
    int ret = set_gfx_mode(GFX_AUTODETECT_WINDOWED, 640, 480, 0, 0);
    if (ret != 0) {
        allegro_message(allegro_error);
        return 1;
    }

    //display screen resolution
    textprintf_ex(screen, font, 0, 0, 15, -1,
        "Polygons Program - %dx%d - Press ESC to quit",
        SCREEN_W, SCREEN_H);

    //wait for keypress
    while(!key[KEY_ESC])
{
       //set a random location
       vertices[0] = 10 + rand() % (SCREEN_W-20);
       vertices[1] = 10 + rand() % (SCREEN_H-20);
       vertices[2] = vertices[0] + (rand() % 30)+50;
       vertices[3] = vertices[1] + (rand() % 30)+50;
       vertices[4] = vertices[2] + (rand() % 30)-100;
       vertices[5] = vertices[3] + (rand() % 30)+50;
       vertices[6] = vertices[4]+ (rand() % 30);
       vertices[7] = vertices[5] + (rand() % 30)-100;

       //set a random color
       red = rand() % 255;
       green = rand() % 255;
       blue = rand() % 255;
       color = makecol(red,green,blue);

       //draw the polygon
       polygon(screen,4,vertices,color);

   rest(50);
}
     //end program
     allegro_exit();
     return 0;
}
END_OF_MAIN()The next function I want to introduce to you in this chapter is floodfill, which fills in a region on the destination bitmap (which can be the screen) with the color of your choice:
void floodfill(BITMAP *bmp, int x, int y, int color)
To demonstrate, the FloodFill program draws a circle on the screen and fills it in using the floodfill function while the “ball” is moving around on the screen. I will be the first to admit that this program could have simply called the circlefill function (which is very likely faster, too), but the object of this program is to demonstrate floodfill with a basic circle shape that has historically been difficult to fill efficiently (see Figure 3.22).
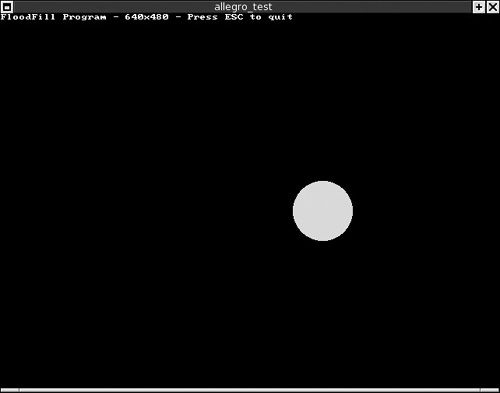
Figure 3.22. The FloodFill program moves a filled circle around on the screen. (The Linux version is shown.)
#include <stdlib.h>
#include <allegro.h>
int main(void)
{
    int x = 100, y = 100;
    int xdir = 10, ydir = 10;
    int red,green,blue,color;
    int radius = 50;

    //initialize some things
    allegro_init();
    install_keyboard();
    install_timer();

    //initialize video mode to 640x480
    int ret = set_gfx_mode(GFX_AUTODETECT_WINDOWED, 640, 480, 0, 0);
    if (ret != 0) {
        allegro_message(allegro_error);
        return 1;
    }

    //display screen resolution
    textprintf_ex(screen, font, 0, 0, 15, -1,
        "FloodFill Program - %dx%d - Press ESC to quit",
        SCREEN_W, SCREEN_H);

    //wait for keypress
    while(!key[KEY_ESC])
    {
        //update the x position, keep within screen
        x += xdir;
        if (x > SCREEN_W-radius)
        {
           xdir = -10;
           radius = 10 + rand() % 40;
           x = SCREEN_W-radius;
      }
      if (x < radius)
      {
          xdir = 10;
          radius = 10 + rand() % 40;
          x = radius;
      }

      //update the y position, keep within screen
      y += ydir;
      if (y > SCREEN_H-radius)
      {
          ydir = -10;
          radius = 10 + rand() % 40;
          y = SCREEN_H-radius;
      }
      if (y < radius+20)
      {
          ydir = 10;
          radius = 10 + rand() % 40;
          y = radius+20;
      }

      //set a random color
      red = rand() % 255;
      green = rand() % 255;
      blue = rand() % 255;
      color = makecol(red,green,blue);

      //draw the circle, pause, then erase it
      circle(screen, x, y, radius, color);
      floodfill(screen, x, y, color);
      rest(20);
      rectfill(screen, x-radius, y-radius, x+radius, y+radius, 0);
     }

     //end program
     allegro_exit();
     return 0;
   }
END_OF_MAIN()Allegro provides numerous useful text output functions for drawing on a console or graphical display. Allegro's text functions support plug-in fonts that you can create with a utility bundled with Allegro, but I'll reserve that discussion for later. For now I just want to give you a heads-up on the basic text output functions included with Allegro (some of which you have already used).
There are four primary text output functions in Allegro. The text_mode function sets text output to draw with an opaque or transparent background. Passing a value of –1 will set the background to transparent, while passing any other value will set the background to a specific color. Here is what the function looks like:
int text_mode(int mode)
Although it will still compile, the text_mode function is now obsolete because the text transparency has been moved to a parameter in the text output functions.
The textout function is the basic text output function for Allegro. The newest version is actually called textout_ex, and it incorporates the text transparency option. The value of –1 draws text transparently over the background, while a value of 0 draws the text with an opaque background. It has the syntax:
void textout_ex(BITMAP *bmp, const FONT *f, const char *s, int x, y,
         int color, int bg)
The BITMAP *bmp parameter specifies the destination bitmap. (You can use screen to output directly to the screen.) FONT *f specifies the font, which is just font if you are using the default font. const char *s is the text to display; int x, y is the position on the screen; and int color specifies the color of the font to use. (Passing –1 will use the colors built into any custom font.) Here is an example usage for textout_ex:
textout_ex(screen, font, "Hello World!", 1, 1, 10, -1)
This line draws directly on the screen using the default font at the position (1,1), using the color 10 (which can also be a custom color with makecol).
The other three text output functions are based on textout but provide justification. The textout_centre function has the same parameter list as textout, but the position is based on the center of the text rather than at the left.
void textout_centre_ex(BITMAP *bmp, const FONT *f, const char *s,
         int x, y, color, int bg)
The textout_right function is also similar to textout, but the text position (x,y) specifies the right edge of the text rather than the left or center.
void textout_right_ex(BITMAP *bmp, const FONT *f, const char *s,
         int x, y, color, int bg)
A slightly different take on the matter of text output is textout_justify, which includes two X coordinates—one for the left edge of the text and one for the right edge—along with the Y position. In effect, this function tries to draw the text between the two points. You want to set the diff parameter to a fairly high value for justification to work; otherwise, it is automatically left-justified. This really is more useful when you are using custom fonts.
void textout_justify_ex(BITMAP *bmp, const FONT *f, const char *s,
int x1, int x2, int y, int diff, int color, int bg)Allegro provides several very useful text output functions that mimic the standard C printf function, providing the capability of formatting the text and displaying variables. The base function is textprintf, and it looks like this:
void textprintf_ex(BITMAP *bmp, const FONT *f, int x, y, color, int bg,
         const char *fmt, ...);
The syntax for textprintf is slightly different from the syntax for the textout functions. As you can see, textprintf has the character string passed as the last parameter, with support for numerous additional parameters. If you are familiar with printf (and you certainly should be if you call yourself a C programmer!), then you should feel right at home with textprintf because it supports the usual %i (integer), %f (float), %s (string), and other formatting elements. Here is an example:
float ver = 4.9;
textprintf_ex(screen, font, 0, 100, 12, -1, "Version %.2f", ver)
This code displays:
Version 4.90
There are three additional functions that share functionality with textprintf. The textprintf_centre produces the same output as textprintf, but the (x,y) position is based on the center of the text output (comparable to textout_centre). Here is the syntax:
void textprintf_centre_ex(BITMAP *bmp, const FONT *f, int x, y, color, int bg,
         const char *fmt, ...)
As you might have guessed, there is also a textprintf_right, which looks like this:
void textprintf_right_ex(BITMAP *bmp, const FONT *f, int x, y, color, int bg,
         const char *fmt, ...)
Likewise, textprintf_justify mimics the functionality of textout_justify but adds the formatting capabilities. Here is the function:
void textprintf_justify(BITMAP *bmp, const FONT *f, int x1, int x2,
int y, int diff, int color, const char *fmt, ...)To put these functions to use, let's write a short demonstration program (see Figure 3.23). Open your favorite IDE (I am using Dev-C++ in Windows and KDevelop in Linux) and create a new project called TextOutput. Remember to add the reference “-lalleg” to the linker options to incorporate the Allegro library file.

#include <allegro.h>

int main(void)
{
    //initialize Allegro
    allegro_init();
    set_gfx_mode(GFX_AUTODETECT_WINDOWED, 640, 480, 0, 0);
    install_keyboard();

    //test the text output functions
    textout_ex(screen, font, "This was displayed by textout", 0, 10, 15, -1);
    textout_centre_ex(screen, font, "Sample of textout_centre function",
        SCREEN_W/2, 50, 14, -1);

    textout_justify_ex(screen, font, "Sample output by textout_justify",
        SCREEN_W/2 - 200, SCREEN_W/2 + 200, 100, 200, 13, -1);

    textprintf_ex(screen, font, 0, 150, 12, -1, "Screen resolution = %i x %i",
        SCREEN_W, SCREEN_H);

    textprintf_centre_ex(screen, font, SCREEN_W/2, 200, 10, -1,
        "%s, %s!", "Hello", "World");

    textprintf_justify(screen, font, SCREEN_W/2 - 200,
        SCREEN_W/2 + 200, 250, 400, 7, "A L L E G R O !");


   //main loop
   while(! key[KEY_ESC]) { }

   allegro_exit();
   return 0;
}
END_OF_MAIN()To round out this chapter I've written one final vector graphics program that I think you will enjoy. This program is called Particles and is fun to watch. This program creates a large number of “particles” that are represented by filled circles, and these particles all exert a gravitational pull on all of the others, causing them to orbit about one another. Figure 3.24 shows the output from the program.
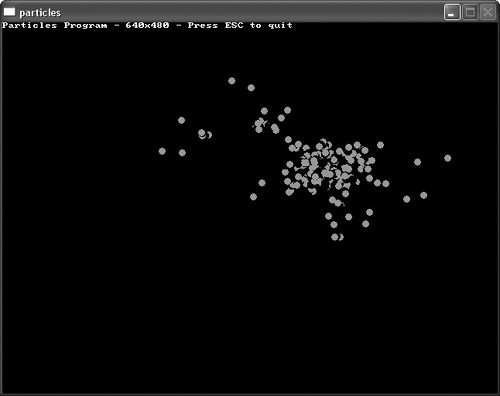
The mechanics of the program are a bit too much for this early in the text, and the focus really is on vector graphics, not mass and velocity calculations. And it is, in any event, more a bonus program for the chapter than anything I want to study in detail. The program is quite fun to watch, and the figure definitely doesn't do it justice. Imagine the little particles flowing around each other, almost like liquid, and that begins to describe what it looks like. If you have a fast PC, try increasing the particle count for an even more spectacular result.
If you want to see an even more interesting program that uses the same sort of code, open up the project on the CD-ROM called StarBuilder. This is a bonus program built upon the same principles as this Particles program, only on a much larger scale.
///////////////////////////////////////////////////////////////////
// Game Programming All In One, Third Edition
// Chapter 3 - Particles Program
///////////////////////////////////////////////////////////////////

#include <math.h>
#include <allegro.h>

#define NUM 200

//particle structure
struct particle
{
    double mass;
    double x, y;
    long oldX, oldY;
    long xp;
    long yp;
    double ax;
    double ay;
    double vx;
    double vy;

}p[NUM];

int CX, CY;

void resetparticle(int n);
void updateparticles();
void resetall();


void attract(struct particle *A, struct particle *B)
{
    double distance;
    double dist, distX, distY;
    double transX, transY;

    //increase position by velocity value
    A->x += A->vx;
    A->y += A->vy;

    //calculate distance between particles
    distX = A->x - B->x;
    distY = A->y - B->y;
    dist = distX * distX + distY * distY;
    if (dist != 0)
        distance = 1 / dist;
    else
        distance = 0;

    transX = distX * distance;
    transY = distY * distance;

    //acceleration = mass * distance
    A->ax = -1 * B->mass * transX;
    A->ay = -1 * B->mass * transY;

    //increase velocity by acceleration value
    A->vx += A->ax;
    A->vy += A->ay;

    //scale position to the screen
    A->xp = CX + A->x;// - p[0].x;
    A->yp = CY - A->y;// + p[0].y;

}

void update()
{
    int n;
    int i;

    //erase old particle
    for (n = 0; n < NUM; n++)

    //calculate gravity for each particle
    for (n = 0; n < NUM; n++)
    {
       circlefill(screen, p[n].oldX, p[n].oldY, 5, 0);

       //apply gravity between every particle
       for (i = 0; i < NUM; i++)
       {
           if (i != n)
               attract(&p[n], &p[i]);
       }

       //reset particle if it gets too far away
       if (p[n].xp < -1000 ||
           p[n].xp > 1000 ||
           p[n].yp < -1000 ||
           p[n].yp > 1000)
       {
           resetparticle(n);
       }

       //plot the new particle
       circlefill(screen, p[n].xp, p[n].yp, 4, 7);

       //keep track of the current position
       p[n].oldX = p[n].xp;
       p[n].oldY = p[n].yp;
    }

    //draw the primary particle
    circlefill(screen, p[0].xp, p[0].yp, 5, 15);

}

void resetparticle(int n)
{
    p[n].mass = 0.001;
    p[n].ax = 0;
    p[n].ay = 0;
    p[n].xp = 0;
    p[n].yp = 0;
    p[n].x = rand() % SCREEN_W/4;
    p[n].y = rand() % SCREEN_H/4;
    p[n].vx = 0;
    p[n].vy = 0;
}

void resetall()
{
    int n;
    CX = SCREEN_W / 2;
    CY = SCREEN_H / 2;

    for (n = 0; n < NUM; n++)
         resetparticle(n);
}

int main(void)
{
    int ret;

    //initialize some stuff
    allegro_init();
    install_keyboard();
    install_timer();
    srand(time(NULL));

    //initialize video mode to 640x480
    ret = set_gfx_mode(GFX_AUTODETECT_WINDOWED, 640, 480, 0, 0);
    if (ret != 0) {
        allegro_message(allegro_error);
        return 1;
    }

    resetall();

    //wait for keypress
    while(!key[KEY_ESC])
    {
       update();

       textprintf_ex(screen, font, 0, 0, 15, -1,
           "Particles Program - %dx%d - Press ESC to quit",
           SCREEN_W, SCREEN_H);
     }

     //end program
     allegro_exit();
     return 0;
}
END_OF_MAIN()This chapter has been a romp through the basic graphics functions built into Allegro. You learned to draw pixels, lines, circles, ellipses, and other geometric shapes in various colors, with wireframe and solid-filled color. I also covered text output in Allegro, and you learned about the different text functions and how to use them. This chapter included many sample programs to demonstrate all of the new functionality presented.
You can find the answers to this chapter quiz in Appendix A, “Chapter Quiz Answers.”