
5
Selecting and Transforming
In this chapter, we are going to learn about the Selections and Transform tools. They are the last two buttons found on the Advanced Features tab at the top-left corner of your workspace. The S-shaped icon is for the Selections tool and the arrow-shaped icon is for the Transform tool. Both of these tools are often used together, to demarcate and edit specific parts of your artwork. This allows you to have better control.
The Selections tool is used to isolate the area of interest, and the Transform tool is used to make further modifications to this selected area. In this chapter, we will look closely into how these tools help you to select and adjust sections of your image while leaving the rest untouched.
We’re going to cover the following broad topics in this chapter:
- The Selections tool
- The Transform tool
The Selections tool
As its name suggests, the Selections tool helps you select your working area and confine all edits to that area only. This is helpful when you need to work on a certain region, or a particular element on a layer, without making any changes to the other areas. Tap on the S-shaped icon to invoke the tool, like this:
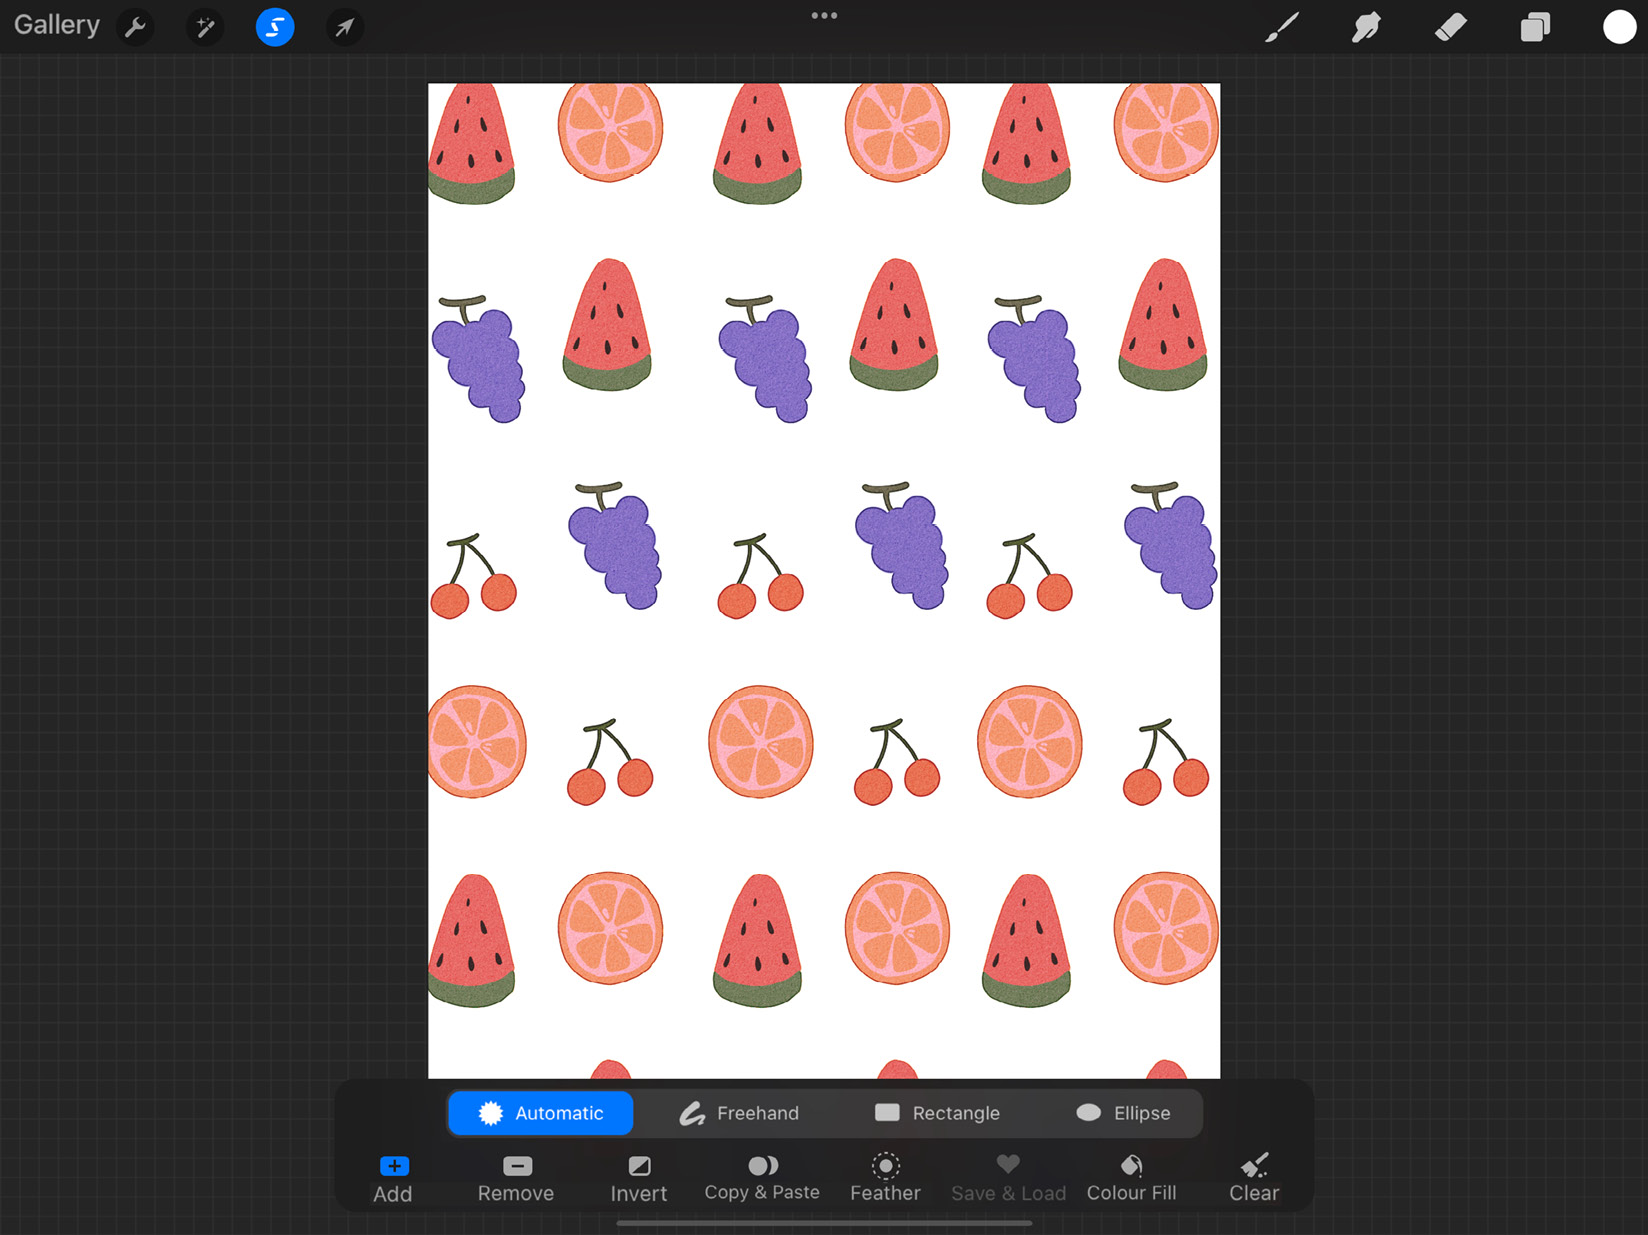
Figure 5.1: Selections tool
You will notice that there are several options available in the Selections tool. Let’s look at them one by one. The first row consists of four options called selection modes, and the second row has secondary tools.
Automatic selection
This option allows you to select chunks of your art with a single tap. It’s especially useful for artworks containing separate shapes. We can select each bunch of grapes with a single tap, as shown here:
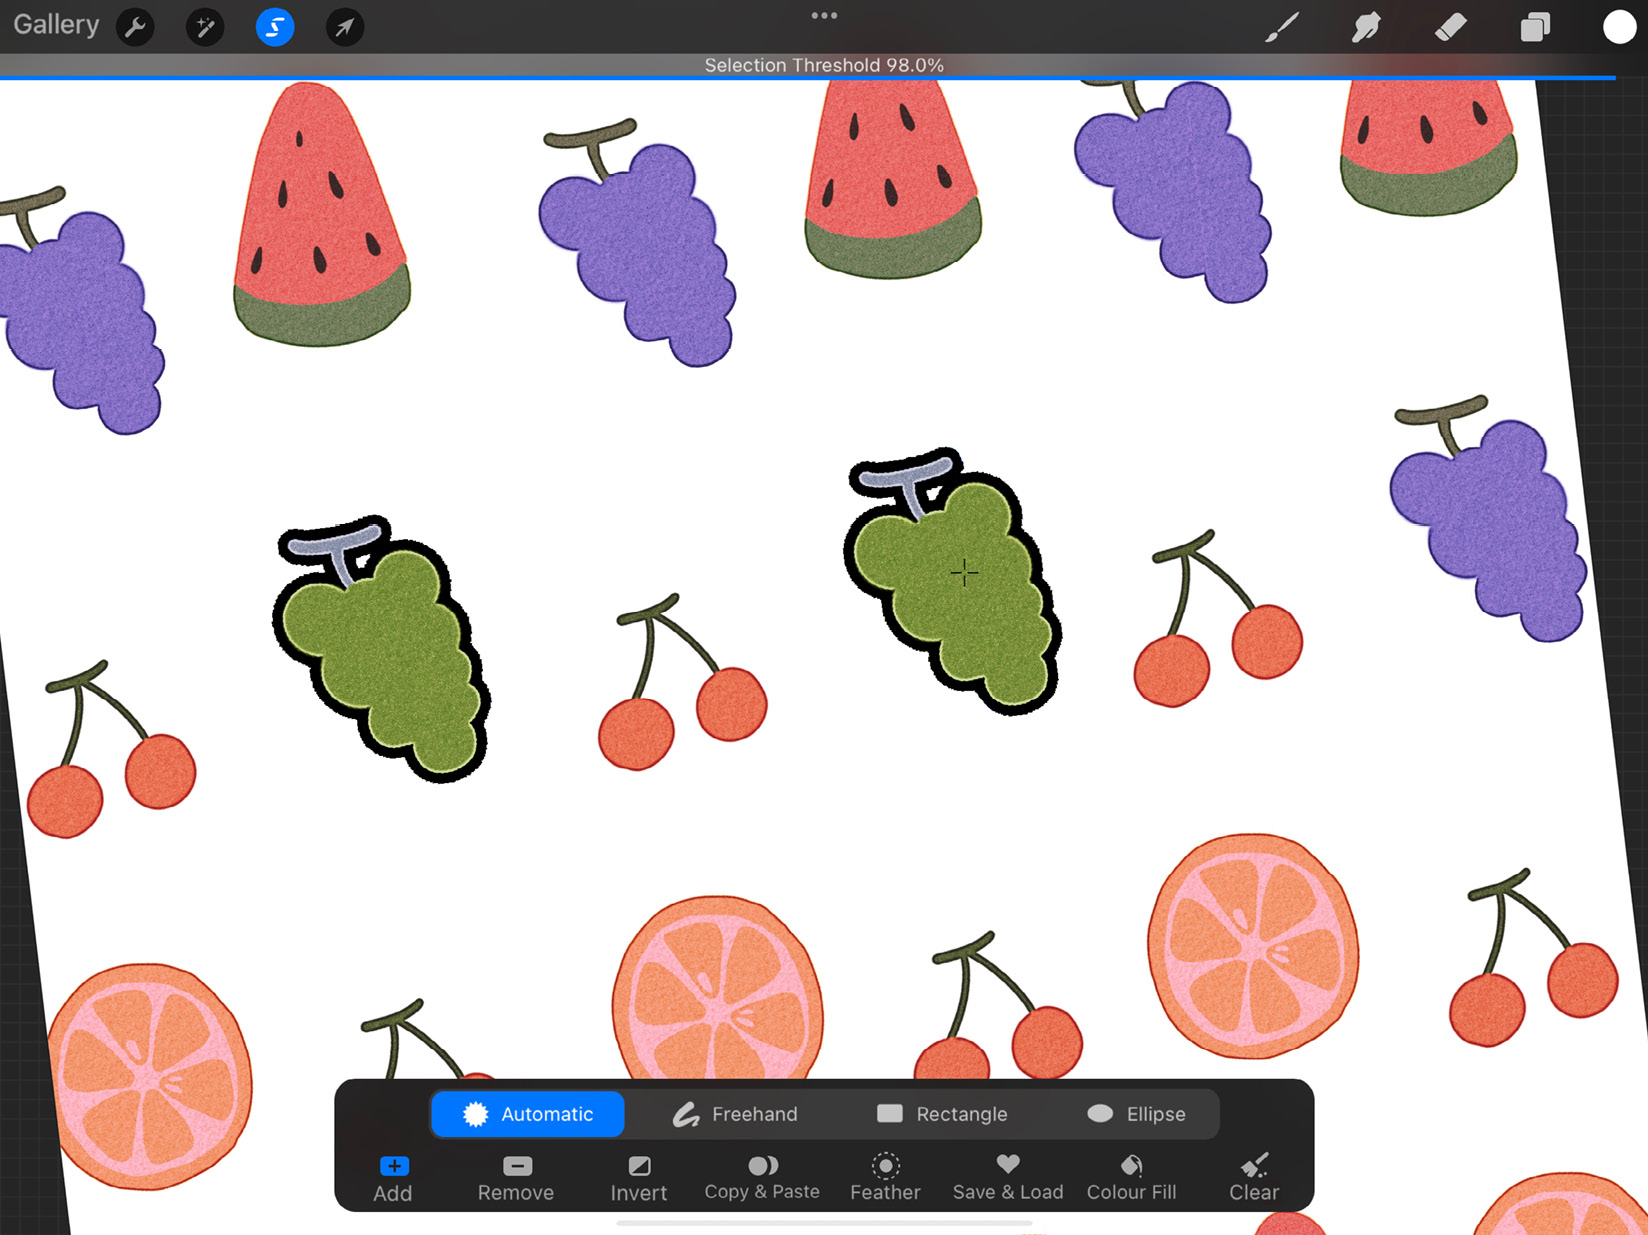
Figure 5.2: Automatic selection
You can change the threshold of the selection. The threshold is a value that can be increased or decreased to include more or fewer pixels surrounding your current selection. It usually takes into account transparency or similar colored pixels.
To activate the selection threshold:
- Tap and hold on a spot you want to select.
- Without lifting your finger/Apple Pencil, slide it to the left or right until you’ve arrived at your preferred threshold.
Freehand selection
Freehand allows you to manually demarcate the area you want to select by drawing around that area by hand. Use this type of selection for more complex shapes. When you start selecting using Freehand, the starting point of the selection appears as a gray circle. When you’re done selecting, you can tap this circle again to create a closed space, which is now a new selection. This is shown in the following two screenshots:
_B16577.jpg)
Figure 5.3: (a) open Freehand selection, (b) closed Freehand selection
An interesting feature of the Freehand selection tool is that you can create polygonal selections by tapping on each corner successively. Each point you tap on gets connected to the previous with a straight line, as shown here:
_B16577.jpg)
Figure 5.4: Polygonal selection using Freehand
In the next section, we will look into shape-specific selection modes.
Rectangle and Ellipse selection
The last two types of selection tools are Rectangle and Ellipse. As their names suggest, they allow you to select rectangular or elliptical areas. This is done by dragging the selection shape into the desired configuration, as shown here:
_B16577.jpg)
Figure 5.5: (a) Rectangle selection, (b) Ellipse selection
These are the four selection modes. You can switch between selection modes while a selection is active to fine-tune your selected area. You can also zoom in and out of your canvas or rotate it.
To fully understand the functions of the Selections tool, we will now look at the rest of the interface, specifically the bottom row of the panel. This consists of the Add, Remove, Invert, Copy & Paste, Feather, Save & Load, Color Fill, and Clear tools. We will cover them in the following sections.
Add
Add is the first button on the second row of the Selections toolbar and is toggled on by default. This button is used to add more area to your selection. It saves you the hassle of selecting the whole area perfectly in one go since you can always go back in and add more. For instance, say we want to add more area to the selection of this lemon in Freehand mode:
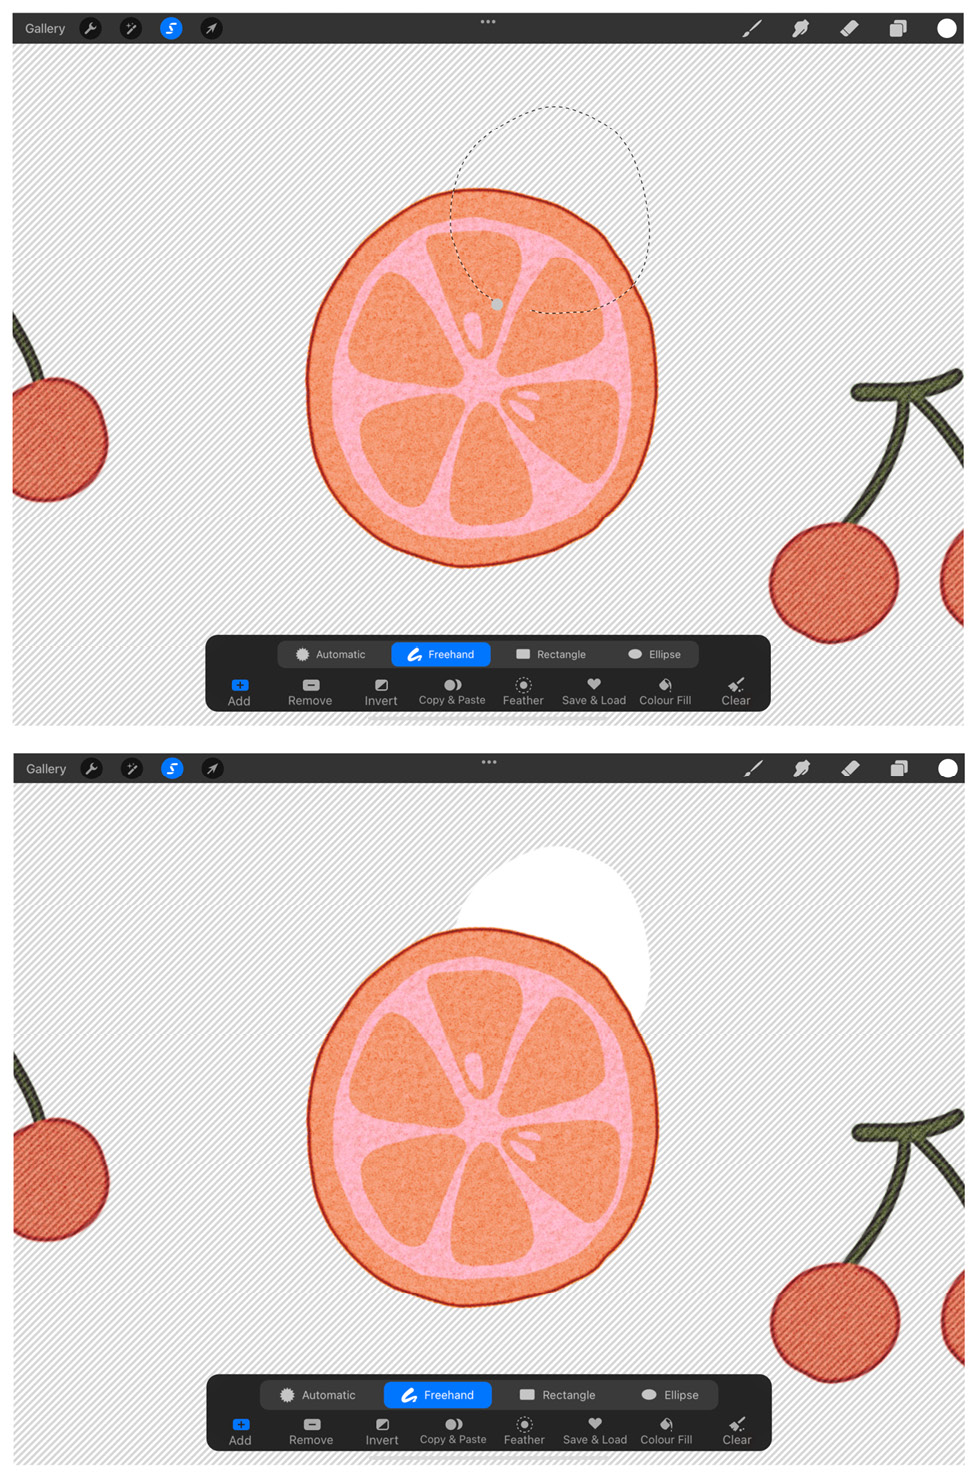
Figure 5.6: (a) Adding area, (b) area added to current selection
Doing this will let you update your selection to include more space.
Add behaves differently depending on which selection mode you’re using. Let’s look into the different ways it can work:
- While using Freehand, tapping Add automatically closes any open selections, and you can continue drawing and selecting more area.
- While using Rectangle and Ellipse, it works similarly. Once you tap Add, you can continue making more shapes and adding to your selection.
- While using the Automatic selection mode, Add is automatically included in its features, so it is grayed out. To add to your selection, simply tap.
Remove
Remove works the same way as Add, but it’s used to “unselect” parts of your existing selection in case you have selected too much area. Remove is also useful for carving out spaces within a selection, or to fine-tune its edges. For instance, say this time you want to deselect a chunk in the middle of this lemon:
_B16577.jpg)
Figure 5.7: (a) Removing area, (b) area removed from the current selection
Evidently, this will let you remove the selection from only the middle of the lemon and make a donut-shaped selection.
Invert
Invert is used to switch the area selected with the rest of the layer area that is not selected. You can switch back and forth as many times as needed. The following screenshots will help demonstrate how this happens:
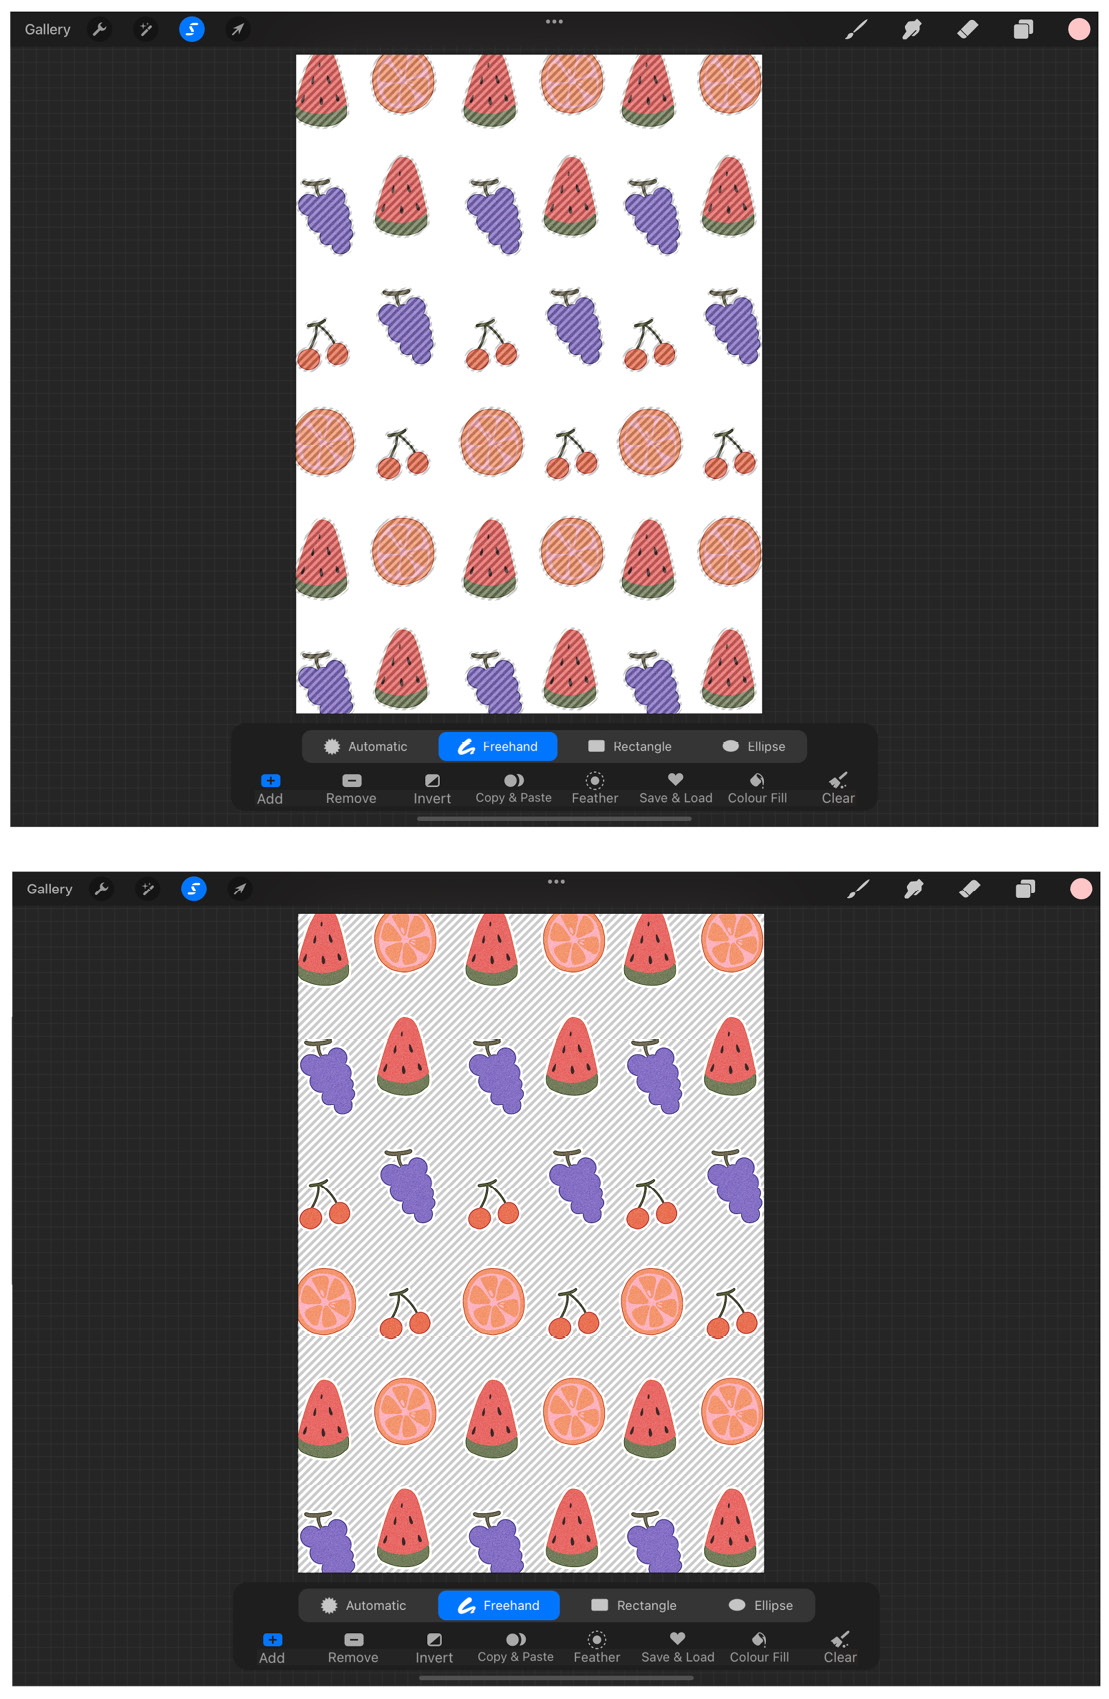
Figure 5.8: (a) Original selection, (b) inverted selection
In the first screenshot, you will notice that the white space surrounding the fruits is selected. Once the selection is inverted in the second screenshot, the fruit shapes will be selected instead. This is how the Invert tool functions.
Copy & Paste
If you’d like to edit your selection on a separate layer, tap Copy & Paste. This will duplicate the selected area onto a new layer above the current one, called From selection, as shown here:

Figure 5.9: (a) Selection copied, (b) duplicated to a new layer
Feather
Feather brings up a slider that lets you blur the edges of your selection. By default, a selection has sharp edges, but you can use this tool to soften those edges as per your needs. This will result in a selection with a diffused border. The degree of diffusion depends on how far along the slider is pushed. The following screenshots demonstrate the use of the Feather tool:
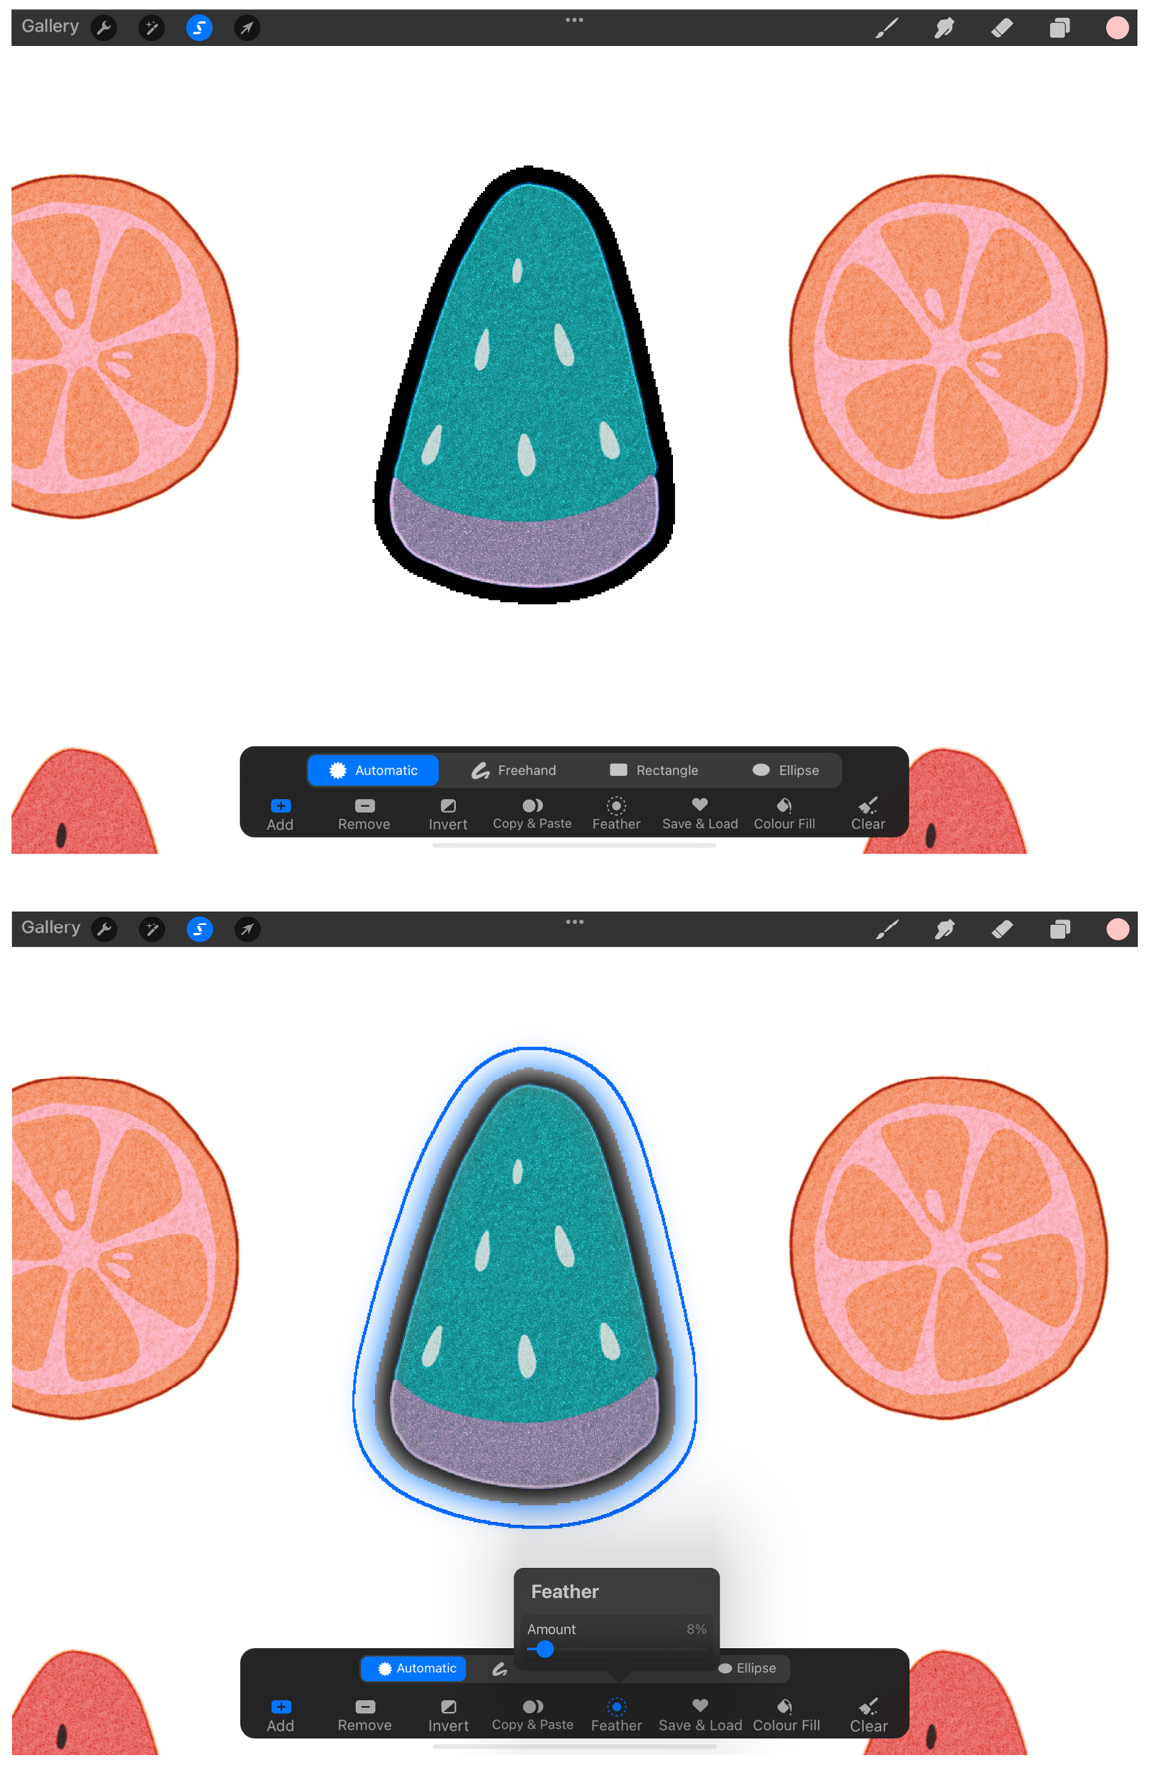
Figure 5.10: (a) Original selection, (b) feathered selection
Save & Load
The heart-shaped icon next to Feather is called Save & Load. This is an extremely useful feature for when you need to make the same selection again and again. This feature allows you to save your commonly used selections, which can be loaded at any time.
To save a selection, follow these steps:
- Make a selection that you want to save for later.
- Tap Save & Load and then tap the + icon to save the selection, as shown here:

Figure 5.11: Saving a selection
To load a saved selection, follow these steps:
- Tap Save & Load. This will bring up the list of all your saved selections, with a thumbnail next to their names showing their shapes.
- Tap on the selection you want, which will activate it.
When you don’t need a saved selection anymore, simply swipe left on it and tap on Delete.
Important Note
Saved selections are only available within the canvas from which they are created. A selection saved in one canvas cannot be loaded in another.
You can also long-press the Selections tool to reload the previous closed selection you had made.
Selection mask visibility
Whenever the Select tool is used to select an area of the canvas, the area outside the selection is overlaid by moving gray diagonal lines, which are usually semi-transparent. This overlay is called the selection mask. It’s possible to adjust how transparent this mask will appear using the Selection mask visibility slider.
To adjust it, follow these steps:
- Tap on Actions, which is the wrench-shaped icon in the top-left corner of the screen.
- Select the Prefs submenu, shown in the following figure.
- Under Prefs, you will spot a slider called Selection mask visibility. Positioning the slider at different points will change the opacity of the selection mask:
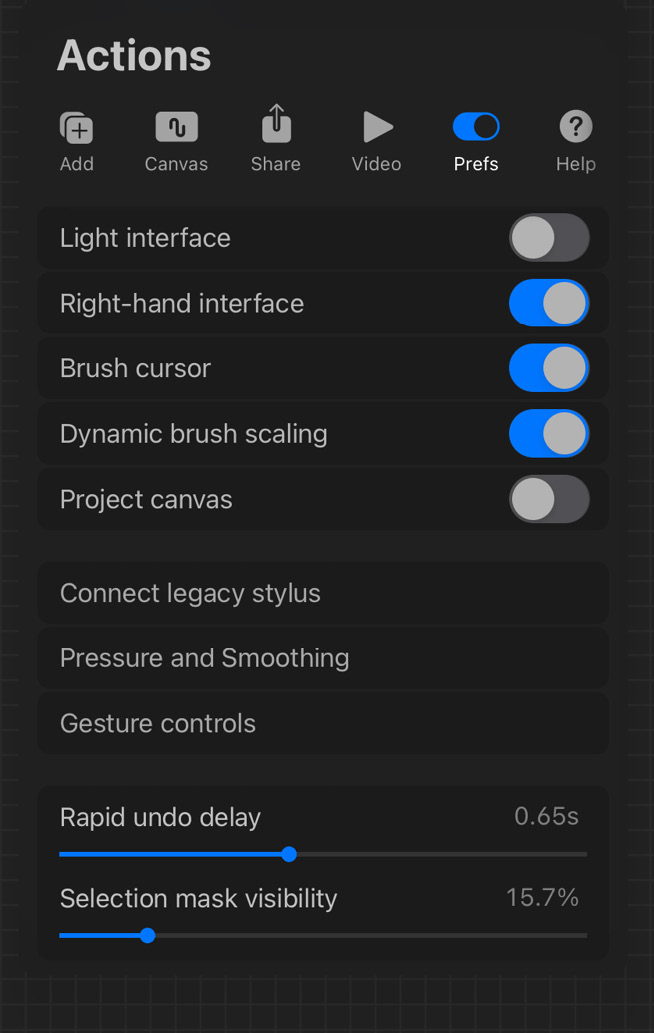
Figure 5.12: Selection mask visibility slider
To learn more about the Actions menu and the Prefs submenu, refer to Chapter 4, Using the Actions Menu.
Selecting layer contents
You can select all the non-transparent pixels on a layer with a single tap, using this feature. To use it, follow these steps:
- Tap on the Layers icon in the top-right-hand corner of the screen. This will open the Layers popover.
- Tap on the layer you want to select the contents of.
- Tap on it once more to bring up the layer options, as shown here:
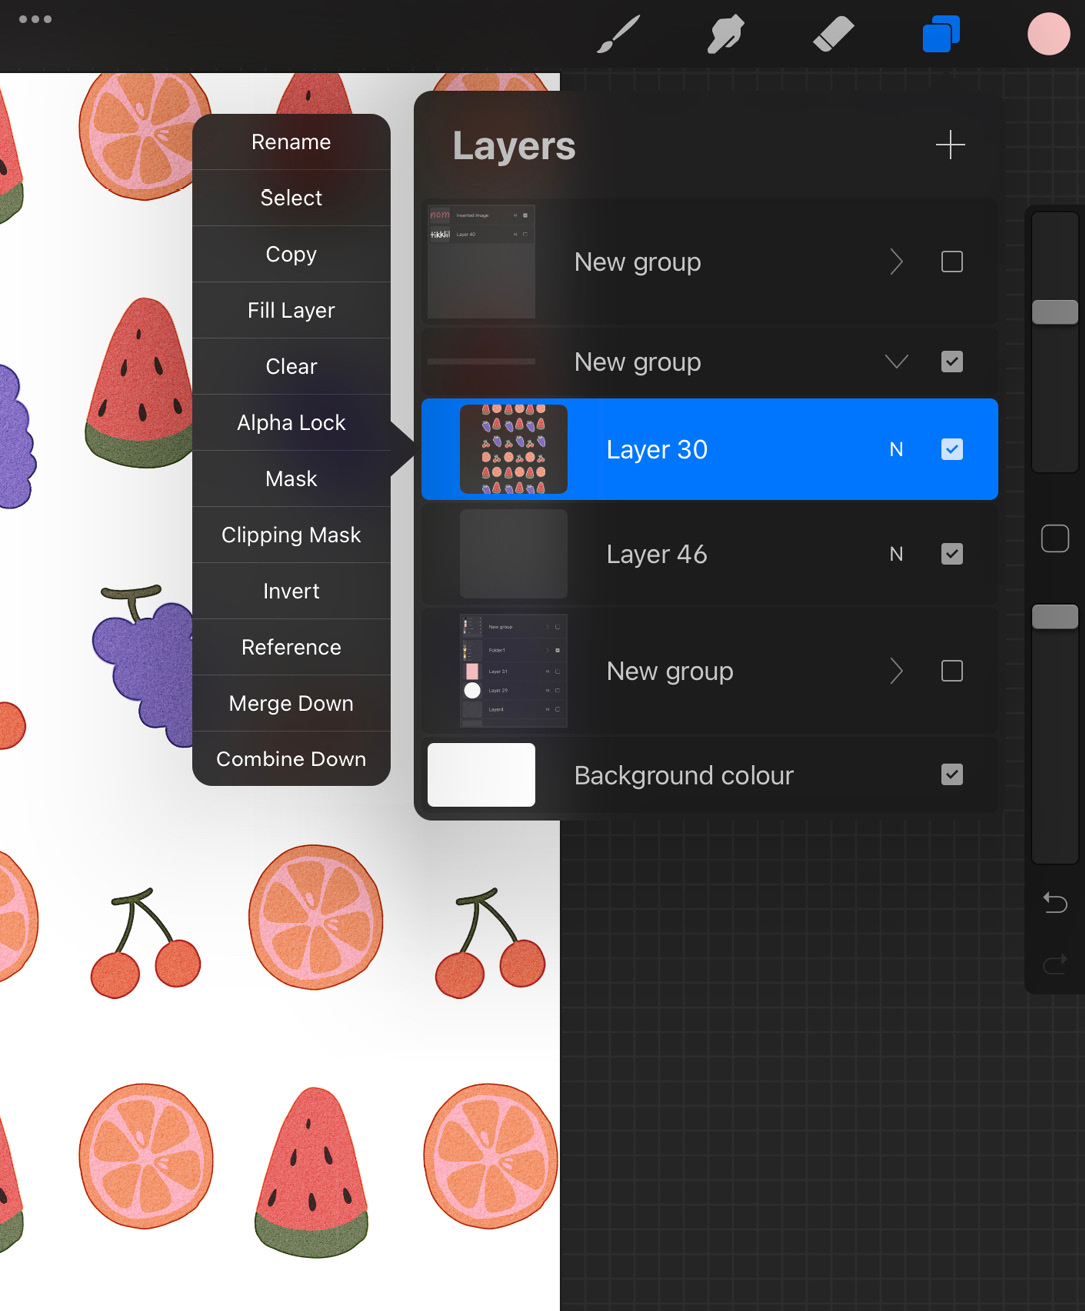
Figure 5.13: Layer options
- Tap on Select.
Doing so will automatically activate selection mode and you can start drawing right away. To make edits to the selection, long-press the Selections button to invoke all its tools. To learn more about using layers and layer options, refer to Chapter 7, Organizing Your Layers.
Finalizing edits
Once you are happy with the edits you have made, simply tap on any other tool, such as Paint or Erase, to exit selection mode and continue drawing.
We have now explored the Selections tool in detail. You learned about the four different selection modes and the array of secondary functions you can use within this tool. Next, we will learn about the Transform tool, which is often used in conjunction with the former.
The Transform tool
To the right of Selections, you will find an arrow-shaped icon. This is the Transform tool. This tool is used to make size adjustments and distortions to your artwork or to reposition parts of it. Although it’s commonly used together with Selections, it can also be used independently. In the following screenshot, you can see the interface of Transform:
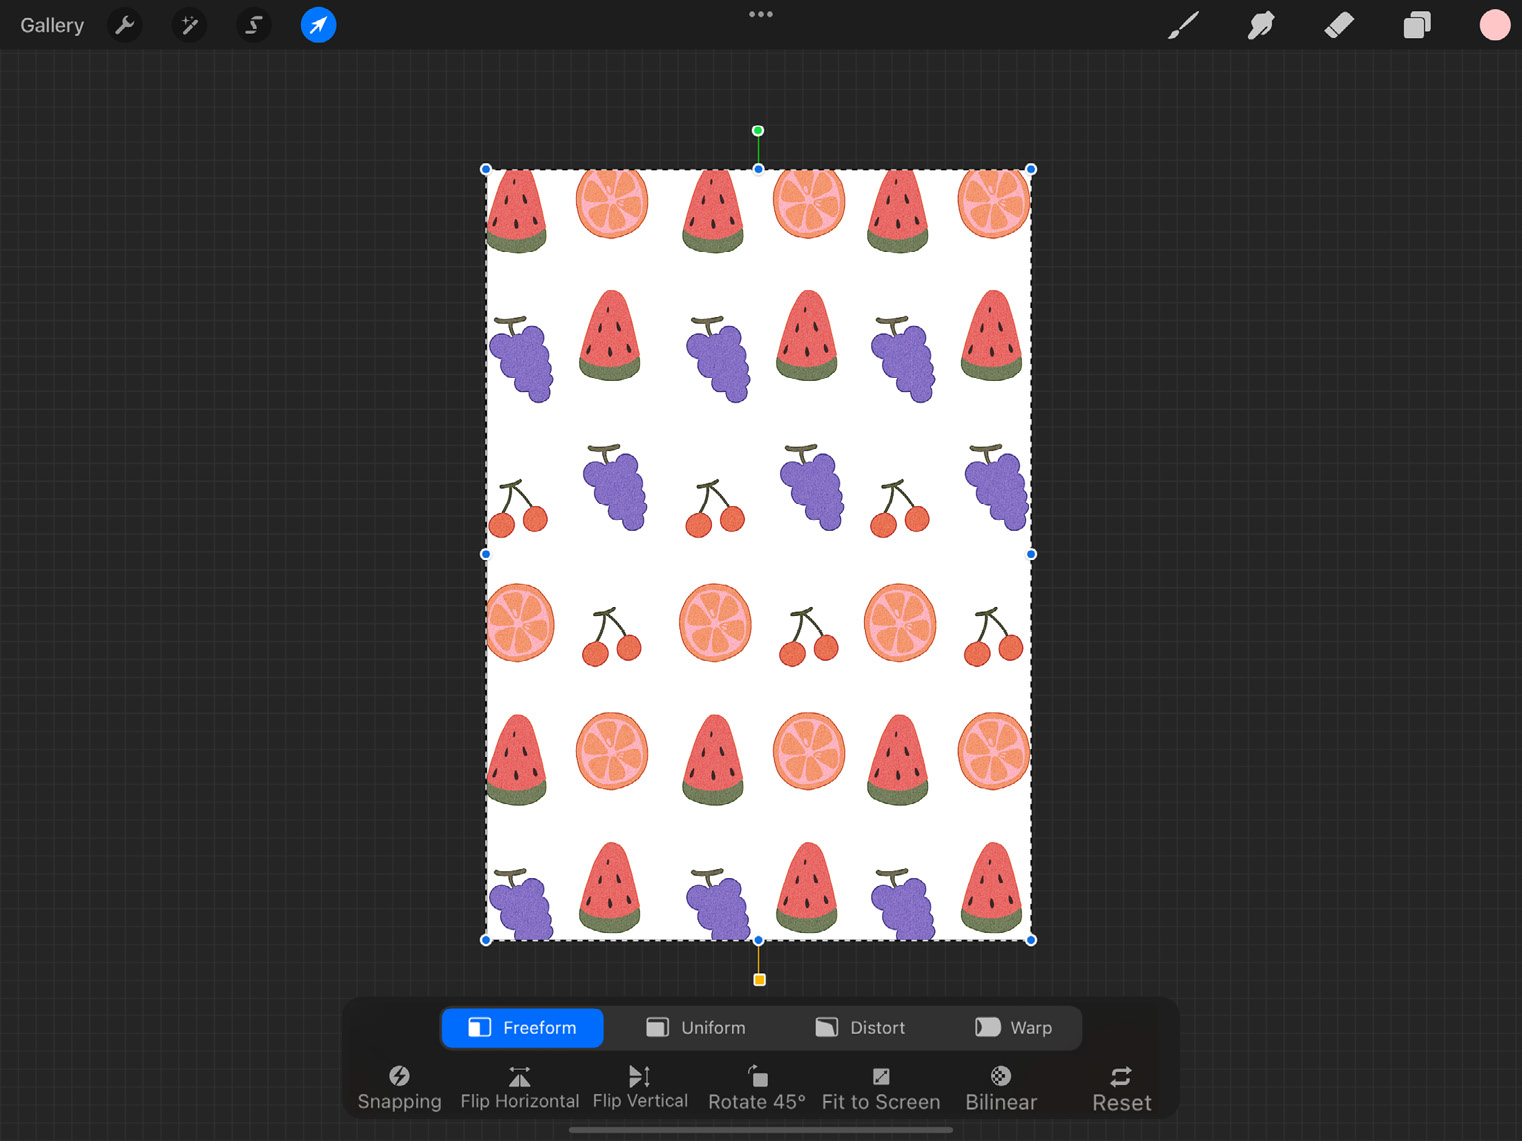
Figure 5.14: Transform tool
As you can see, tapping on the arrow icon automatically detects the contents of the current layer, encloses them in a bounding box, and brings up its toolbar. Alternatively, it’s possible to select a section using the Selections tool and then tap on Transform, in which case, all the transformations will apply to the selected area only.
On the top row of the toolbar, there are four different methods of transforming, and on the bottom row are the sub-options available for each style. Let’s try to understand each element of the Transform tool in more detail.
Interface
Once the Transform button is tapped, the interface of the tool gets activated. There are several elements of this interface that we must note:
- Bounding box:
The selection, or contents of the layer, gets enclosed by a box of moving dashed lines. This is the bounding box. It is the exact height and width of the image being transformed, as shown:
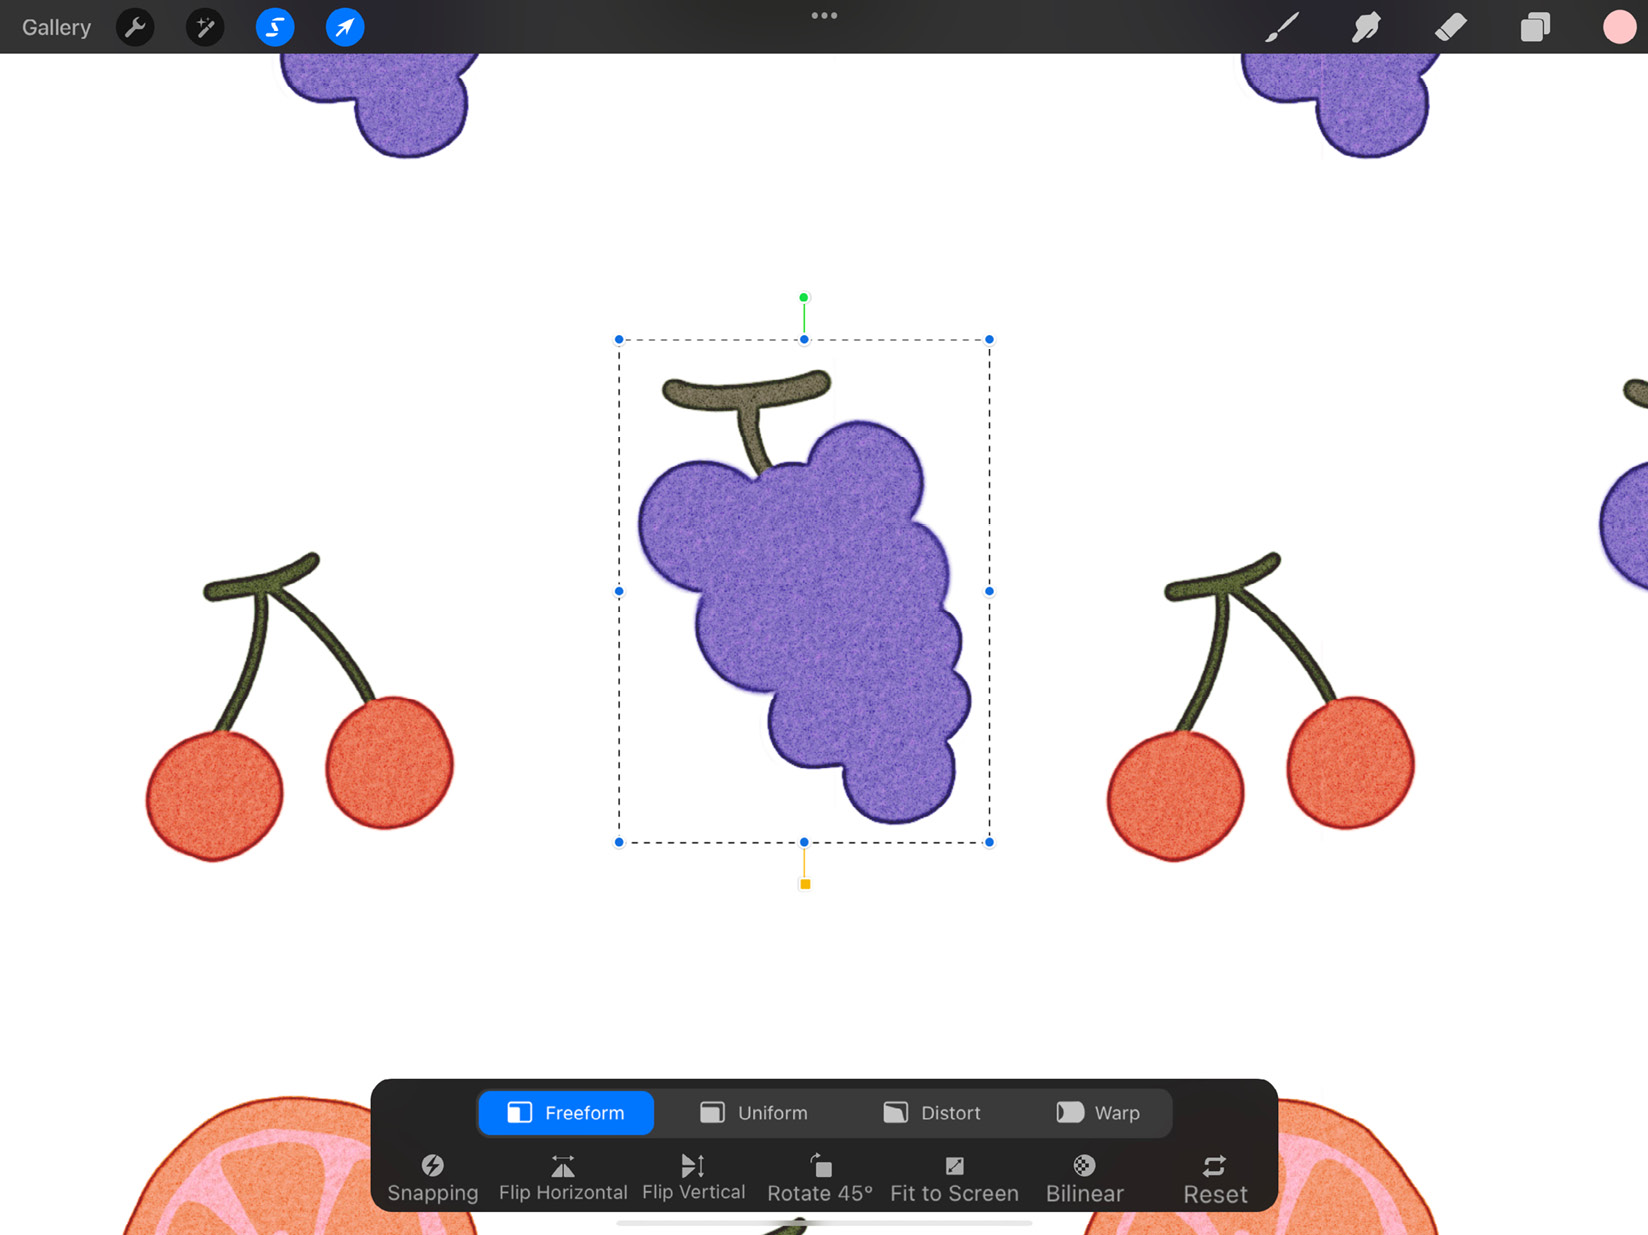
Figure 5.15: Bounding box
Once you see the bounding box, you can touch anywhere on the screen and drag to move the selection around. You can also pinch inside the box to zoom and rotate it, as shown in this screenshot:
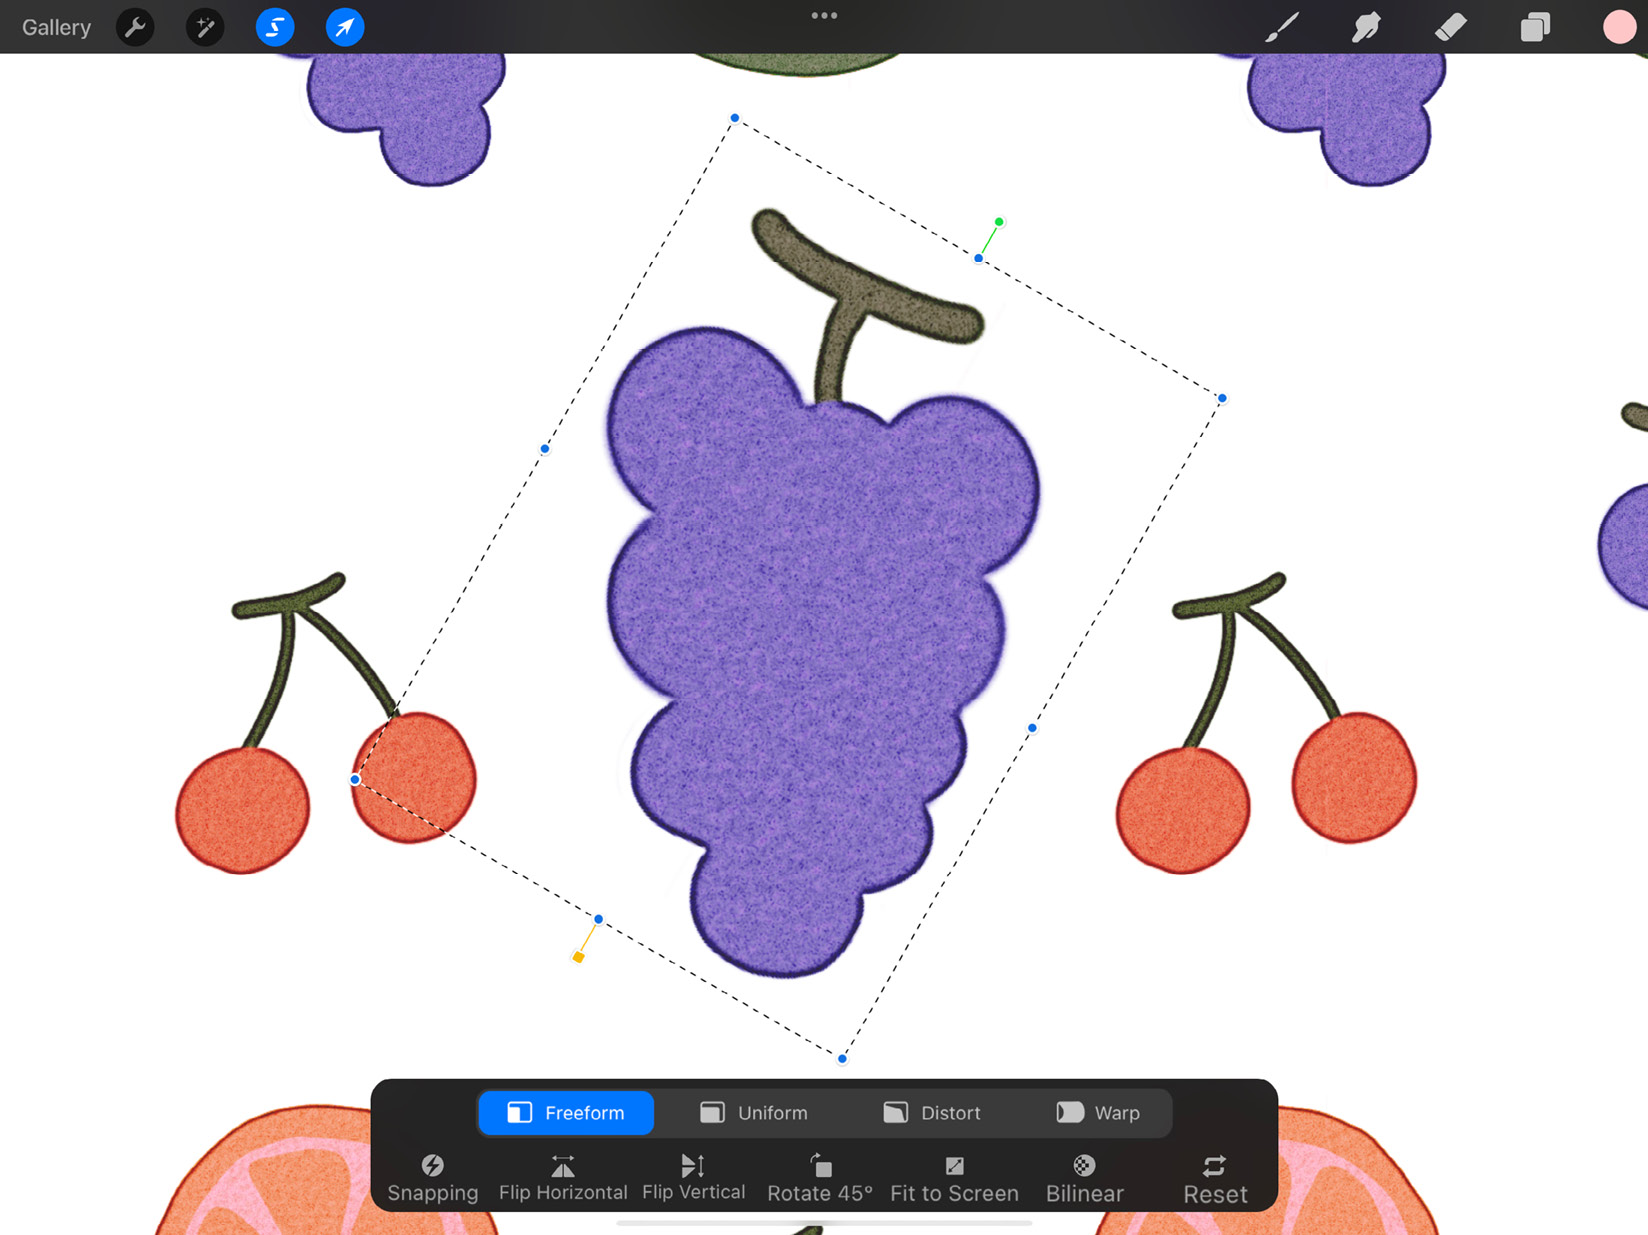
Figure 5.16: Pinch-zoomed and rotated selection
- Transformation nodes:
The bounding box has small blue points on each corner and the midpoint of each edge. These are called transformation nodes. You can use them as handles to transform the shape and size of the selection.
- Bounding box adjust node:
The yellow node at the bottom of the bounding box can be used to rotate it around the selected content. At each orientation, the bounding box will fit the dimensions of the selection, as shown in the following screenshot. This feature allows you to transform along any angle:
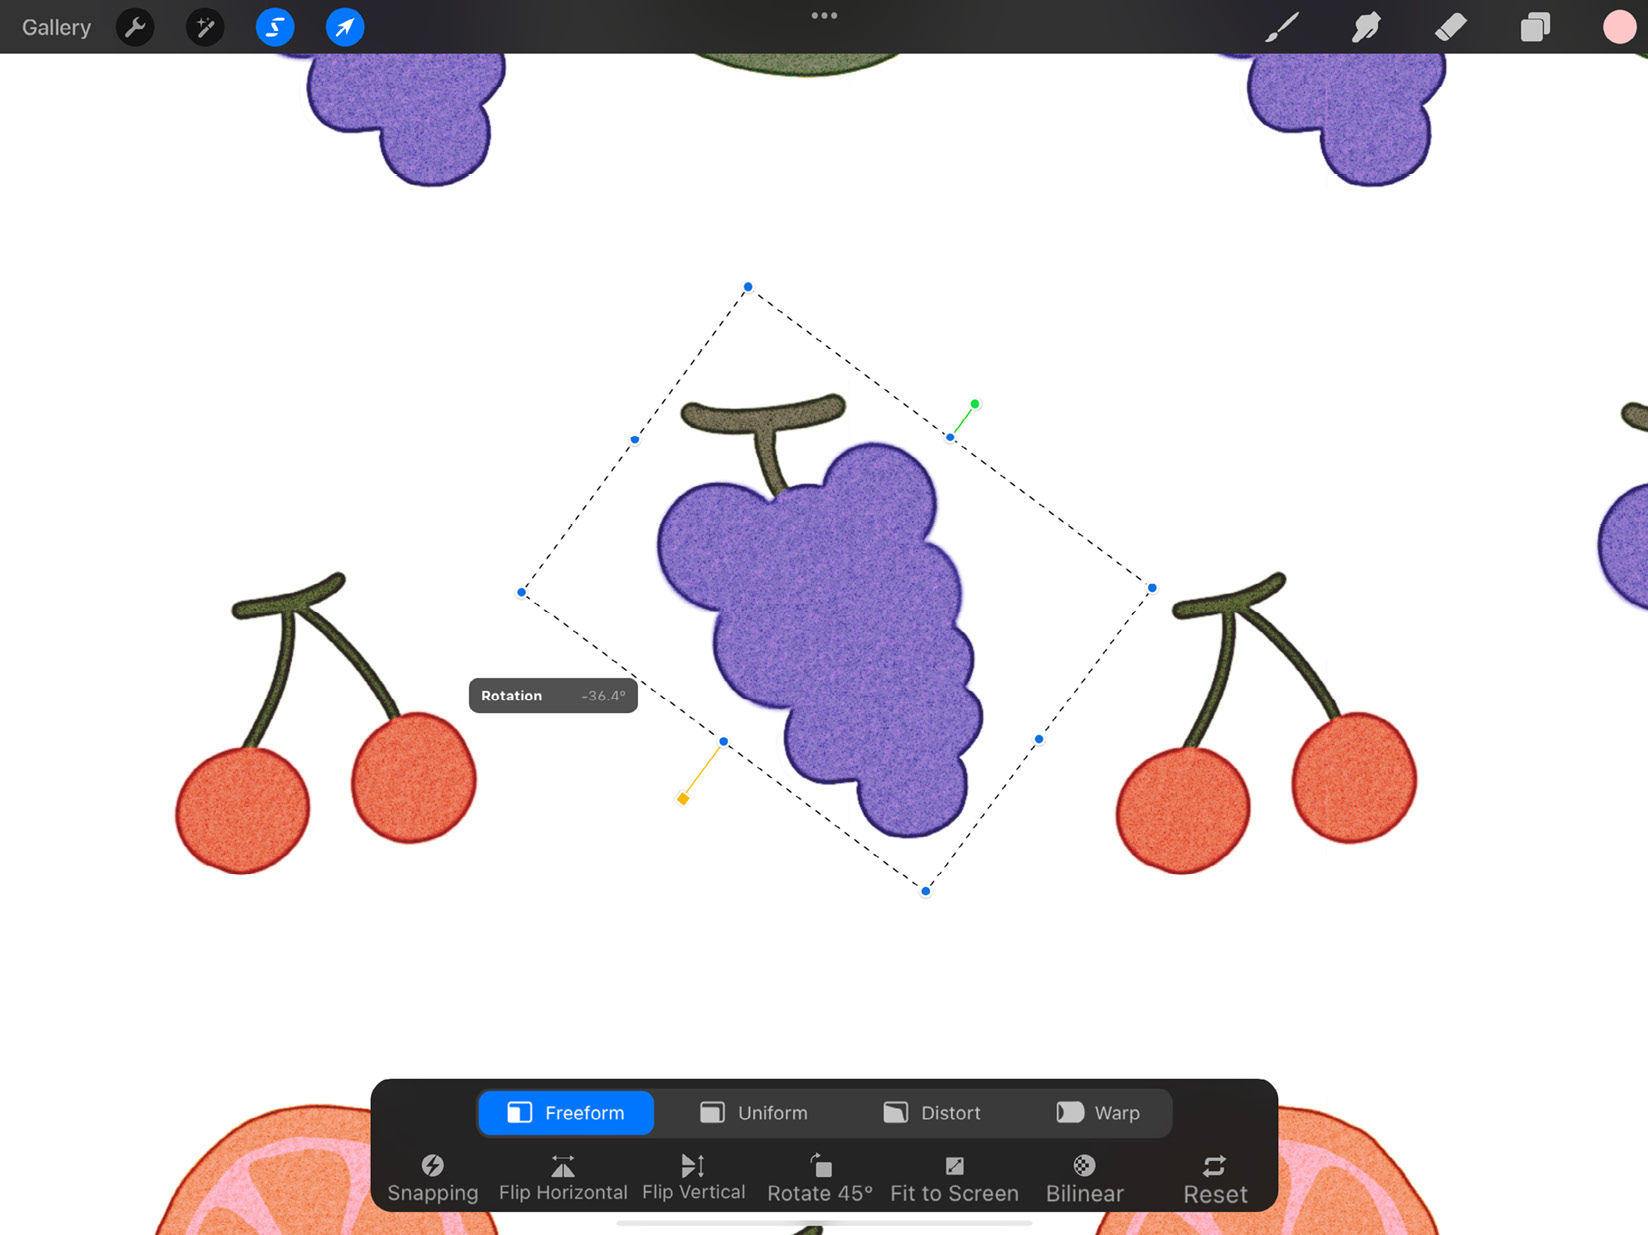
Figure 5.17: Adjusted bounding box
- Rotation node:
The green node at the top of the bounding box is the rotation node. As the name suggests, you can rotate the selected content about its midpoint using this node, like this:

Figure 5.18: Rotated selection
All these elements of the interface behave differently depending on which transformation method you are using. We will now learn about these transformation methods one by one.
Freeform
The first option on the top row of the toolbar is Freeform. This method allows you to stretch or squash your selection along its height or width. You can adjust using the nodes on the edges of the bounding box to transform just one dimension, while keeping the other constant, like this:

Figure 5.19: Freeform used to stretch one side
Alternatively, adjust using the corner nodes to transform both the height and width at the same time, as shown here:
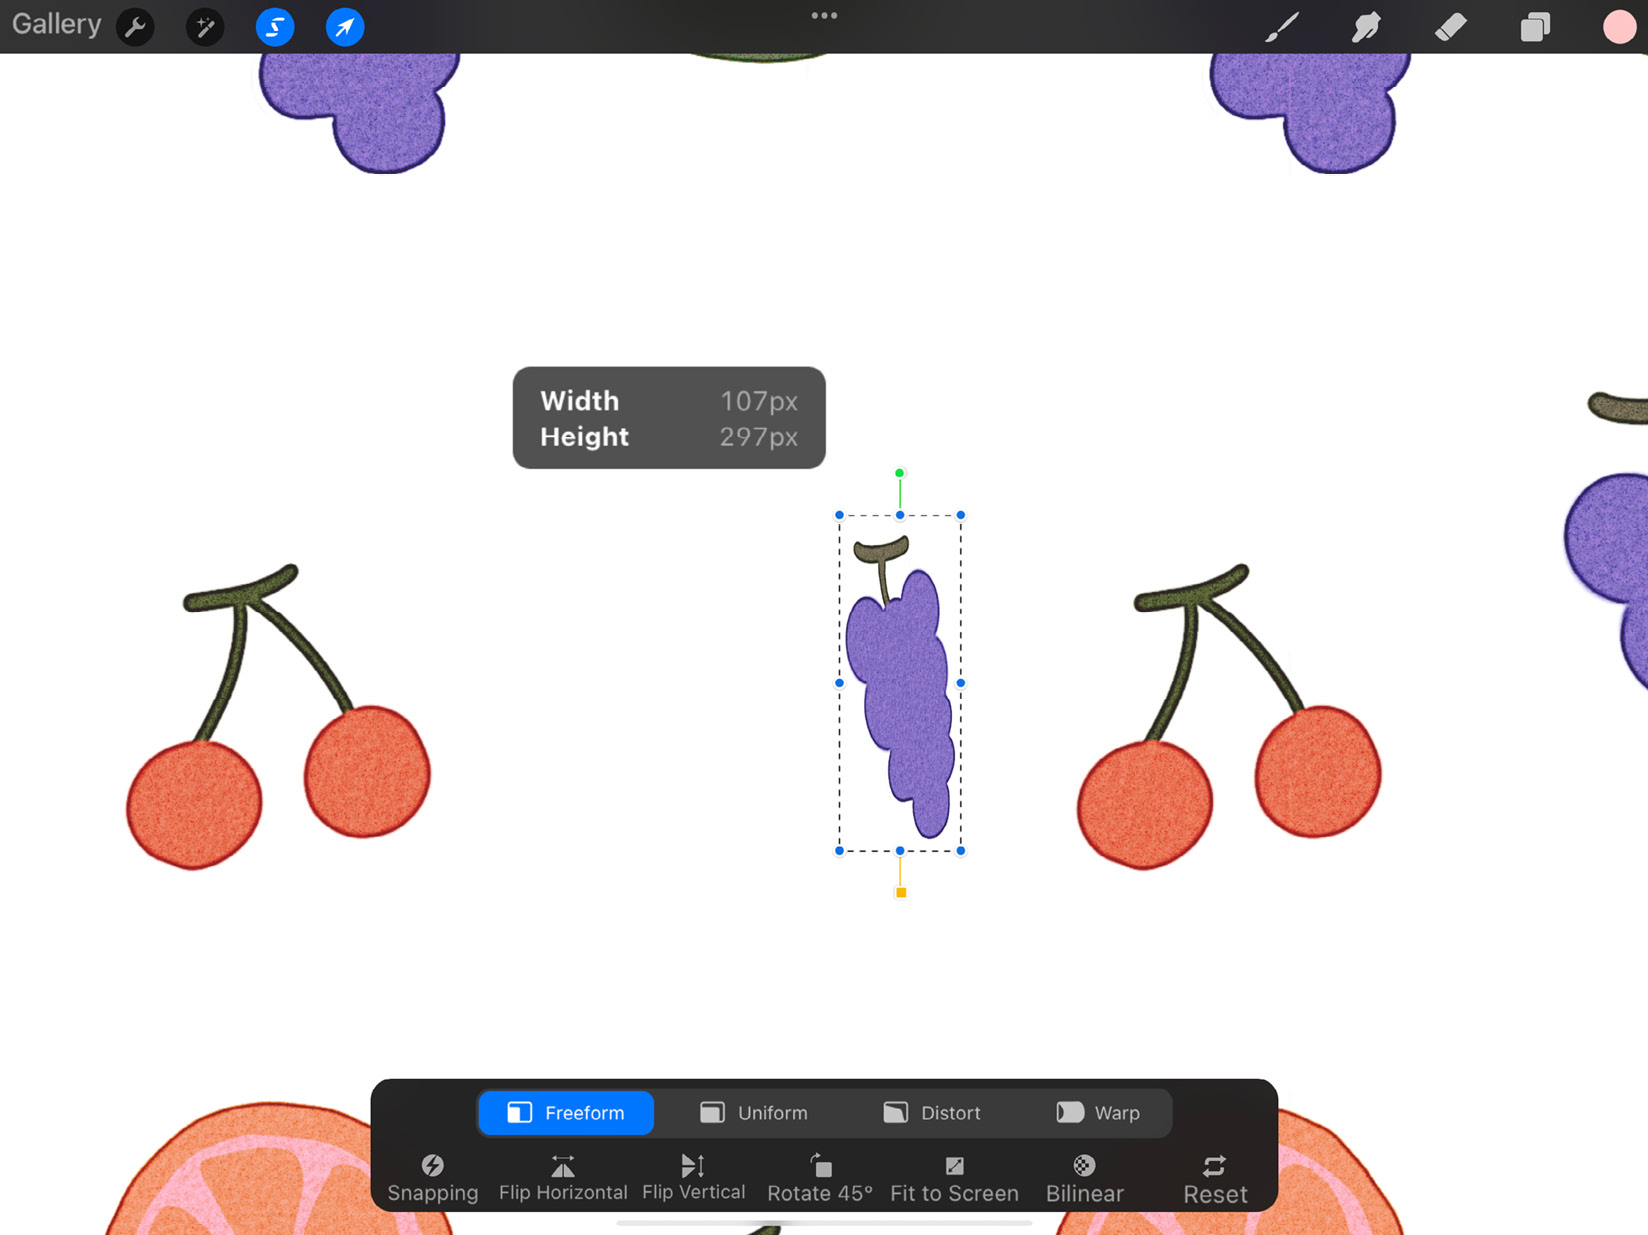
Figure 5.20: Freeform used to transform whole selection
Uniform
Uniform is the next transformation method, which allows you to scale your selection up and down uniformly while keeping the height-width ratio locked. No matter which node you adjust by, the rest of the image will automatically scale to keep the aspect ratio constant:
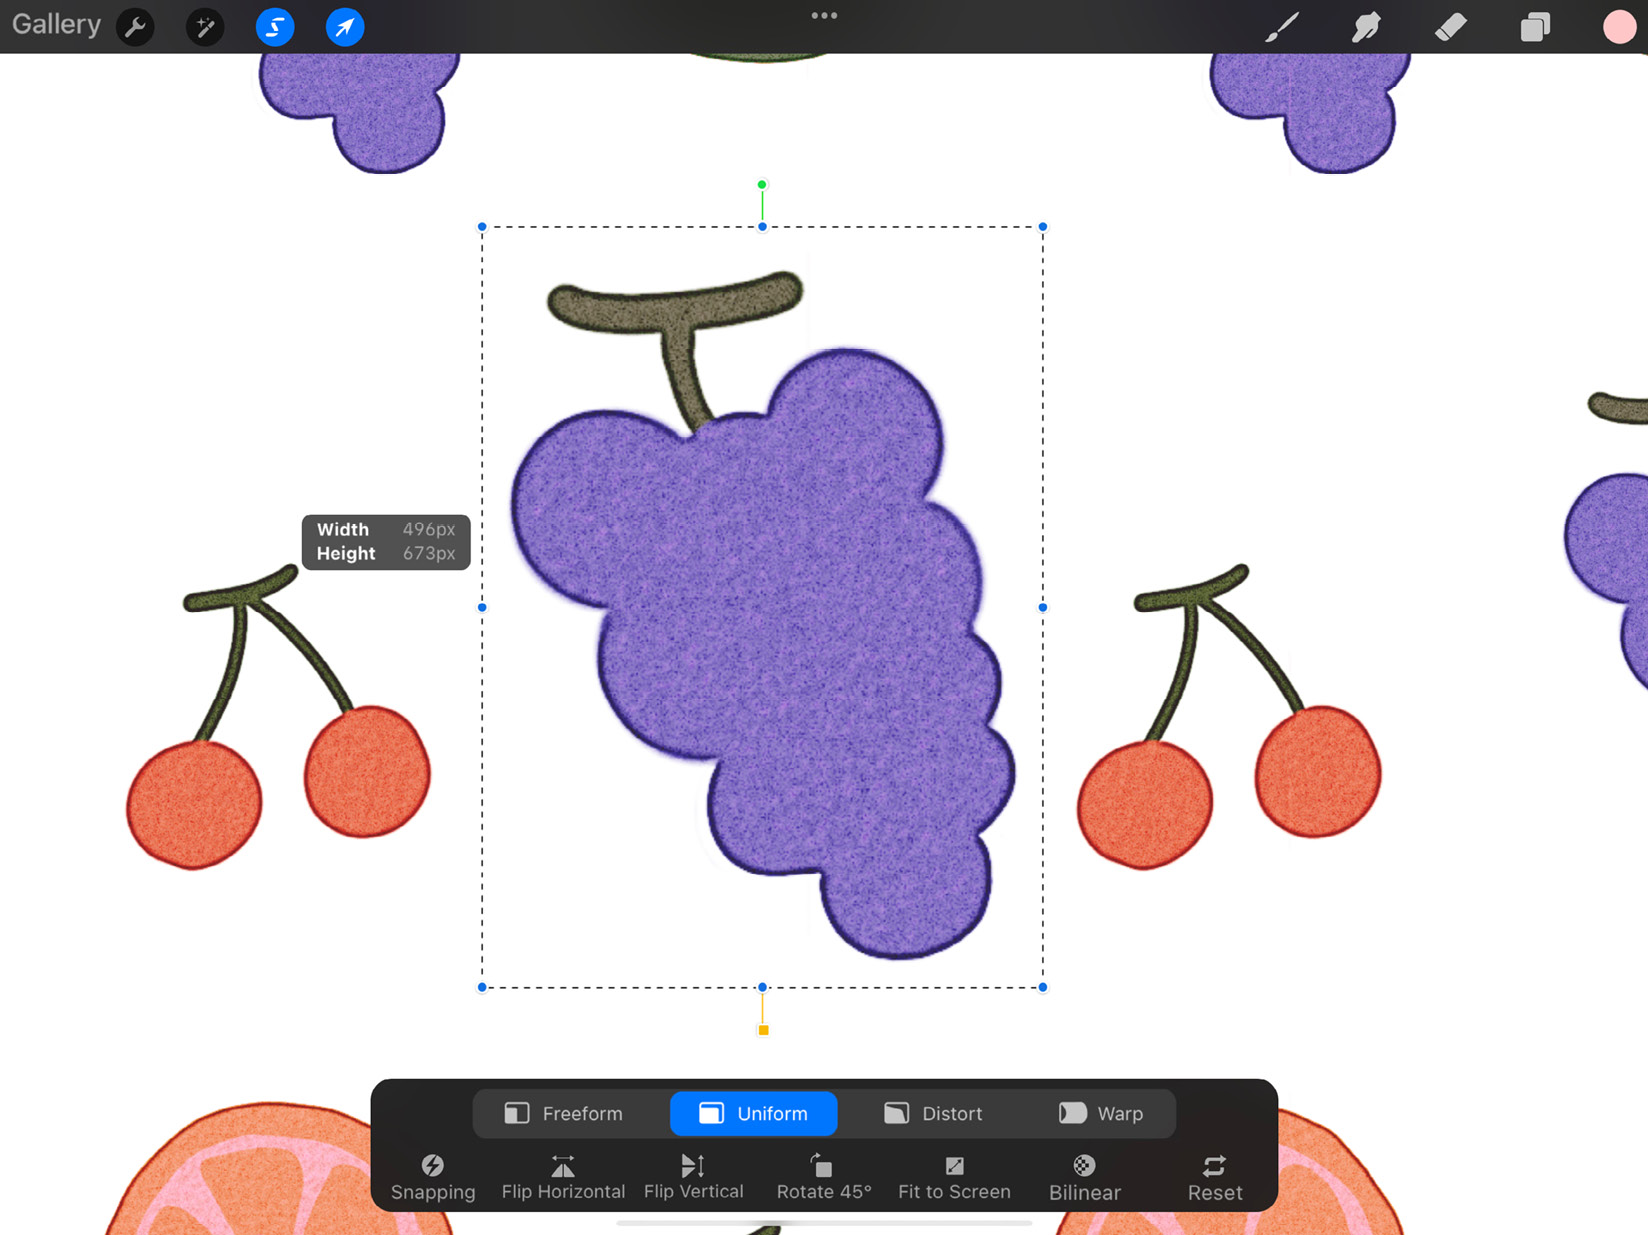
Figure 5.21: Uniform transformation
Distort
Distort allows you to deform the selection using all of the transformation nodes. Just like Freeform, it doesn’t lock the aspect ratio and makes it possible to freely transform. It’s useful when you want to align an image to perspective. Distorting a selection using the corner nodes makes these perspective-like transformations, as in this screenshot:
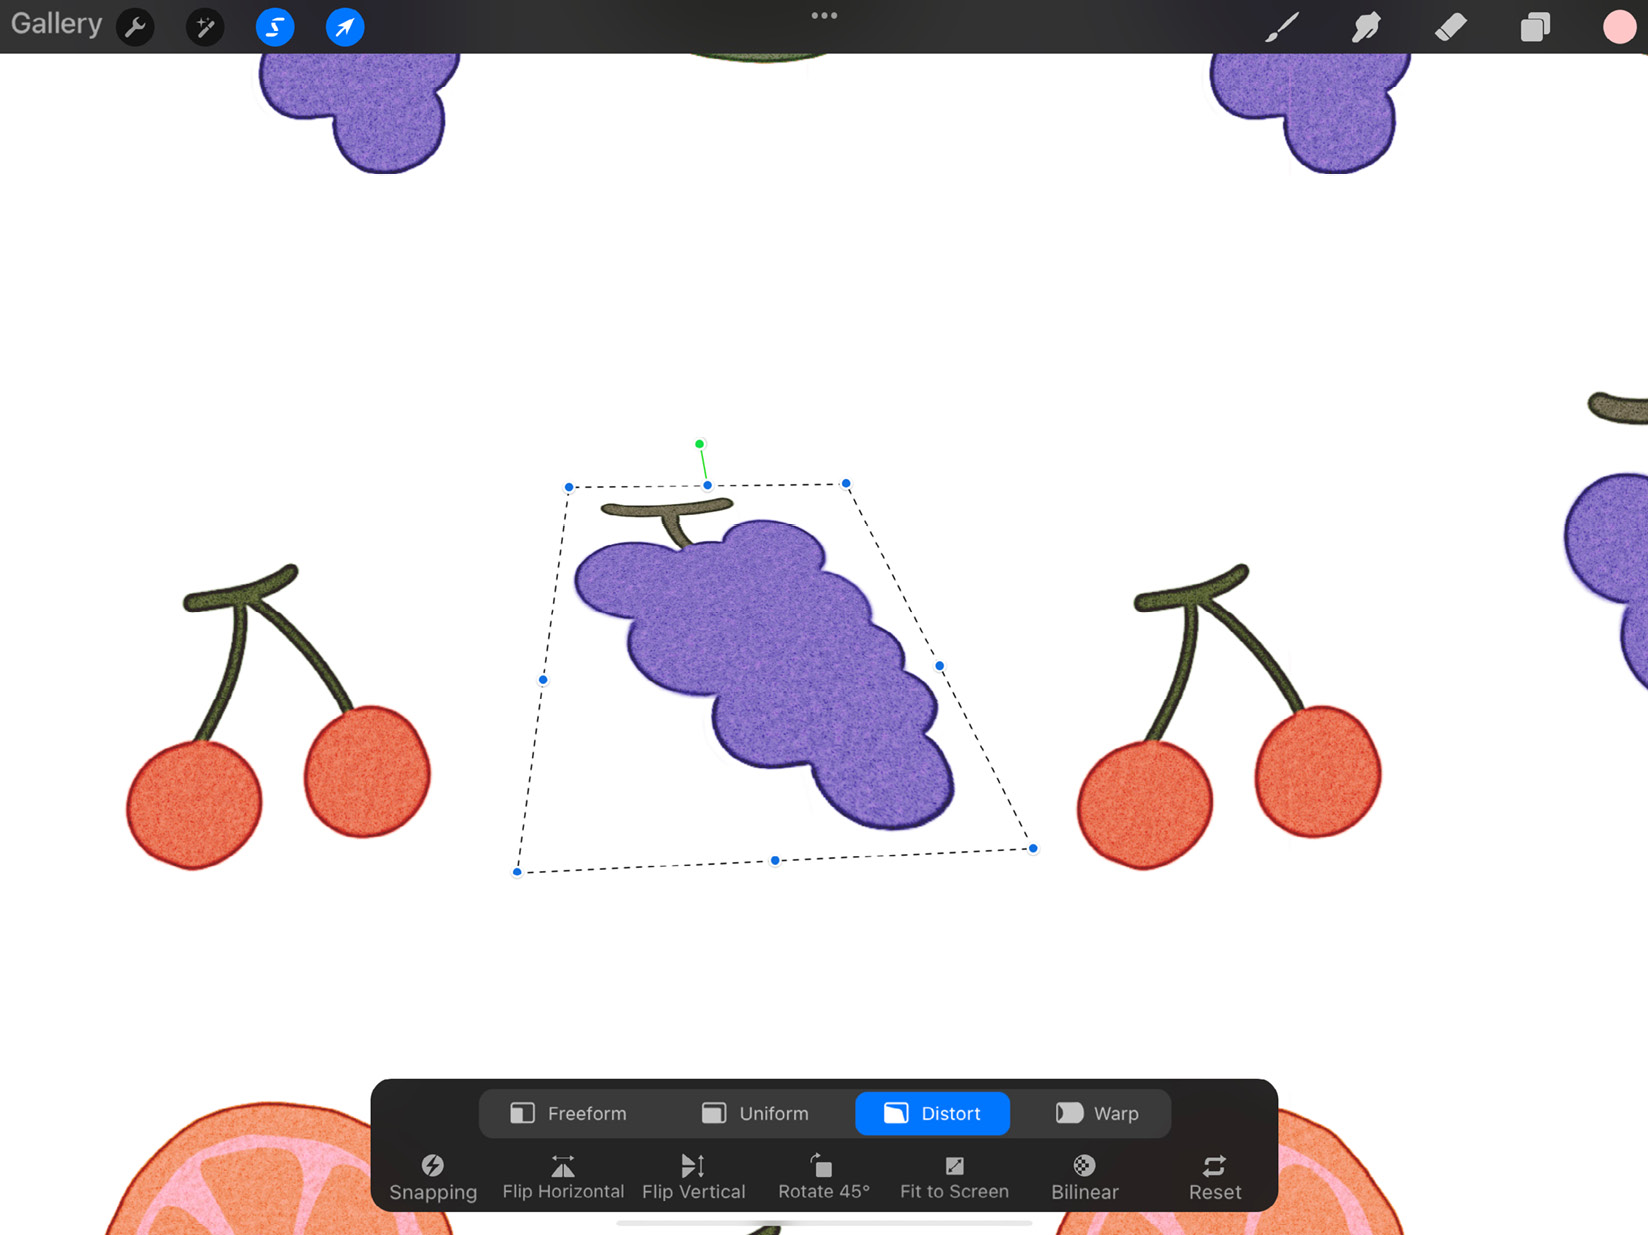
Figure 5.22: Perspective using Distort
Using the nodes on the midpoints helps stretch and shear the selection, as shown here:
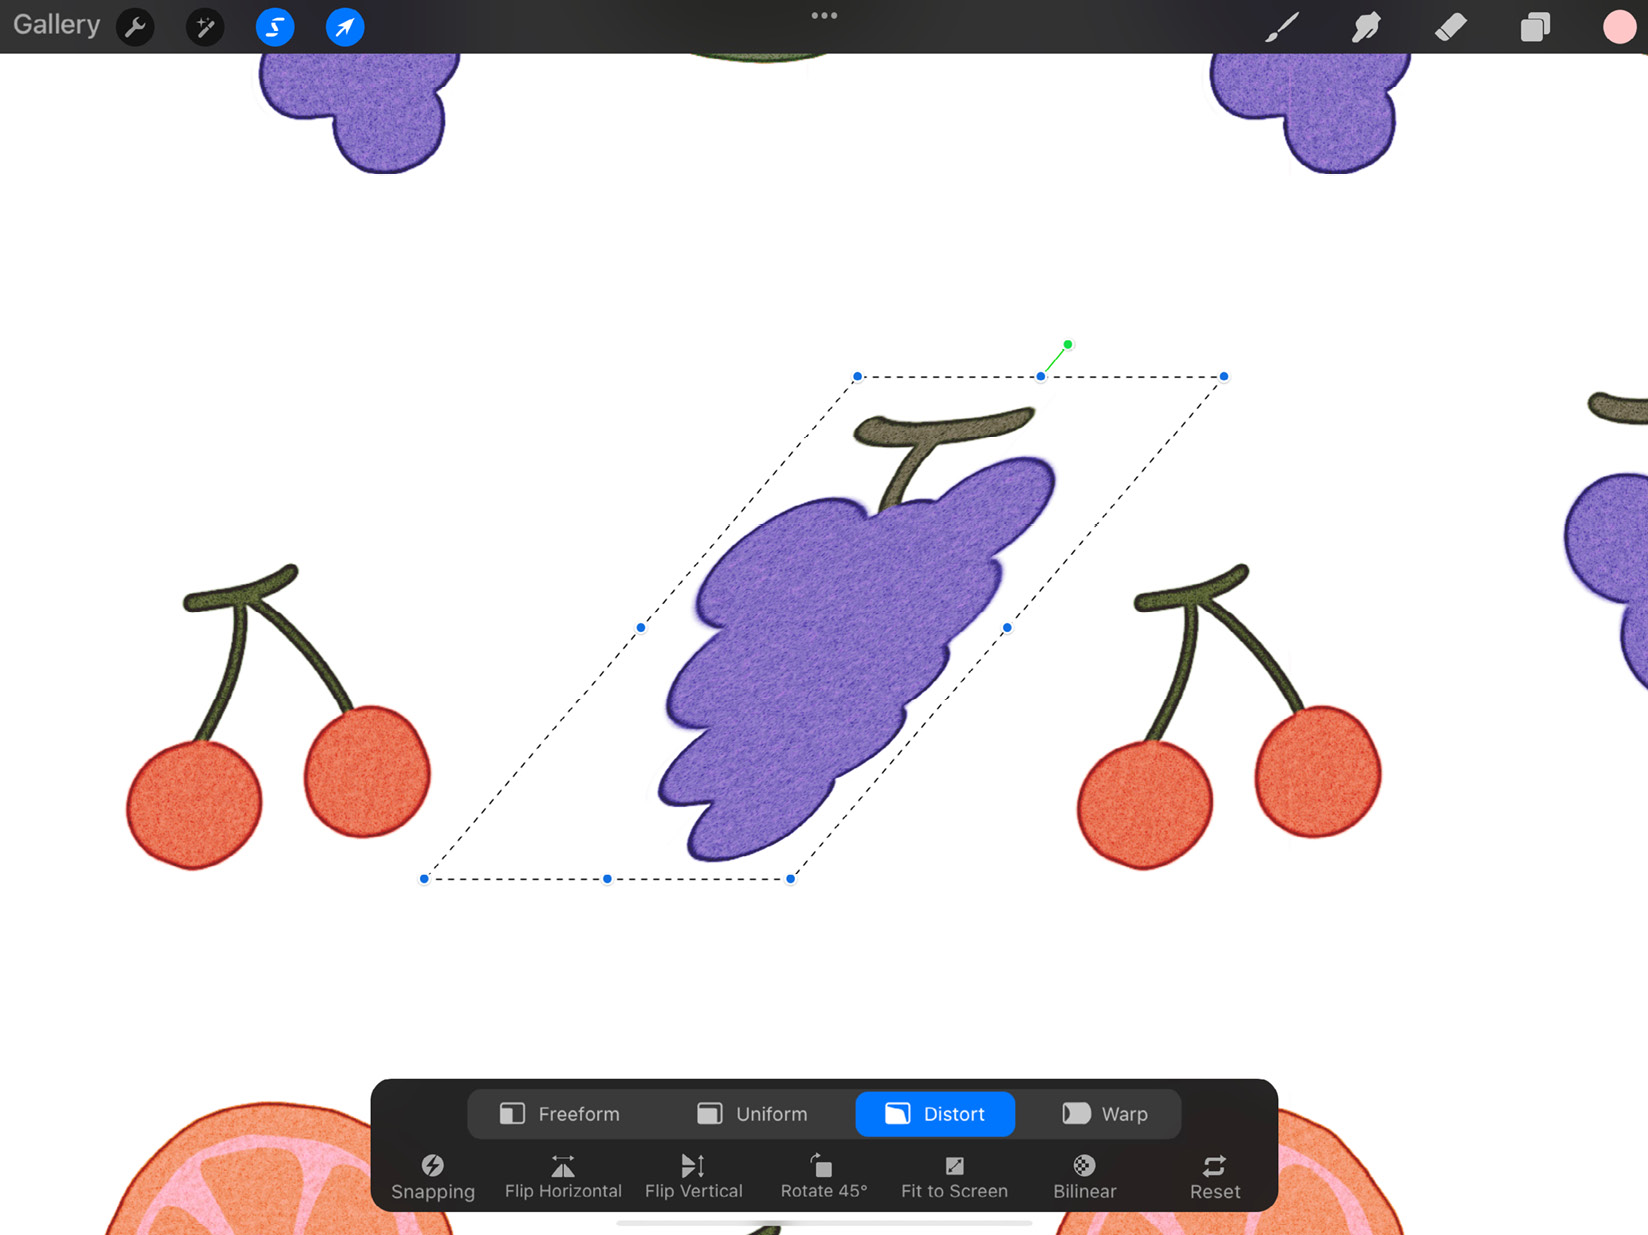
Figure 5.23: Shearing using Distort
Warp
The last option on the list of transformation methods is Warp. This tool places a mesh over the selection, which can be distorted by dragging anywhere on the selection area. The following screenshot demonstrates how it works:
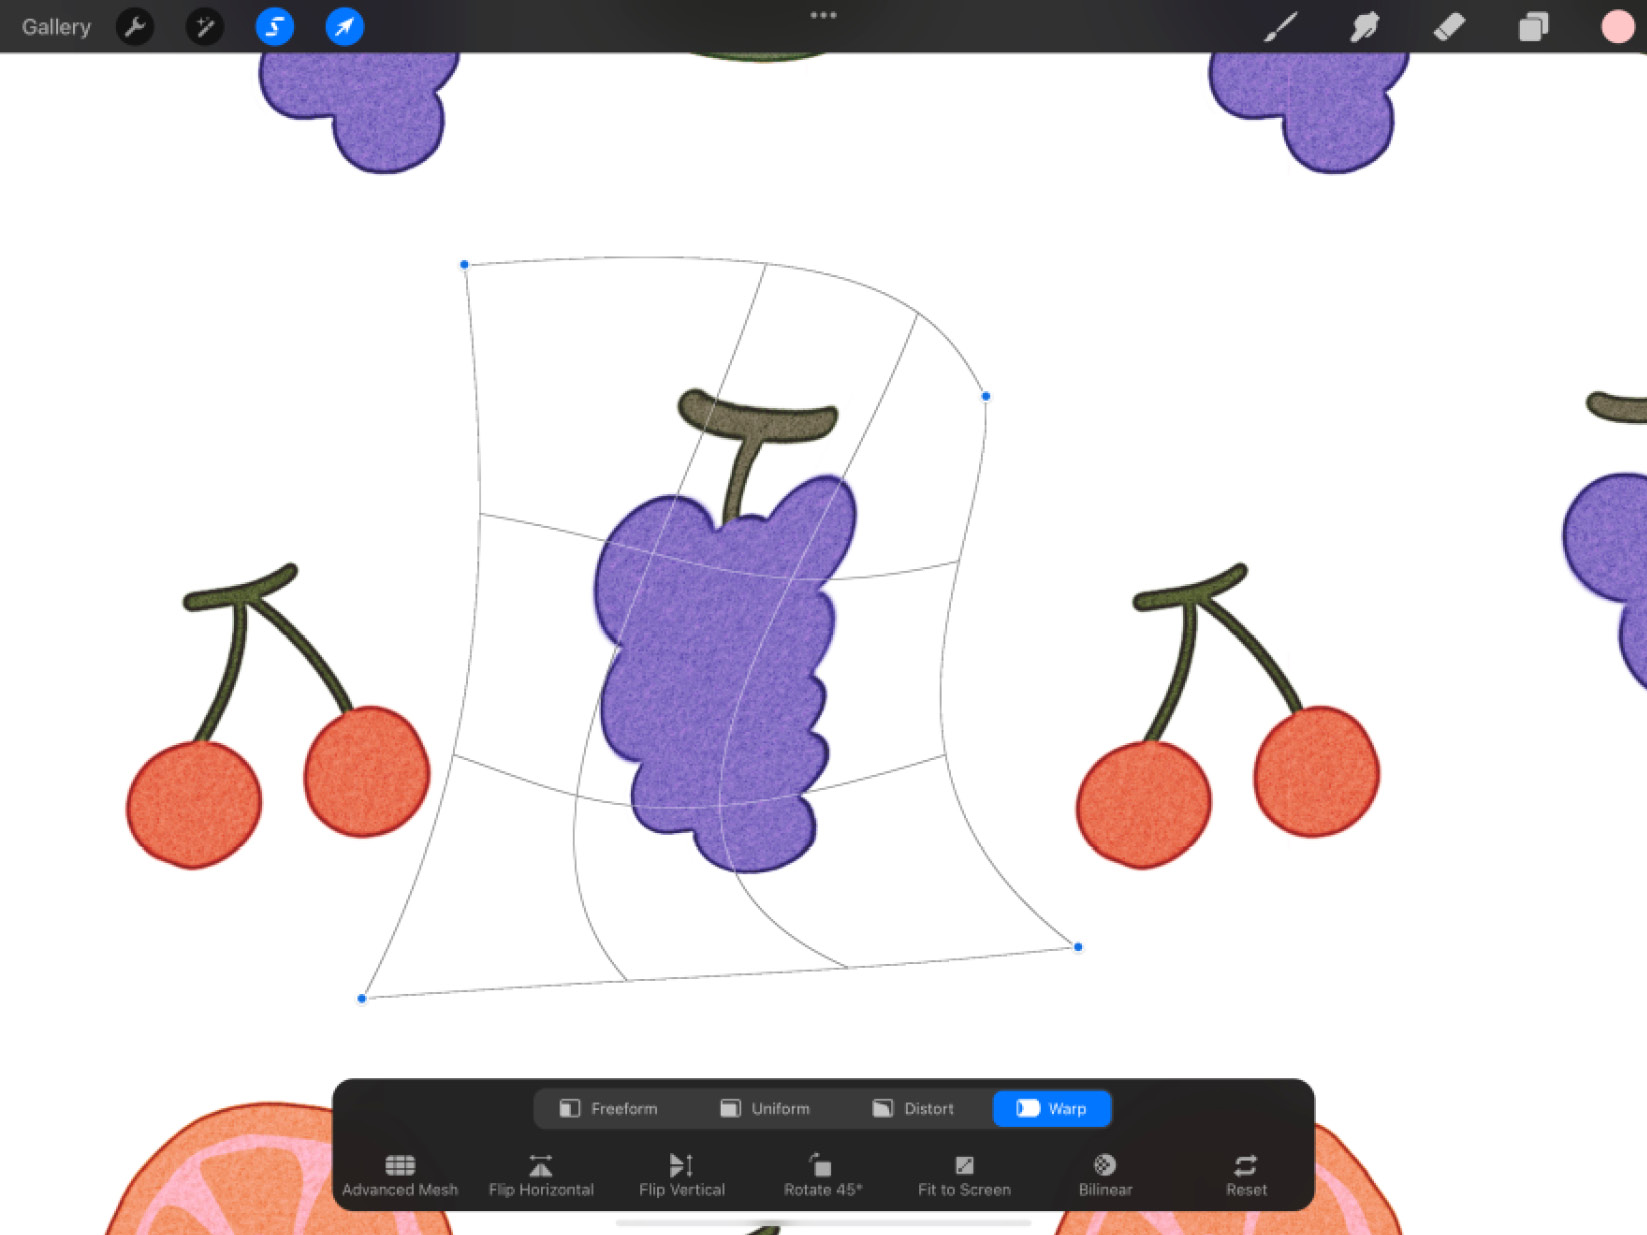
Figure 5.24: Warp tool
Warp is a special mode since it makes a new option appear on the second row of the toolbar. This option is called Advanced Mesh, shown as follows:

Figure 5.25: Advanced Mesh
This is a “power-up” for the Warp tool, where individual nodes appear on the mesh. These nodes can be transformed independently to make dramatic distortions to the image. Advanced Mesh is especially useful for overlaying designs on cloth, to mimic the flow of fabric.
We have covered all four methods of transformation and how they have their own specific areas of use. These tools are flexible, and you can switch between modes anytime during a transformation, allowing you finer control.
Now we can dive into the second row of tools available on the Transform toolbar. These remain mostly constant and apply to all of the aforementioned transformation modes. They are Snapping, Flip, Rotate 45°, Fit to Screen, Interpolation, and Reset.
Snapping
Snapping is a useful feature of the Transform tool. It helps to place a selection in alignment with the center of the canvas, or with respect to objects on other layers. It is the first tool on the bottom row of the toolbox. There are two types of snapping tools available:
- Magnetics: When this is toggled on, you can move the bounding box in a certain direction, be it vertically, horizontally, or at an angle. This feature locks the direction of movement and shows you a blue guide line along that axis. Refer to the following screenshot to get a better idea:
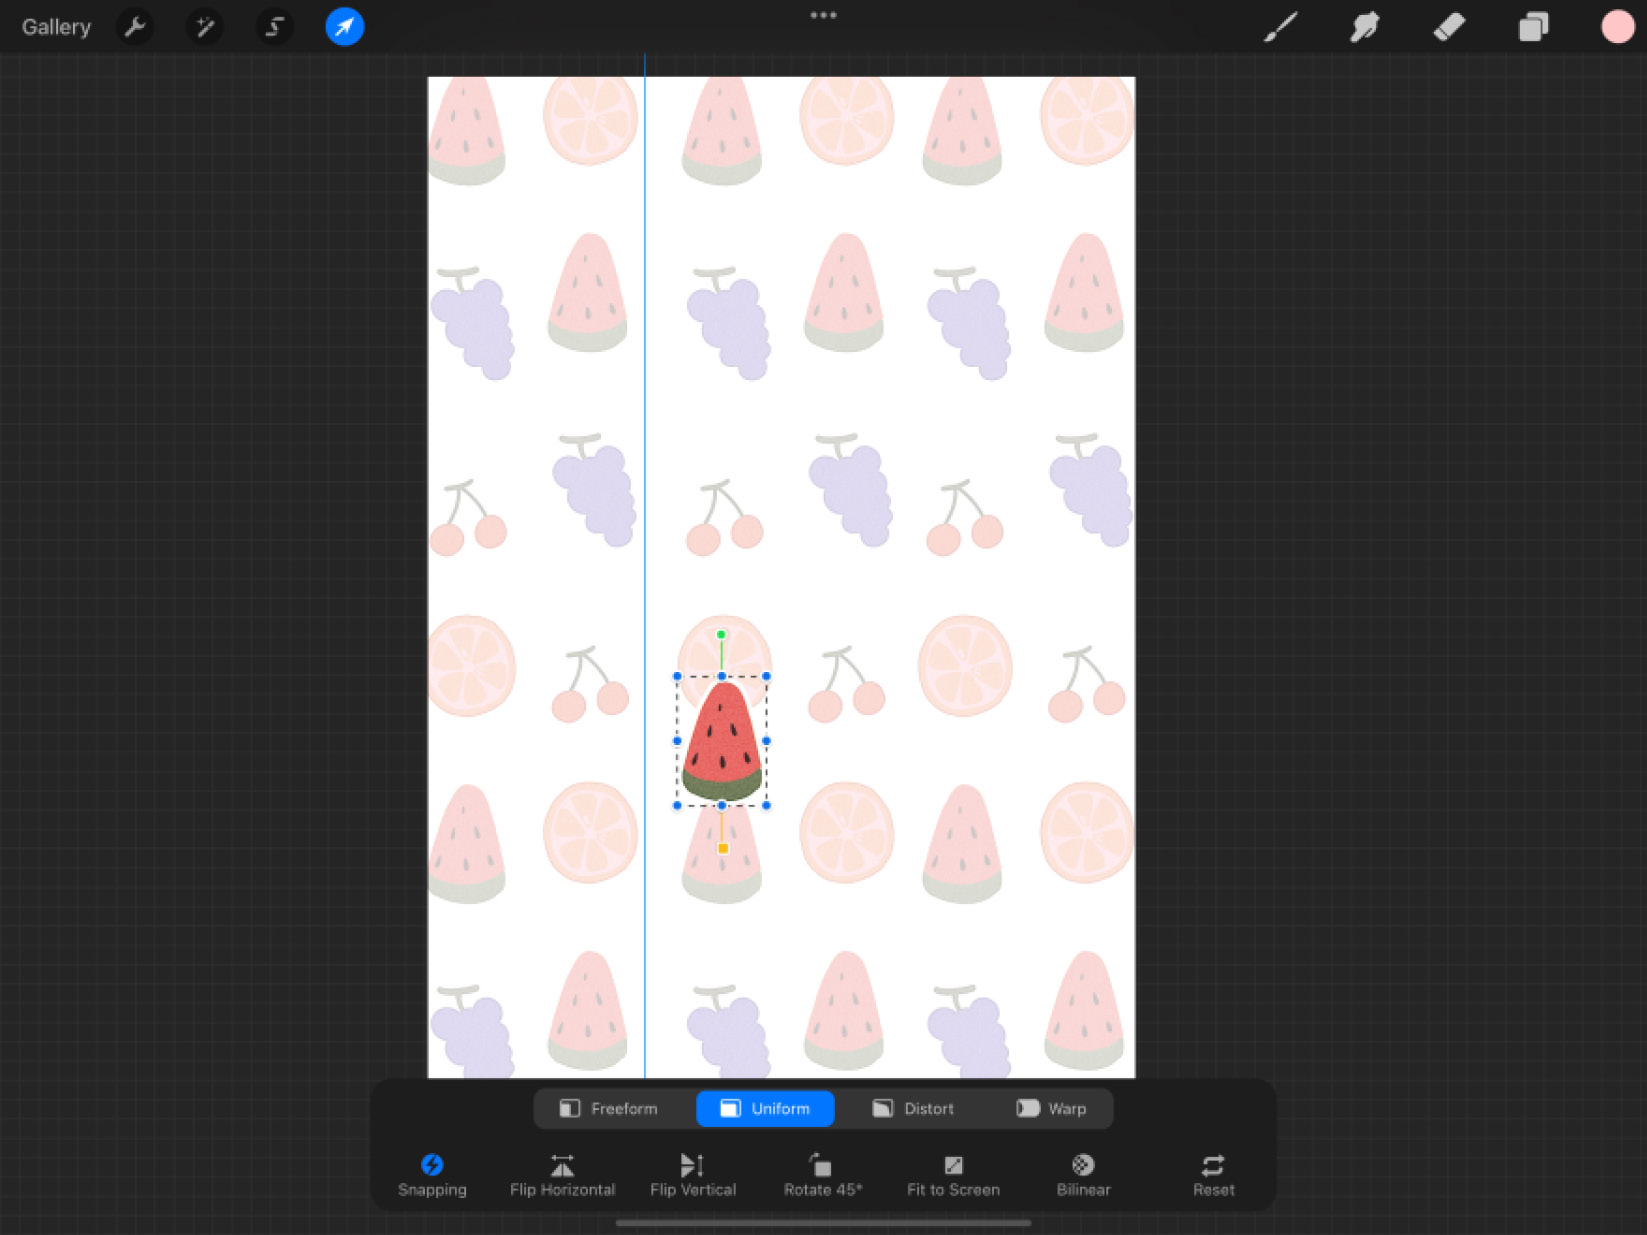
Figure 5.26: Direction locking in Magnetics
The same thing happens for rotation, where the selection snaps to 45° increments.
- Snapping: When toggled on, this tool detects the center and edges of the canvas, as well as objects on other layers, and snaps your bounding box to help align with them. Axes pertaining to the entire canvas show up as yellow guide lines, such as here, where the image has been snapped to the center of the canvas:
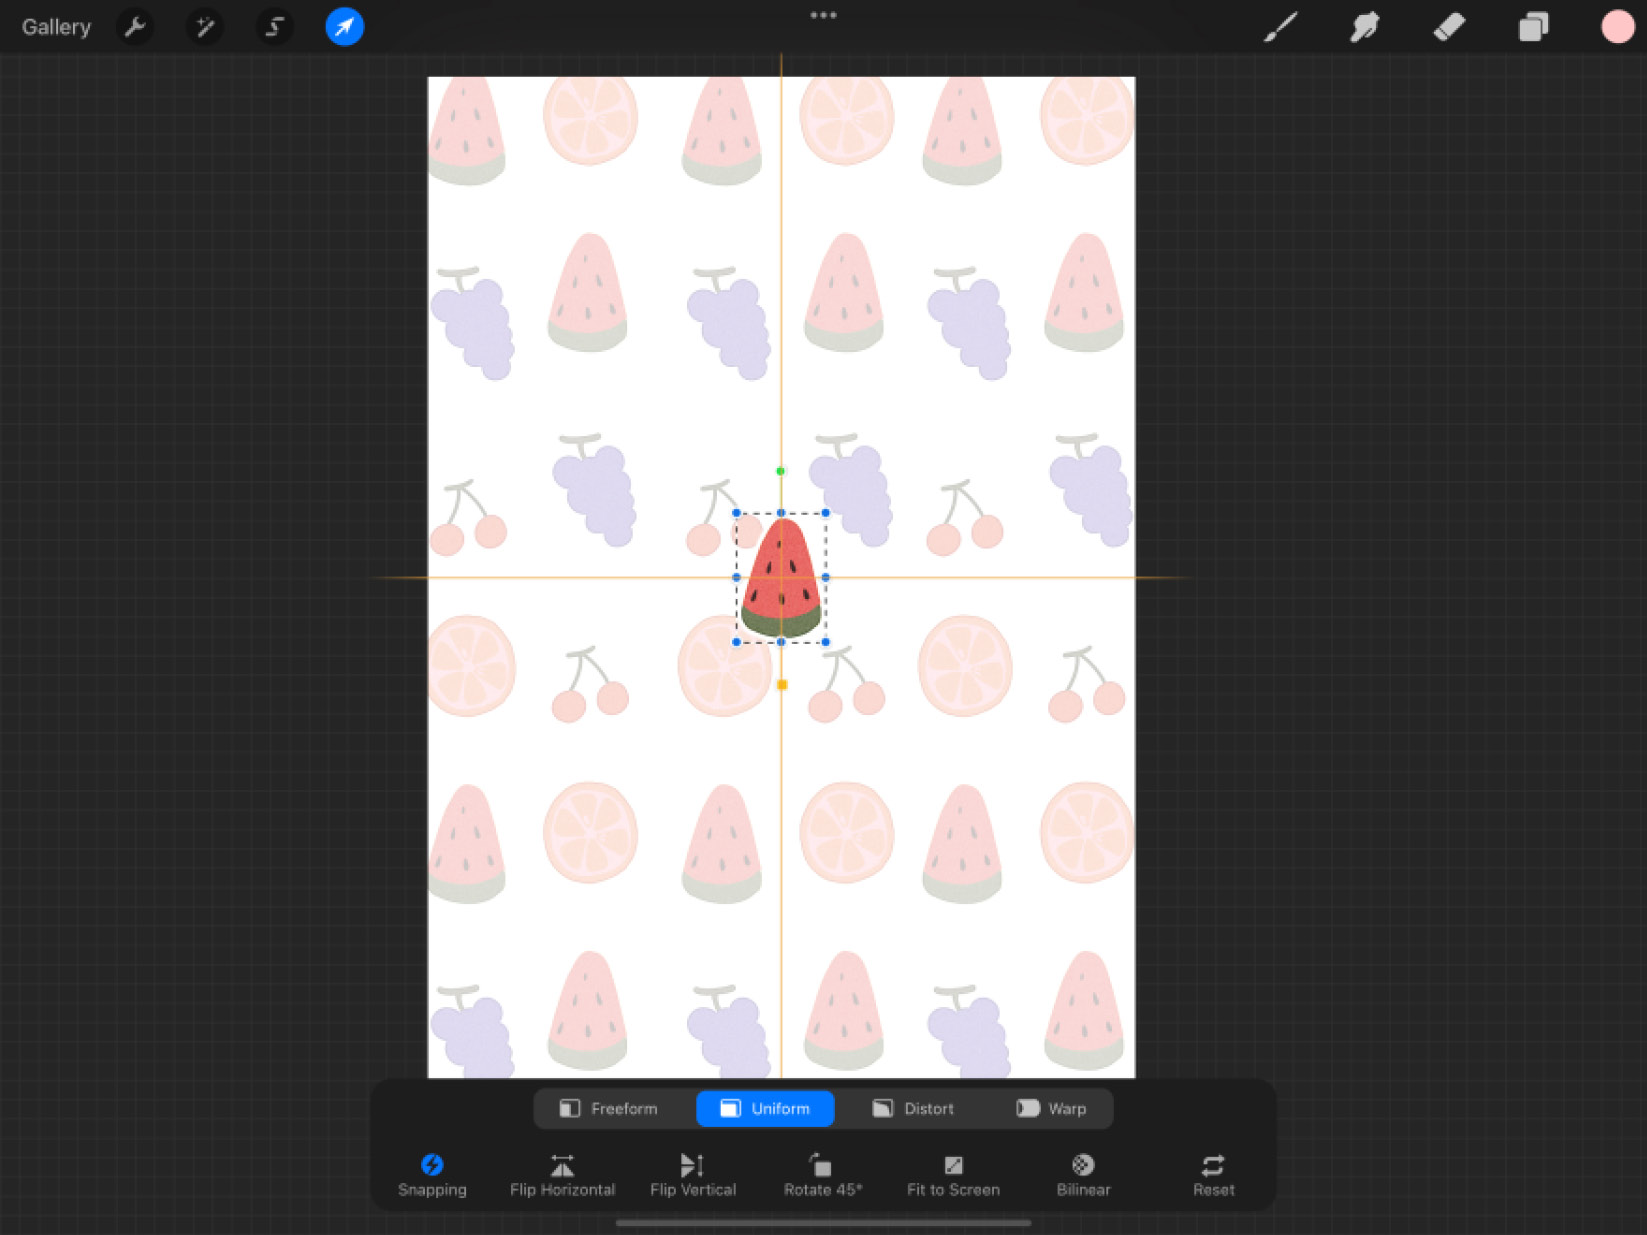
Figure 5.27: Snapping to the canvas center
Axes snapping to elements on the canvas are indicated by blue guide lines running through the element of reference. In the following screenshot, you can see how this happens when one watermelon is aligned with another:
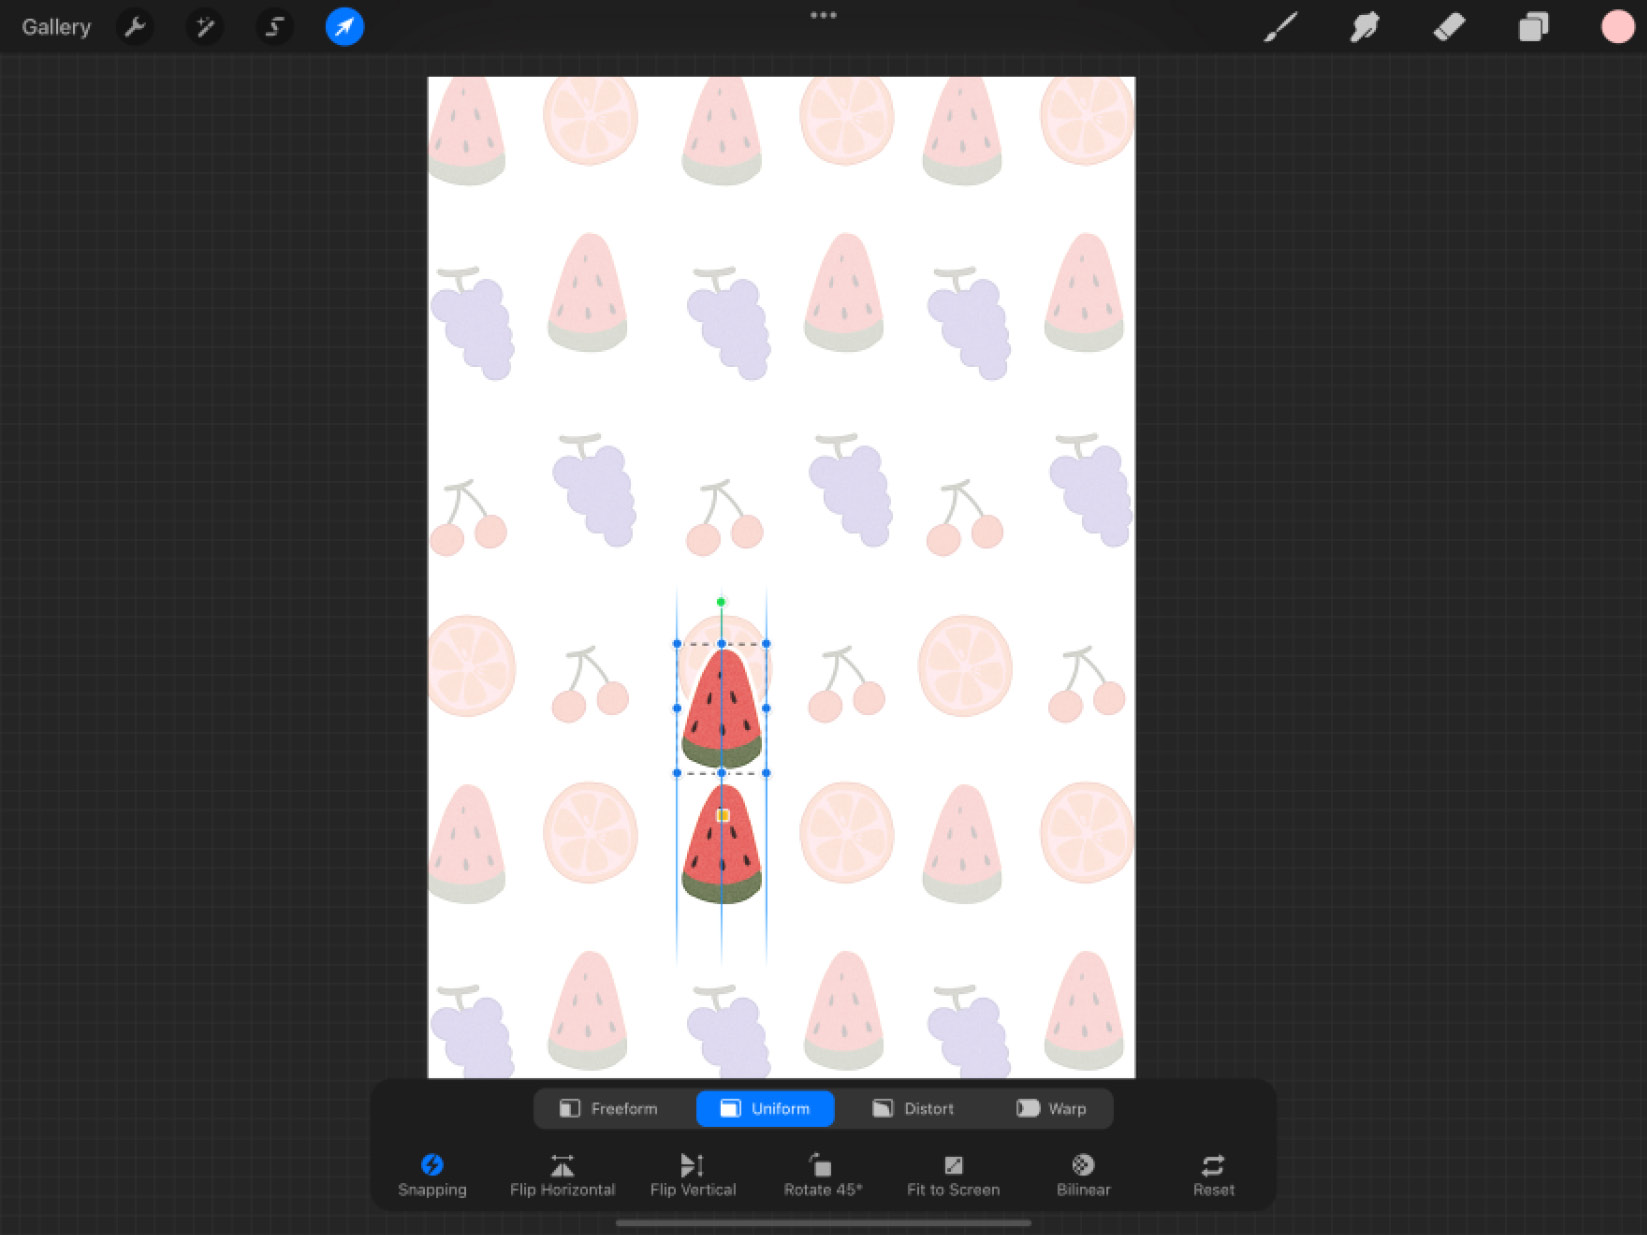
Figure 5.28: Snapping to object
After this, we come to a common but essential feature that makes transforming more efficient.
Flipping tools
The next two tools you will spot on the bottom row are Flip Horizontally and Flip Vertically. As their names suggest, they are used to flip your selection along these two axes. It’s worth noting that these actions flip only the selected content and not the whole canvas. To learn about flipping the canvas, refer to Chapter 4, Using the Actions Menu.
The next option provides a quick and accurate way to rotate your selection at specific angles.
Rotate 45°
The next option, Rotate 45°, is used to make clockwise rotational increments of 45° to your selection. The cherries rotate about their center, as shown here:
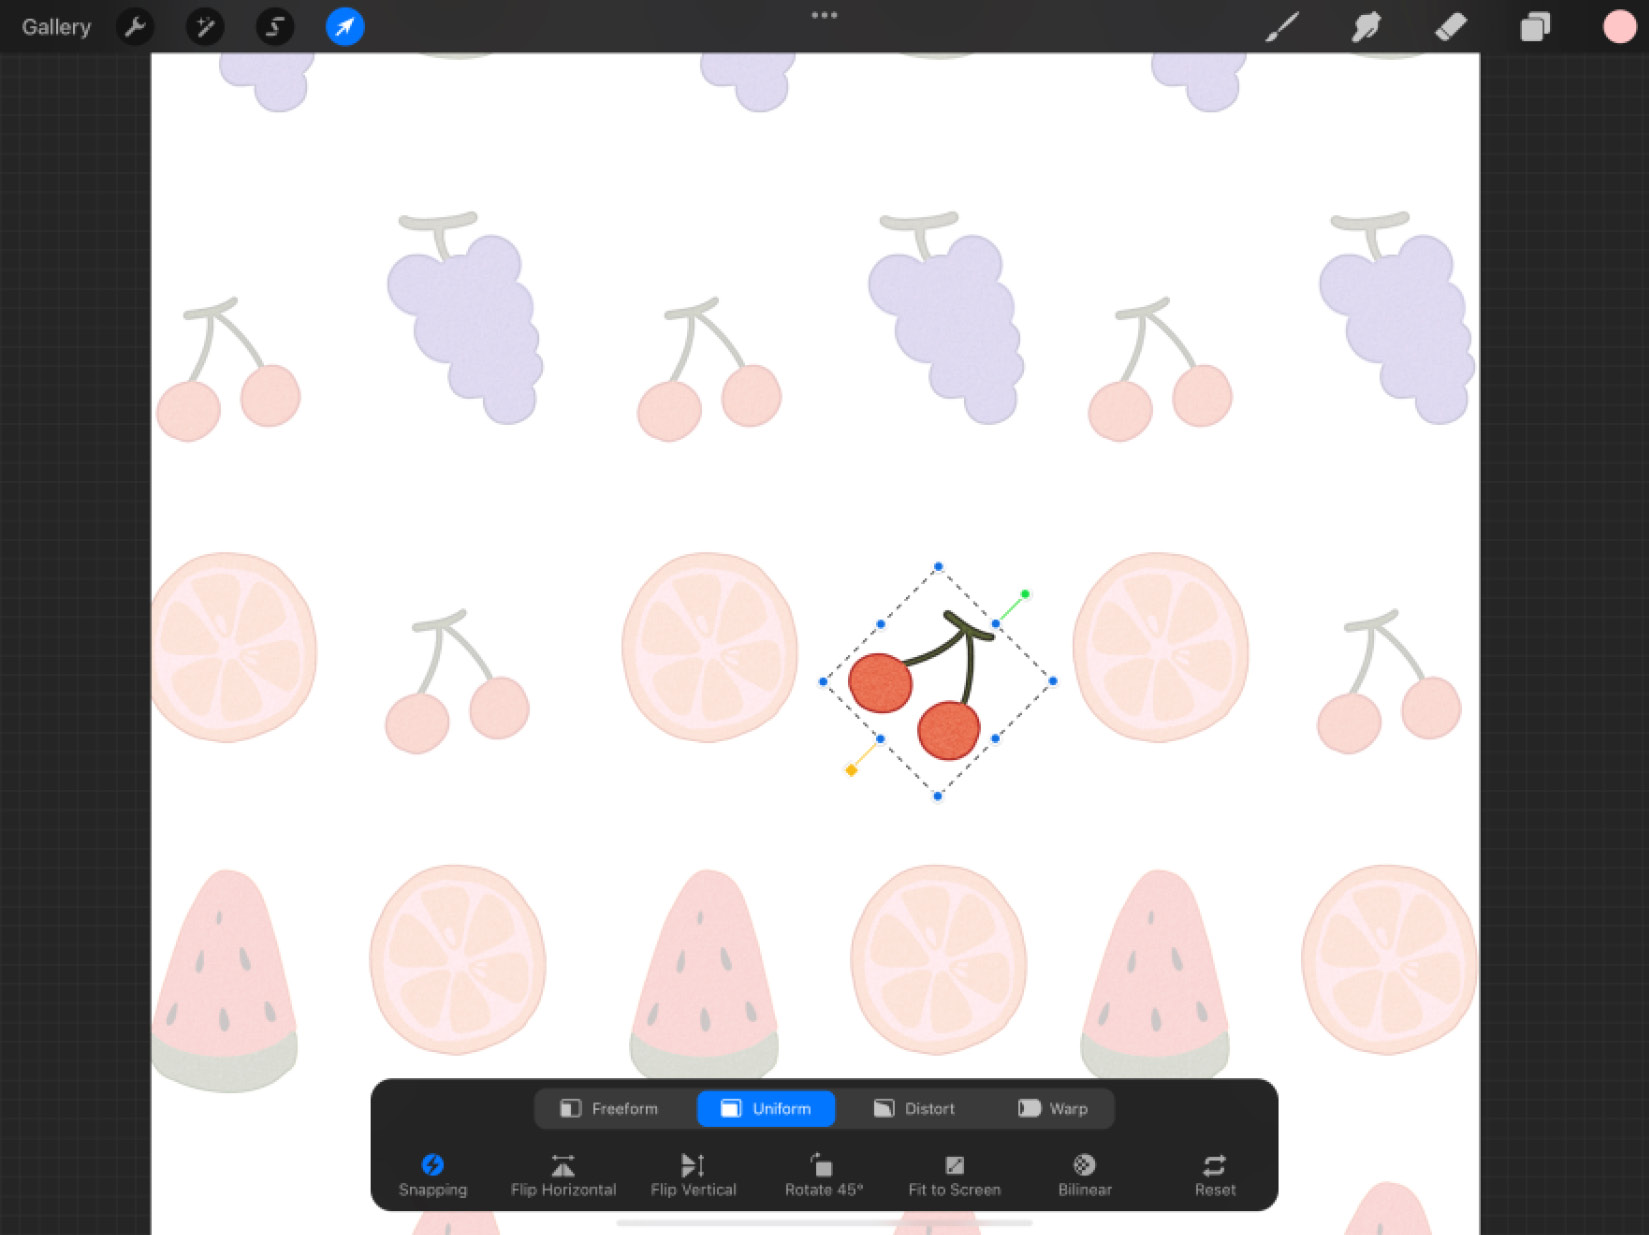
Figure 5.29: Rotation by 45°
The option we will look at next is useful for filling the screen with the selection.
Fit to Screen
When you want to scale your selection to fit edge-to-edge inside your canvas, use the Fit to Screen feature. Normally, tapping this button will scale the selection as large as it can go without cropping any part of it, as shown here:
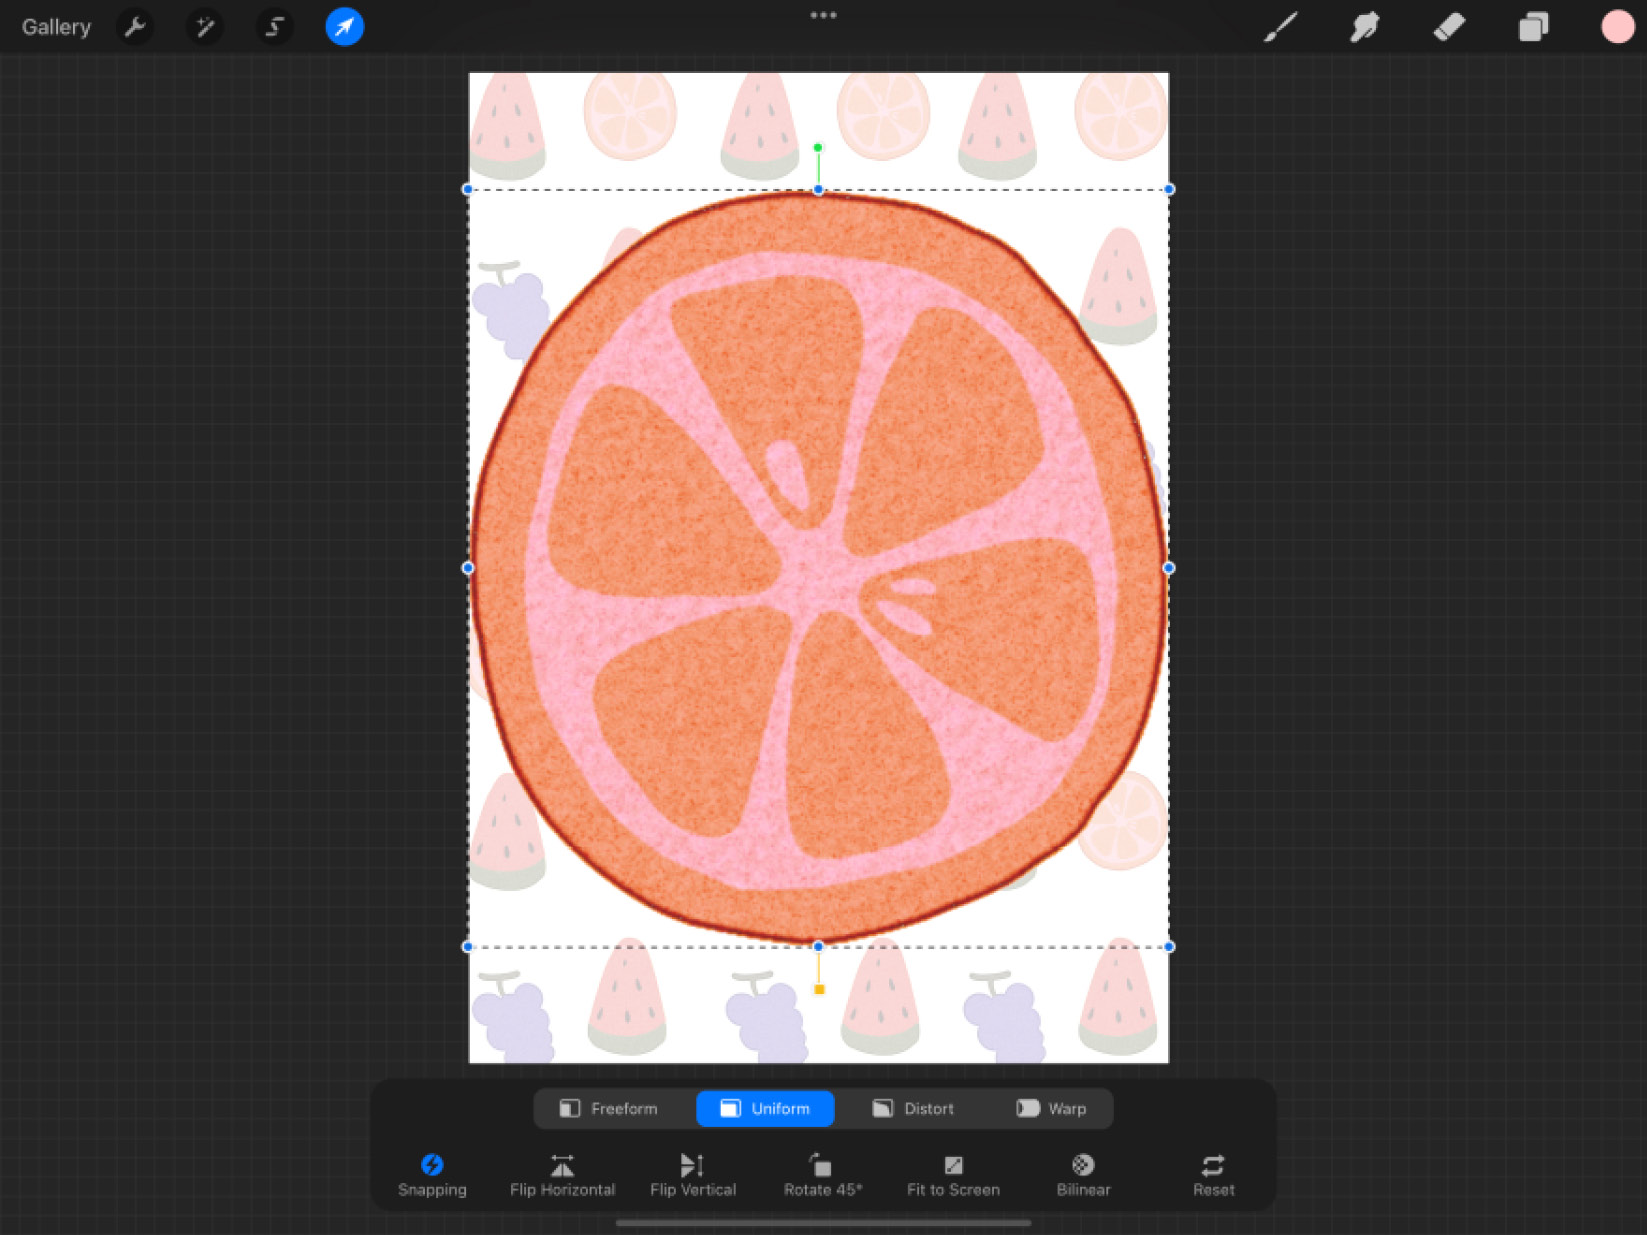
Figure 5.30: Fit to Screen without cropping
However, if Magnetics is toggled on, Fit to Screen scales the selection for maximum coverage. In this case, some part of it can spill out of the canvas area, like this:
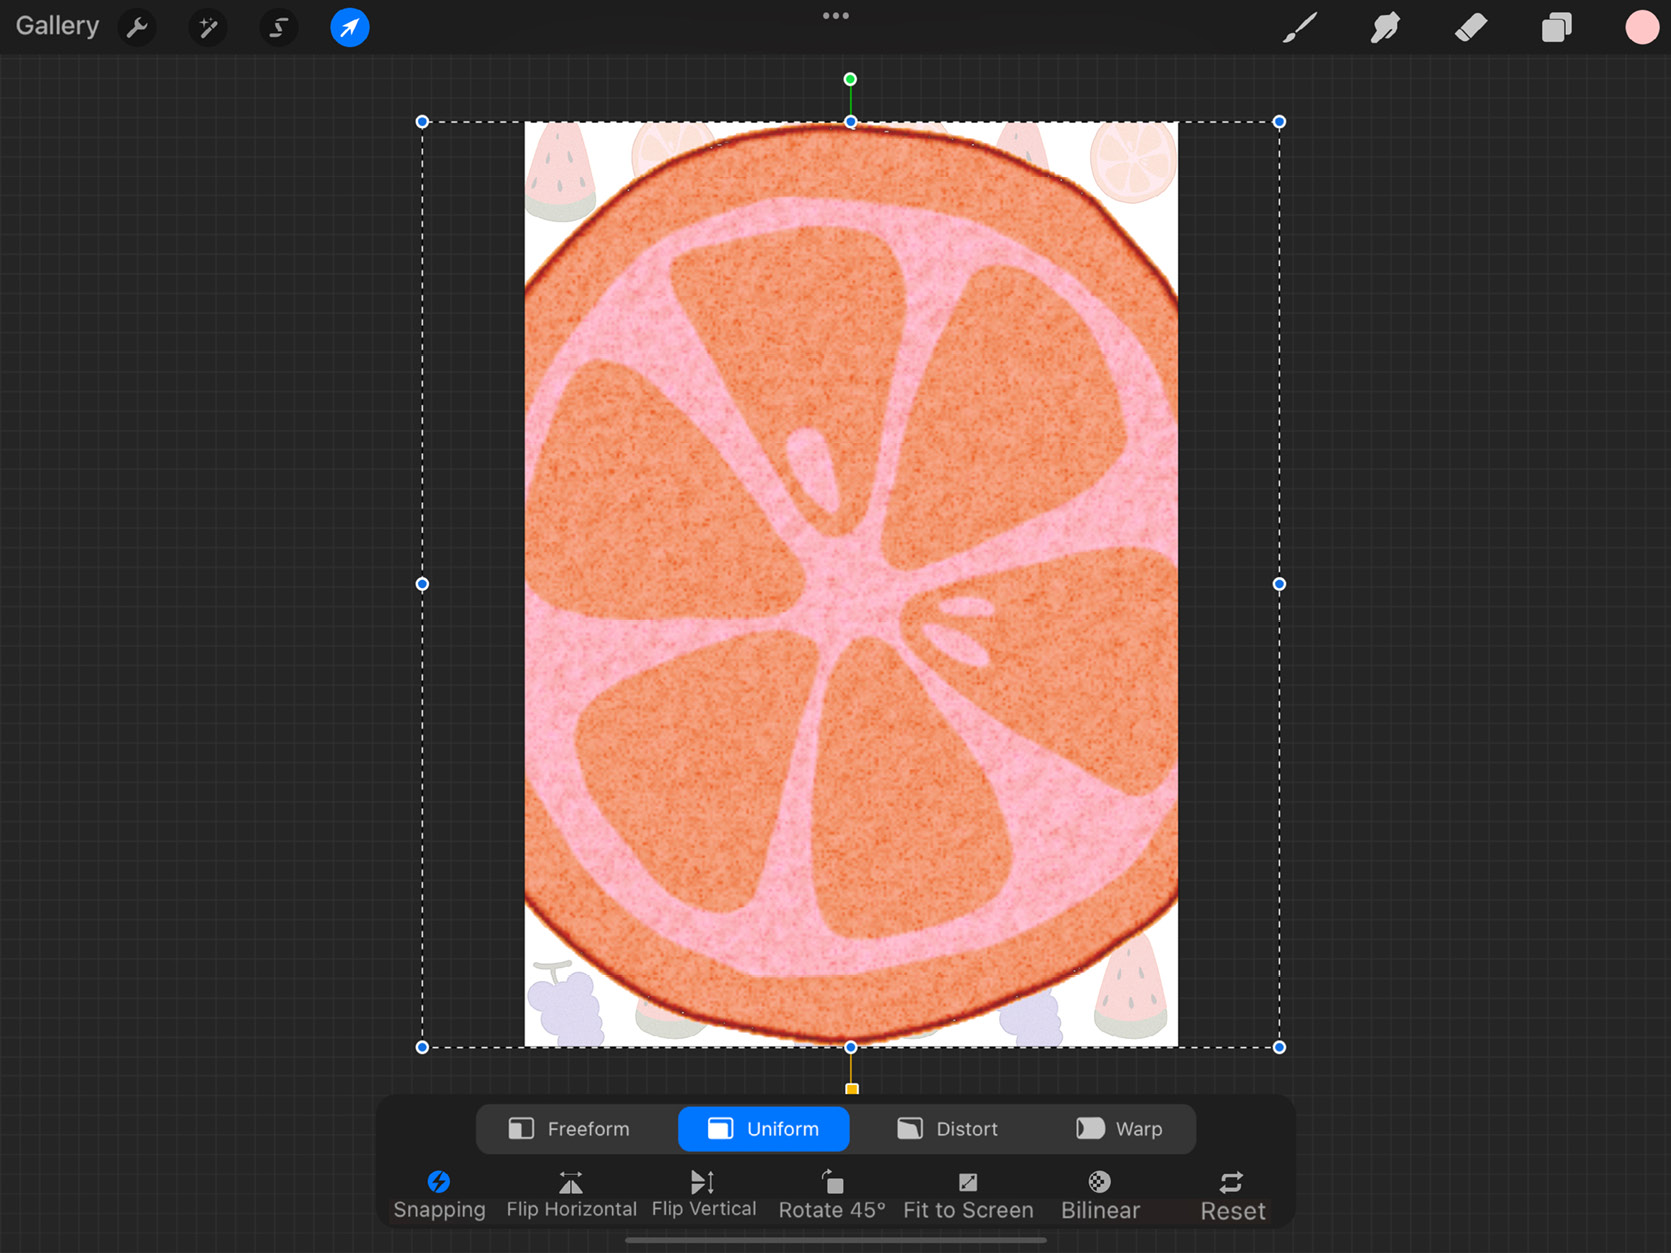
Figure 5.31: Fit to Screen for maximum coverage
Important Note
Once a part of the transformed selection is cropped out of the canvas, it’s lost permanently. It is a useful practice to have a copy of the layer (or the whole canvas) handy, in case you’re not sure about cropping.
Next, we will look at the engine that makes sure transformations are done with pixel-perfect accuracy.
Interpolation
The small circular icon second from the right is responsible for interpolation. When a selection is resized, rotated, or deformed, new pixels must be created or existing pixels need to be readjusted to facilitate that. However, the pixel grid making up the canvas stays the same. Interpolation is a feature that controls how this readjustment is done.
By default, this icon is labeled Nearer. Tap on it to bring up a popover that has more options. These are the three different ways interpolation can happen:
- Nearest Neighbor: This is the simplest form of interpolation where the engine just takes into account the nearest pixel while transforming. In other words, it makes sure your image has sharp edges even after multiple transformations. In some cases, the result may appear jagged, but it works fine for smaller selections.
- Bilinear: This method uses a 2x2 area of pixels around the edge of the selection when calculating new pixels. It is slower but more accurate than the previous option. Bilinear is the most versatile mode for both small and large artworks.
- Bicubic: The sharpest and most accurate type of interpolation is the Bicubic type, which considers an area of 16 pixels around the edge of the selection. Preference is given to the pixels nearer to the edge, giving a more accurate result than the other two modes. However, smaller images may appear blurry with this kind of interpolation.
Reset
The last option on the Transform toolbox is the icon with two arrows, called Reset. This button basically undoes all the transformation actions performed up until this point and makes it revert back to the original state.
Finalizing edits
Once you are happy with the transformation you have made, simply tap on any other tool, such as Paint or Erase, to exit transform mode and continue drawing.
Summary
To summarize, in this chapter, we learned about the Selections and Transform tools. Both of these are essential in terms of demarcating a specific work area (using Selections) and manipulating its size, shape, and position (using Transform).
By now, you should be familiar with how to choose the correct selection mode to suit your needs: Automatic for large chunks, Freehand for complex shapes, and Rectangle or Ellipse for specific shapes. You will also be familiar with all the other functions you can do while selecting, including adding, removing, inverting, and color-filling selections, among others.
Under Transform, we covered the four methods of transformation: Freeform for stretching and squashing along the two axes, Uniform for scaling up and down uniformly, Distort for applying perspective-like effects, and Warp for complex deformations. In this tool’s other functions, we learned about its interface, and how to flip, rotate, align, and much more.
In the next chapter, we will start our exploration of one of the most crucial parts of using Procreate: gestures.