
12
Using Assisted Drawing Tools
Sometimes your artwork requires you to draw within constraints with accuracy. This could mean drawing perfectly straight lines, following a perspective grid, and so on. To help you with these requirements, Procreate has a feature called Drawing Assist.
There are a variety of assisted drawing tools, called drawing guides, available for different purposes. With drawing guides, you can easily draw geometrically accurate drawings such as squared grids and isometric diagrams. You can also follow a realistic perspective or draw perfectly symmetrical drawings. We will cover all of them in depth in this chapter.
We’re going to cover the following broad topics here:
- Using the Drawing Assist interface
- Drawing squared grids with 2D Grid
- Drawing technical graphics with the Isometric Grid
- Realistic drawing with Perspective Guides
- Symmetrical drawing with Symmetry Guides
By the end of this chapter, you will have learned about the four different types of drawing guides, and when to use them, to draw precisely and accurately.
Using the Drawing Assist interface
To start using drawing guides on a specific canvas, you must activate Drawing Assist on it. This feature allows you to choose and edit which type of drawing guide will be applied to your art. Drawing Assist can be toggled on and off using the Canvas tab of the Actions menu (the wrench-shaped icon in the top left-hand corner of the screen). To turn it on, follow these steps:
- Tap the wrench icon to open the Actions menu popover, and select the Canvas tab, as shown in the following screenshot:
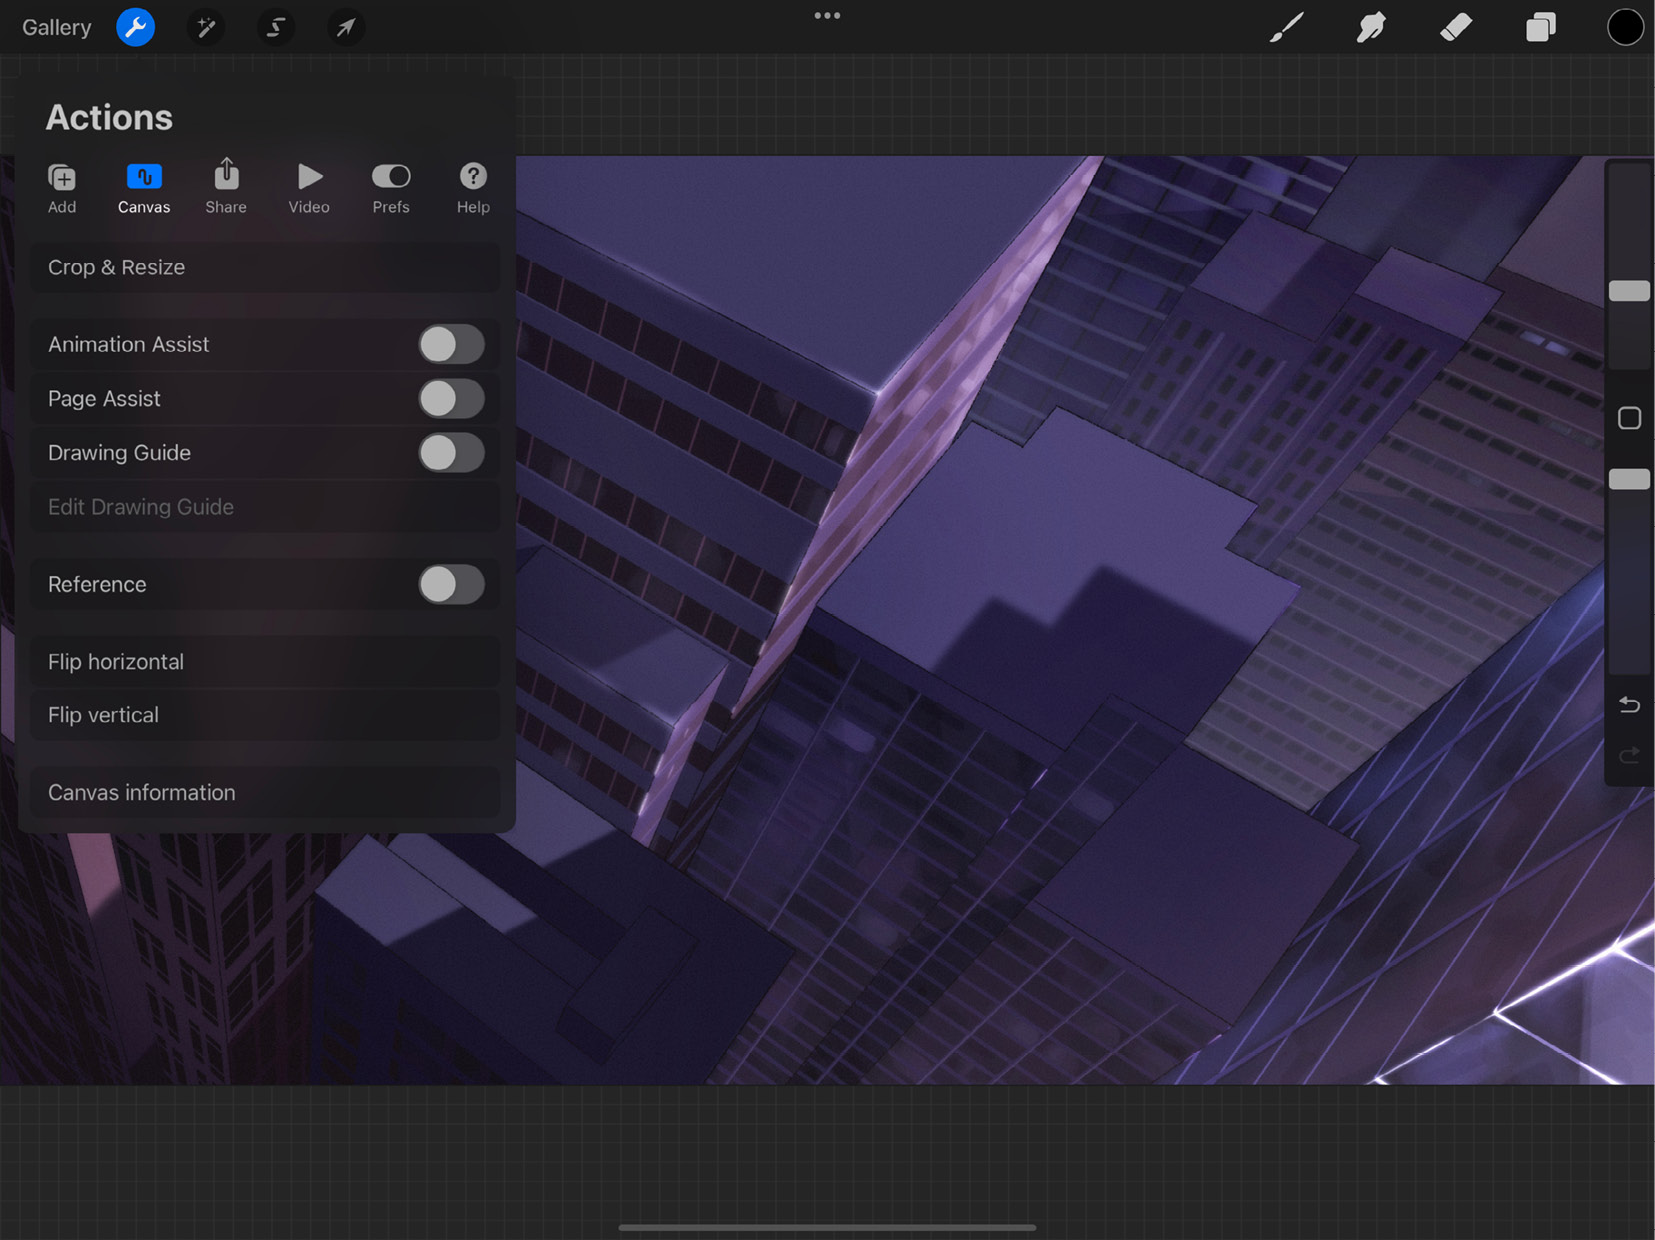
Figure 12.1: Canvas tab
- Toggle on the Drawing Guide option. A square grid will appear over your canvas. This is the 2D Grid, which is the default drawing guide, as shown in the following screenshot:
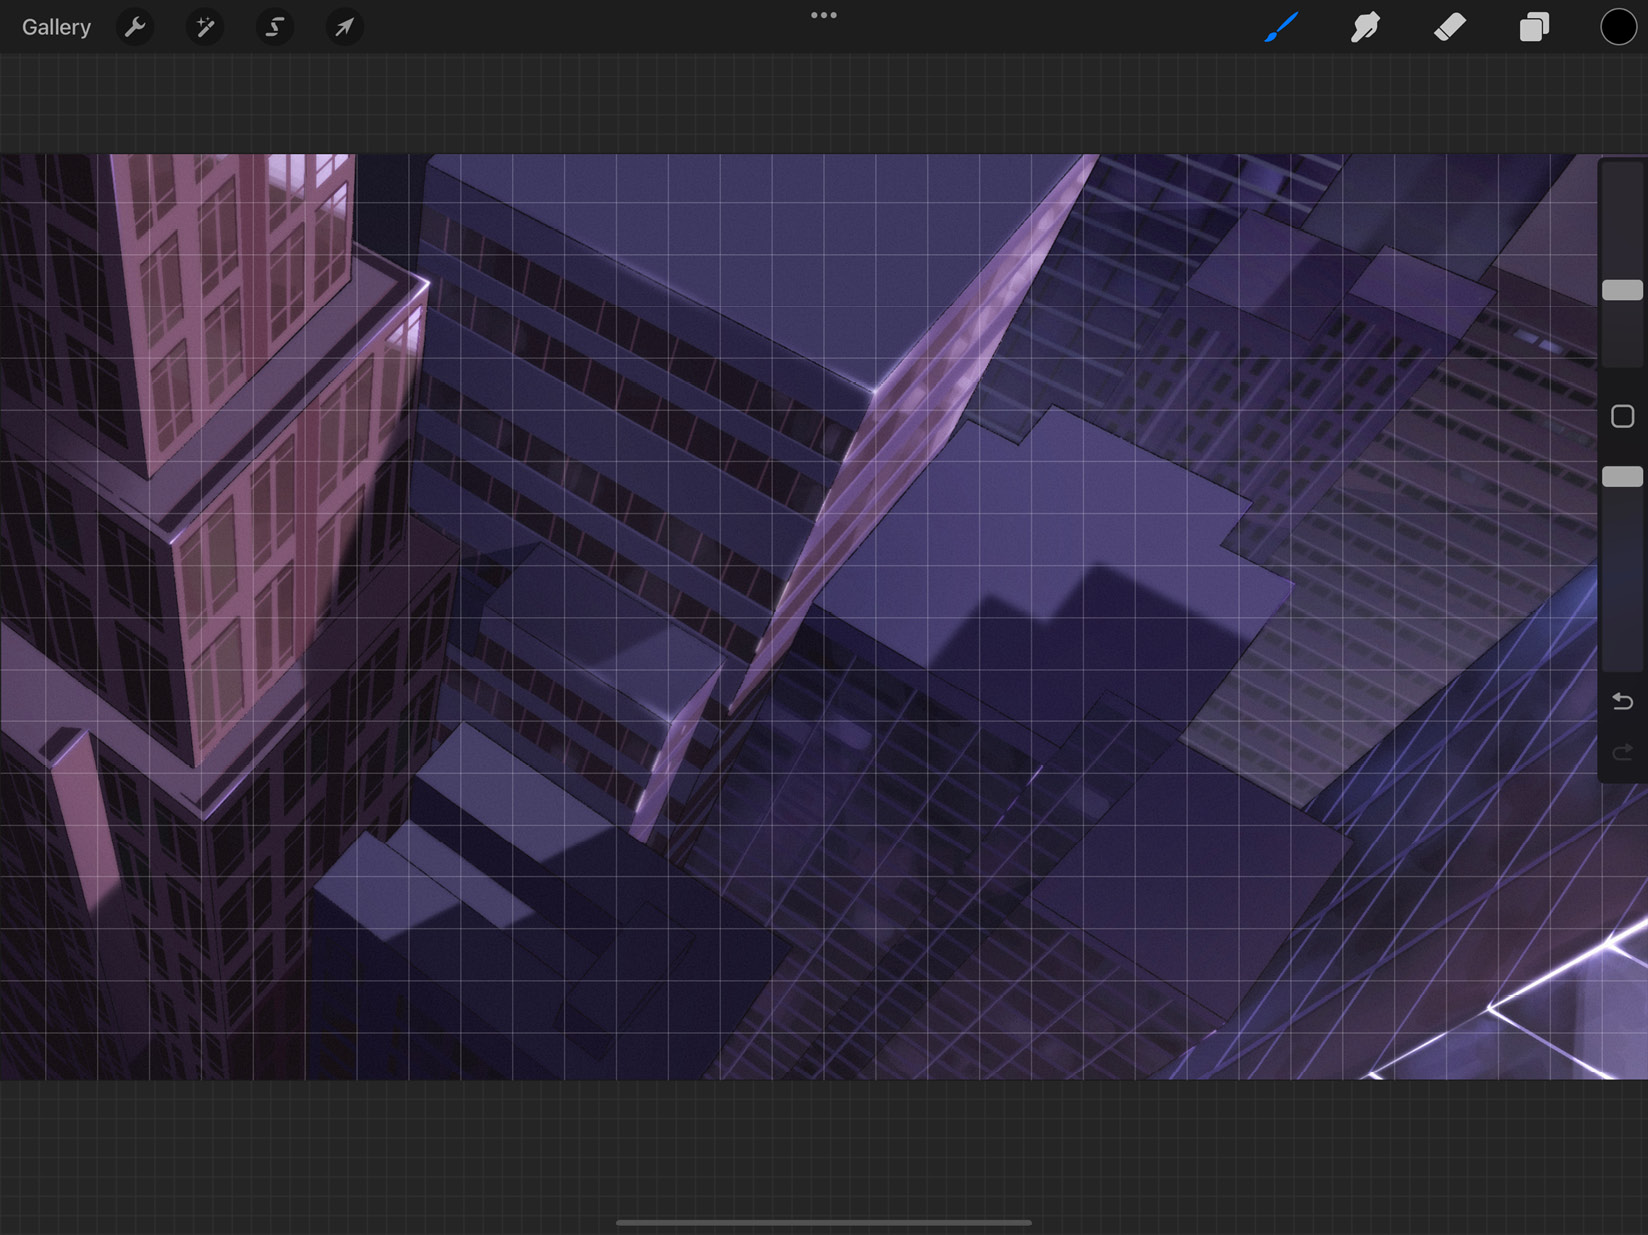
Figure 12.2: Drawing Assist active
If you’ve already used another drawing guide on this canvas before, Procreate will load that instead.
- Notice the option Edit Drawing Guide in the Actions menu. It was greyed out earlier but is now active. Tap it to bring up the Drawing Guides interface, shown in the following screenshot:
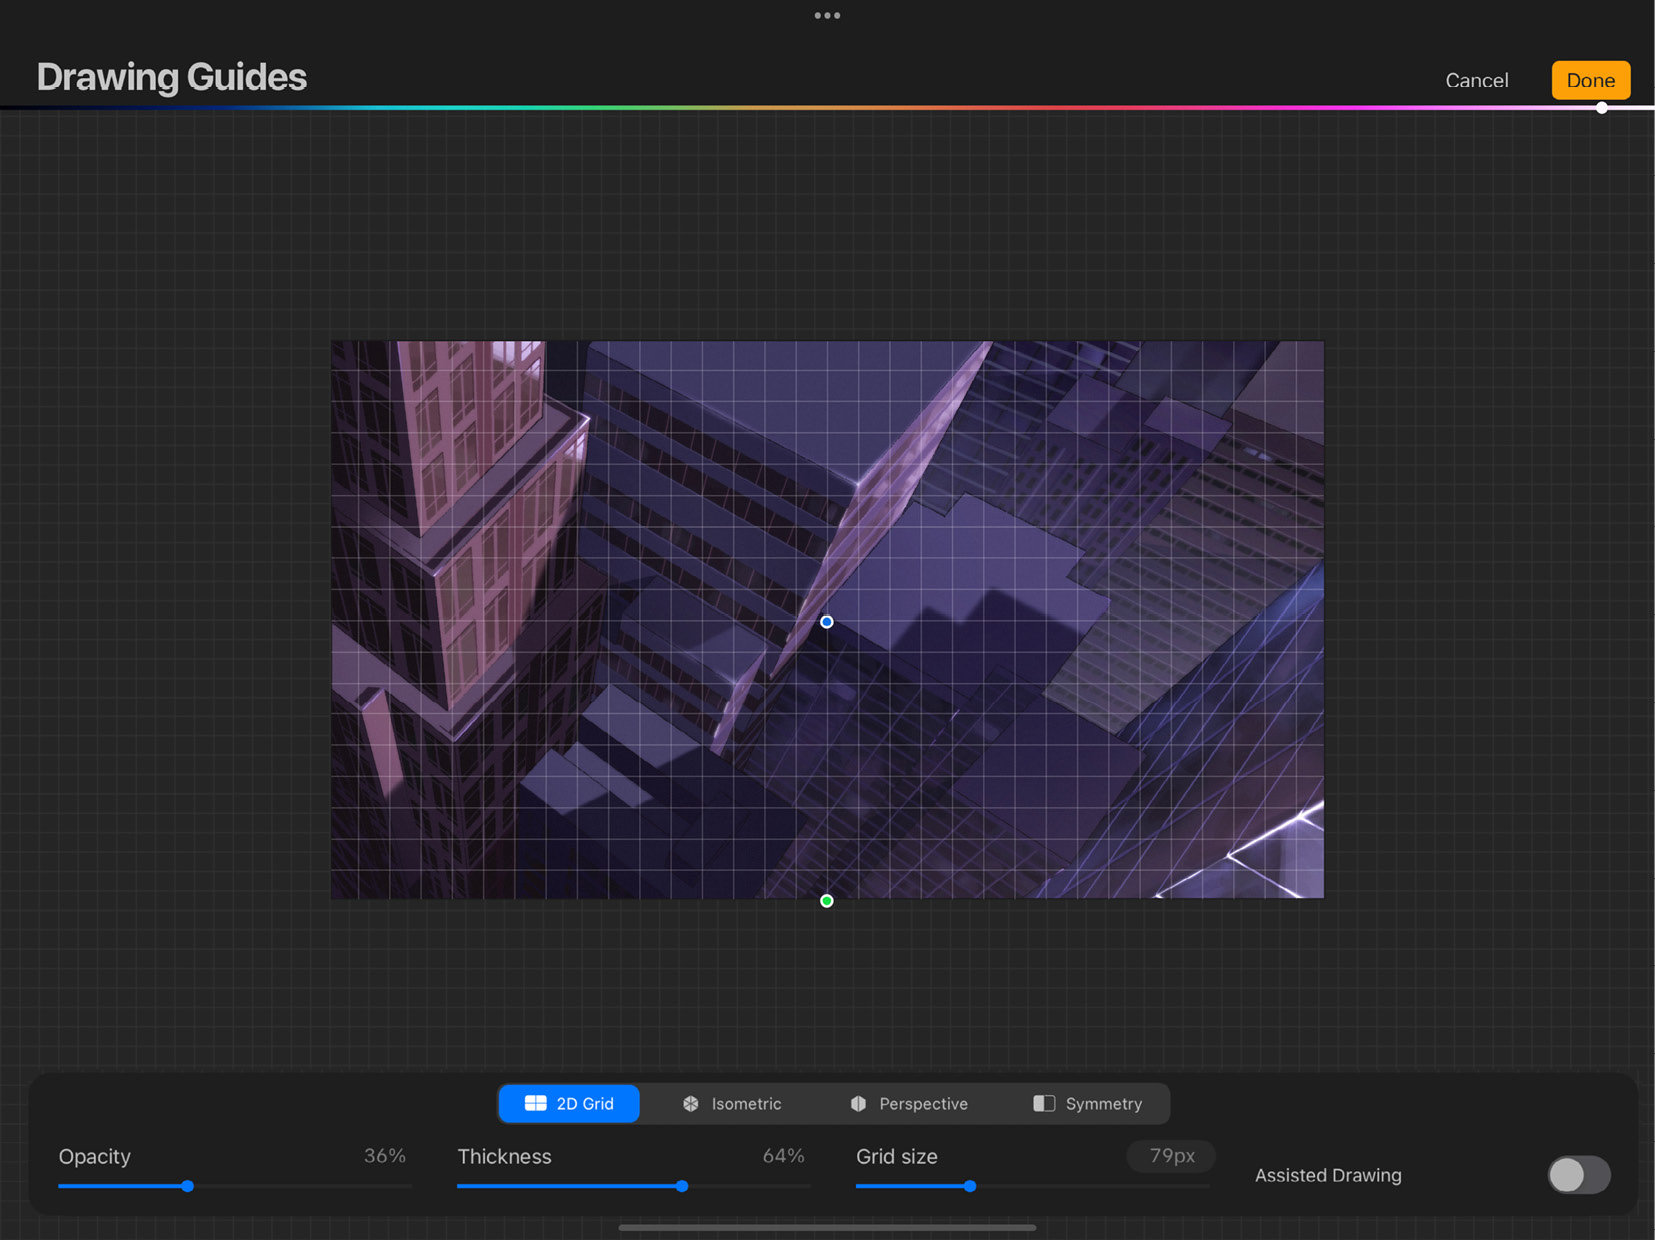
Figure 12.3: Edit Drawing Guide
This interface is where you will be able to select a preferred drawing guide and customize it to suit your needs. We will learn more about each type of drawing guide in later sections of the chapter.
- The toolbar at the bottom of the screen sports a toggle labeled Assisted Drawing. Toggle this to turn it on to make your active layer follow the drawing guide, as shown in the following screenshot:
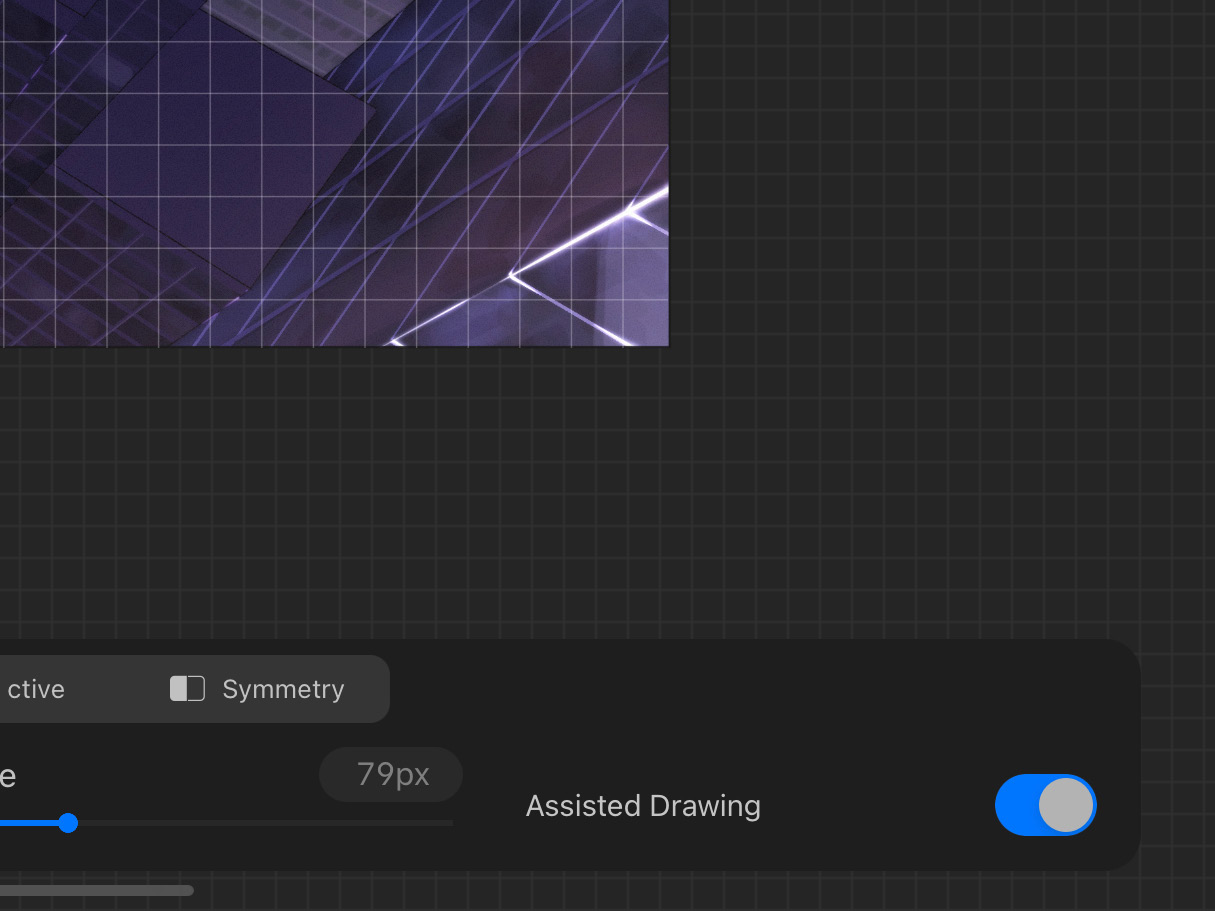
Figure 12.4: Assisted Drawing toggled on
- Another way to activate it is to tap on a layer to bring up the layer options menu, and select Drawing Assist. This is shown in the following screenshot:
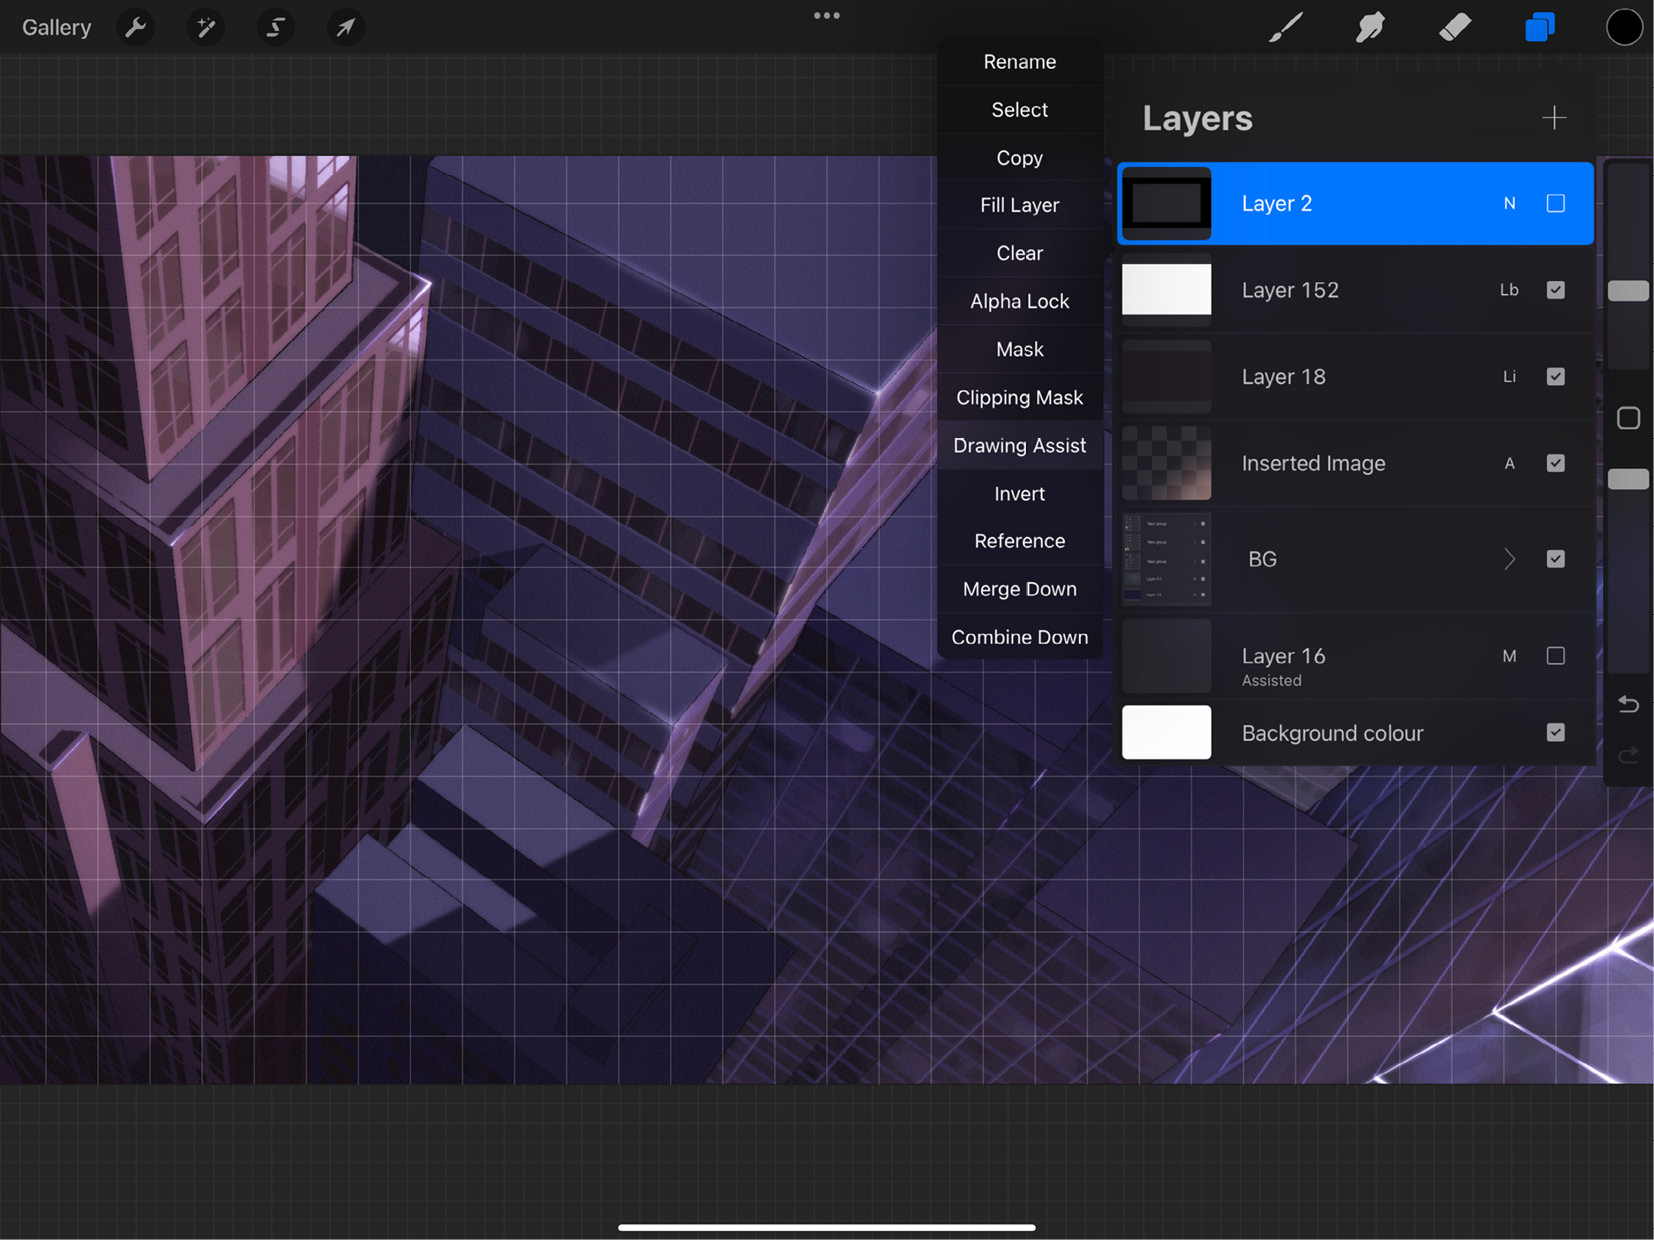
Figure 12.5: Layer options menu
- Tap on Done to commit to changes or Cancel to discard them and exit the interface.
Important Note
Multiple layers may have Drawing Assist enabled at the same time, but it needs to be enabled on them one at a time. You cannot enable Drawing Assist on a layer group, or several layers at once.
Moreover, two types of drawing guides can’t be active at the same time on the same canvas, though you may switch between them anytime.
In the following sub-section, we’ll go over the basic elements of the Drawing Guides interface, which are shared by all the drawing guides.
The Drawing Guides interface
The interface of the Drawing Guides screen has certain elements that are common no matter which style of guide you’re using. We will look at some of those in this sub-section:
- Color: The hue slider at the top of the screen lets you edit the color of gridlines.
- Nodes: Each type of grid except Perspective has two types of nodes to help manipulate the position and rotation of the grid. The blue (positional node) is used to reposition the grid and the green (rotational node) is used to rotate it, as shown in the following screenshots:

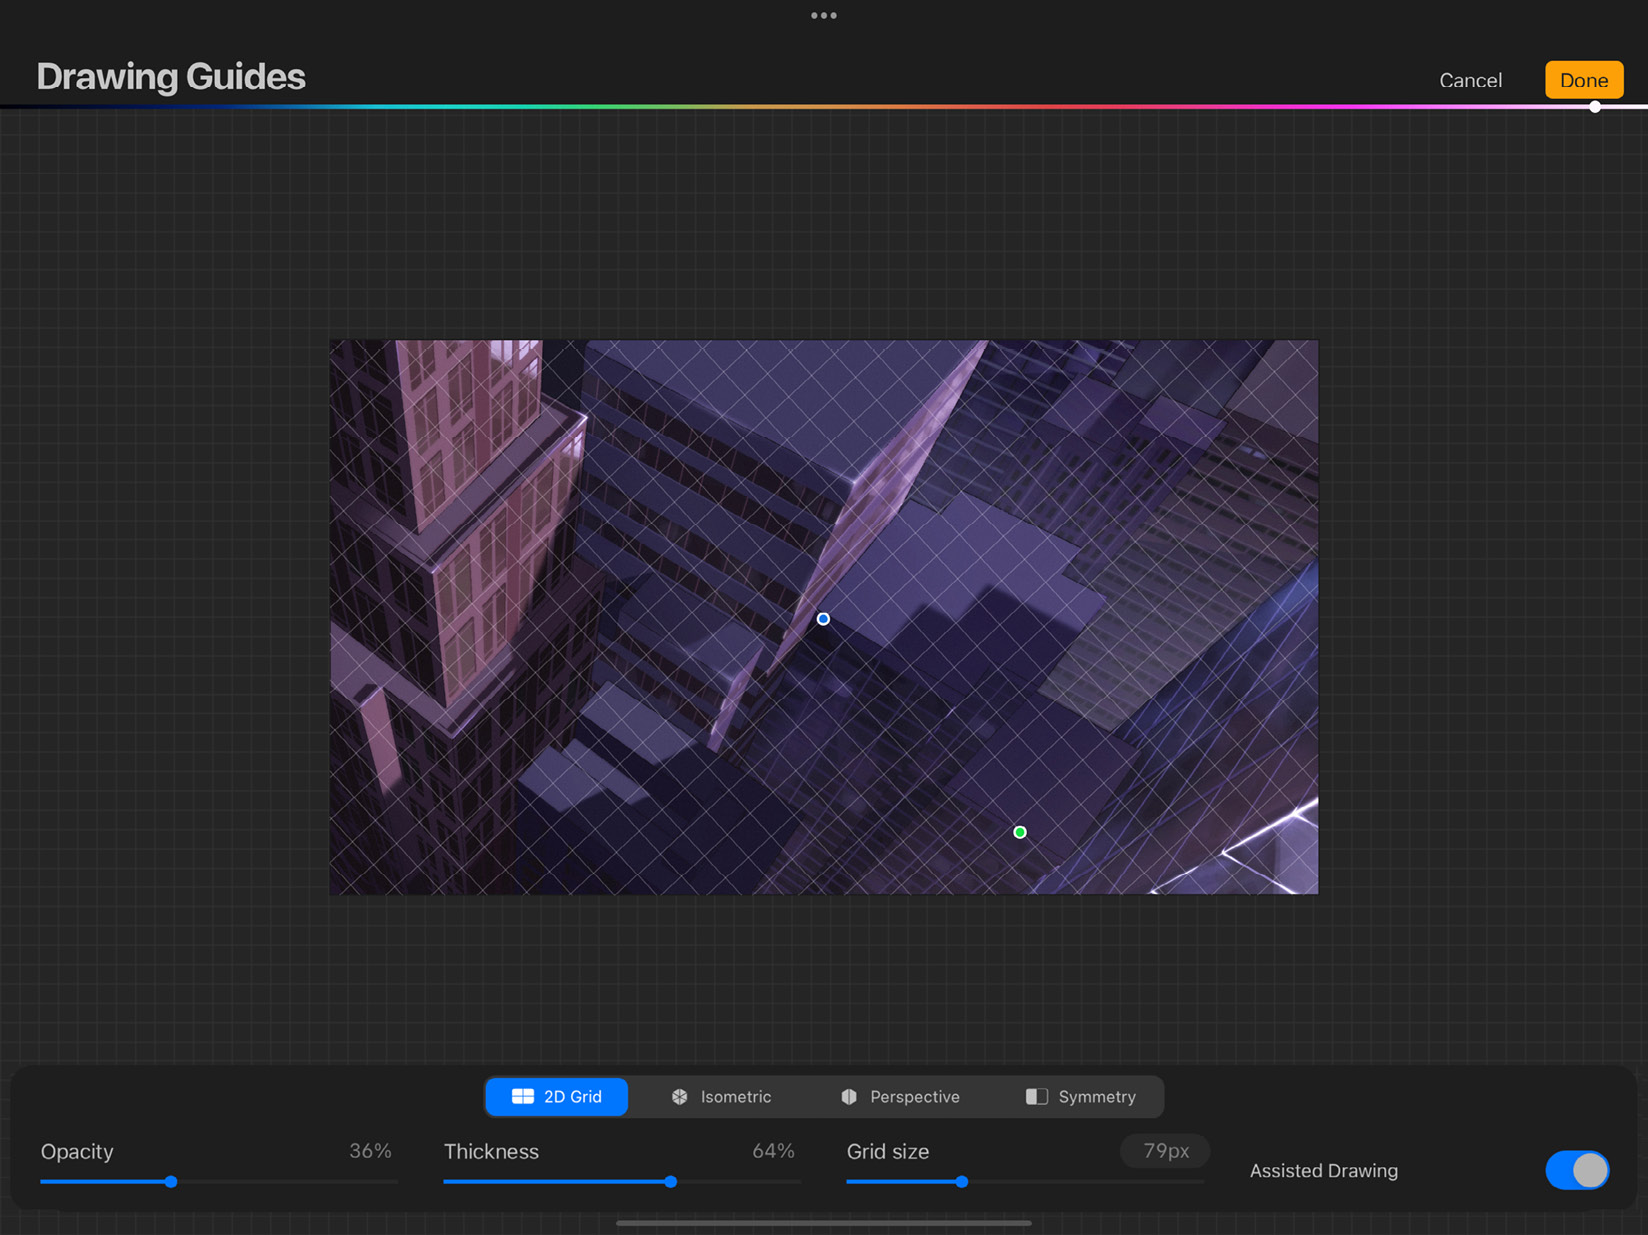
Figure 12.6 (a): Positional node repositions grid (b): Rotational node rotates grid
They also serve functions specific to the type of drawing guide, which we will discuss later in the chapter.
- Opacity: This slider controls the opacity of the gridlines.
- Thickness: By default, a drawing guide grid has thin lines, but this slider lets you control the line thickness further.
Now that you are familiar with the Drawing Assist interface, let us look at the different drawing guide styles.
Drawing squared grids with 2D Grid
The first type of drawing guide on the toolbar is 2D Grid. This guide helps you draw straight lines in the vertical and horizontal directions. It functions like a ruler that restricts every stroke you draw to a straight vertical or horizontal line. The following screenshot shows rectangular panels, which can be drawn using this guide:
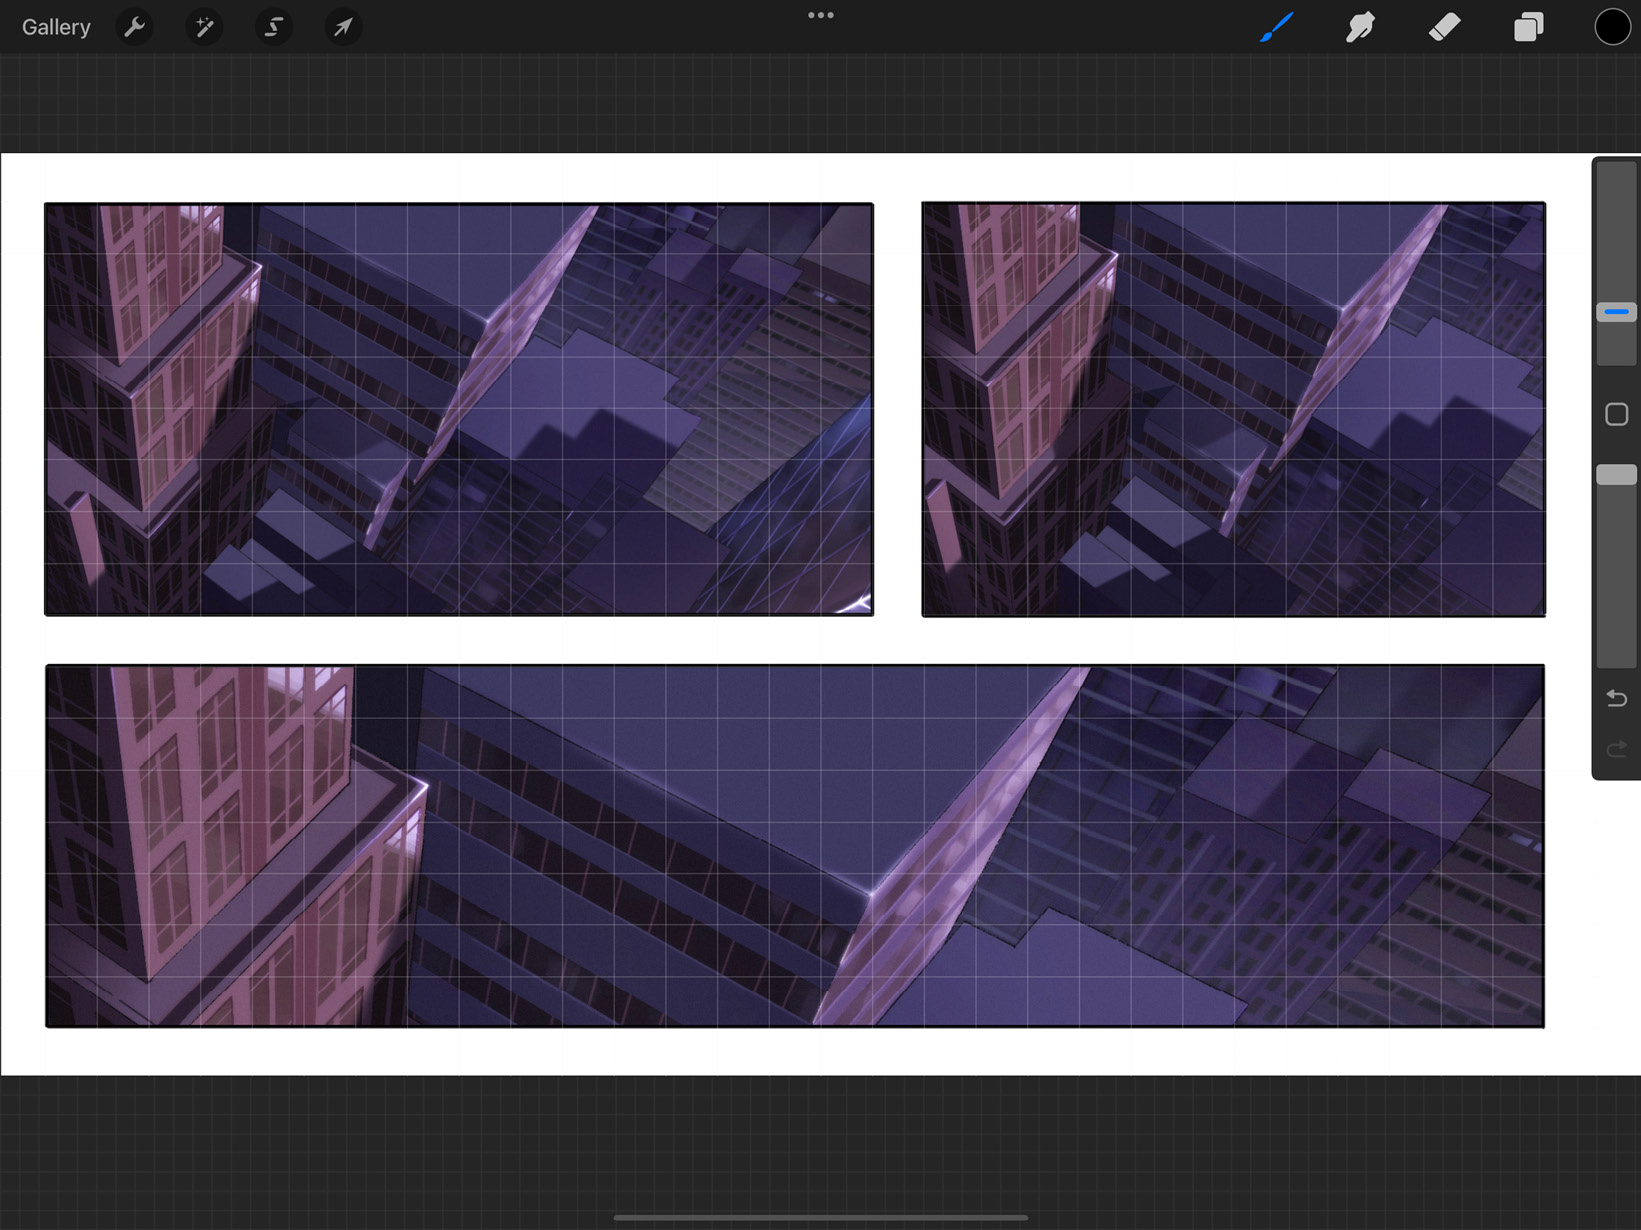
Figure 12.7: Panels drawn using 2D Grid
We will now look at the interface of this guide.
The 2D Grid interface
When 2D Grid is selected, the toolbar has the interface shown in the following screenshot:
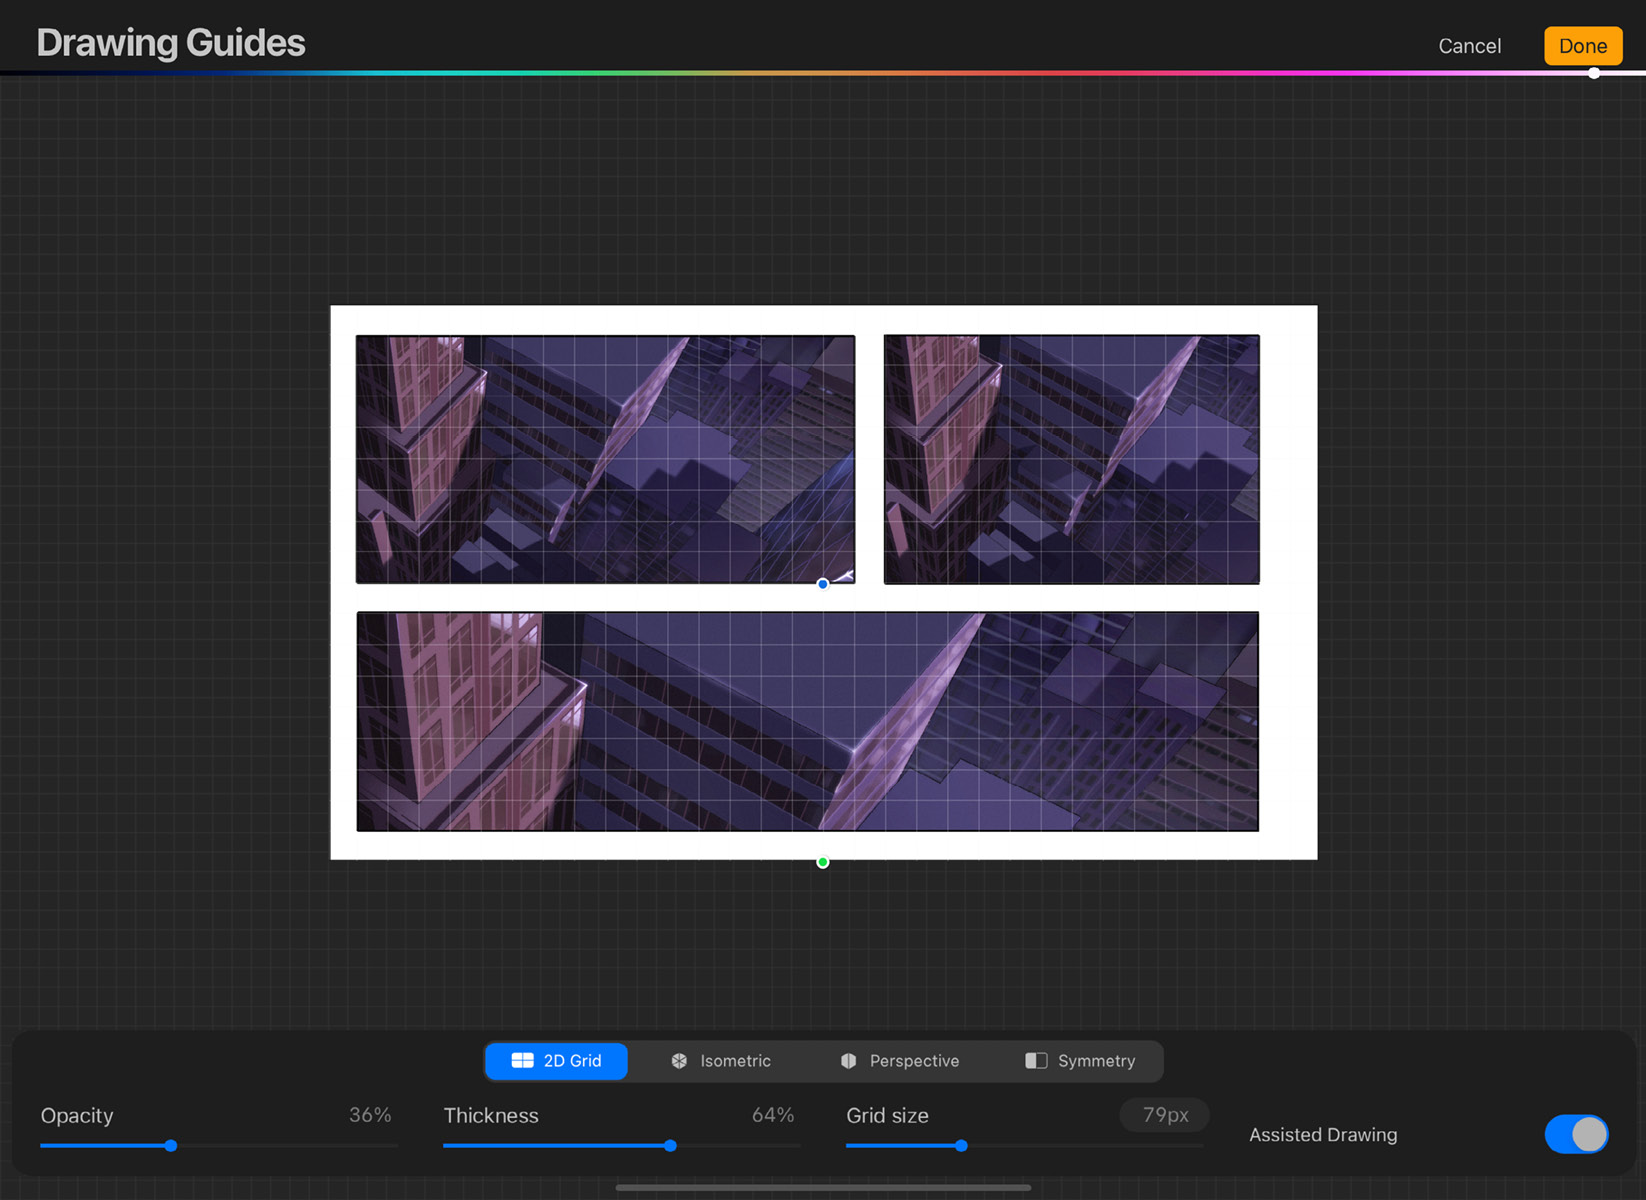
Figure 12.8: 2D Grid interface
These are the elements of this interface:
- Opacity: This slider controls the opacity of the gridlines.
- Thickness: This slider controls the thickness of the gridlines.
- Grid size: This slider controls how large the grid appears on the canvas.
- Nodes: This guide has both the positional and rotational nodes. The blue positional node lets you move around the grid, while the green rotational node rotates it.
Tap on the either of these nodes to bring up a button called Reset, shown in the following screenshot:
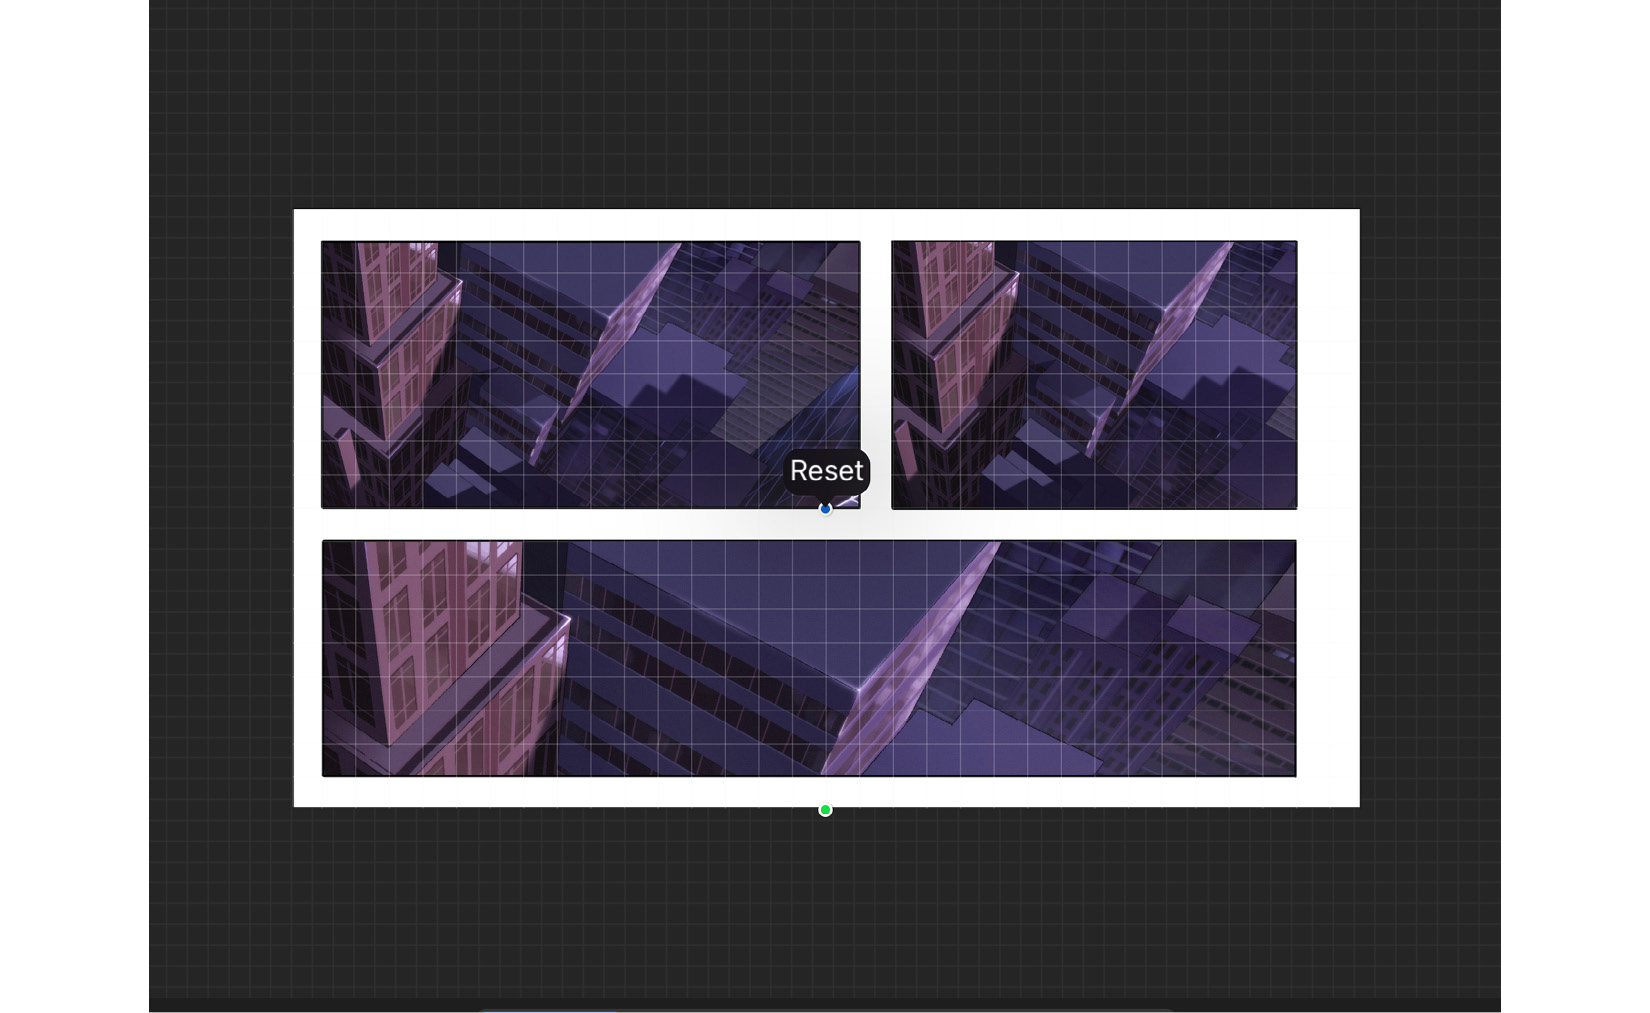
Figure 12.9: Reset grid
Tap it to reset the grid to its original position or rotation.
With this, you will be able to use the 2D Grid guide to draw squared grids. In the next section, we will discuss another similar style of drawing guide.
Drawing technical graphics with the Isometric Grid
The Isometric Grid functions in a way that is similar to the 2D Grid. The Isometric Grid lets you draw straight vertical lines, as well as lines at a 45° angle. This guide is useful for drawing isometric views in technical drawings. Shown below is an isometric diagram that can be drawn using this guide:
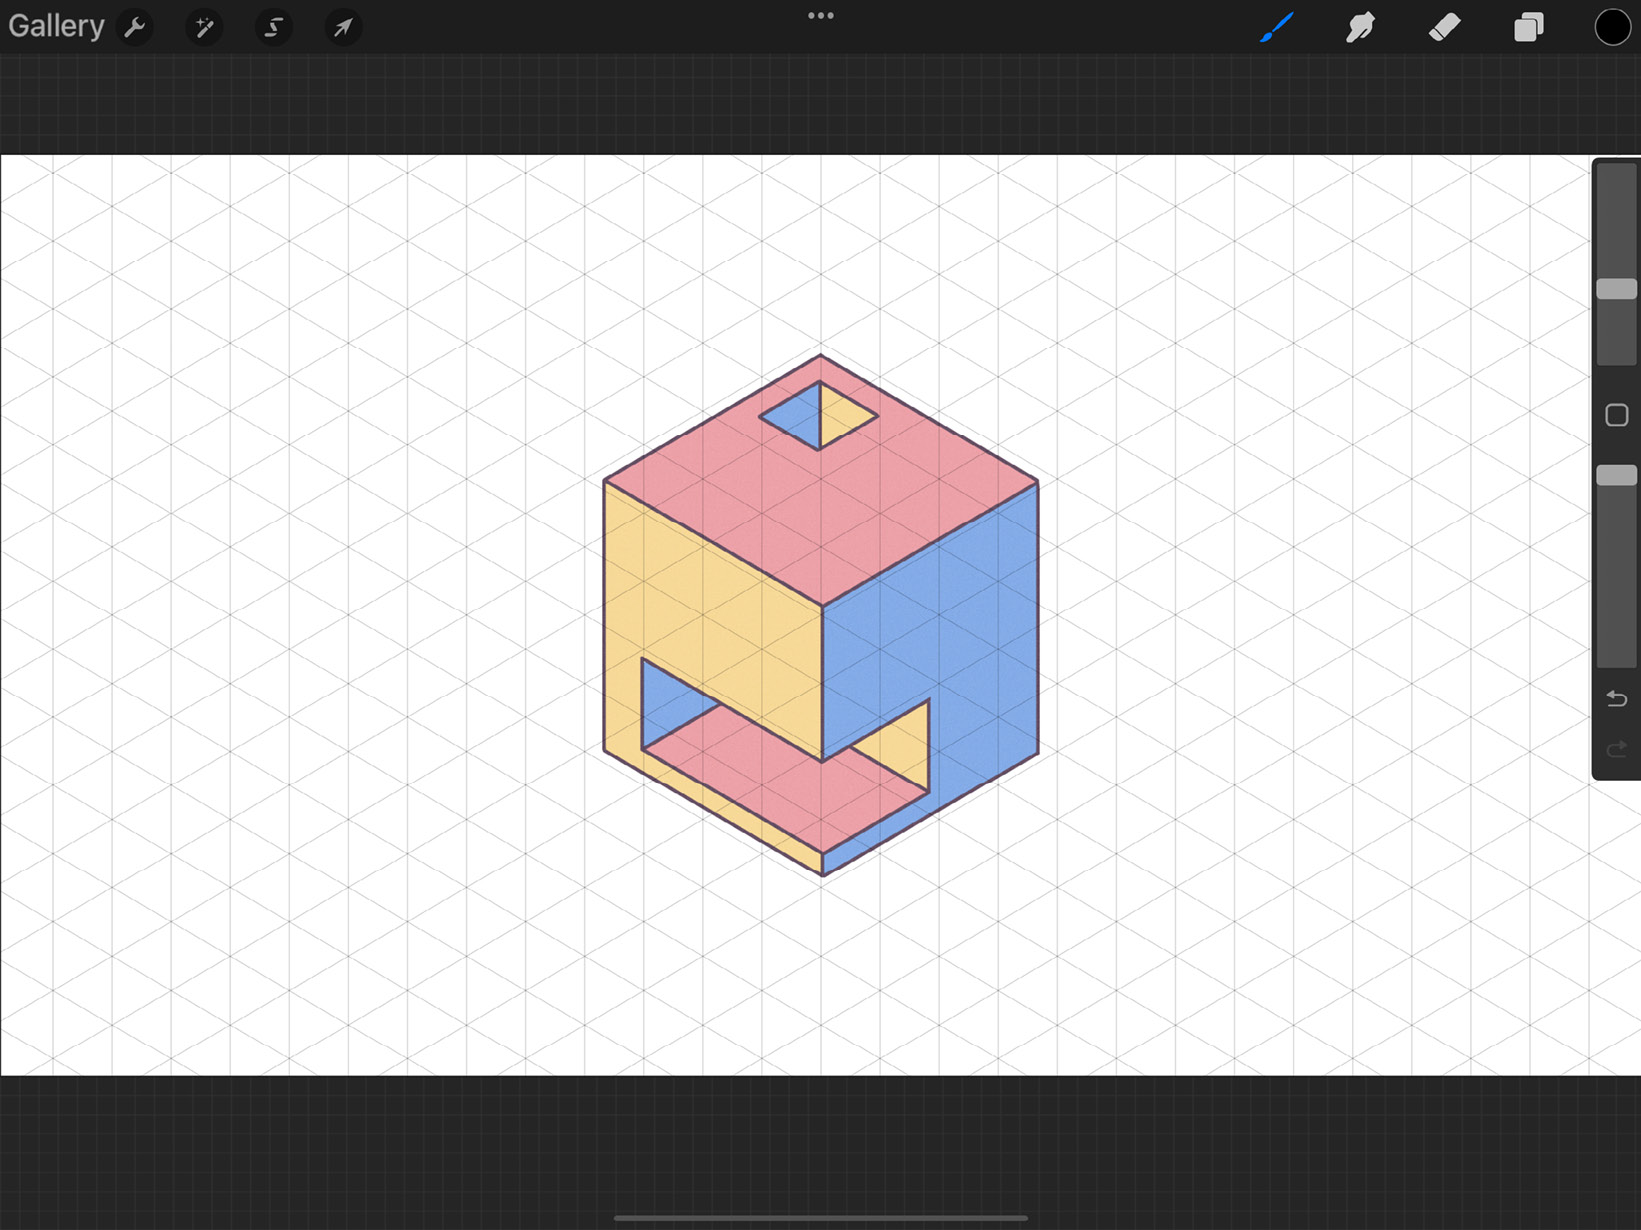
Figure 12.10: Technical graphic drawn with the Isometric Grid guide
We will now look at the interface of this guide.
The Isometric interface
When Isometric is selected, the toolbar has the interface shown in the following screenshot:
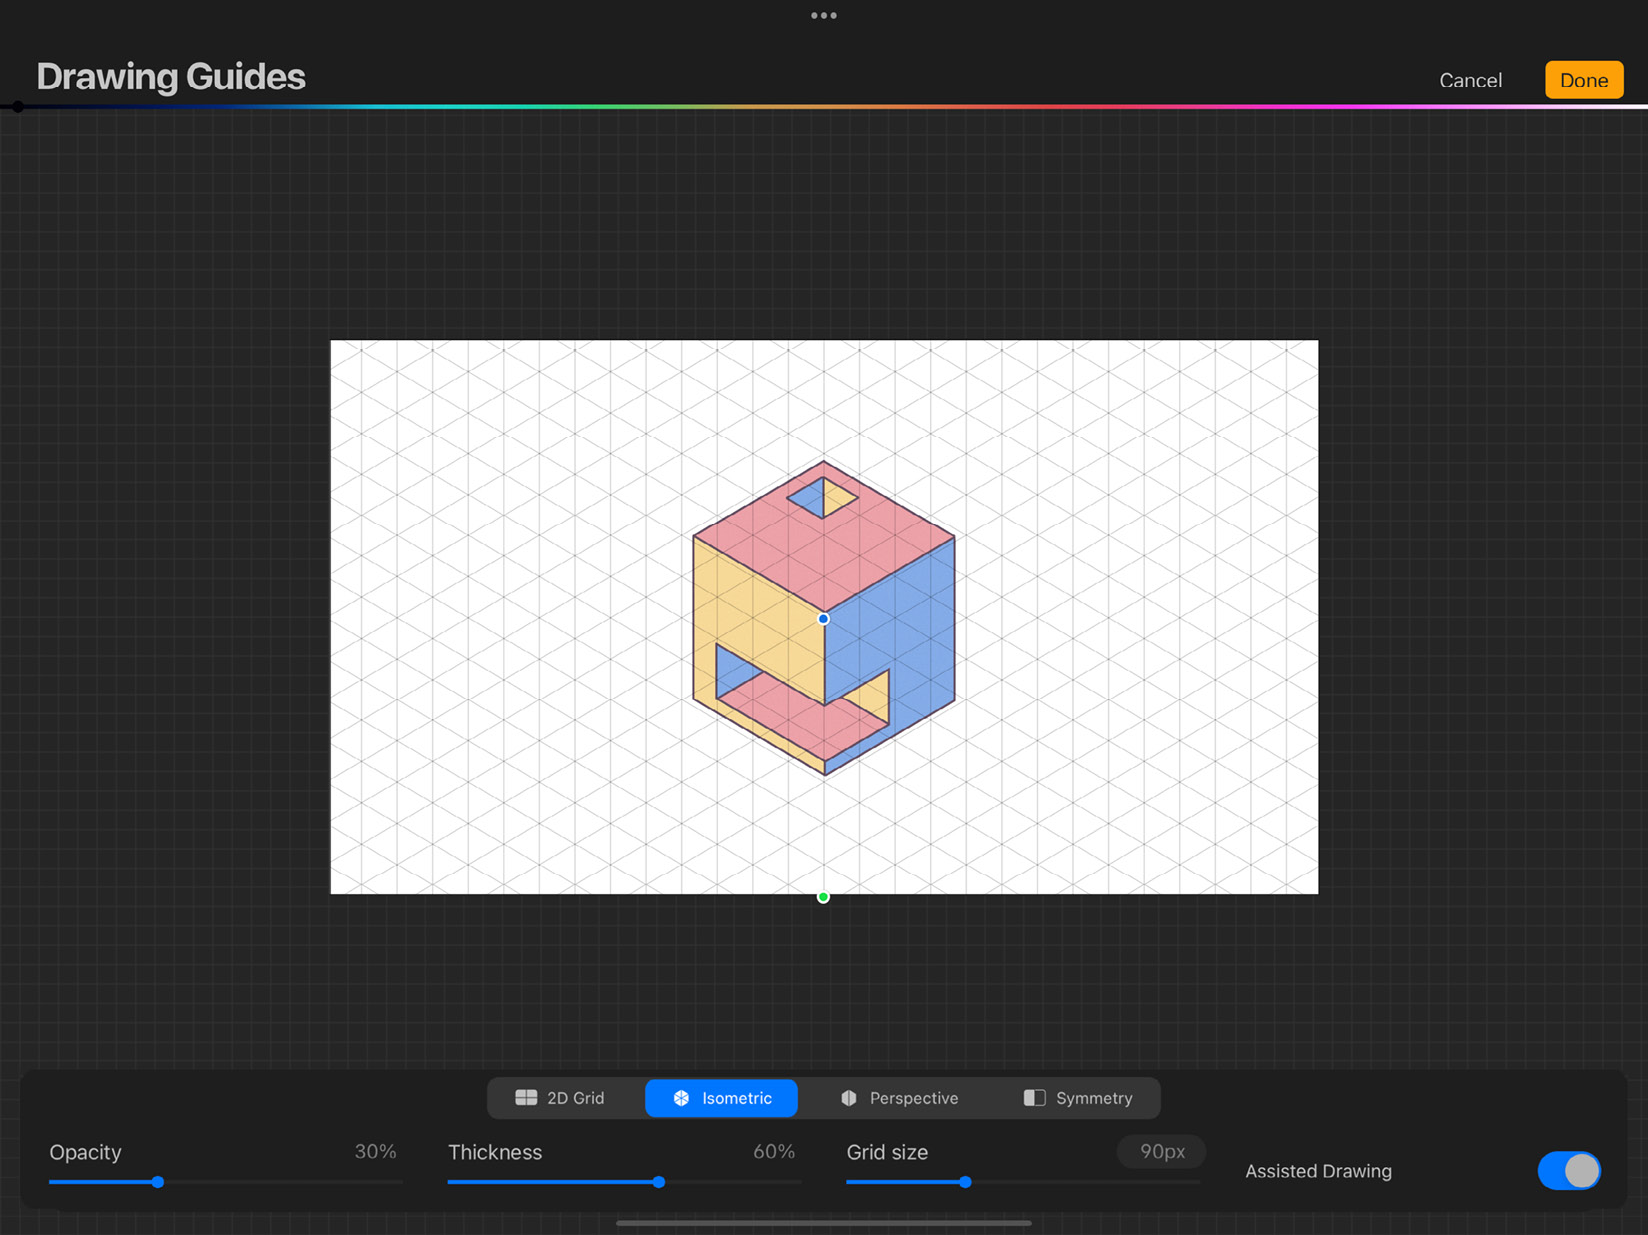
Figure 12.11: Isometric Grid interface
These are the elements of this interface:
- Opacity: This slider controls the opacity of the gridlines.
- Thickness: This slider controls the thickness of the gridlines.
- Grid size: This slider controls how large the grid appears on the canvas.
- Nodes: This guide has both the positional and rotational nodes, much like the previous guide. The blue positional node lets you move around the grid, while the green rotational node rotates it.
Tap on either of these nodes to bring up a button called Reset, shown in the following screenshot:
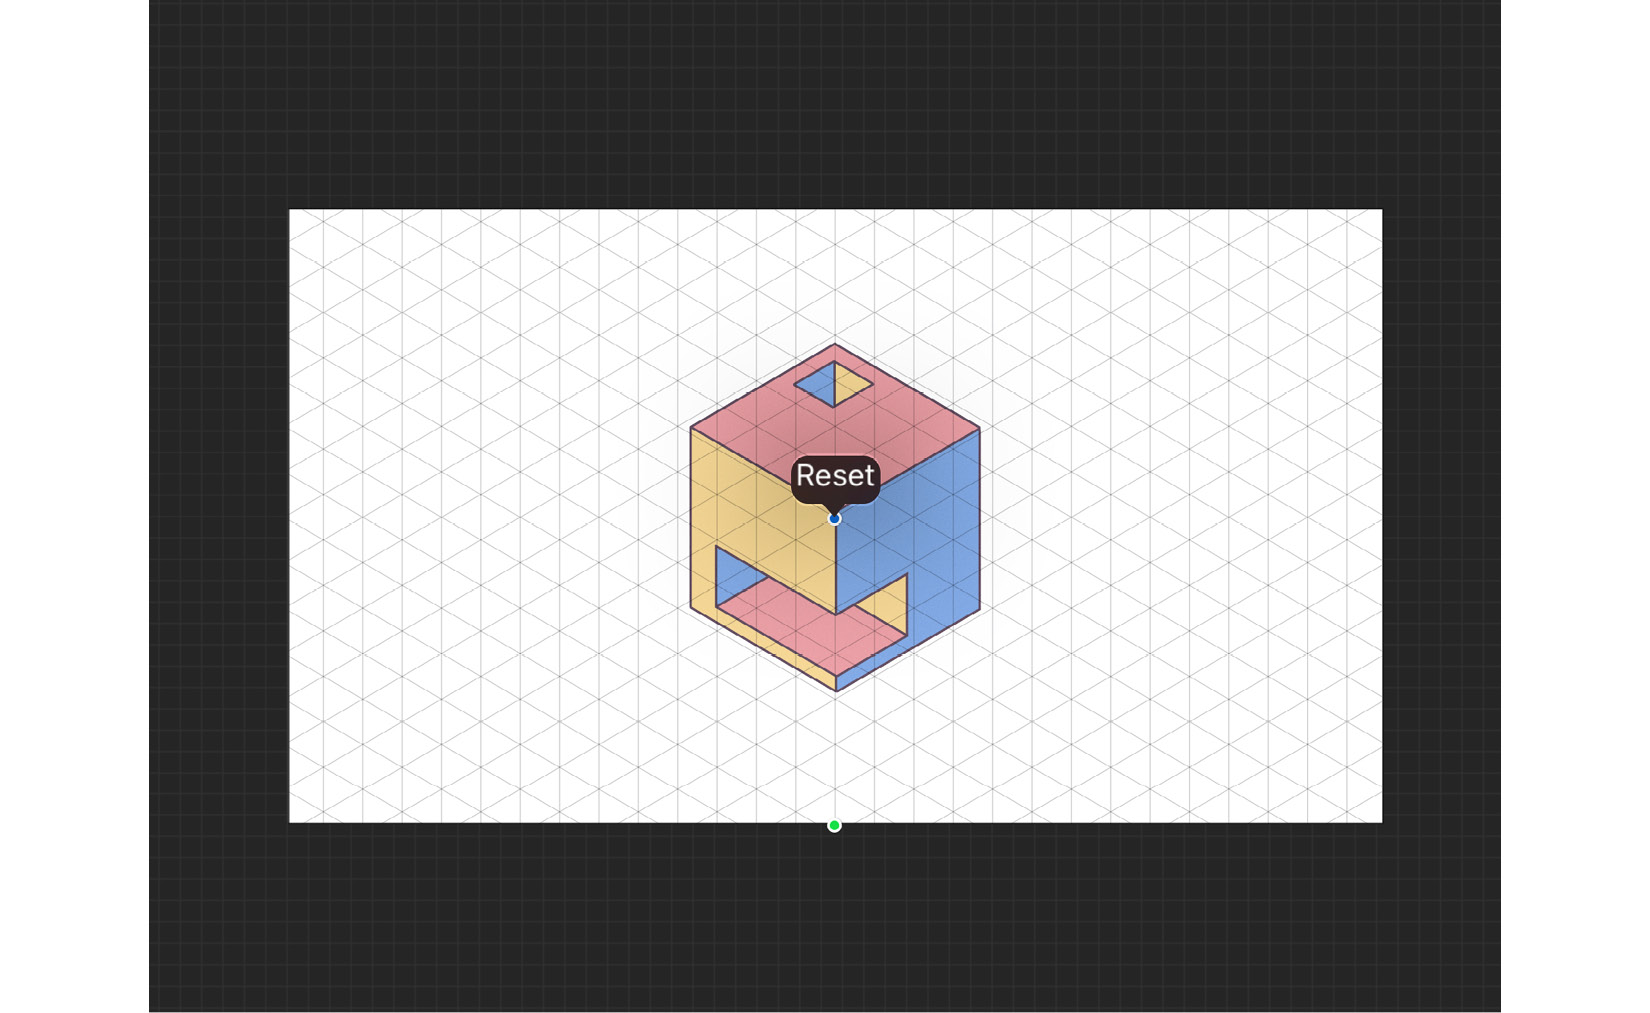
Figure 12.12: Reset grid
Tap it to reset the grid to its original position or rotation.
The next section will introduce the next type of guide, which functions slightly differently from the grid-style guides.
Realistic drawing with Perspective Guides
The Perspective guide is a special kind of assisted drawing tool. It helps you draw backgrounds and objects with a realistic perspective by adding up to three adjustable vanishing points. The following screenshots show one-point, two-point, and three-point perspectives that can be drawn using this guide:
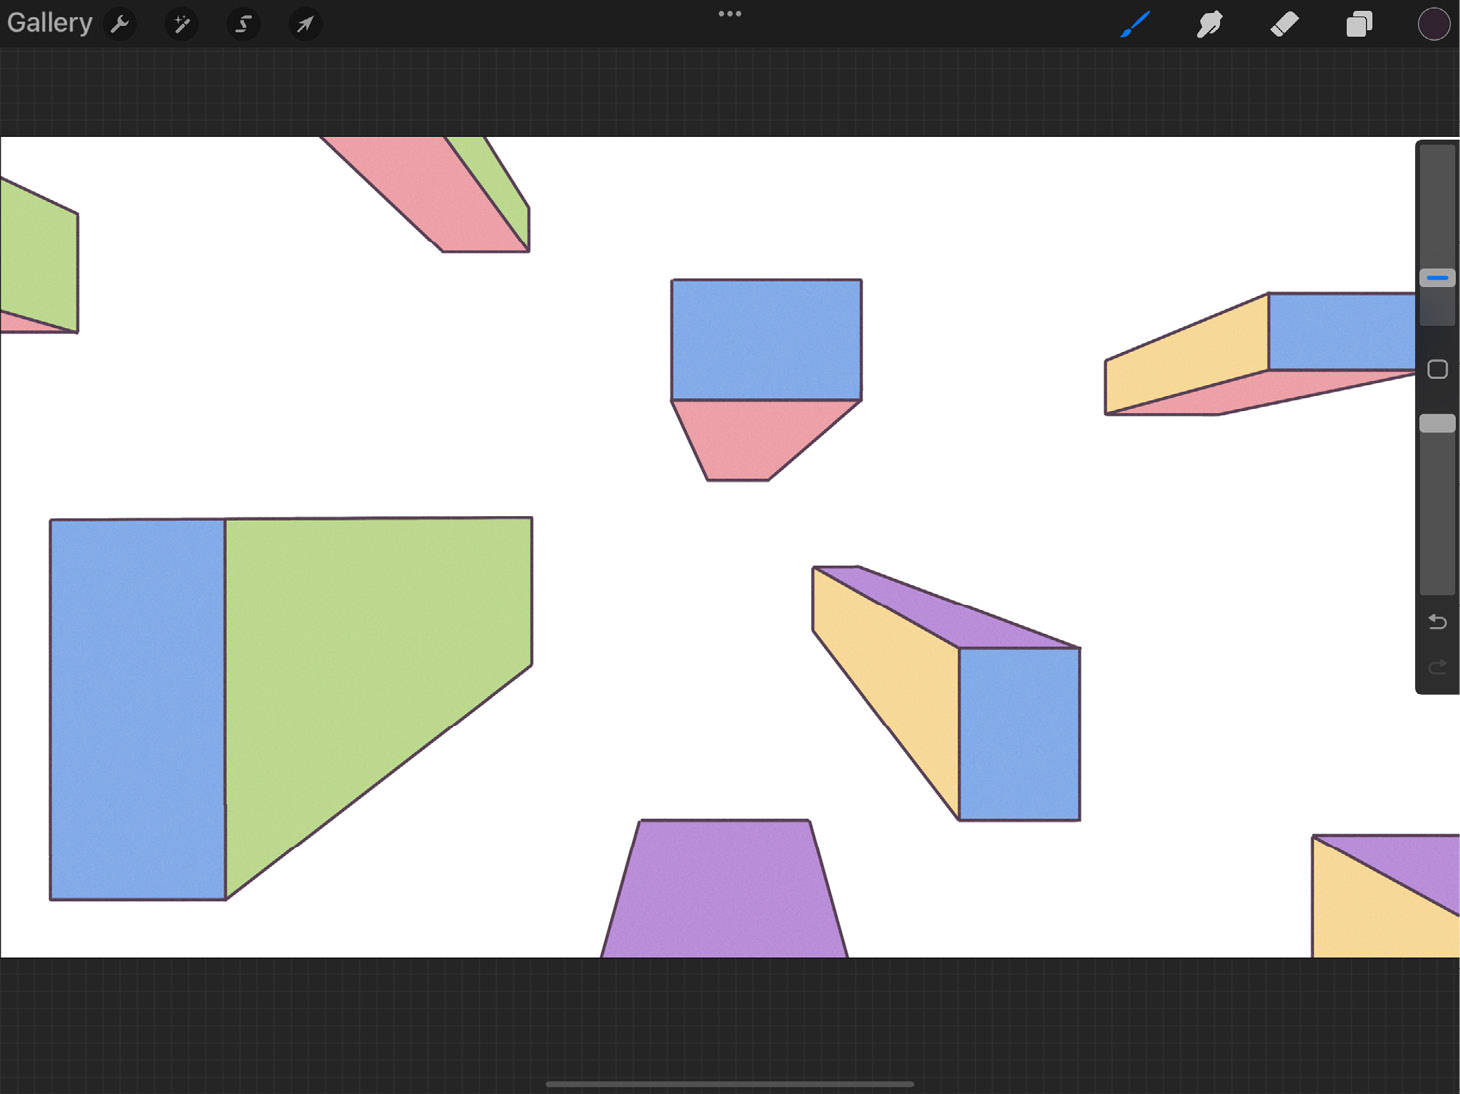
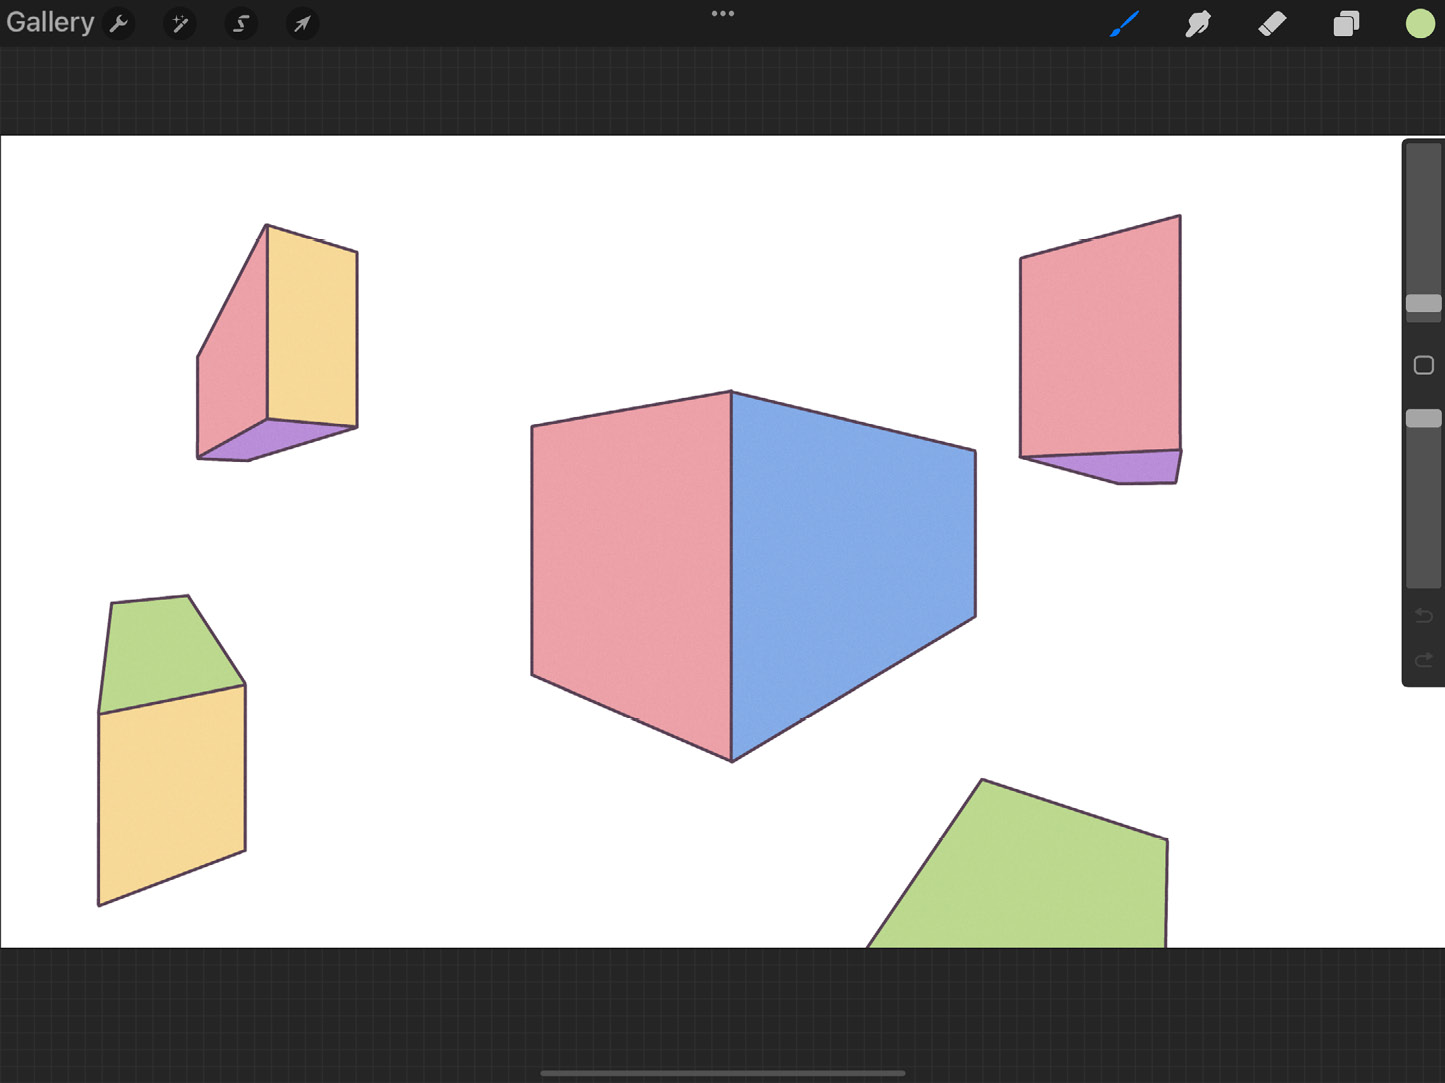
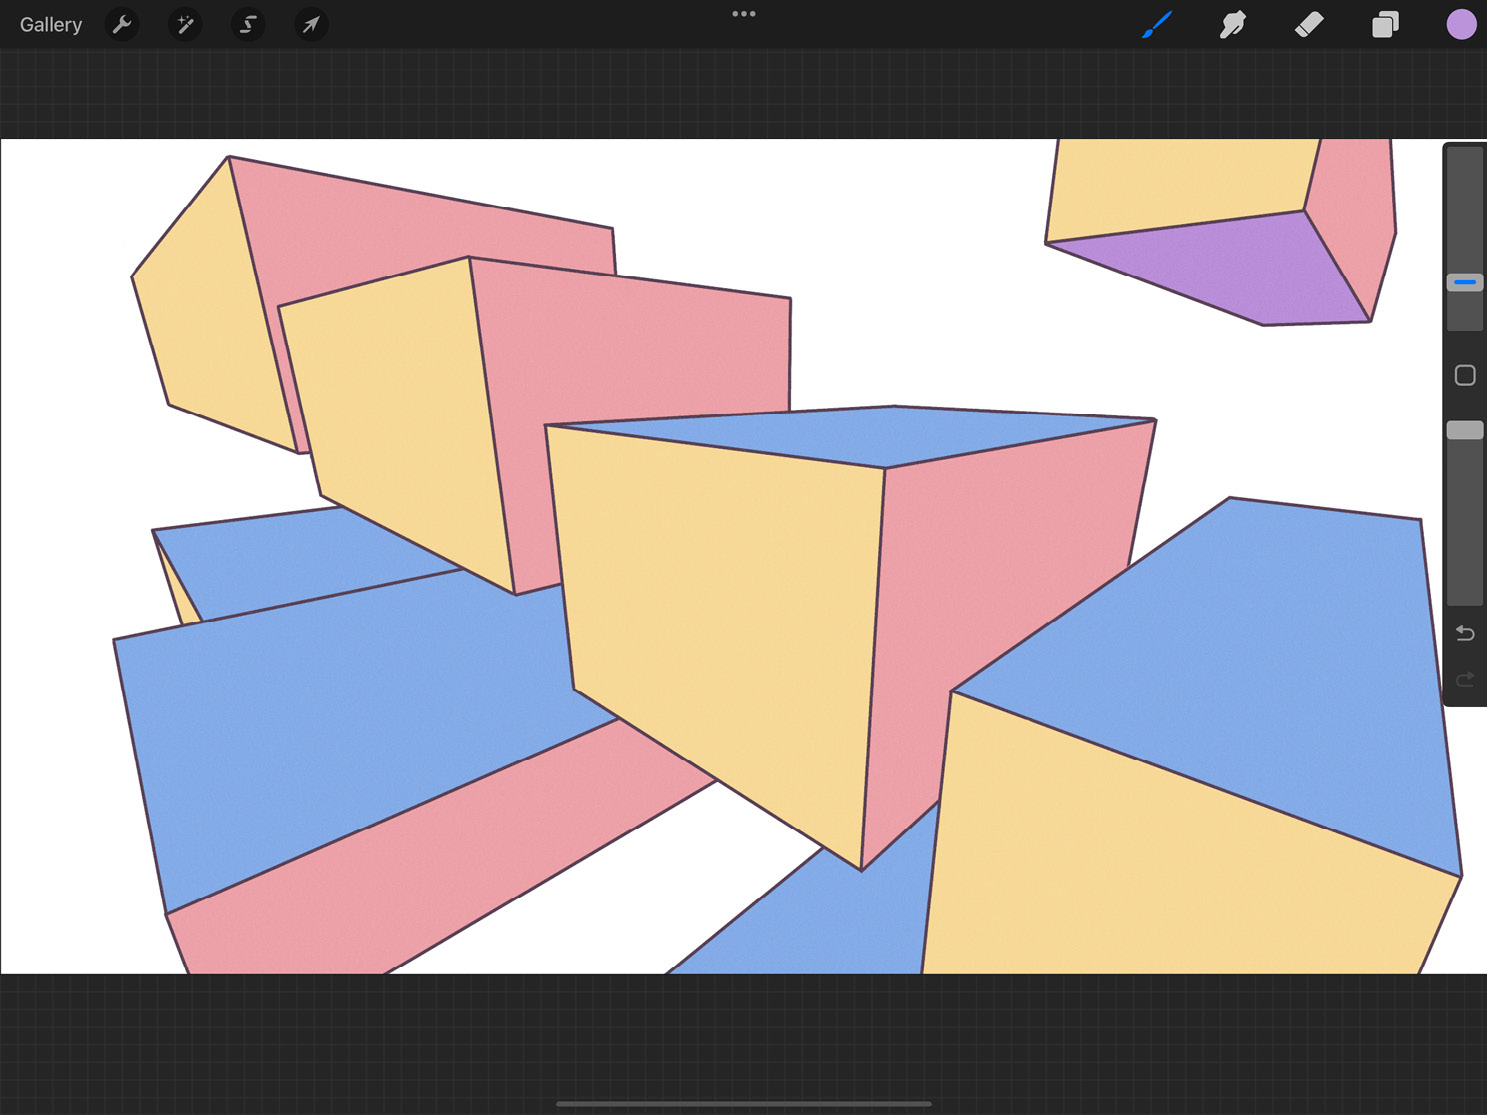
Figure 12.13: (a) One-point perspective (b) Two-point perspective (c) Three-point perspective
To use the Perspective guide, follow these steps:
- Open Actions and select Edit Drawing Guide.
- From the toolbar, select Perspective.
- Tap anywhere on the screen to create a vanishing point at that spot. The vanishing point is marked by a blue node, as shown in the following screenshot:
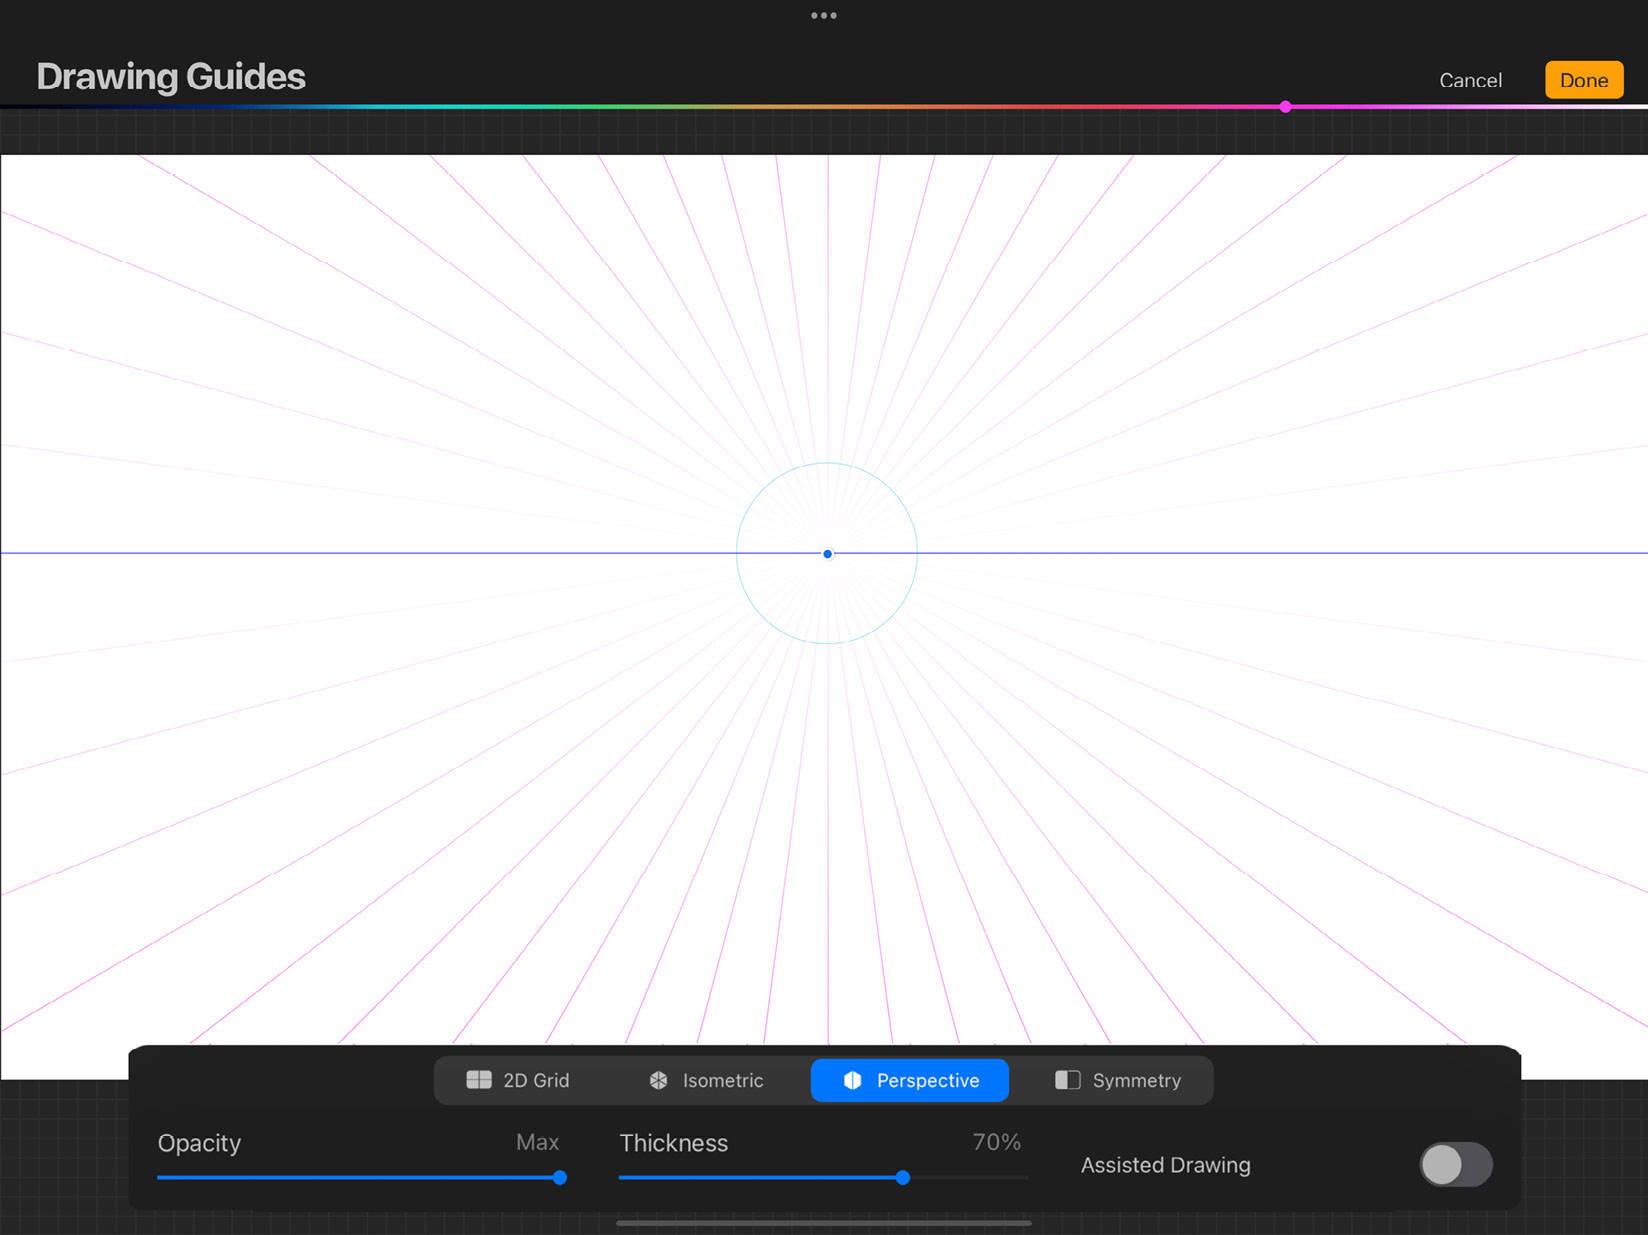
Figure 12.14: Perspective guide interface
This point may be inside or outside the canvas boundaries.
- Add up to two more vanishing points similarly by tapping on the screen. All these points are adjustable. Place your finger on the node and move it around to reposition it. You will notice the perspective grid re-adjust itself as you move the vanishing points.
- Tap on a vanishing point to bring up the two options shown in the following screenshot:

Figure 12.15: Vanishing point options
When you tap on Select, all changes made to the color, opacity, or thickness of the guide affect only the perspective lines radiating from that vanishing point. The Delete option removes a vanishing point.
- Once you’re happy with the perspective setup, tap on Done to exit the Drawing Guides interface and go back to drawing. Your lines will now follow this setup.
We will now look at the interface of this guide.
The Perspective interface
When Perspective is selected, the toolbar has the interface shown in the following screenshot:
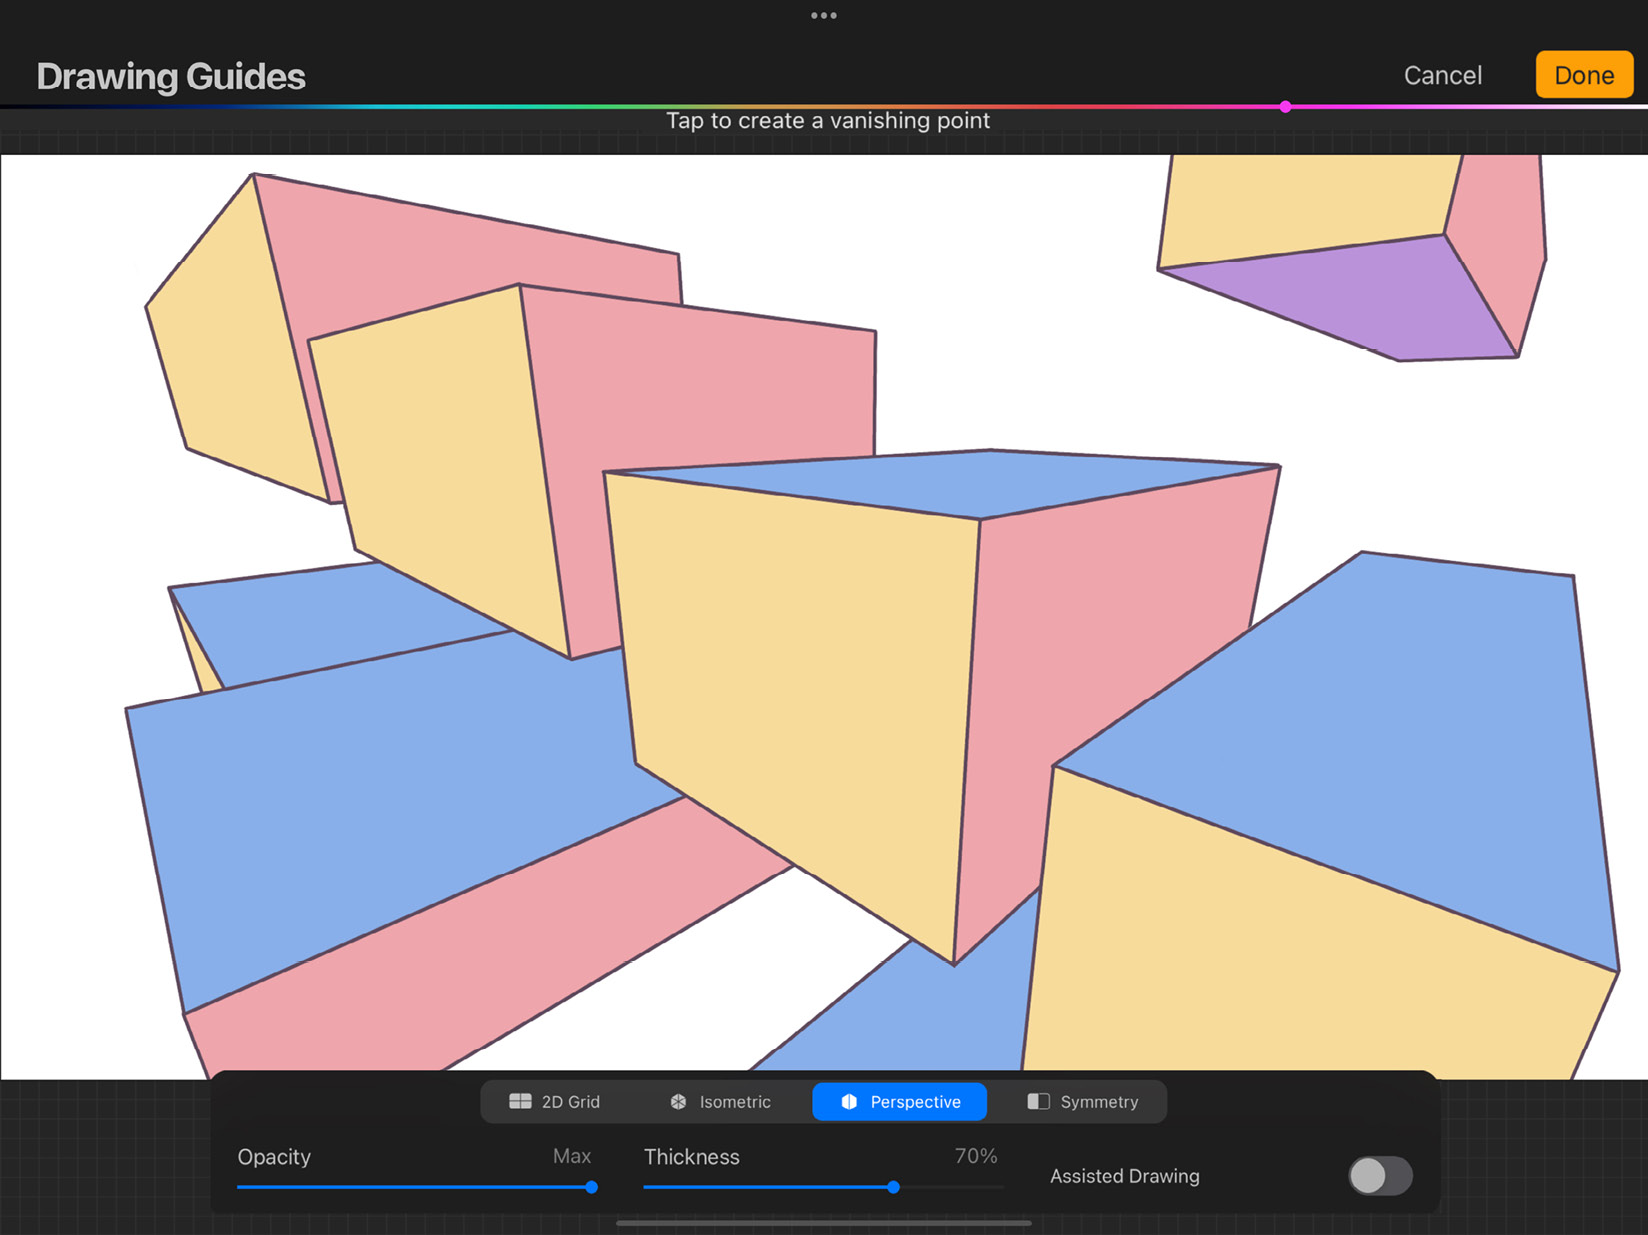
Figure 12.16: Perspective Guide interface
These are the elements of this interface:
- Opacity: This slider controls the opacity of the gridlines.
- Thickness: This slider controls the thickness of the gridlines.
- Vanishing points: These function as nodes that can reposition the guide. They can also be selected and deleted as we learned previously.
This tool will help you easily tackle drawing environments and objects that require knowledge of perspective. The next section will discuss the next and final type of drawing guide.
Symmetrical drawing with Symmetry Guides
The last type of drawing guide is the Symmetry Guide. It is used to draw perfectly symmetrical drawings along four different styles of alignment. The following screenshots show some drawings that can be drawn using this guide:
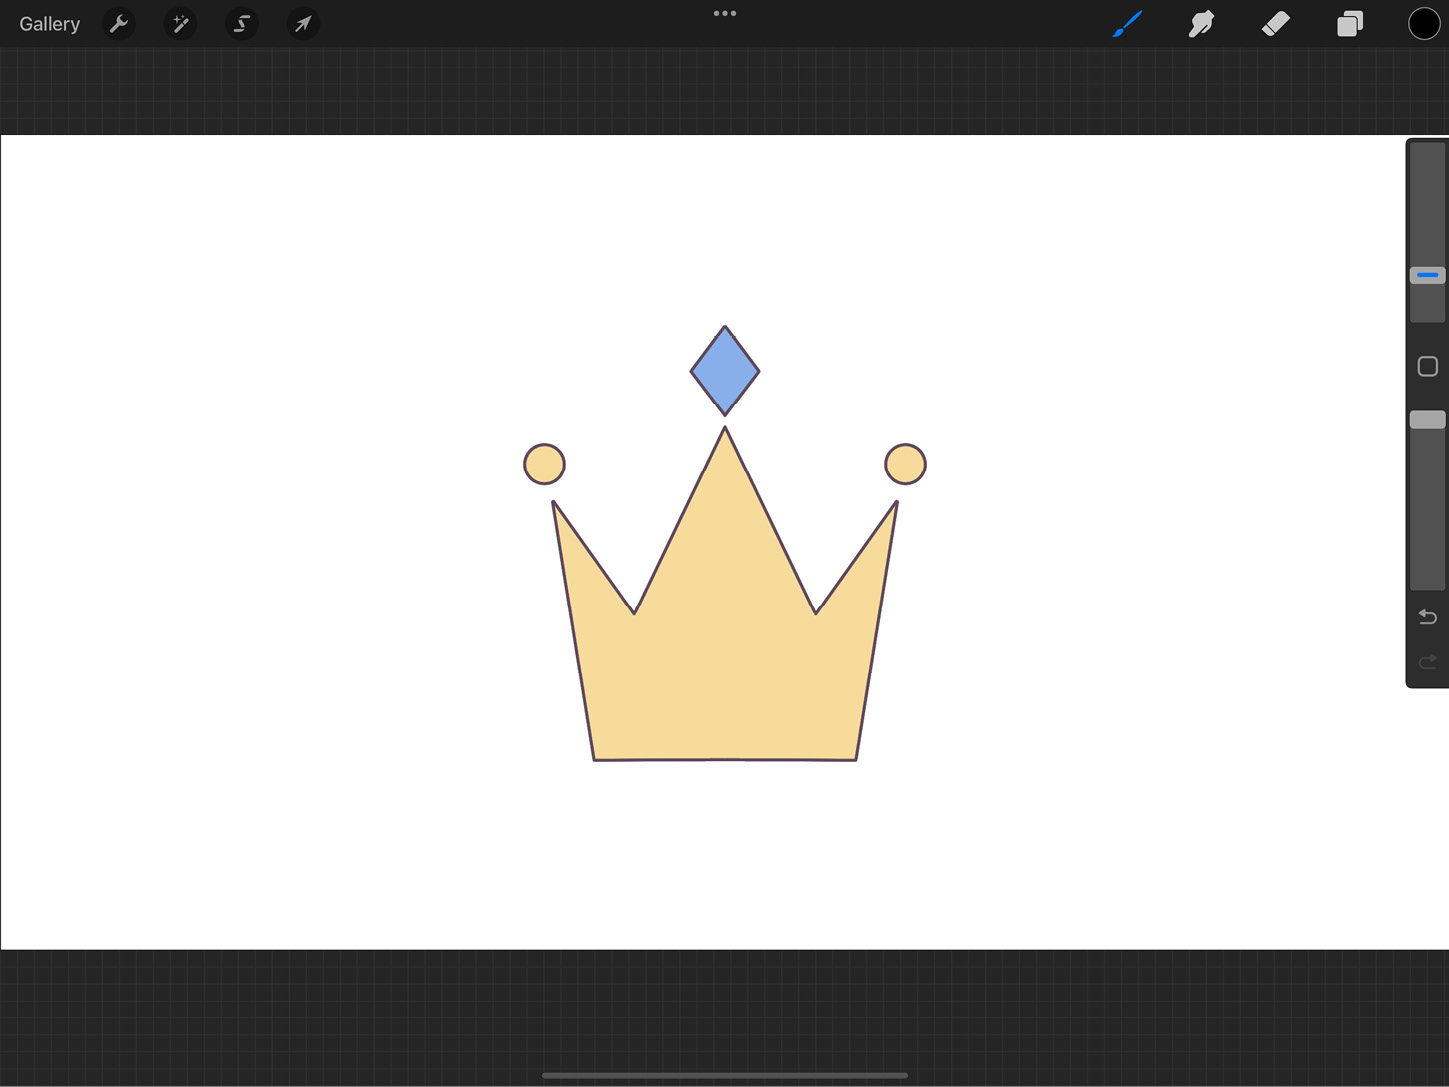
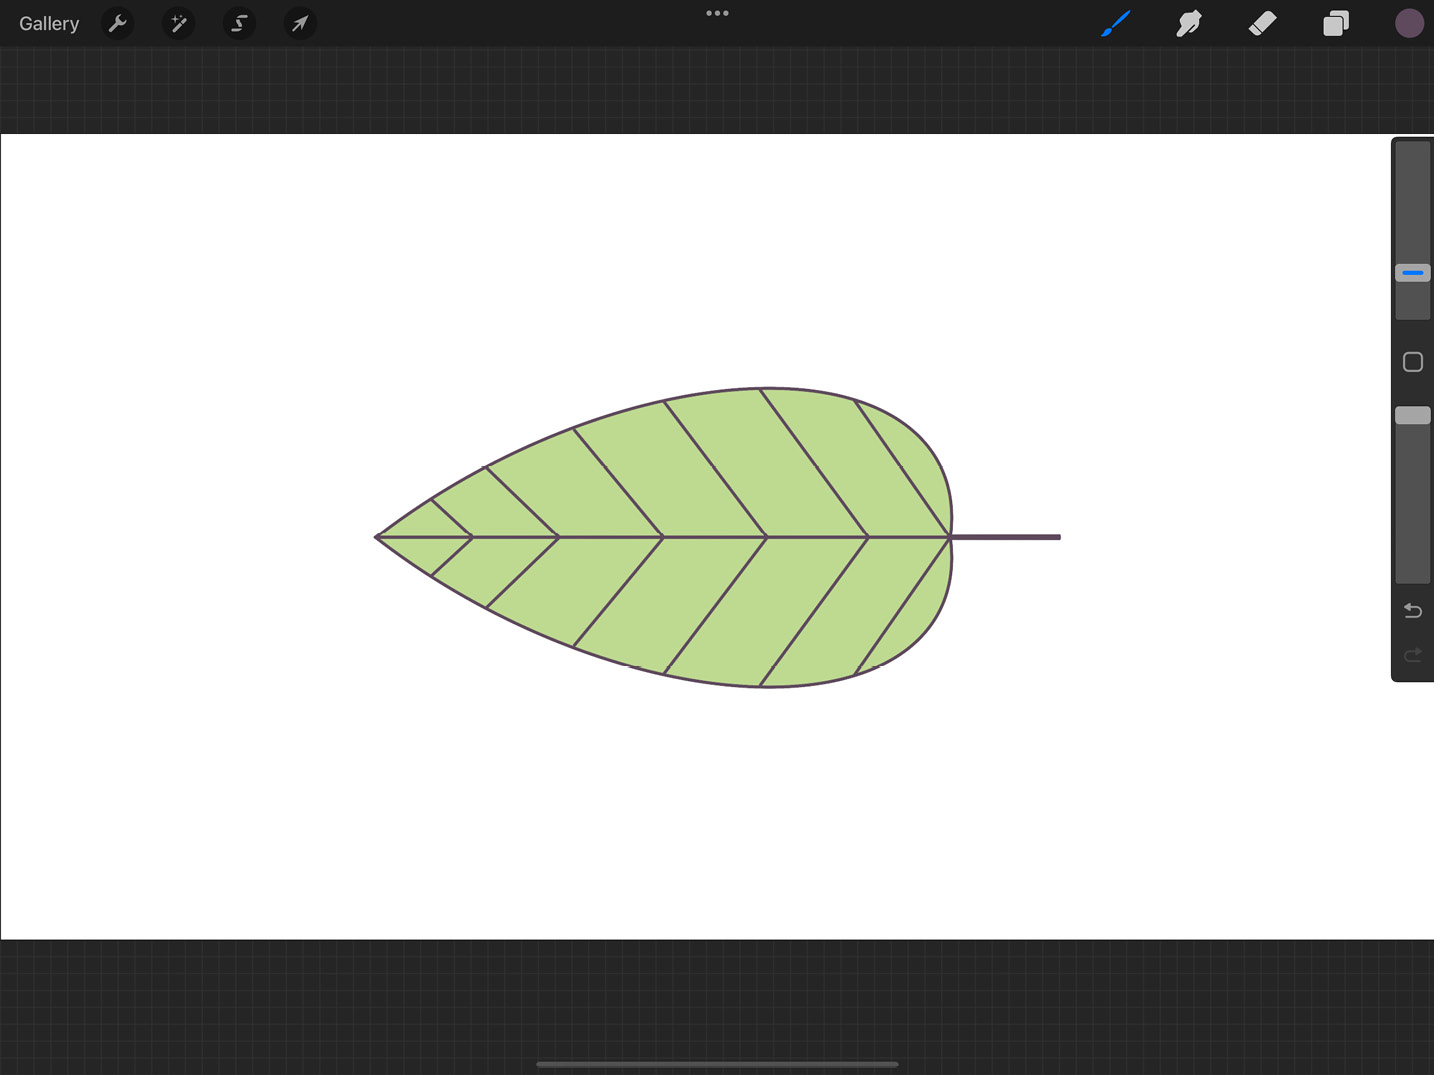
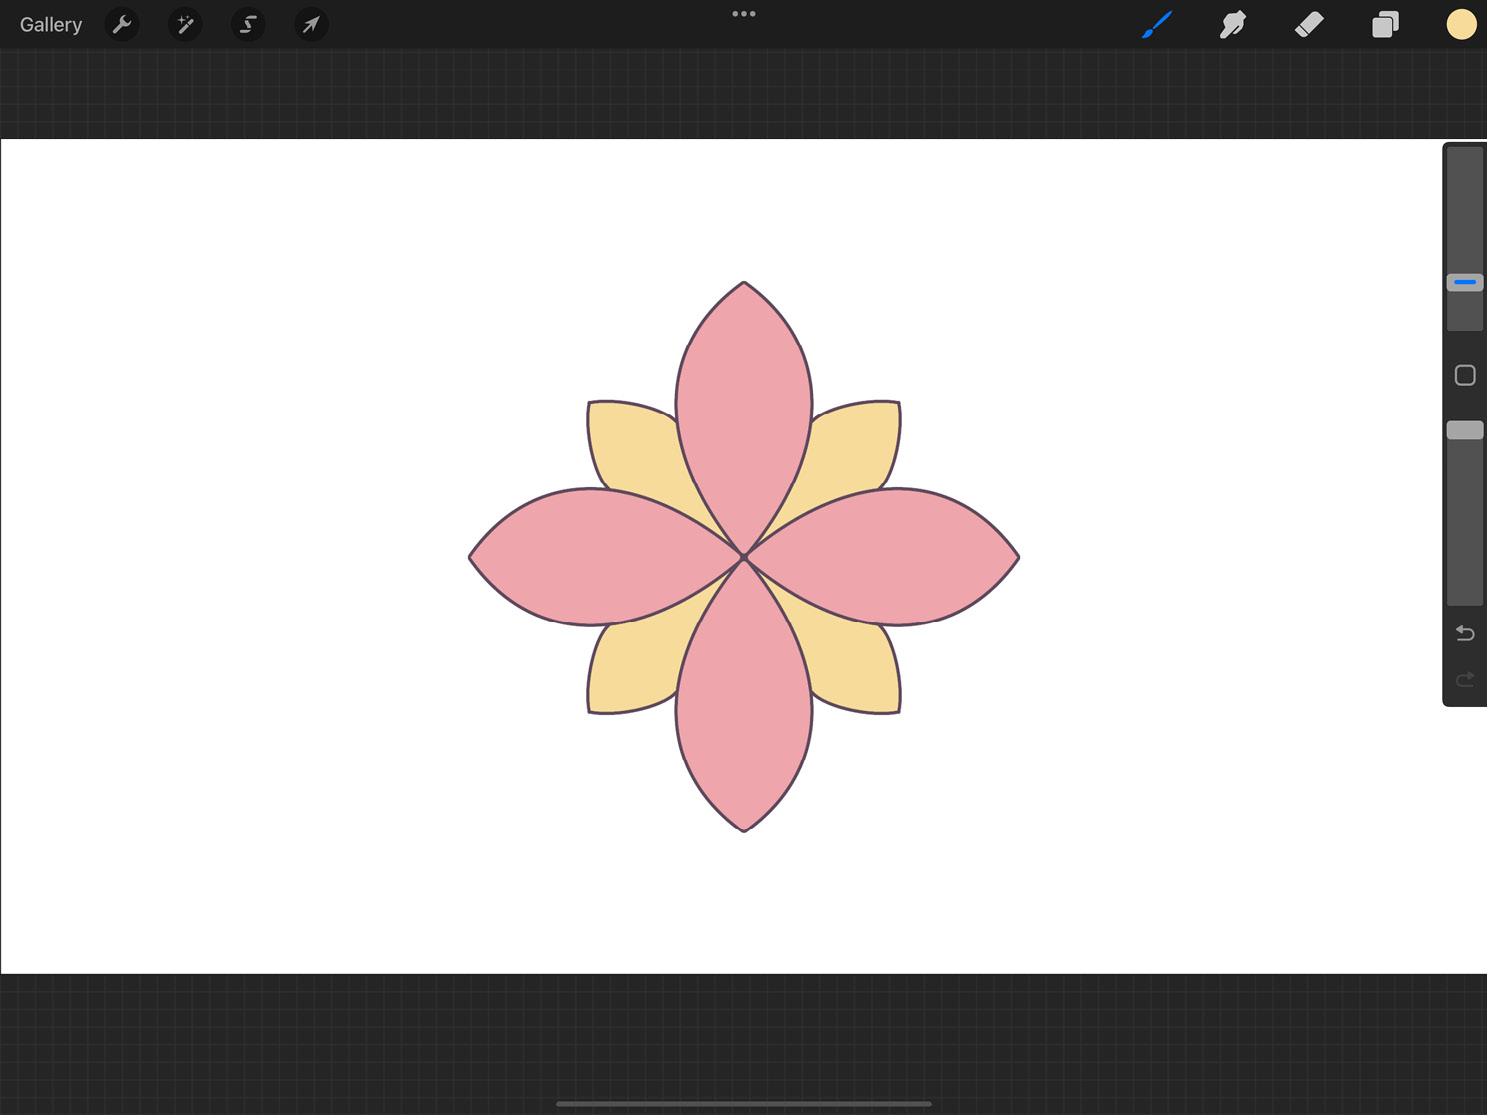
Figure 12.17: (a) Vertical symmetry (b) Horizontal symmetry (c) Radial symmetry
We will now look at the Symmetry interface.
The Symmetry interface
When Symmetry is selected, the toolbar has the interface shown in the following screenshot:
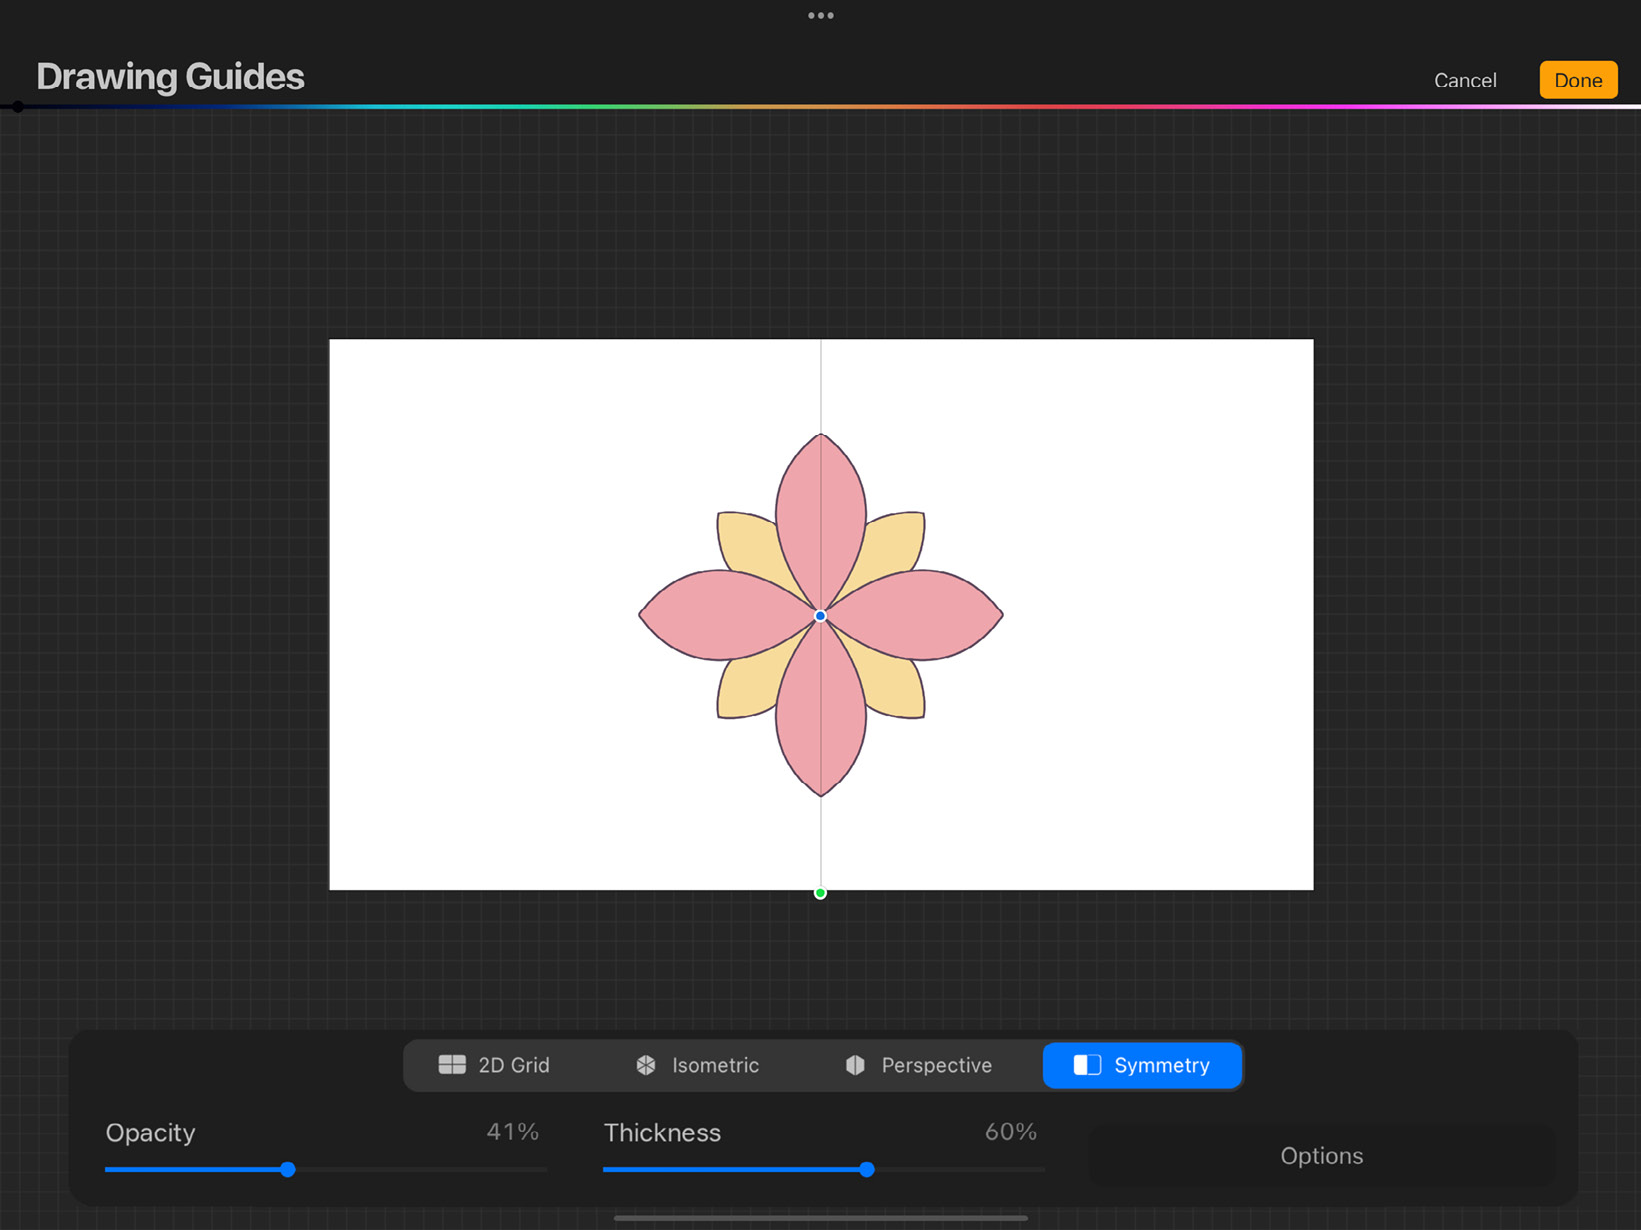
Figure 12.18: Symmetry Guide interface
These are the elements of this interface:
- Opacity: This slider controls the opacity of the guide.
- Thickness: This slider controls the thickness of the guide.
- Options: This button to the right brings up the following menu when tapped:

Figure 12.19: Symmetry Guide Options
These are the different styles of symmetry that can be achieved using this guide. We will learn more about them in the next sub-section.
- Axes and nodes: Each symmetry style has its own configuration of axes, be it a single horizontal or vertical axis or multiple radial ones. These axes appear on the canvas, along with the positional and rotational nodes like the previous guides.
Next, we will look into the different guide options for Symmetry.
Guide Options
Tapping on the button labeled Options in the Symmetry toolbar brings up the following menu:
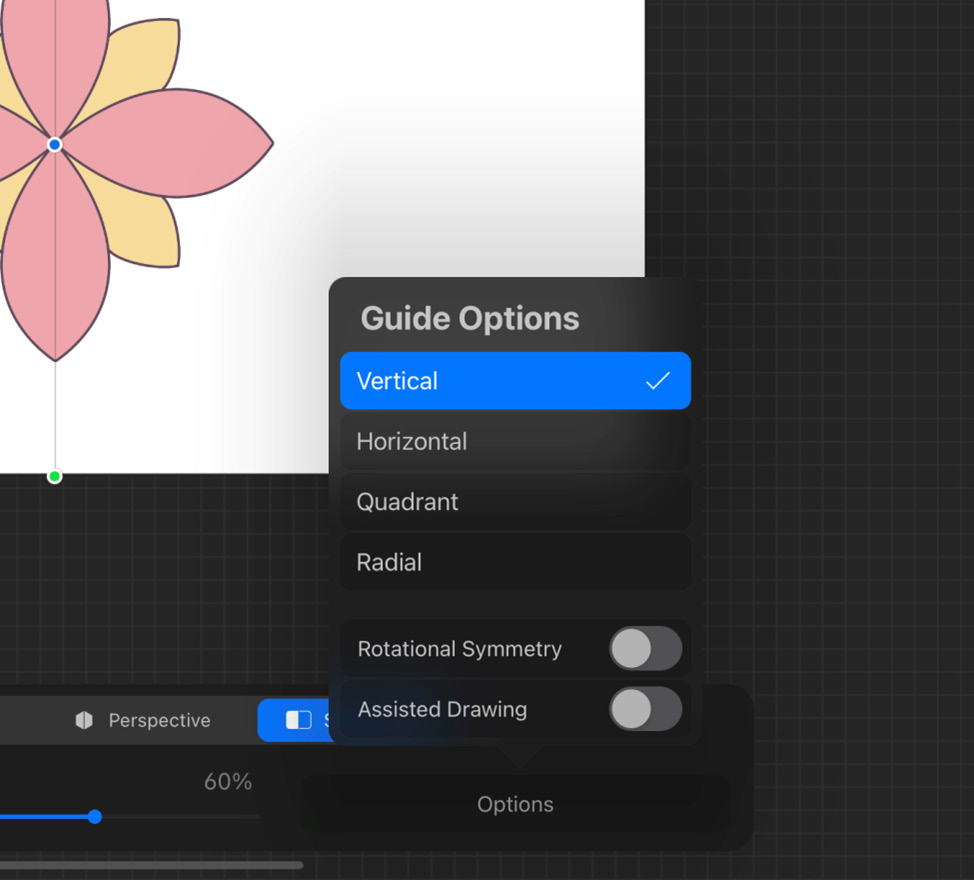
Figure 12.20: Symmetry Guide Options
These are the options available:
- Vertical: This option divides the canvas into two halves with a vertical axis. Drawings are mirrored in a left-right direction, as shown in the following screenshot:
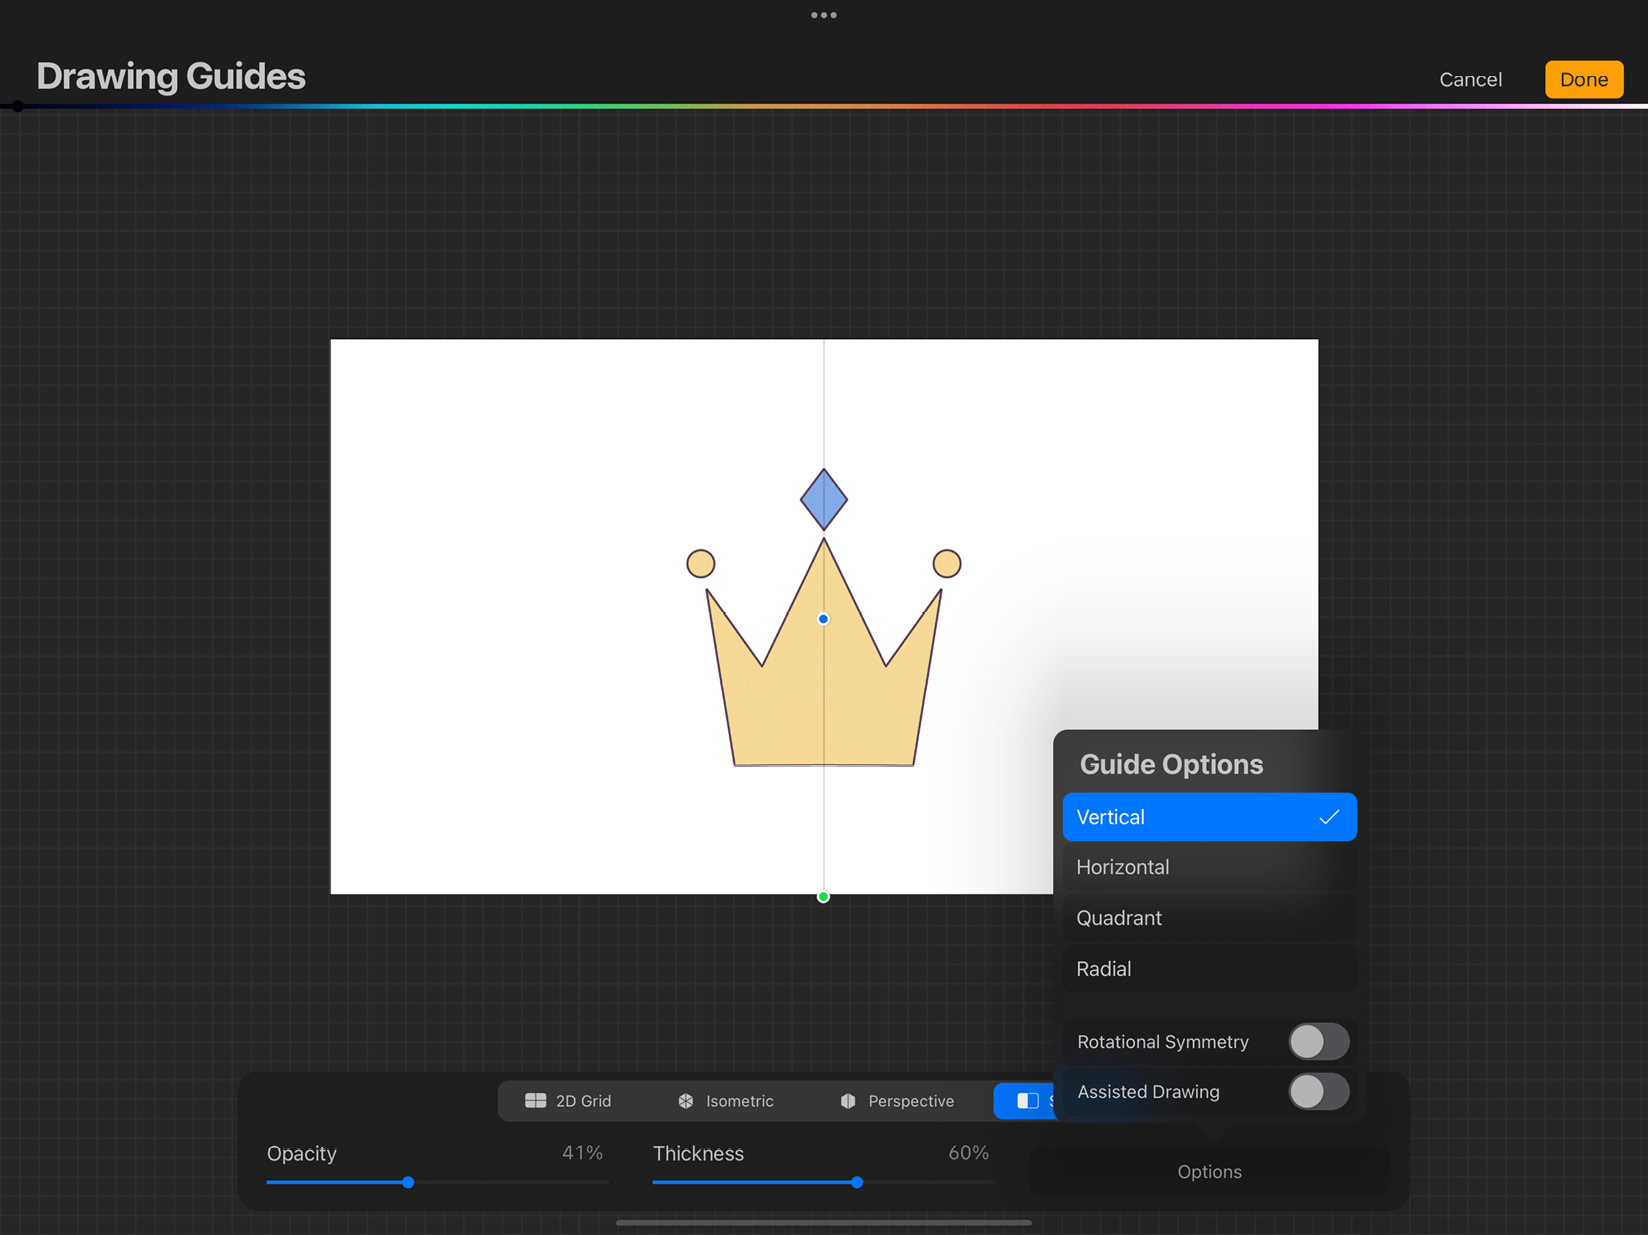
Figure 12.21: Vertical symmetry
- Horizontal: This option divides the canvas into two halves with a horizontal axis. Drawings are mirrored in an up-down direction, as shown in the following screenshot:
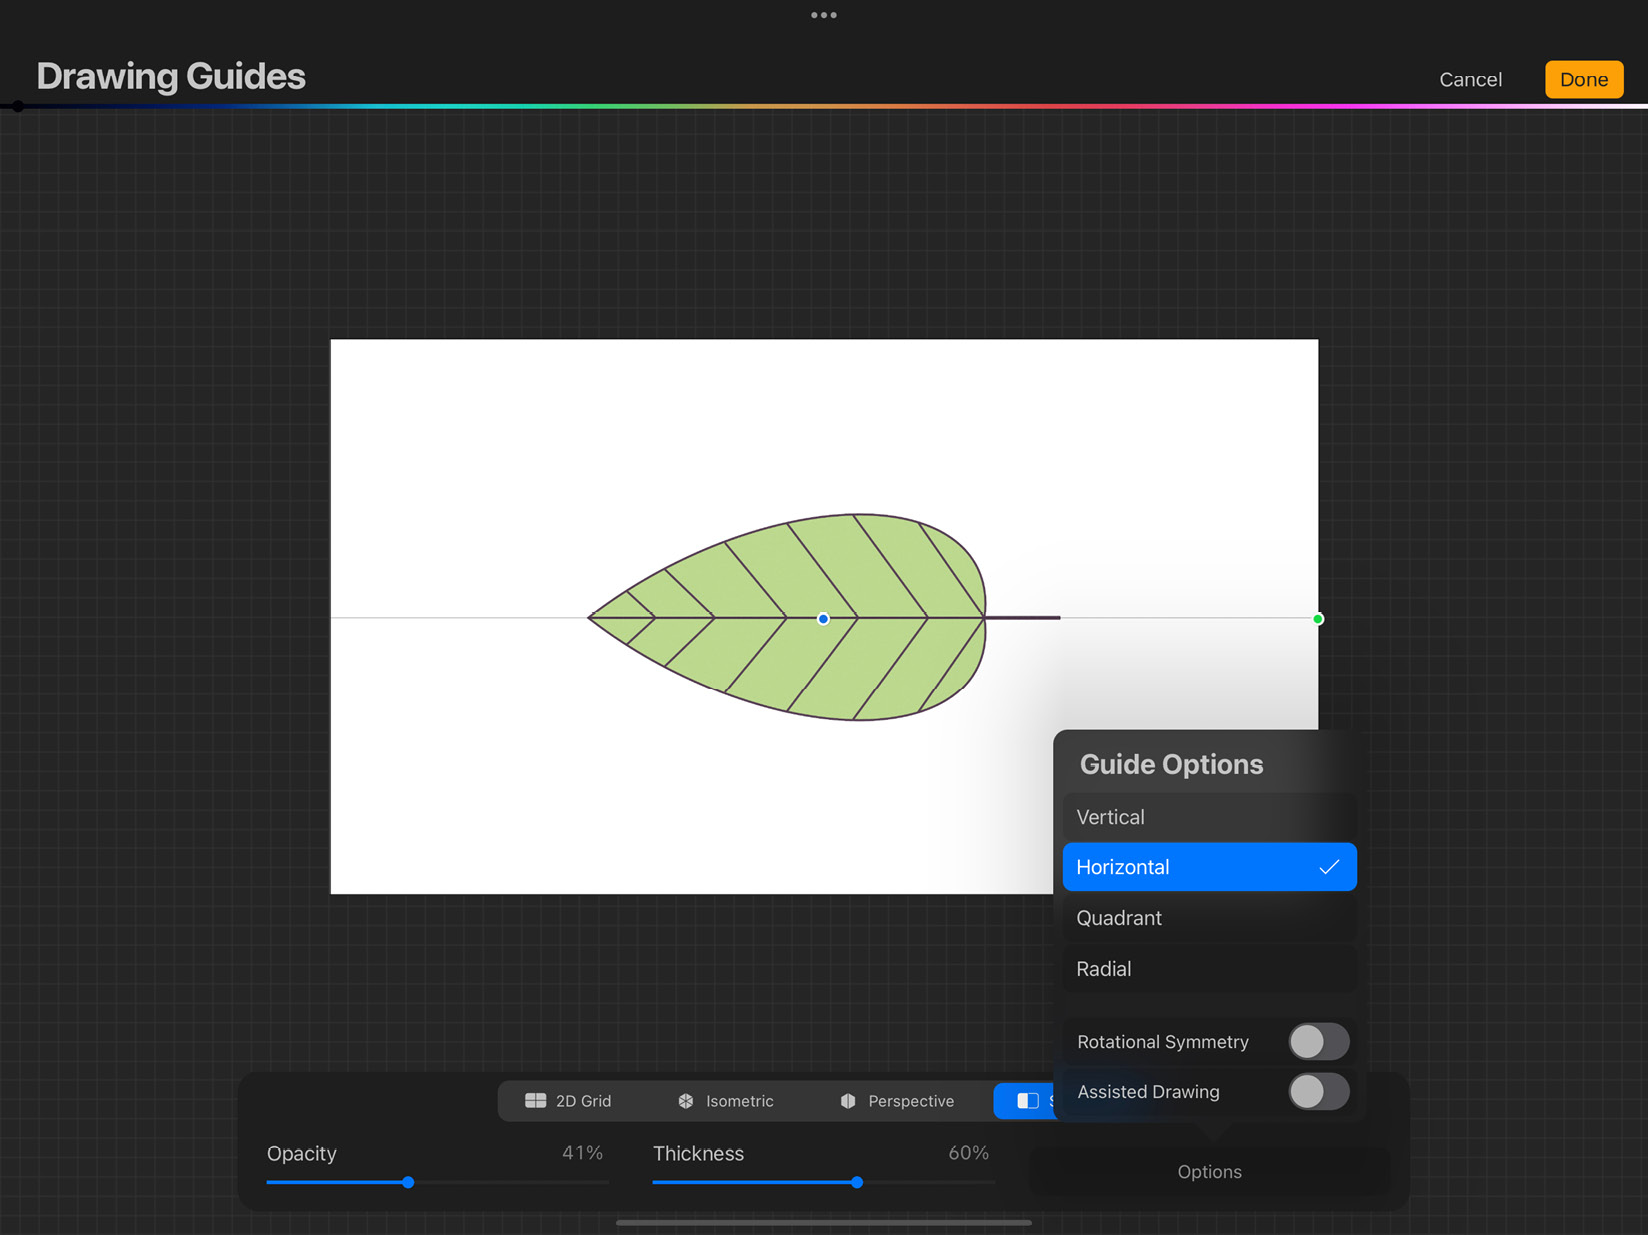
Figure 12.22: Horizontal symmetry
- Quadrant: This option divides the canvas into four quadrants with two intersecting vertical and horizontal axes. Drawings are mirrored four ways along each axis, as shown in the following screenshot:
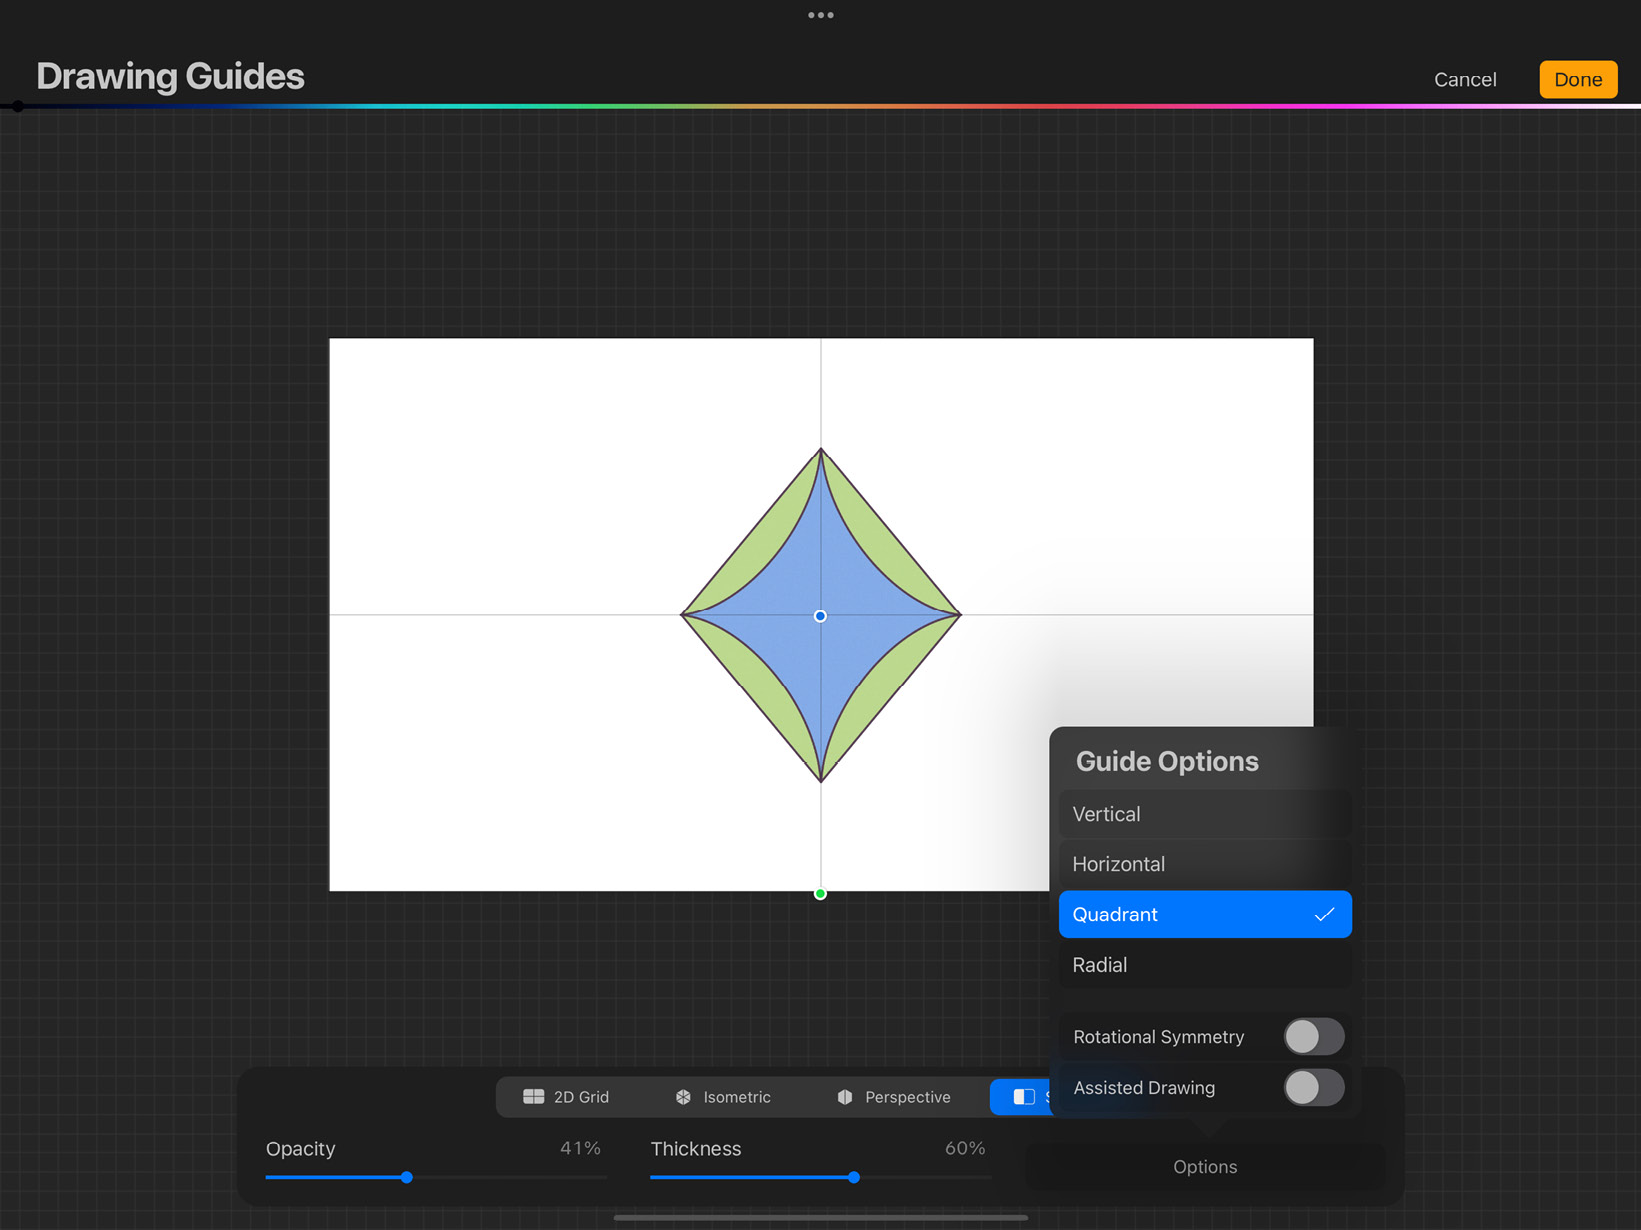
Figure 12.23: Quadrant symmetry
- Radial: This option divides the canvas into eight radial portions with four intersecting axes. Drawings are mirrored eight ways along each axis, as shown in the following screenshot:
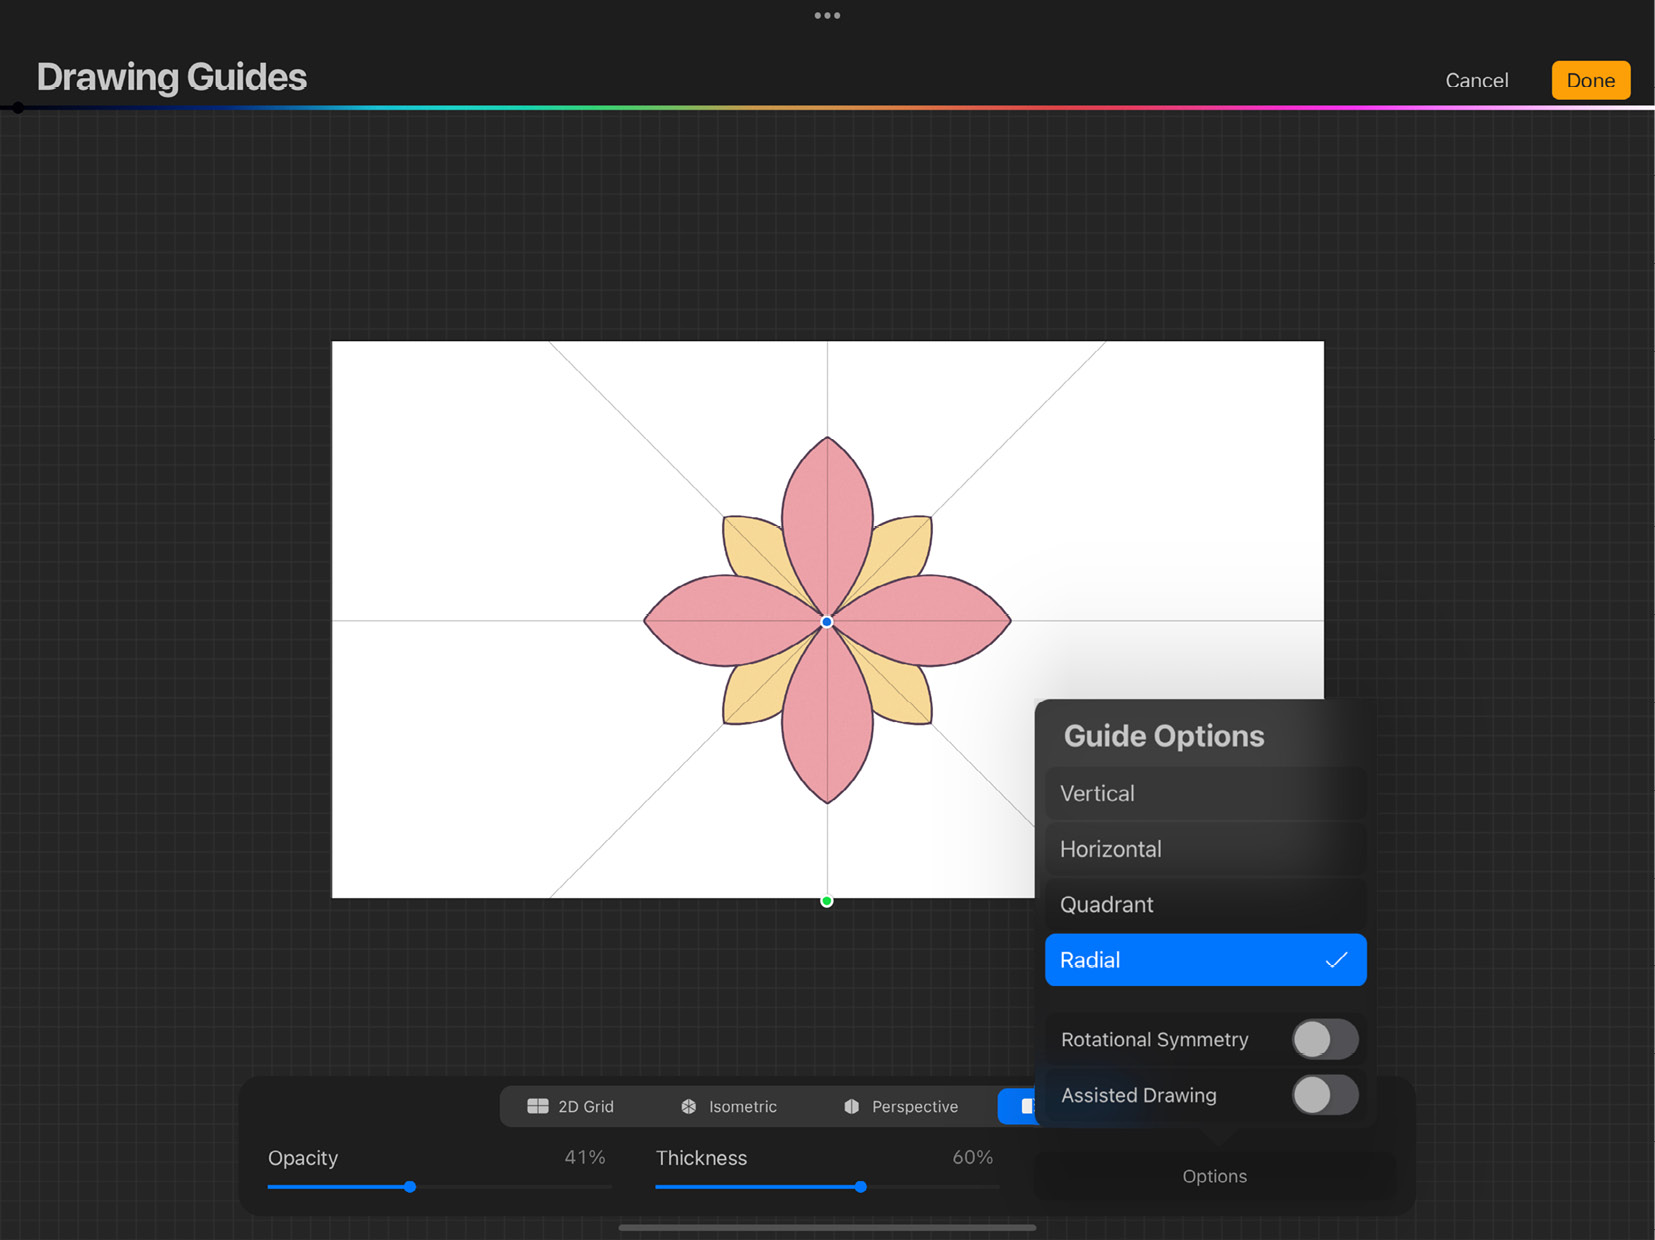
Figure 12.24: Radial symmetry
The next option on the menu is a toggle button called Rotational Symmetry. By default, the Symmetry Guide uses what is known as Mirrored Symmetry. This is when the drawing on one side is flipped once about the axis of symmetry, as shown in the following screenshot:

Figure 12.25: Mirrored Symmetry
Rotational Symmetry is when a drawing is flipped twice— once about the axis, and then along the direction of the axis, as shown in the following screenshot:
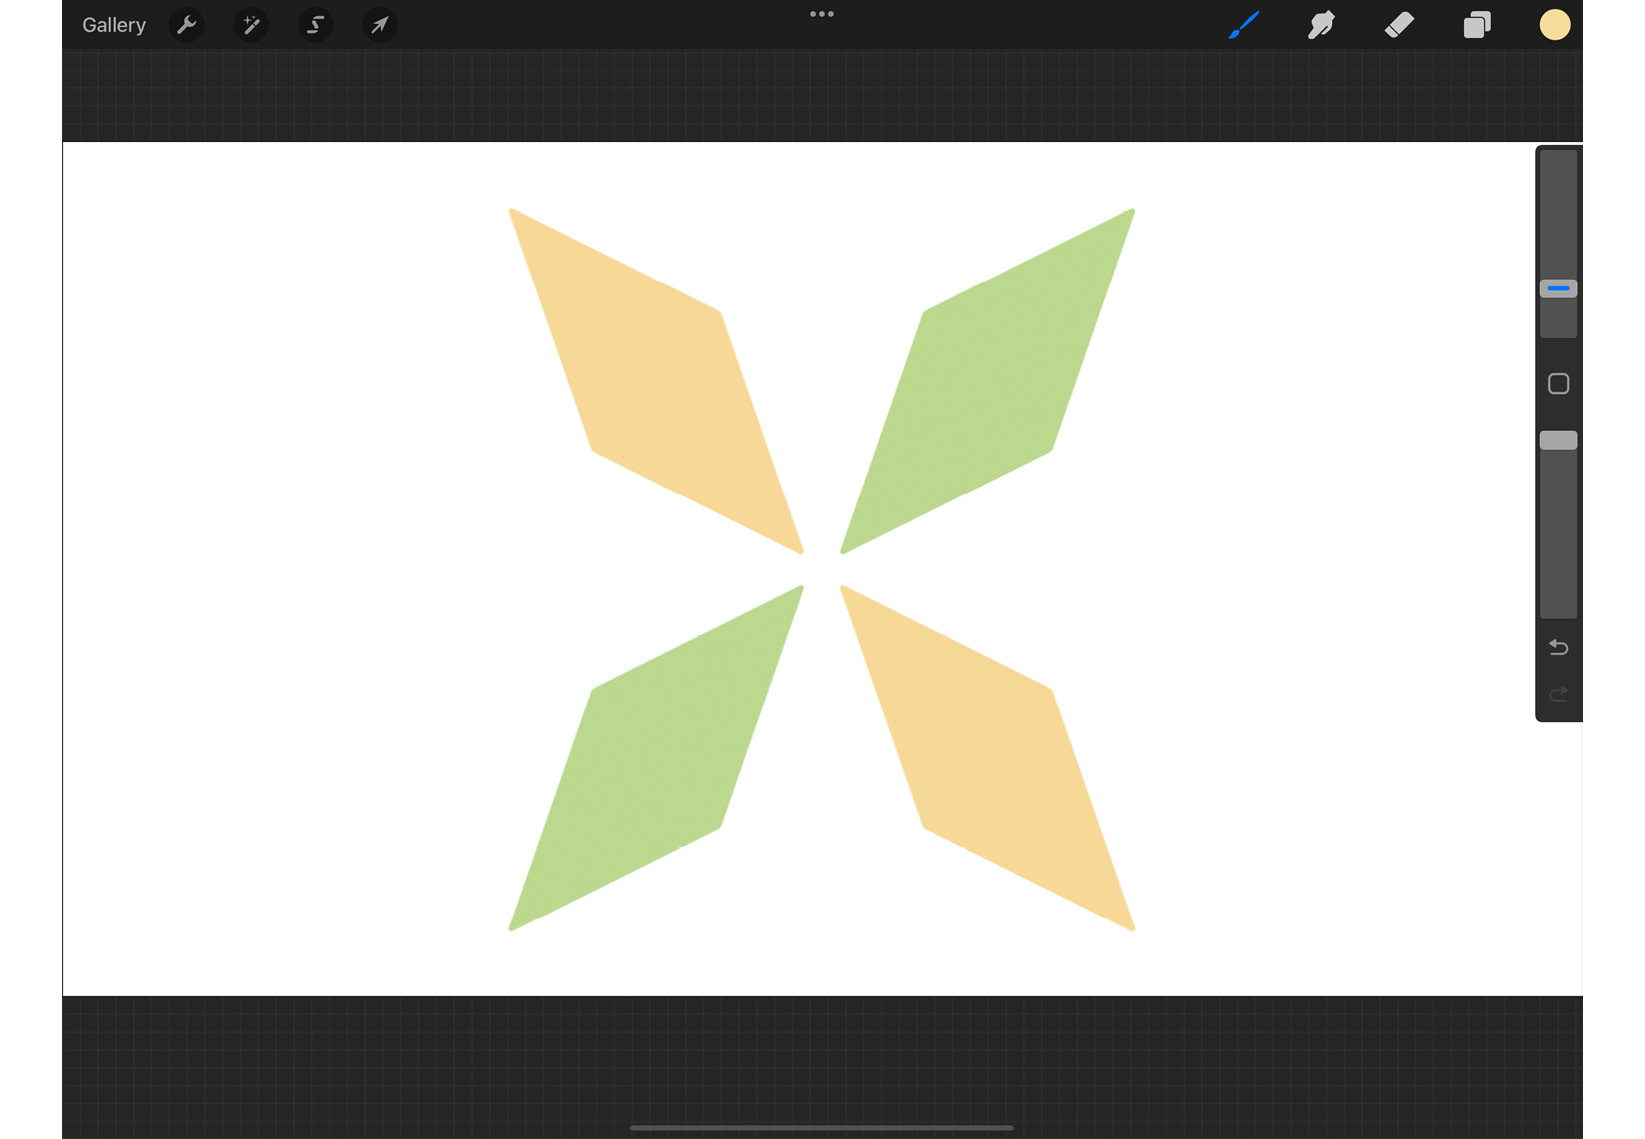
Figure 12.26: Rotational Symmetry
It gives rise to interesting results when used in combination with any of the four types of symmetry guides.
This brings us to the end of this chapter, where we discussed the various types of drawing guides available on Procreate. Let’s summarize.
Summary
Drawing guides are assisted drawing tools available on the Procreate app. These tools help you draw accurately based on constraints. This chapter introduced you to the different types of drawing guides and how to use them.
We learned about drawing squared grids with vertical and horizontal lines using the 2D Grid guide. The chapter also introduced how to create isometric technical drawings with the Isometric Grid Guide. The Perspective Guide makes it easy to incorporate realistic perspective and space into your artwork, using up to three vanishing points. Lastly, the chapter covered using the Symmetry Guide to make mirrored drawings across multiple configurations of axes.
In the next chapter, we will learn how to create animations in Procreate.