
1
Introduction to the micro:bit
If you’ve been paying attention to news in the world of technology, you may have noticed that there seems to be an astonishing number of single-board computers (SBCs) hitting the market lately. In a wave of devices that may have started with the Raspberry Pi, there are now dozens of small, powerful devices, ranging in price from a few dollars to a few hundred dollars. The Pi Zero, the Raspberry Pi Foundation’s lowest-cost board, uses a small, 1 GHz, single-core ARM chip and costs about five dollars. On the other end of the spectrum, the NVIDIA Jetson TK1 includes both an ARM A57 quad-core chip and a 256-core Maxwell GPU and will cost you about six hundred dollars. It is, however, still considered a single-board computer. Kickstarter is full of new SBCs, some successful, some not.
At the same time as the release of all of these surprisingly powerful small computers, various technology companies have been quietly releasing a flood of even smaller, lower-power chips and devices in the background. These boards are powered by a variety of processors, from ARM CPUs to smaller microcontrollers like the Atmega 328, and they are usually designed mainly for one purpose: performing one or more simple tasks and then interfacing with the Internet of Things (IoT).
What is the Internet of Things? For the full story behind the IoT, check out the accompanying sidebar. The short version is that the IoT is a worldwide web of small, low-power devices that are able to communicate with other devices—both IoT devices and more full-featured machines such as smartphones and computers—via the Internet and other smaller networks. These devices are meant to connect everything, from your home thermostat to your refrigerator to your toaster to your keychain, and allow them to communicate via a network. They must necessarily subsist on almost no power (there’s no room for big, bulky batteries in your keychain) and thus must also be sort of stupid, CPU-wise. The vast majority of them don’t need to be particularly powerful, though; many times their main function is simply to collect data and relay it to a more powerful computer, smartphone, or tablet, or perform a simple task in response to a simple command from another device.
These small IoT development boards also run the gamut of prices but generally stay below the one hundred dollar mark. The C.H.I.P. is the newest kid on the block (Figure 1-1) and costs only about nine dollars. The Particle Photon has an ARM Cortex processor and will cost you about twenty dollars, and the Intel Edison—the powerhouse of the group—costs about seventy dollars (Figure 1-2).
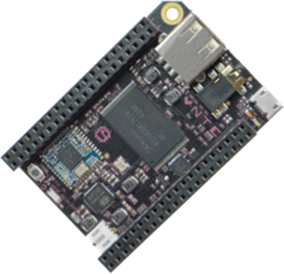
Figure 1-1: The C.H.I.P.

Figure 1-2: Intel Edison
Into this group we have a newcomer: the BBC micro:bit. This little device is being given away, at no cost, to a million 11-year-old students in the United Kingdom, courtesy of the British Broadcasting Corporation’s Make It Digital initiative. This initiative is part of a push to increase digital skills among British youngsters, as—according to the BBC—there is a significant digital skills shortage in the country, with 1.4 million skilled professionals projected to be needed in the next five years. The BBC is following in the footsteps of the Raspberry Pi Foundation; organizers of the initiative believe that by giving young people access to cheap or free computers and technology, they can stimulate a lifelong interest in learning, programming, and engineering. The company is partnering with about 30 other organizations to bring this idea to fruition. Some are offering financial assistance; others, like element14, are helping manufacture the boards, and so on. It’s truly a group effort on the part of many different technological associations in order to get kids interested in technology.
The micro:bit itself is a tiny device (Figure 1-3)—4 by 5 centimeters to a side—and can be powered by a variety of sources: two AAA batteries, a coin cell, a USB connection, or any other source of 3 volts. The board connects to your Windows, Mac, or Linux computer with a standard micro USB cable and mounts as an external drive or device without any driver software necessary. It is equipped with twenty-five LEDs and two small buttons, all of which are programmable, that allow the user to interact with it. The bottom of the board is lined with twenty general-purpose input/output (GPIO) pins, which are accessible with either alligator or banana clips, or by inserting the board into a special connector that connects headers to all of these pins. The micro:bit also has an onboard compass and accelerometer that you can read from and incorporate into your scripts, and it has an onboard Bluetooth Low-Energy (BLE) antenna that enables it to pair with any Bluetooth-enabled devices, such as your smartphone or laptop.
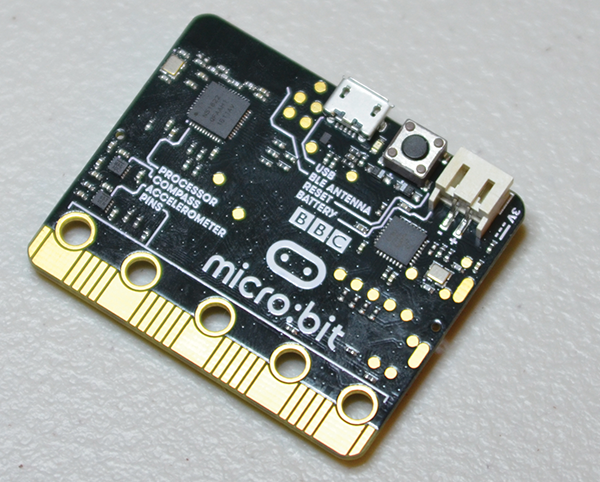
Figure 1-3: The BBC micro:bit
In the interest of keeping things simple so that kids stay interested and involved, the Micro:bit Foundation offers five (as of this writing) different ways to program the micro:bit. All five are web-based programming environments for different languages, written in JavaScript. Students can choose Touch Develop by Microsoft, Code Kingdoms’ JavaScript editor, Microsoft’s Block Editor (Figure 1-4), MicroPython (Figure 1-5), or PXT, again by Microsoft. All of these environments vary according to skill level; some are simple block-based programming similar to Scratch (students move code-based puzzle pieces into place in a graphical environment) whereas others are fully text based for more advanced coders. There are other ways to program the onboard processor that go beyond these simple web-based environments, which we’ll get into later.

Figure 1-4: Microsoft Block Editor environment
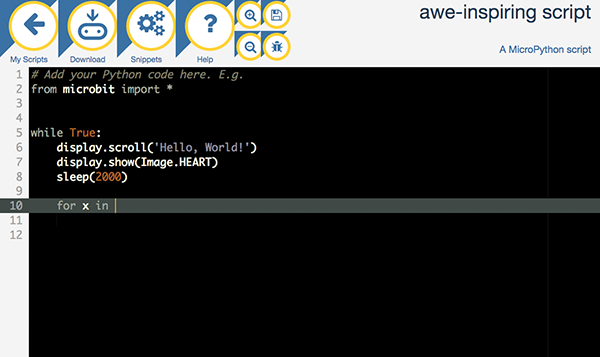
Figure 1-5: MicroPython environment
So how do we go about procuring one of these awesome boards? As I write this, the micro:bit is now available all around the world, though it was originally only available from UK-based sellers. If you prefer to order from overseas, however, https://ww.kitronik.co.uk has always been a reliable source, and that’s where I’ve gotten all of my micro:bits and the associated accessories.
Speaking of accessories, I highly recommend doing some more serious shopping when you buy your board, because you’re more than likely going to want to do more with your board than just program a few simple scripts and games. When you go online to purchase your micro:bit, do a search for “micro:bit accessories” and see what’s available. Here’s what I bought to go along with mine:
- The Edge Connector Breakout Board (Figure 1-6)—This is almost a must-have, because without it you will have an extremely difficult time accessing the GPIO pins on the bottom of the board. Once you slide the micro:bit into the slot on the edge connector, all of its pins are mapped to a row of headers, allowing you to use the jumper wires you probably already have in your toolkit.

Figure 1-6: The Edge Connector Breakout Board
- The Edge Connector Motor Driver Board (Figure 1-7)—If you want to use your micro:bit to do anything really cool, like, say, drive a robot in response to signals from your cell phone, you’re going to want this board. Again, you slide the micro:bit into the slot, and all the pins you need to connect to external motors and power sources are instantly made available to you. It’s very handy and will save you a lot of time when it comes to building.
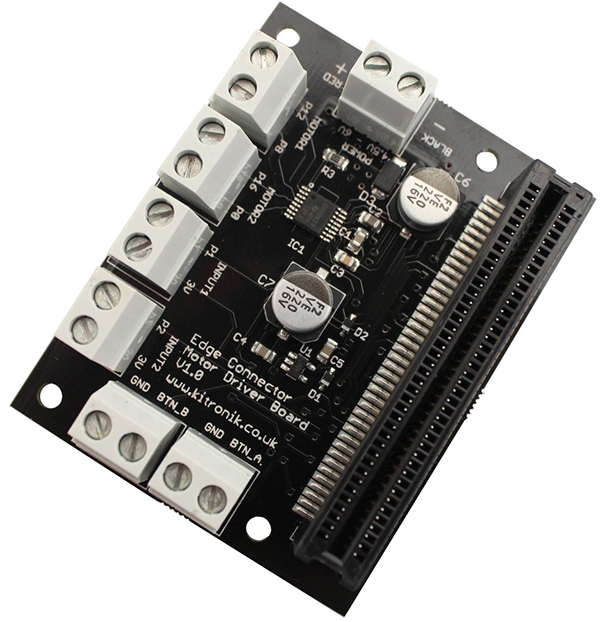
Figure 1-7: The Edge Connector Motor Driver Board
- The MI:power board (Figure 1-8)—I don’t consider this board as vital as the other two I’ve mentioned, but it’s definitely useful nonetheless. First, it allows you to power your micro:bit using a coin cell battery rather than a bulky pair of AAAs. Second, it mounts to your board as a shield, similar to the Arduino shields, making everything a one-piece set. And finally, it has a piezoelectric buzzer built in, letting you experiment with the sound-making capabilities of the micro:bit without having to make any extra connections.

Figure 1-8: The MI:power board
I’m going to proceed with this introductory chapter on the assumption that you have at least the basic micro:bit in your hot little hands and are itching to get to do something with it. We’ll get to using the accessories later.
For now, let’s jump in, power on the micro:bit, and see what it does. Connect it to an available USB port on your computer using a micro USB cable (your device probably came with one; if it didn’t, any standard micro USB cable will work). The board LEDs will flash in a square pattern, and then “HELLO” will scroll across the board (Figure 1-9). If by chance your board doesn’t have this introductory program loaded onto it, you can download it here: https://github.com/wdonat/microbit-code/blob/master/chapter1/MicroBit-First-Experience.hex.

Figure 1-9: “HELLO” on the micro:bit
Next, the LEDs will flash “A,” followed by an arrow pointing to the button on the left. When you push the button, the LEDs flash another pattern, and then “B” and a right-pointing arrow. Pushing this button results in another pattern, and then the message “SHAKE!” Shaking the board results in yet another pattern, followed by the message “CHASE THE DOT.” This is a little game that allows you to tilt the micro:bit to make one light “follow” the one lit by the device. Once you “catch” it once or twice, the board replies with “GREAT! NOW GET CODING!” and a little heart symbol that flashes on and off (Figure 1-10).
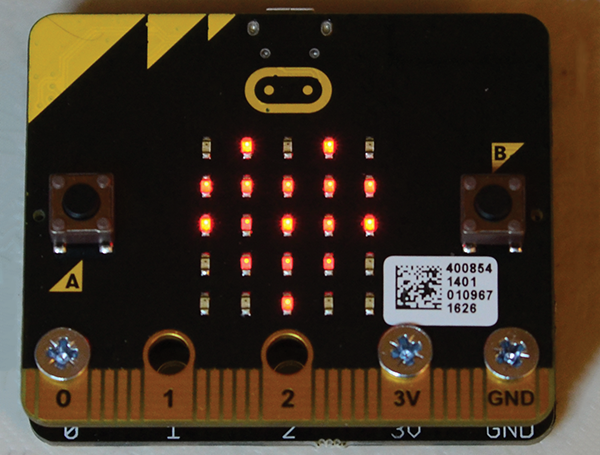
Figure 1-10: The micro:bit heart symbol
This little introductory display may not seem like much, but it’s an enlightening intro into some of what the board can do. The LEDs can be lit in any pattern you like, including scrolling text—this addresses the problem of interacting with the user without a screen or monitor. (In fact, later on when you’re programming, any error messages actually scroll across the LED array. Handy, if a bit difficult to read.) You can program the two buttons to respond to presses, and you can also use the onboard accelerometer to respond to user inputs such as shaking. In fact, about the only things on the board not introduced by the introductory program are the onboard compass/magnetometer and the Bluetooth Low Energy antenna (BLE). Don’t worry—we’ll get to those soon enough.
Now that you’ve seen the default program, let’s go through the process of putting our own simple program onto the board. Probably the easiest way to program the micro:bit is while it’s still attached to the computer with the USB cable. If you open your Windows Explorer window or the Mac Finder window, you should see the micro:bit showing up as an external drive or device (Figure 1-11.)
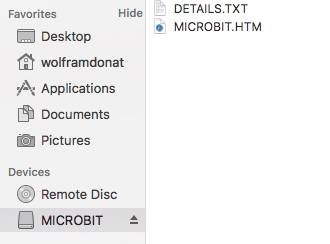
Figure 1-11: micro:bit Finder window (Mac)
When you write programs (also called scripts) and download them to your computer, you’ll move the resulting hex file to the MICROBIT drive you see here. This will flash the device with your program. You can also flash the device with a Bluetooth connection, but we’ll get to that later.
For now, let’s experiment with adding another program. Open a browser window and visit https://github.com/wdonat/microbit-code/tree/master/chapter1. Right-click on the microbit-astounding-script.hex file and save it to your machine. When the file is downloaded (it shouldn’t take long—it’s only 584 KB), drag the script onto your MICROBIT device and let it do its thing. The transfer should only take a few seconds. When the device has finished flashing (signified by the yellow LED ceasing to flicker), your computer may complain that you should properly eject the MICROBIT device; ignore it and just close the warning pop-up window.
This is a simple script; it just counts the number of times you press the A button (on the left) and displays that count after each press, up to 150 presses. The actual script is seven lines of code, though the hex file is much more—about 13,000 lines. (If you’re interested, right-click on the downloaded hex file and open it with a text editor like Notepad or Sublime Text, and you can see what the script looks like after it’s been compiled. Definitely not user-friendly.) The script is straight from the Microsoft Touch Develop page for the micro:bit (one of the programming editors that are available to use) and looks like this:
function main()
     var counter := 0
     input → on button pressed (A) do
          counter := counter + 1
          basic → show number (counter, 150)
     end
end function
I won’t go too deep into detail about this script now, because it’s highly language-dependent and I don’t plan to cover Touch Develop until one of the appendices, but a quick look over the code shows how basic the commands really are. You declare a variable (counter), look for some inputs, tell the board what to do with those inputs, and finally end the function. It really doesn’t get much simpler than that.
That is a very high-level introduction to the micro:bit, what it can do, and how to interact with it. In the next chapter, I’ll go over what exact hardware is on the board, as well as the add-ons we talked about.