
Chapter 2
Setting Up Your Collaborative Coding Environment
IN THIS CHAPTER
![]() Touring GitHub.com
Touring GitHub.com
![]() Installing GitHub Desktop
Installing GitHub Desktop
![]() Installing Atom
Installing Atom
GitHub has a lot of features to offer new and returning coders. A good way to get acquainted with all those features is to explore the GitHub.com website. This chapter not only gives you that overview, but also guides you in setting up your local machine so that you can start building.
Exploring GitHub.com
The home page of GitHub.com, shown in Figure 2-1, is a great starting point for many tasks, including starting your own project, learning about a topic, or exploring existing repositories.

FIGURE 2-1: The home page of GitHub.com.
The top menu bar, shown in Figure 2-2, is always available to you and is a direct link to the most important functions you need to perform.
- GitHub home page: If you click the GitHub logo in the top left of the browser, you return to the home page. Check out the sidebar “Mona Lisa Octocat” for more information on the logo.
- Search bar: The search bar on the top menu is pretty snazzy. Not only can you search all of GitHub, but as you start to use the site, it offers suggestions based on your most recent activity. These suggestions make it fast and easy to find the repository you were working on yesterday.
Pull requests: The link to pull requests takes you to a list of all pull requests that you created, were assigned to complete, were mentioned in, or were asked to review. A pull request is a proposed change to the code of a repository. When first starting, you normally don’t have anything in this section, but as you start interacting with collaborative repositories, you get an overview of any tasks you may want to attend to. For more on pull requests, see Chapter 3.
 If you click the Pull requests link, you might notice a ProTip, shown in Figure 2-3. The search bar for pull requests gives you several ways to specify a search to get exactly what you’re looking for. In fact, an entire page (
https://help.github.com/articles/searching-issues-and-pull-requests) is dedicated to effective searching. You can find ProTips throughout GitHub.com, so be sure to look out for them.- Issues: The list of issues is almost the same as the list of pull requests. The main difference between an issue and a Pull Request is that an issue is a report of a bug or a feature request. An issue doesn’t contain a proposed code change like a pull request does and therefore doesn’t require a reviewer.
- Marketplace: The marketplace on GitHub is a great place to find applications and tools that can help your collaborative coding workflow. For example, I have used AppVeyor, a continuous integration application, on projects. When you connect AppVeyor to one of your repositories, it continuously runs tests and deploys apps to make sure that every bit of code you’re adding won’t break what you’ve already built.
- Explore: The Explore link takes you to a list of things you may be interested in (see Figure 2-4). You may find events and opportunities that GitHub hosts or supports. For example, at the time we wrote this book, GitHub just released “The State of the Octoverse,” which presents a lot of interesting analytics about code on GitHub — for example, GitHub users made 1.1 billion contributions in 2018!
- Notifications: The bell icon leads you to a list of your notifications. See Chapter 1 for how to change your notification settings.
- Quick pick: The add-sign icon provides you with a list of quick actions you can take at any time: create a new repository, import a repository from another SCM, create a gist (a quick way to share code, notes, and snippets), or create a new organization.
- Account menu: The account menu appears when you click on your avatar. Here, you can get to your profile, repositories, anything you’ve starred, gists you’ve created, the help documents, and settings and can sign out.
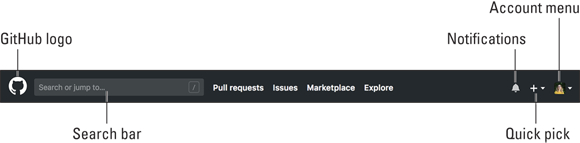
FIGURE 2-2: The top menu bar of GitHub.com.
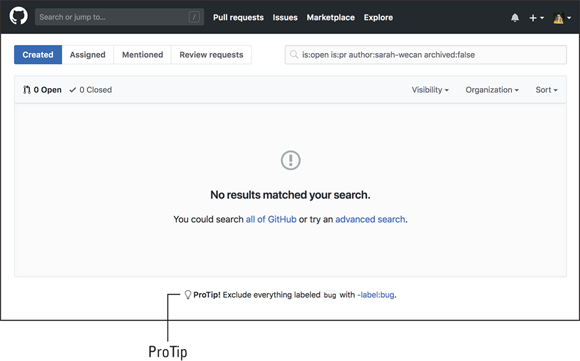
FIGURE 2-3: ProTip found on the Pull request page.

FIGURE 2-4: Curated list of repositories on GitHub.com.
Understanding Your Profile
Your profile is a public view of, essentially, your portfolio. To view your profile, click your avatar and then choose Your profile from the menu that appears. You can see my profile in Figure 2-5.
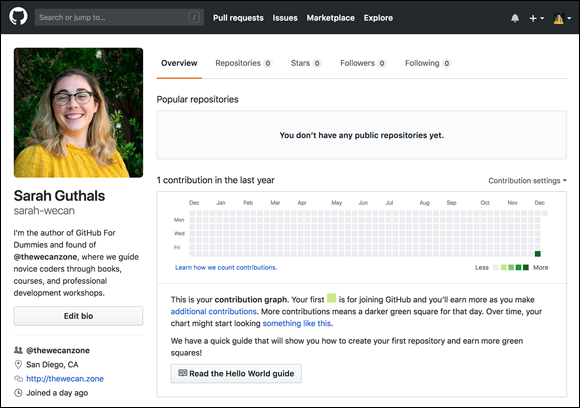
FIGURE 2-5: My profile.
The top menu bar of your profile offers quick links to your repositories, things you’ve starred, your followers, and anyone that you follow. Below that are repositories that you’re often visiting and your contribution graph. The contribution graph tracks how much code you’ve written per day. You can choose to include contributions to private repositories and an activity overview, which is a new feature.
 The amount and frequency at which you write code is not the bar by which software development is measured. It is true that the more you practice, the better you will be, but the practice you do must be deliberate. Making random code changes every single day without challenging yourself, or giving yourself time to think, design, and plan the code you want to write, is much worse than missing a white square.
Getting to Know GitHub Desktop
GitHub Desktop is a free, open source application that makes it easier for Mac and Windows users alike to manage repositories and GitHub connections on their local computer.
The fact that Desktop is open source means that you can follow the development of new features, connect with the developers right on the actual repository where the application is being built, and even choose to add features you’re interested in having.
You can find the repository at https://github.com/desktop/desktop.
To install the GitHub Desktop on your computer:
Go to
https://desktop.github.comand click Download for the platform you’re using. This book is written with examples using Google Chrome and a Mac. GitHub Desktop works on a Windows PC as well because it’s built using Electron, which allows it to work on both operating systems.
After the download finishes, click the file that was downloaded.
The file automatically unzips.
On Mac, the GitHub Desktop application appears in your Downloads folder, next to the zip file. On Windows, the application immediately opens after you unzip the file.
- On Mac, drag the purple GitHub Desktop application into your Applications folder.
On Mac, go to your Applications folder and double-click the GitHub Desktop icon.
The application opens, shown in Figure 2-6.
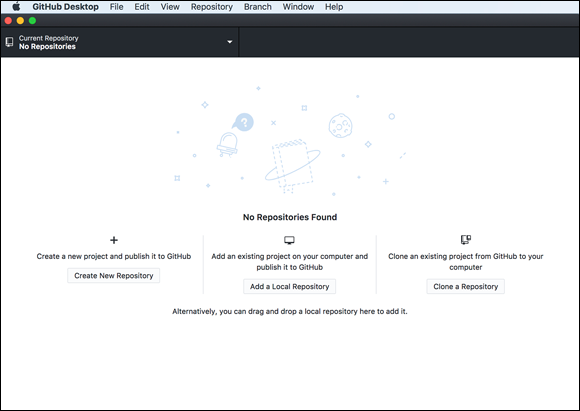
FIGURE 2-6: The GitHub Desktop application default view.
You may get an alert that you are trying to open an application that was downloaded from the Internet. Click “Open” if this alert appears.
Setting up GitHub Desktop
Before you can use GitHub Desktop effectively, you have to do a few things to connect it to your GitHub.com account. If you do not yet have a GitHub.com account, go to Chapter 1. If you already have a GitHub.com account and have already downloaded GitHub Desktop, you can set up GitHub Desktop with the following steps:
- Open the GitHub Desktop application.
- Choose File ⇒ Preferences.
On the Accounts tab, click Sign In on the GitHub.com row.
The Sign In dialog box, shown in Figure 2-7, appears.
Type your username and password and click the Sign in button or click Sign in using your browser.
When you click Sign in, all the dialog boxes close.
Repeat Step 1 to re-open the preferences.
Your account with your avatar, name, and GitHub username appears under the GitHub.com row, confirming that you have successfully logged in.
Click on the Git tab.
The information has been auto-filled for you.
On the Appearance tab, choose Light or Dark.
Screenshots in this book are in Light mode.
Set other preferences, such as the Editor and usage data, on the Advanced tab.
This book uses Atom and Visual Studio Code as example editors, but you can select whichever editor you prefer.
I recommend agreeing to send usage data, which is checked by default. By leaving it checked, you help the GitHub Desktop development team understand how all users use the application and therefore make it better.
If you do not have a GitHub repository on your computer yet, you can stop the setup here. If you do have a repository, see Chapter 4.

FIGURE 2-7: The Sign in dialog box for the GitHub Desktop application.
While a team of folks at GitHub predominately does the development of GitHub Desktop, a part of their role is to support community members who want to contribute to the project. Don’t hesitate to reach out to the team on its repository at https://github.com/desktop/desktop.
Introducing Atom
Atom is a free, open-source editor. Just like GitHub Desktop, Atom is built on Electron, making it work on Mac or Windows PC. Atom is extensible, meaning you can add your own features to it.
You can take a look at what the Atom team at GitHub is working on by visiting the repository; https://github.com/atom/atom.
Atom is a lightweight editor that shouldn’t take long to install. To install Atom, go to https://atom.io and click Download.
Just like with GitHub Desktop in the previous section, when Atom finishes downloading, click to unzip the file. On Mac, the Atom application appears in your Downloads folder. Drag the Atom application into your applications folder. On Windows or Mac, double-click the application to open it. When you do, you should see what is shown in Figure 2-8.
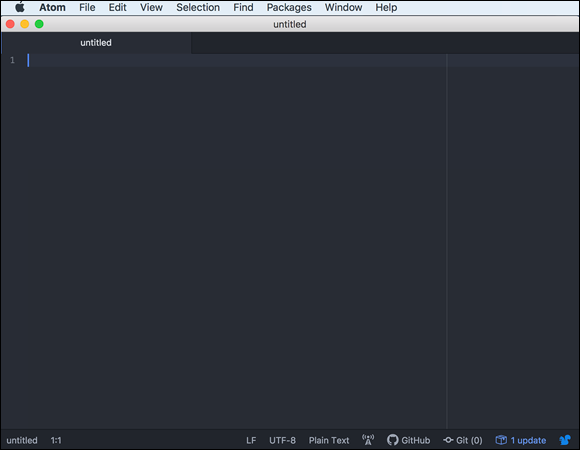
FIGURE 2-8: The Atom application default view.
You may get an alert that you’re trying to open an application that was downloaded from the Internet. Click Open if this alert appears.
Here are a few things that you should know about Atom:
Updates: Each time you start Atom, make sure you check the bottom- right corner to see whether any updates need to happen so that you keep your software as current as possible. When you click the Update link, the Settings tab opens, and the packages appear on the screen. In Figure 2-9, you can see that I had previously installed the package t
eletype, which requires an update. After clicking Update to 0.13.3 or Update All if I have multiple packages that need updating, we restart Atom. You can click the Squirrel icon to go to the Atom About page to ensure that your Atom editor is also kept up-to-date.Git and GitHub tabs: At the bottom, right, next to where the updates are, you can easily open the Git and GitHub tabs by choosing Packages ⇒ GitHub ⇒ Toggle Git/GitHub Tab.
You may notice that some menu items throughout Atom have keyboard bindings, such as the Git and GitHub tabs in Figure 2-10. Keyboard bindings are combinations of keys you can press on your keyboard to make something happen in a specific application. You probably already know some of these. For example, when you're browsing the Internet, you can type ⌘ -T on a Mac or Ctrl+T on Windows to open a new tab. Finding ways to become more efficient in your coding, such as by using keyboard bindings, can be an effective strategy for you as you become more expert in your coding journey.- Preferences: You can specify a lot of preferences for Atom. I don’t explain each one in this book, but I encourage you to browse them and really set up Atom to make it exactly right for you. You can find the preferences by choosing Atom ⇒ Preferences (see Figure 2-11).
- Packages: You can install more than 8,000 Atom packages to make Atom most effective for you. You can find them under preferences or at
https://atom.io/packages. Going through each of these packages is beyond the scope of this book, but I encourage you to explore some and search them if you’re ever feeling limited by your Atom experience.
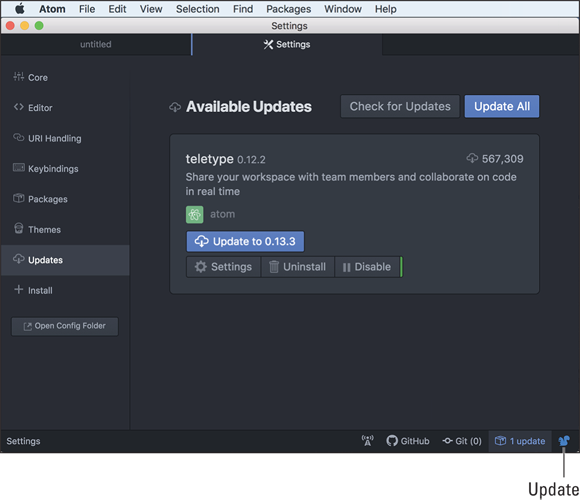
FIGURE 2-9: the Squirrel icon takes you to the About page where you can update Atom.
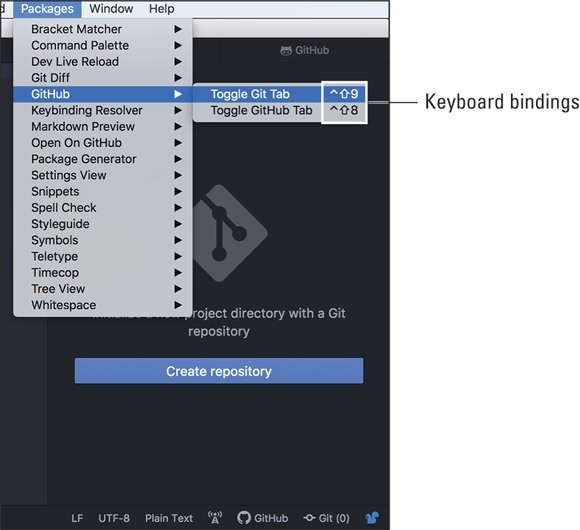
FIGURE 2-10: Keyboard bindings for toggling the Git and GitHub tabs.

FIGURE 2-11: The Atom Settings page.
If you’re looking for resources outside of this book, check out the Atom documentation at https://atom.io/docs and the Atom Flight Manual at https://flight-manual.atom.io. Both of these resources can help guide you through any problem you may encounter. If they don’t, you can reach out to the developers who work on Atom by visiting the open source repository at https://github.com/atom/atom.