Chapter 16. Sniping for Multiple Items
In which we bid for multiple items, splitting the per-connection code from the per-auction code. We use the table model we just introduced to display the additional bids. We extend the user interface to allow users to add items dynamically. We’re pleased to find that we don’t have to change the tests, just their implementation. We tease out a “user request listener” concept, which means we can test some features more directly. We leave the code in a bit of a mess.
Testing for Multiple Items
A Tale of Two Items
The next task on our to-do list is to be able to snipe for multiple items at the same time. We already have much of the machinery we’ll need in place, since our user interface is based on a table, so some minor structural changes are all we need to make this work. Looking ahead in the list, we could combine this change with adding items through the user interface, but we don’t think we need to do that yet. Just focusing on this one task means we can clarify the distinction between those features that belong to the Sniper’s connection to the auction house, and those that belong to an individual auction. So far we’ve specified the item on the command line, but we can extend that to pass multiple items in the argument list.
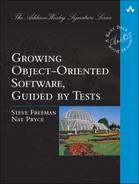
As always, we start with a test. We want our new test to show that the application can bid for and win two different items, so we start by looking at the tests we already have. Our current test for a successful bid, in “First, a Failing Test” (page 152), assumes that the application has only one auction—it’s implicit in code such as:
application.hasShownSniperIsBidding(1000, 1098);
We prepare for multiple items by passing an auction into each of the ApplicationRunner calls, so the code now looks like:
application.hasShownSniperIsBidding(auction, 1000, 1098);
Within the ApplicationRunner, we remove the itemId field and instead extract the item identifier from the auction parameters.
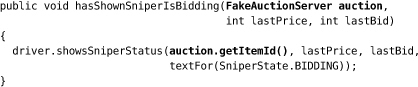
The rest is similar, which means we can write a new test:
Following the protocol convention, we also remember to add a new user, auction-item-65432, to the chat server to represent the new auction.
Avoiding False Positives
![]()
We group the showsSniper methods together instead of pairing them with their associated auction triggers. This is to catch a problem that we found in an earlier version where each checking method would pick up the most recent change—the one we’d just triggered in the previous call. Grouping the checking methods together gives us confidence that they’re both valid at the same time.
The ApplicationRunner
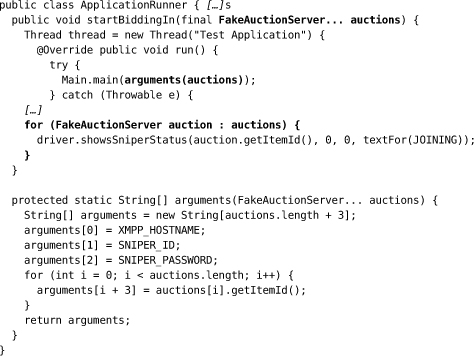
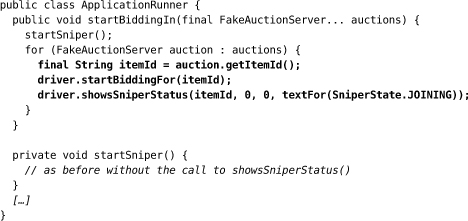
The one significant change we have to make in the ApplicationRunner is to the startBiddingIn() method. Now it needs to accept a variable number of auctions passed through to the Sniper’s command line. The conversion is a bit messy since we have to unpack the item identifiers and append them to the end of the other command-line arguments—this is the best we can do with Java arrays:
We run the test and watch it fail.

A Diversion, Fixing the Failure Message
We first saw this cryptic failure message in Chapter 11. It wasn’t so bad then because it could only occur in one place and there wasn’t much code to test anyway. Now it’s more annoying because we have to find this method:
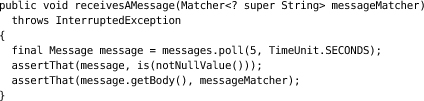
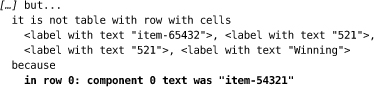
and figure out what we’re missing. We’d like to combine these two assertions and provide a more meaningful failure. We could write a custom matcher for the message body but, given that the structure of Message is not going to change soon, we can use a PropertyMatcher, like this:
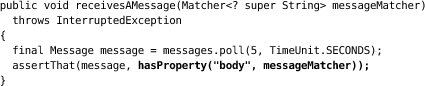
which produces this more helpful failure report:
![]()
With slightly more effort, we could have extended a FeatureMatcher to extract the message body with a nicer failure report. There’s not much difference, expect that it would be statically type-checked. Now back to business.
Restructuring Main
The test is failing because the Sniper is not sending a Join message for the second auction. We must change Main to interpret the additional arguments. Just to remind you, the current structure of the code is:
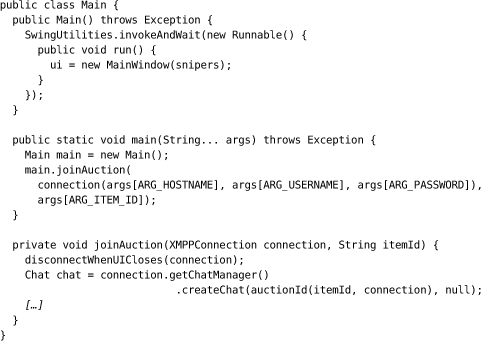
To add multiple items, we need to distinguish between the code that establishes a connection to the auction server and the code that joins an auction. We start by holding on to connection so we can reuse it with multiple chats; the result is not very object-oriented but we want to wait and see how the structure develops. We also change notToBeGCd from a single value to a collection.
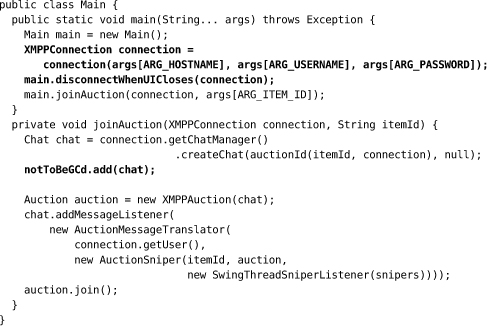
We loop through each of the items that we’ve been given:
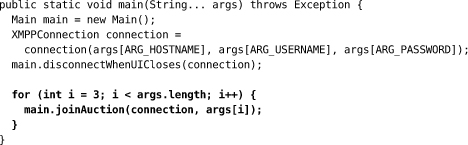
This is ugly, but it does show us a separation between the code for the single connection and multiple auctions. We have a hunch it’ll be cleaned up before long.
The end-to-end test now shows us that display cannot handle the additional item we’ve just fed in. The table model is still hard-coded to support one row, so one of the items will be ignored:
Incidentally, this result is a nice example of why we needed to be aware of timing in end-to-end tests. This test might fail when looking for auction1 or auction2. The asynchrony of the system means that we can’t tell which will arrive first.
Extending the Table Model
The SnipersTableModel needs to know about multiple items, so we add a new method to tell it when the Sniper joins an auction. We’ll call this method from Main.joinAuction() so we show that context first, writing an empty implementation in SnipersTableModel to satisfy the compiler:
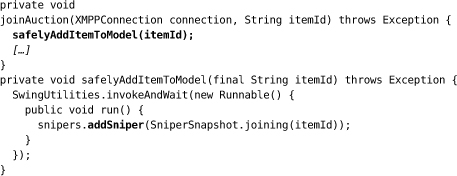
We have to wrap the call in an invokeAndWait() because it’s changing the state of the user interface from outside the Swing thread.
The implementation of SnipersTableModel itself is single-threaded, so we can write direct unit tests for it—starting with this one for adding a Sniper:
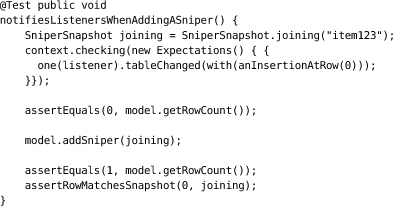
This is similar to the test for updating the Sniper state that we wrote in “Showing a Bidding Sniper” (page 155), except that we’re calling the new method and matching a different TableModelEvent. We also package up the comparison of the table row values into a helper method assertRowMatchesSnapshot().
We make this test pass by replacing the single SniperSnapshot field with a collection and triggering the extra table event. These changes break the existing Sniper update test, because there’s no longer a default Sniper, so we fix it:
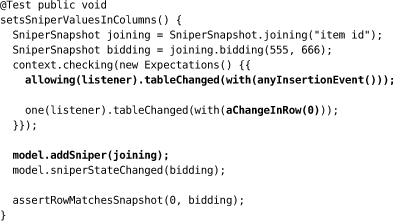
We have to add a Sniper to the model. This triggers an insertion event which isn’t relevant to this test—it’s just supporting infrastructure—so we add an allowing() clause to let the insertion through. The clause uses a more forgiving matcher that checks only the type of the event, not its scope. We also change the matcher for the update event (the one we do care about) to be precise about which row it’s checking.
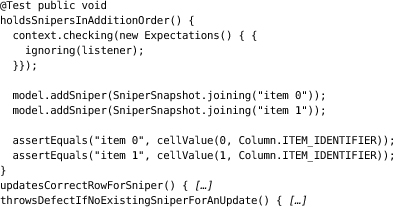
Then we write more unit tests to drive out the rest of the functionality. For these, we’re not interested in the TableModelEvents, so we ignore the listener altogether.
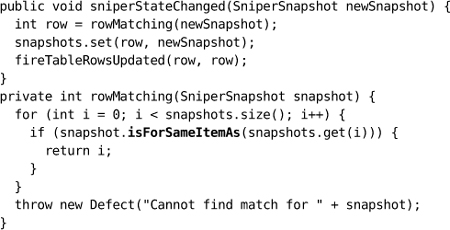
The implementation is obvious. The only point of interest is that we add an isForSameItemAs() method to SniperSnapshot so that it can decide whether it’s referring to the same item, instead of having the table model extract and compare identifiers.1 It’s a clearer division of responsibilities, with the advantage that we can change its implementation without changing the table model. We also decide that not finding a relevant entry is a programming error.
1. This avoids the “feature envy” code smell [Fowler99].
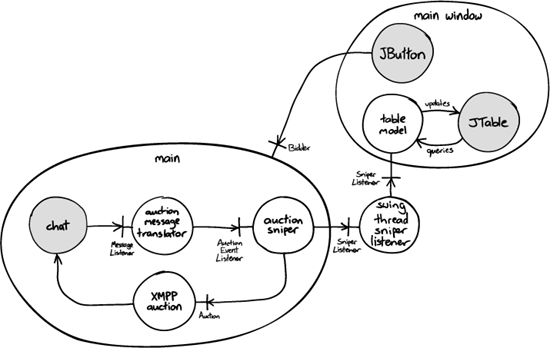
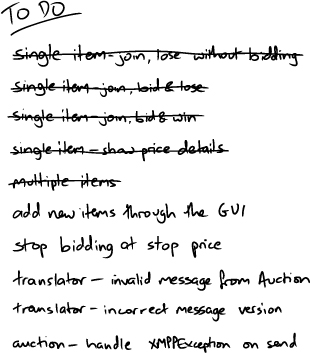
This makes the current end-to-end test pass—so we can cross off the task from our to-do list, Figure 16.1.
Figure 16.1 The Sniper handles multiple items
The End of Off-by-One Errors?
![]()
Interacting with the table model requires indexing into a logical grid of cells. We find that this is a case where TDD is particularly helpful. Getting indexing right can be tricky, except in the simplest cases, and writing tests first clarifies the boundary conditions and then checks that our implementation is correct. We’ve both lost too much time in the past searching for indexing bugs buried deep in the code.
Adding Items through the User Interface
A Simpler Design
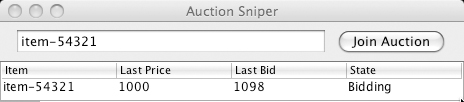
The buyers and user interface designers are still working through their ideas, but they have managed to simplify their original design by moving the item entry into a top bar instead of a pop-up dialog. The current version of the design looks like Figure 16.2, so we need to add a text field and a button to the display.
Figure 16.2 The Sniper with input fields in its bar
Making Progress While We Can
![]()
The design of user interfaces is outside the scope of this book. For a project of any size, a user experience professional will consider all sorts of macro- and micro-details to provide the user with a coherent experience, so one route that some teams take is to try to lock down the interface design before coding. Our experience, and that of others like Jeff Patton, is that we can make development progress whilst the design is being sorted out. We can build to the team’s current understanding of the features and keep our code (and attitude) flexible to respond to design ideas as they firm up—and perhaps even feed our experience back into the process.
Update the Test
Looking back at AuctionSniperEndToEndTest, it already expresses everything we want the application to do: it describes how the Sniper connects to one or more auctions and bids. The change is that we want to describe a different implementation of some of that behavior (establishing the connection through the user interface rather than the command line) which happens in the ApplicationRunner. We need a restructuring similar to the one we just made in Main, splitting the connection from the individual auctions. We pull out a startSniper() method that starts up and checks the Sniper, and then start bidding for each auction in turn.
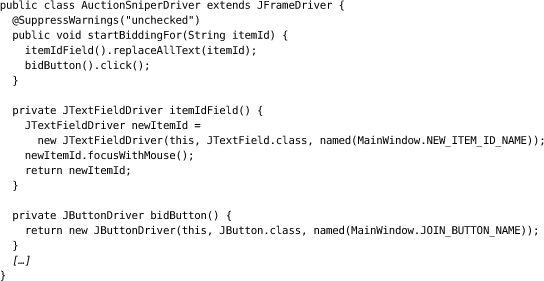
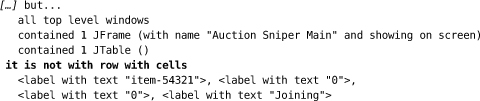
The other change to the test infrastructure is implementing the new method startBiddingFor() in AuctionSniperDriver. This finds and fills in the text field for the item identifier, then finds and clicks on the Join Auction button.
Neither of these components exist yet, so the test fails looking for the text field.

Adding an Action Bar
We address this failure by adding a new panel across the top to contain the text field for the identifier and the Join Auction button, wrapping up the activity in a makeControls() method to help express our intent. We realize that this code isn’t very exciting, but we want to show its structure now before we add any behavior.
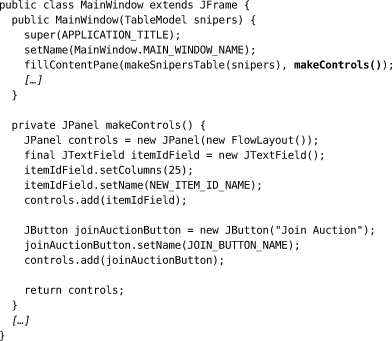
With the action bar in place, our next test fails because we don’t create the identified rows in the table model.
A Design Moment
Now what do we do? To review our position: we have a broken acceptance test pending, we have the user interface structure but no behavior, and the SnipersTableModel still handles only one Sniper at a time. Our goal is that, when we click on the Join Auction button, the application will attempt to join the auction specified in the item field and add a new row to the list of auctions to show that the request is being handled.
In practice, this means that we need a Swing ActionListener for the JButton that will use the text from the JTextField as an item identifier for the new session. Its implementation will add a row to the SnipersTableModel and create a new Chat to the Southabee’s On-Line server. The catch is that everything to do with connections is in Main, whereas the button and the text field are in MainWindow. This is a distinction we’d like to maintain, since it keeps the responsibilities of the two classes focused.
We stop for a moment to think about the structure of the code, using the CRC cards we mentioned in “Roles, Responsibilities, Collaborators” on page 16 to help us visualize our ideas. After some discussion, we remind ourselves that the job of MainWindow is to manage our UI components and their interactions; it shouldn’t also have to manage concepts such as “connection” or “chat.” When a user interaction implies an action outside the user interface, MainWindow should delegate to a collaborating object.
To express this, we decide to add a listener to MainWindow to notify neighboring objects about such requests. We call the new collaborator a UserRequestListener since it will be responsible for handling requests made by the user:
![]()
Another Level of Testing
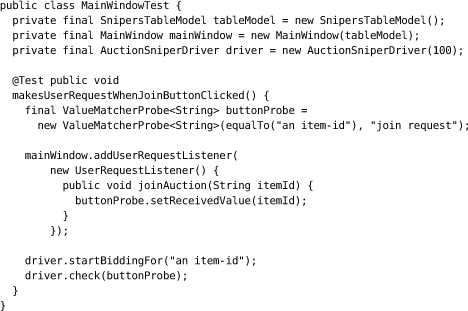
We want to write a test for our proposed new behavior, but we can’t just write a simple unit test because of Swing threading. We can’t be sure that the Swing code will have finished running by the time we check any assertions at the end of the test, so we need something that will wait until the tested code has stabilized—what we usually call an integration test because it’s testing how our code works with a third-party library. We can use WindowLicker for this level of testing as well as for our end-to-end tests. Here’s the new test:
WindowLicker Probes
![]()
In WindowLicker, a probe is an object that checks for a given state. A driver’s check() method repeatedly fires the given probe until it’s satisfied or times out. In this test, we use a ValueMatcherProbe, which compares a value against a Hamcrest matcher, to wait for the UserRequestListener’s joinAuction() to be called with the right auction identifier.
We create an empty implementation of MainWindow.addUserRequestListener, to get through the compiler, and the test fails:

To make this test pass, we fill in the request listener infrastructure in MainWindow using Announcer, a utility class that manages collections of listeners.2 We add a Swing ActionListener that extracts the item identifier and announces it to the request listeners. The relevant parts of MainWindow look like this:
2. Announcer is included in the examples that ship with jMock.
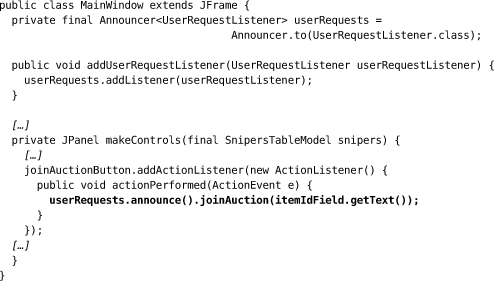
To emphasize the point here, we’ve converted an ActionListener event, which is internal to the user interface framework, to a UserRequestListener event, which is about users interacting with an auction. These are two separate domains and MainWindow’s job is to translate from one to the other. MainWindow is not concerned with how any implementation of UserRequestListener might work—that would be too much responsibility.
Micro-Hubris
![]()
In case this level of testing seems like overkill, when we first wrote this example we managed to return the text field’s name, not its text—one was item-id and the other was item id. This is just the sort of bug that’s easy to let slip through and a nightmare to unpick in end-to-end tests—which is why we like to also write integration-level tests.
Implementing the UserRequestListener
We return to Main to see where we can plug in our new UserRequestListener. The changes are minor because we did most of the work when we restructured the class earlier in this chapter. We decide to preserve most of the existing code for now (even though it’s not quite the right shape) until we’ve made more progress, so we just inline our previous joinAuction() method into the UserRequestListener’s. We’re also pleased to remove the safelyAddItemToModel() wrapper, since the UserRequestListener will be called on the Swing thread. This is not obvious from the code as it stands; we make a note to address that later.
We try our end-to-end tests again and find that they pass. Slightly stunned, we break for coffee.
Observations
Making Steady Progress
We’re starting to see more payback from some of our restructuring work. It was pretty easy to convert the end-to-end test to handle multiple items, and most of the implementation consisted of teasing apart code that was already working. We’ve been careful to keep class responsibilities focused—except for the one place, Main, where we’ve put all our working compromises.
We made an effort to stay honest about writing enough tests, which has forced us to consider a couple of edge cases we might otherwise have left. We also introduced a new intermediate-level “integration” test to allow us to work out the implementation of the user interface without dragging in the rest of the system.
TDD Confidential
We don’t write up everything that went into the development of our examples—that would be boring and waste paper—but we think it’s worth a note about what happened with this one. It took us a couple of attempts to get this design pointing in the right direction because we were trying to allocate behavior to the wrong objects. What kept us honest was that for each attempt to write tests that were focused and made sense, the setup and our assertions kept drifting apart. Once we’d broken through our inadequacies as programmers, the tests became much clearer.
Ship It?
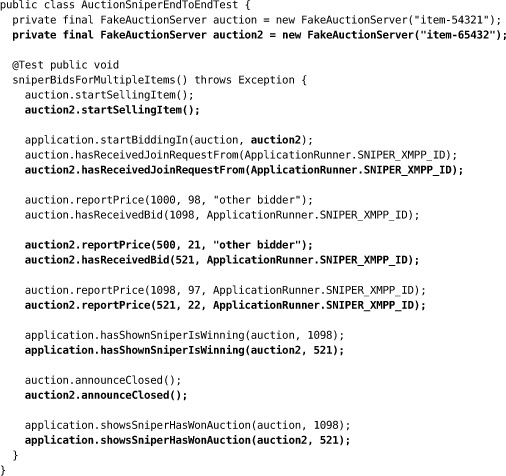
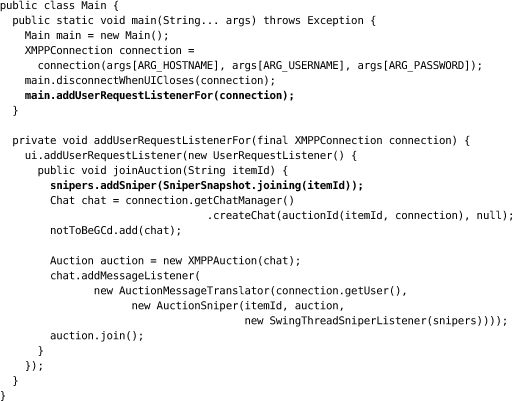
So now that everything works we can get on with more features, right? Wrong. We don’t believe that “working” is the same thing as “finished.” We’ve left quite a design mess in Main as we sorted out our ideas, with functionality from various slices of the application all jumbled into one, as in Figure 16.3. Apart from the confusion this leaves, most of this code is not really testable except through the end-to-end tests. We can get away with that now, while the code is still small, but it will be difficult to sustain as the application grows. More importantly, perhaps, we’re not getting any unit-test feedback about the internal quality of the code.
We might put this code into production if we knew the code was never going to change or there was an emergency. We know that the first isn’t true, because the application isn’t finished yet, and being in a hurry is not really a crisis. We know we will be working in this code again soon, so we can either clean up now, while it’s still fresh in our minds, or re-learn it every time we touch it. Given that we’re trying to make an educational point here, you’ve probably guessed what we’ll do next.
Figure 16.3 Everything implemented in Main