
Chapter 19. Output
Several years ago the title of this chapter would have been “Printing.” That was what you did with page-layout documents: You printed them using a desktop printer. Today, however, there are many more choices for publishing your InDesign documents.
Most InDesign files are created as part of the professional prepress process. (For more information on professional printing, see The Non-Designer’s Scan and Print Book, by Sandee Cohen and Robin Williams, published by Peachpit Press.) You need to know more than just how to print to a desktop printer. You need to know how to make sure your document has been set up correctly. You need to know what files are necessary to send to a print shop.
So this chapter is now called “Output.” Output refers to preparing documents and printing them—either with an ordinary desktop printer or with a high-end printing device such as an imagesetter.
Printing a Document
When a document is printed, many different instructions are sent to the printing machine. You need to set those instructions correctly.
Tip
Adobe recommends using only the controls inside the InDesign Print dialog box—not the Page Setup (Mac) dialog box or the Printer Properties (Win) dialog box.
- Choose File > Print. This opens the Print dialog box
 .
.
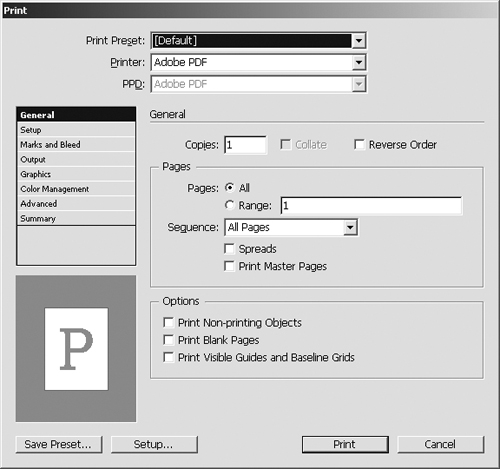
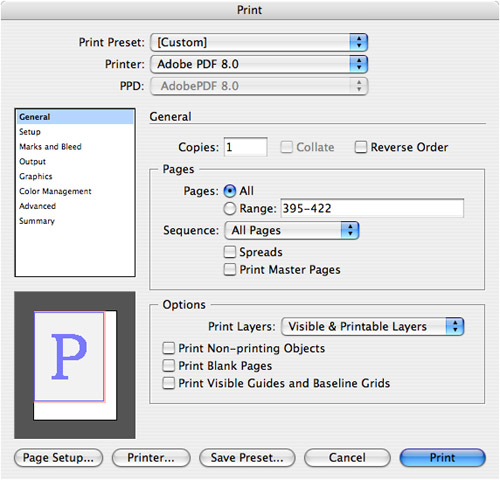 The Print dialog box contains all the settings for printing documents.
 - Click each of the categories
 on the left side of the dialog box to set the options as described in the chart on the following page.
 Click each of the categories to display those settings in the Print dialog box.
 - Click the Print button to print the document according to the settings.
Before you print a document, you may want to set some objects (such as private notes or alternate designs) to not print.
To set elements to not print:
• Select the object and turn on Nonprinting in the Attributes panel.
or
Turn off the visibility of the layer in the document. This suppresses the printing for all objects on the layer.
Setting the General Print Options
If you are printing to a desktop printer, the options in the General category may be all you need to set to print a document.
To choose the printer:
• Choose the printer from the Printer menu at the top of the dialog box ![]() .
.
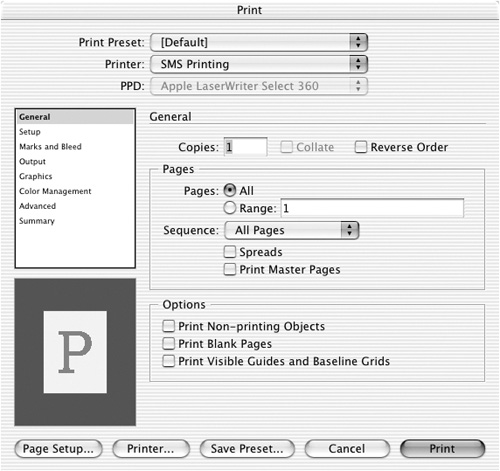
![]() The Printer list lets you choose the printer to print a document.
The Printer list lets you choose the printer to print a document.
- Set the number of copies in the Copies field
 .
.
 The Copies and Pages area of the General controls for printing.
 - Choose Collate to print multiple copies organized as complete sets.
- Choose Reverse Order to print the copies back to front.
- Choose All to print all the pages .
or
Choose Range. Use a hyphen to specify a range of pages. Use a comma to specify individual pages.
- Choose Collate to print copies as sets.
- Use the Sequence menu to choose All Pages, Even Pages, or Odd Pages.
- Check Spreads to print spreads together.
- Choose Print Master Pages to print any master pages in the document.
- Choose which layers to print
 .
.
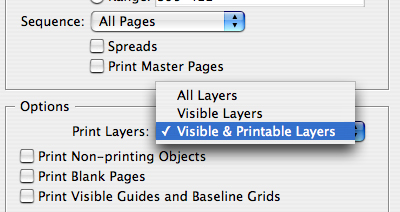 The Print Layers menu in the Options area of the General controls for printing.
 - Check Print Non-printing Objects to print objects set to not print
 .
.
 The Options area of the General controls for printing.
 - Check Print Blank Pages to print pages that have no visible items.
- Check Print Visible Guides and Baseline Grids to print the guides and grids.
Choosing the Setup Controls
The Setup options contain the controls to set the paper size and orientation.
To set the paper size and orientation:
- Use the Paper Size menu to choose the size of the paper on which to print the document
 .
.
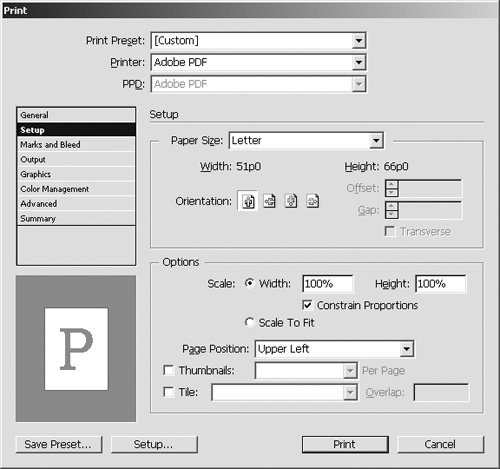 The Paper Size and Orientation controls in the Setup category of the Print dialog box.
 - Click one of the Orientation buttons. This changes the rotation of the document on the printed page.
- Set the Scale amount for either Height or Width to change the size of the printed document on the paper
 .
.
 The Options controls in the Setup category of the Print dialog box.
 - Click the Scale to Fit button to have the document automatically resized to fit the chosen paper size.
- Use the Page Position menu to choose where to position the document on the printed page
 .
.
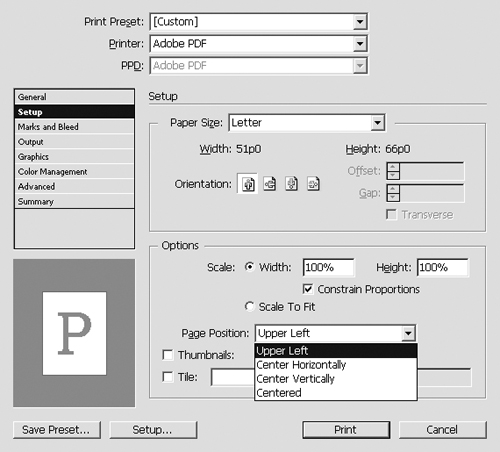 The Page Position menu in the Setup category of the Print dialog box.
 - Check Thumbnails to print small versions of the pages on a single page.
- If you have chosen Thumbnails, use the Thumbnails menu to choose how many pages are printed on each page
 .
.
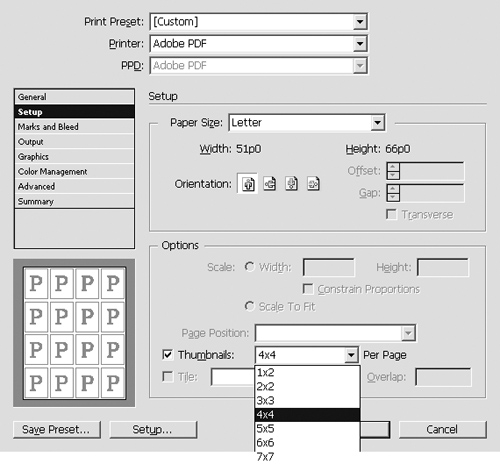 The Thumbnails menu in the Setup category of the Print dialog box.
Tiling Pages
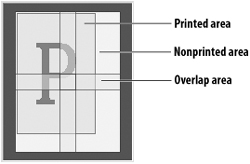
If your document is larger than the paper in the printer, you can print portions of the document on different pages. You can then assemble the pages together. This is called tiling. Auto tiling automatically divides the page into smaller segments.
- Check Tile in the Setup category of the Print dialog box.
- Choose Auto from the Tiling menu
 .
.
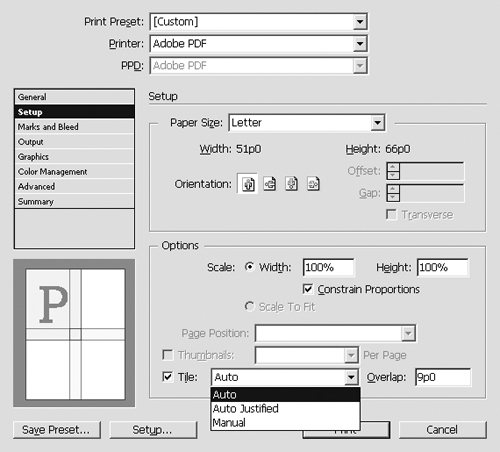 The Tile menu in the Setup category of the Print dialog box.
 - Set the amount in the Overlap field. This controls how much of one page is repeated on the tile for a second section of the page.
Auto justified tiling divides the pages so that the right edge of the document lies on the right side of a printed page and the bottom edge of the document lies on the bottom edge of a printed page ![]() .
.
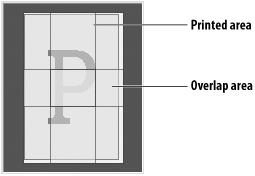
![]() The Preview area set to Auto Justified tile.
The Preview area set to Auto Justified tile.
Tip
The Auto setting ensures that there is no white space on the right side and bottom of the tiled pages.
- Check Tile in the Setup category of the Print dialog box.
- Choose Auto Justified from the Tiling menu.
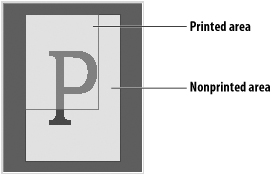
You can also tile pages manually. This lets you make sure that the edge of the paper does not cut across an important portion of the document.
- Use the zero-point crosshairs on the ruler to set the upper-left corner of the area you want to print
 . (See Chapter 2, “Document Setup,” for more information on setting the zero point of the ruler.)
 Move the zero-point crosshairs to set the area to print as a tile on one page.
 - Choose File > Print.
- Click the Setup category of the Print dialog box.
- Choose Manual from the Tiling menu.
- Click Print to print that one page.
- Reposition the zero-point crosshairs to set a new area to be printed.
- Follow steps 2 through 5 to define and print the second tile.
- Repeat the process until the entire page has been printed.
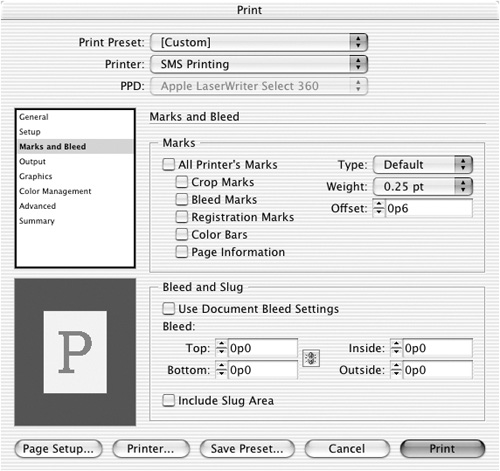
Setting Marks and Bleed
You can also add information that shows where the page is to be trimmed, the document name, and so on. This information is sometimes called printer’s marks or page marks.
- Check All Printer’s Marks to turn on all the marks, or use the checkboxes to set each one individually
 and
and  .
.
• Crop Marks indicates where the page should be trimmed.
• Bleed Marks shows how far outside the crop marks you must put graphics so that they are trimmed correctly.
• Registration Marks adds crosshair targets that are used to line up pieces of film.
• Color Bars provides boxes that display the colors used in the document as well as the tint bars that can be used to calibrate the printing press for correct tints of colors.
• Page Information prints the name of the file, the page number, and the time the document was printed.
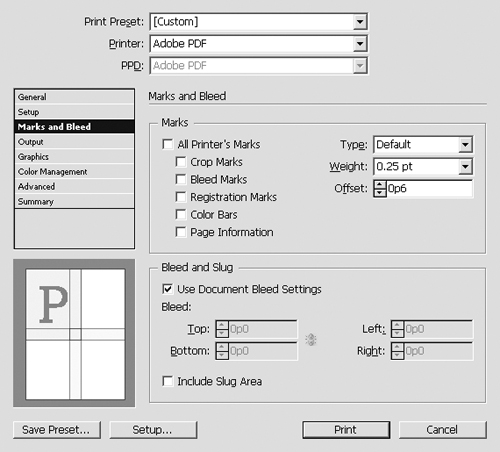 The Marks settings in the Marks and Bleed category of the Print dialog box.
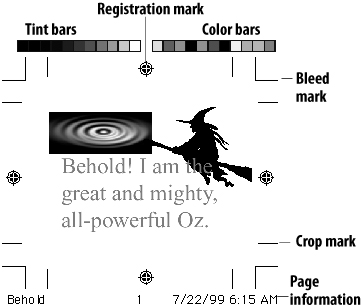 The page marks and information as they appear on the printed page.
 - Use the Type menu to choose a custom set of marks such as those used in Japanese printing.
- Enter an amount in the Weight menu for the thickness of the crop marks.
- Enter an amount in the Offset field to determine how far away from the trim the page marks should be positioned.
You can also control the bleed, or the area that allows objects that extend off the page to print ![]() .
.
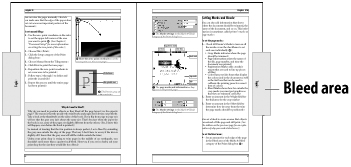
![]() An example of an object that bleeds off a page.
An example of an object that bleeds off a page.
To set the bleed area:
• To use the bleed set in the Document Setup dialog box, check Use Document Bleed Settings ![]() .
.

![]() Check the option for Use Document Bleed Setup to have the bleed use the same settings as in the Document Setup dialog box.
Check the option for Use Document Bleed Setup to have the bleed use the same settings as in the Document Setup dialog box.
or
Deselect Use Document Bleed settings and then set the custom amounts for the bleed around each side of the page ![]() .
.
![]() The Bleed controls allow you to define a custom bleed in the Print dialog box.
The Bleed controls allow you to define a custom bleed in the Print dialog box.
Tip
These custom bleed controls make it easy for print shops to set a uniform bleed as part of a print preset.
If you have set a slug for the document, you can choose whether that slug area prints or not.
To set the slug area:
• To print items in the slug area, check Include Slug Area.
Setting the Output Controls
You may need to set the color controls to choose how color documents are printed.
To control how colors are printed:
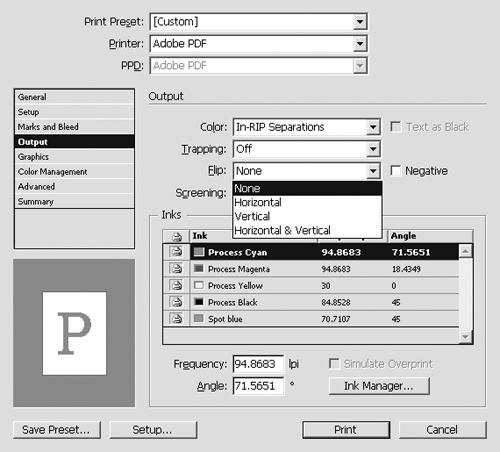
- Choose one of the following from the Color menu
 :
:
• Composite Leave Unchanged prints without converting colors to either RGB or CMYK.
• Composite Gray prints all the colors as a gray image. Use this when printing on one-color laser printers.
• Composite RGB prints all the colors as an RGB image. Use this when printing on RGB ink-jet printers.
• Composite CMYK prints all the colors as a CMYK image. Use this when printing on PostScript CMYK printers.
• Separations prints all the colors onto separate plates or pages.
• In-RIP Separations prints all the colors onto separate plates using the separation controls in the RIP.
 The Color menu in the Output category of the Print dialog box.
 - If you choose one of the composite settings, you can check Text as Black.
- Use the Flip menu if you need to flip the orientation of the page
 and
and  .
.
 The Flip menu in the Output category of the Print dialog box.
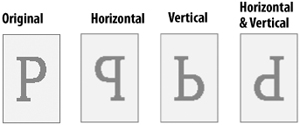 Examples of how the Flip menu changes the readability of a document.
 - Check the Negative box in the Output category of the Print dialog box.
You can also change the screen frequency and angle of halftones in the image.
To change the screen settings:
- Use the Screening menu to set the frequency and angle for the screen applied to images
 .
.
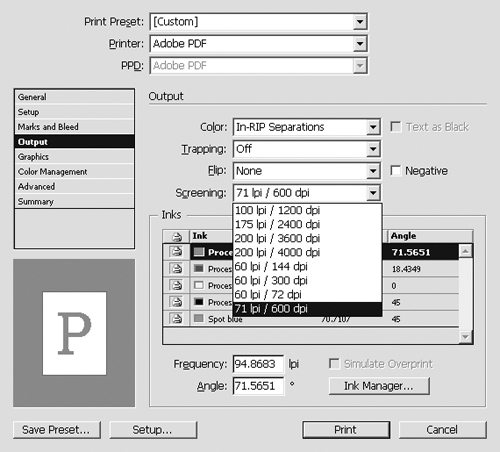 The Screening menu in the Output category of the Print dialog box.
 - Select a color in the Inks area and then use the Frequency and Angle fields
 .
.
 The Frequency and Angle fields in the Output category of the Print dialog box.
Trapping refers to the various techniques that are used to compensate for the misregistration of printing plates. However, if you don’t understand trapping, you should consult with the service bureau that will print your file before you set the trapping.
To turn on basic trapping:
• Choose Application Built-In or Adobe In-RIP from the Trapping menu ![]() .
.
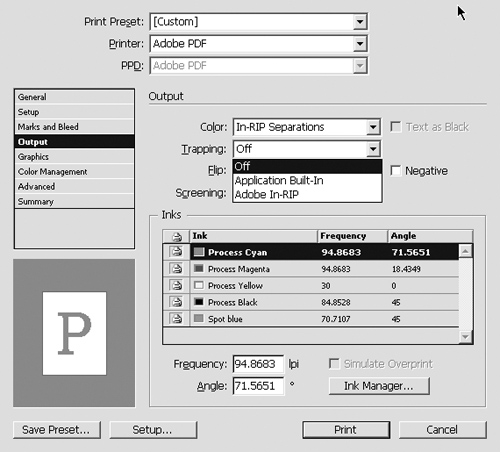
![]() The Trapping menu in the Output category of the Print dialog box.
The Trapping menu in the Output category of the Print dialog box.
Working with Separations Preview
When a document is printed with more than one color, each color is called a plate. Printing the different colors onto separate plates is called making separations. You use the Separations Preview panel to view the different color plates onscreen. This makes it possible to gauge how a document will look on press.
To turn on separations preview:
- Choose Window > Output > Separations Preview. The Separations Preview panel appears.
- Choose Separations from the View menu
 . This displays the controls for the colors in the document
  .
.
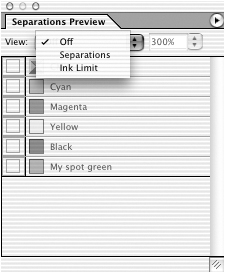 Use the View menu in the Separations Preview panel to turn on the separations preview.
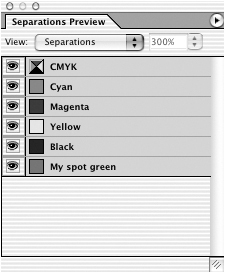 The colors in the document are displayed in the Separations Preview panel.
 - Click each Show/Hide icon next to the color name to change the display of the colors on the page
 .
.
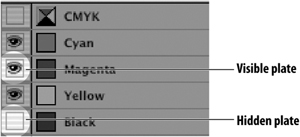 Click the Show/Hide icons in the Separations Preview panel to change the display of the colors on the page.
The Separations Preview panel also lets you view the total amount of ink for each plate.
To view the inks for each plate:
- Choose Separations from the View menu.
- Move the cursor around the page. The ink percentages appear next to the name of each color
 .
.
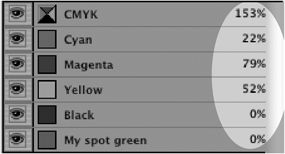 The Separations Preview displays the ink percentages next to each color plate.
Separations Preview also shows you the areas of the page that exceed a certain ink limit. For instance, many print shops will request that you not define colors totaling more than 300% of all the inks combined. The Ink Limit setting lets you see if there are any areas that exceed this limit.
- Select Ink Limit from the View menu in the Separations Preview panel.
- Use the amount menu to set the ink limit amount
 .
.
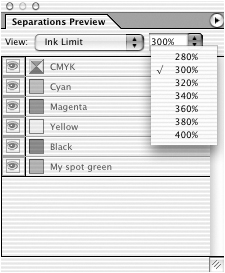 Use the Ink Limit controls to check the total ink applied in areas of the layout.
Tip
When you switch to the Ink Limit view, the document preview changes to a grayscale image. Any areas that exceed the ink limit are shown in red. The deeper the red, the more the color is over the ink limit.
Color Separations and Ink Manager
The Inks area of the Output category also lets you control how the inks are separated and printed.
To set the inks to be printed:
• Click the printer icon next to the name of each color. Each click changes how the ink will print as follows ![]() :
:
• If the icon is visible, the color will print.
• If the icon is not visible, the color does not print.
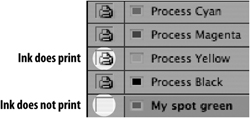
![]() The printer icon next to an ink color indicates whether that ink will print or not.
The printer icon next to an ink color indicates whether that ink will print or not.
Sometimes you find yourself with a document that contains spot colors that should be process colors. The Ink Manager lets you convert the spot colors to process inks.
To convert spot colors to process:
- Open the Ink Manager by clicking the Ink Manager button in the Output area of the Print dialog box
 .
.
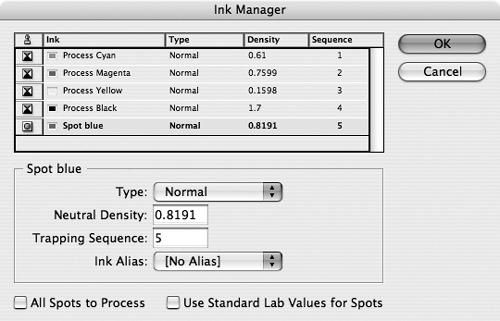 The Ink Manager dialog box gives you control over how inks are separated or printed.
 - Click the color icon next to the name of each color. Each click changes how the ink will print as follows
 :
:
• A CMYK symbol indicates that the color will separate as a process color.
• A spot color symbol indicates that the color will separate on its own plate.
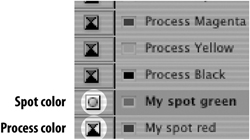 Click the color icons in the Ink Manager to convert spot colors to process.
 - Click the All Spots to Process option to convert all spot colors to process.
- If desired, check Use Standard Lab Values for Spots. This converts the spot colors to process using their built-in Lab color values.
When you import artwork that contains spot colors, those spot colors are added to the document and the Swatches panel. There are no problems if the imported colors are named exactly the same as existing colors. But if the name of the imported color differs from the color you have defined, you can wind up with two separate color plates instead of one ![]() . Thankfully, InDesign lets you map one color to be an alias of another.
. Thankfully, InDesign lets you map one color to be an alias of another.
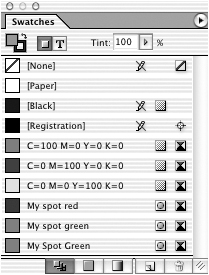
![]() An example of how names typed in different cases can create too many spot colors in a document.
An example of how names typed in different cases can create too many spot colors in a document.
To map one color to be the alias of another:
- Select the color you want to change in the Ink Manager.
- Use the Ink Alias menu to choose a different color to map to the selected one
 . The color is listed in the Ink Manager as mapped to the other color
  .
.
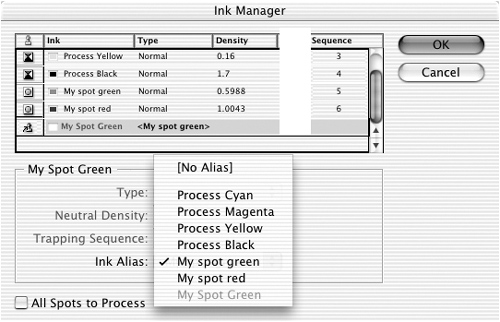 Use the Ink Alias menu to have one color map to a different one.
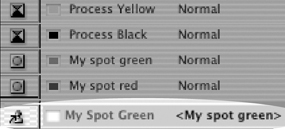 An example of how one color is used as the alias for another.
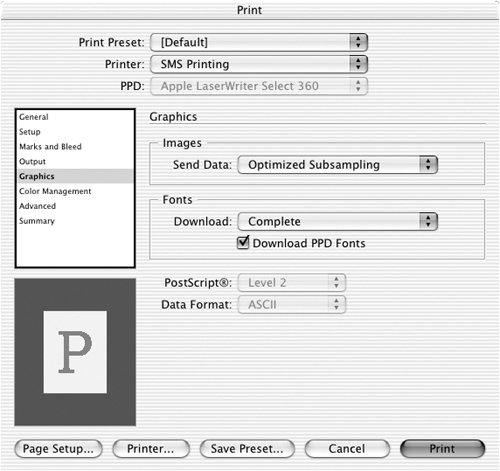
Setting the Graphics Options
The Graphics options control how much information is sent to the printer. You can control the data that is sent for placed images.
To control the data sent for images:
• Choose one of the following from the Images Send Data menu ![]() :
:
• All sends all the information for the image. This is the slowest setting.
• Optimized Subsampling sends only the amount of information necessary for the chosen output device. Use this option if you’re proofing high-resolution images on a desktop printer.
• Proxy sends only a 72-ppi version of the image.
• None replaces the image with crosshairs within the frame. Use this option when you want to proof only the text in the file.
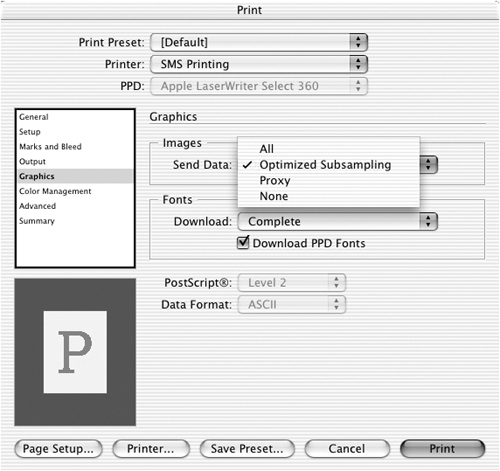
![]() Use the Send Data menu in the Graphics category to control how images are printed.
Use the Send Data menu in the Graphics category to control how images are printed.
You can also control how much of the font information is sent to the printer.
To control the font information sent for printing:
- Choose one of the following from the Download menu
 :
:
• None sends no font information, only a reference to the font. Do not use this option unless you understand how to replace the reference in the PostScript data stream.
• Complete sends the entire set of glyphs for the font. This is the longest option.
• Subset sends only those glyphs used in the document.
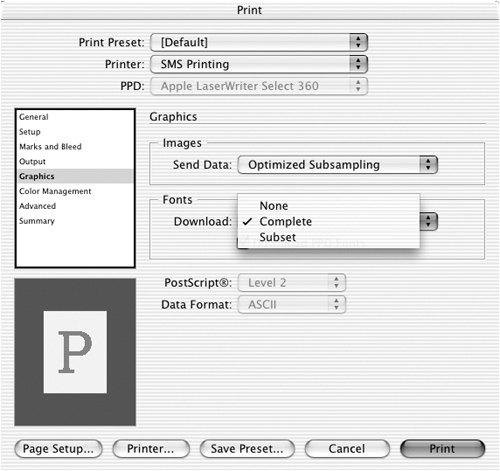 Use the Download menu in the Graphics category to control how much of a font is sent to the printer.
 - Choose Download PPD Fonts to send all fonts, even if they have been installed on the printer
 . This option is helpful if you use a variation of the fonts installed on the printer.
![]() Choose Download PPD Fonts to send printer fonts as part of the print information.
Choose Download PPD Fonts to send printer fonts as part of the print information.
Setting the Advanced Options
The Advanced category lets you set the options for OPI and choose a transparency preset. OPI stands for Open Prepress Interface. The OPI controls are used when files are sent to Scitex and Kodak prepress systems.
- In the OPI area, click the OPI Image Replacement checkbox
 .
.
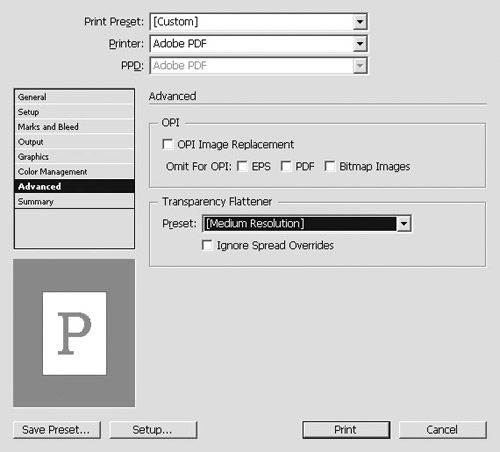 Set the OPI Image Replacement options to control how images are handled during prepress.
 - Choose which types of images should be replaced during an OPI workflow. (An OPI workflow uses low-resolution images for the layout and swaps them with high-resolution images just before printing.)
When you use any of the transparency features, InDesign needs to flatten or convert those effects into vector and raster images as they are sent for output. The Transparency Flattener section of the Advanced category controls how InDesign flattens the image.
- Use the Preset menu to choose one of the flattener settings
 .
.
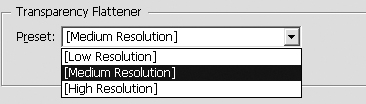 Use the Preset menu in the Transparency Flattener area to set the resolution for converting transparency effects into rasterized images.
 - If you have used the Pages panel to flatten individual spreads, you can check Ignore Spread Overrides to override that setting. This means that the setting you choose in this dialog box will be used no matter what flattener settings you have applied to the individual pages.
Flattener Presets and Preview
The transparency flattener presets control how the transparency effects, drop shadows, and feathers are handled during output.
To create a transparency flattener preset:
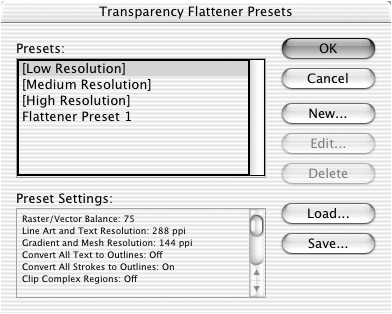
- Choose Edit > Transparency Flattener Presets. This opens the Transparency Flattener Presets dialog box
 .
.
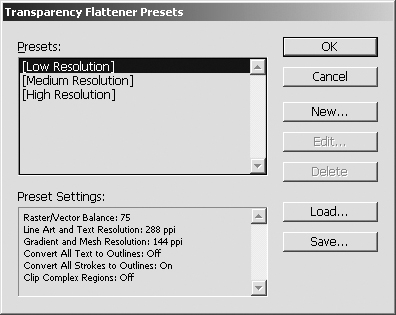 The Transparency Flattener Presets dialog box lets you define new presets for handling transparency effects.
 - Click the New button. The Transparency Flattener Preset Options dialog box appears
 .
.
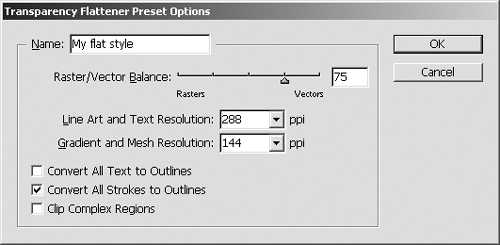 The Transparency Flattener Preset Options dialog box contains the settings for a custom transparency flattener preset.
 - Use the Name field to name the preset.
- In the Options area, move the Raster/Vector Balance slider to create more vector or more rasterized artwork
 .
.
 The Options area in the Transparency Flattener Preset Options dialog box.
 - Set an output resolution in the Line Art and Text Resolution field.
- Set an output resolution for gradient objects in the Gradient and Mesh Resolution field.
- Check Convert All Text to Outlines to convert the text to paths.
- If you have strokes that pass through different transparencies, you may want to choose Convert All Strokes to Outlines to convert the strokes to filled paths.
- Check Clip Complex Regions to ensure that any differences in raster and vector objects always fall along existing paths.
To edit a transparency flattener preset:
- Choose the preset you want to edit.
- Click the Edit button.
- Edit the preset in the Transparency Flattener Presets dialog box.

To delete transparency flattener presets:
- Choose the presets you want to delete.
- Click the Delete button.
You can also save transparency flattener presets to share among others. Once saved, the presets can then be loaded onto other machines.
To save a transparency flattener preset:
- Choose the presets you want to save.
- Click the Save button.
- Name the file.
To load a transparency flattener preset:
- Click the Load button.
- Navigate to find the file that contains the presets.
- Click Open. The presets appear in the Transparency Flattener Presets dialog box.
You can apply a flattener preset to the document in the Advanced category of the Print dialog box. However, you may have one page that requires special flattener controls. InDesign lets you apply flattener presets to each specific spread.
To apply a flattener preset to an individual spread:
- Move to the spread.
- In the Pages panel menu, choose one of the following from the Spread Flattening menu:
• Default leaves the spread flattening at whatever setting is applied to the document.
• None (Ignore Transparency) prints the spread without any transparency effect. This setting is useful for print shops that need to troubleshoot during output.
• Custom opens the Custom Spread Flattener Settings dialog box. These settings are identical to ones in the Transparency Flattener Preset Options dialog box
 .
.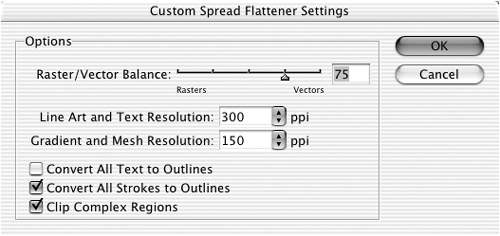 The Custom Spread Flattener Settings dialog box lets you apply different flattener controls to a specific spread.
Instead of waiting for your file to be printed, you can preview how the flattening will occur with the Flattener Preview panel.
To preview the flattener settings:
- Choose Window > Output > Flattener Preview. This opens the Flattener Preview panel
 .
.
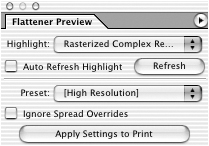 The Flattener Preview panel lets you see the effects of the flattener presets on your document.
 - Choose one of the options from the Highlight menu
 . This controls which objects will be displayed in the flattener preview.
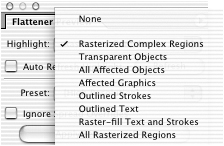 Use the Highlight menu to choose which objects will be displayed in the flattener preview.
 - Use the Preset menu to choose which flattener preset is used to control the flattener preview.
- Click the Refresh button to update the screen preview. The page displays the highlighted objects in red against other grayscale objects
 .
.
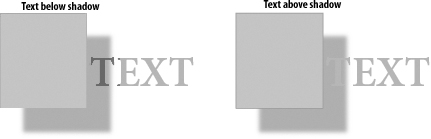 The Flattener preview highlights the objects affected by transparency. Here the text below the shadow is highlighted while the text above the shadow is not.
or
Check Auto Refresh Highlight to have the screen update automatically.
- Check Ignore Spread Overrides to use only the setting in the Preset menu.
- If you want, click the Apply Settings to Print button to apply the settings to the Advanced category of the Print dialog box.
Working with Print Presets
With all the areas in the Print dialog box, you wouldn’t want to have to set all the controls each time you have a new document. InDesign lets you save the print settings so you can easily apply them later.
- Set all the categories in the Print dialog box to the settings you want to save.
- Click the Save Preset button at the bottom of the Print dialog box
 . This opens the Save Preset dialog box
  .
.
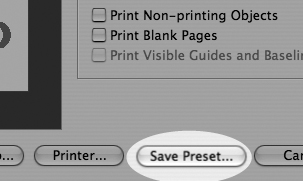 Click the Save Preset button to save the current Print settings as a print preset.
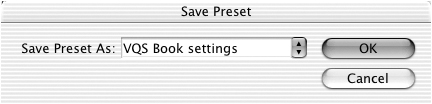 Use the Save Preset dialog box to name your own printer preset.
 - Enter a name for the preset.
- Click OK. This saves the preset.
To apply a print preset:
• Choose a saved preset from the Print Preset menu at the top of the Print dialog box ![]() .
.
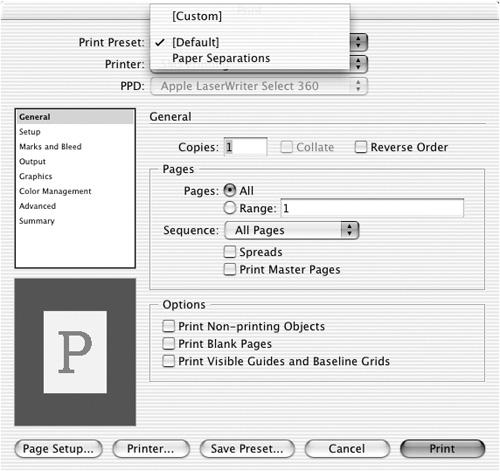
![]() A saved preset can be applied using the Print Preset menu at the top of the Print dialog box.
A saved preset can be applied using the Print Preset menu at the top of the Print dialog box.
You don’t need to go through the Print dialog box to create and save a print preset.
- Choose File > Print Presets > Define. The Print Presets dialog box appears
 .
.
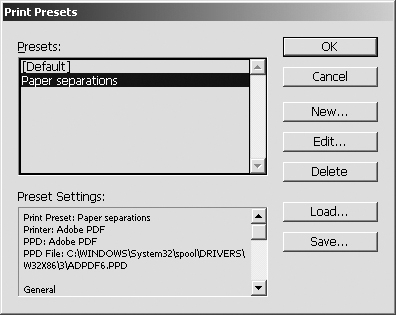 Saved presets are listed in the Print Presets dialog box.
 - Click the New button to define a new preset. This opens a version of the Print dialog box that lets you set the various print categories.
or
Click the Edit button to make changes to the selected print preset.
- Select the presets you want to delete in the Print Presets dialog box.
- Click the Delete button.
One of the benefits of working with printer presets is that you can export them so others can print documents with the same settings.
- In the Print Presets dialog box, select the presets you want to export.
- Click Save. A dialog box appears where you can name the document that contains the exported presets.
Your service bureau can provide you with printer presets that you can import to use for printing or packaging documents.
- In the Print Presets dialog box, click Load.
- Use the dialog box to select the document that contains the presets exported from another machine.
- Click OK. The presets appear in the Print Presets dialog box.
Creating a Print Summary
With all the settings in the Print dialog box, you may want to keep track of how a document has been printed. The Summary area gives you a report of all the print settings.
To use the Summary area:
• Scroll through the summary area to see all the settings applied to a print job ![]() .
.
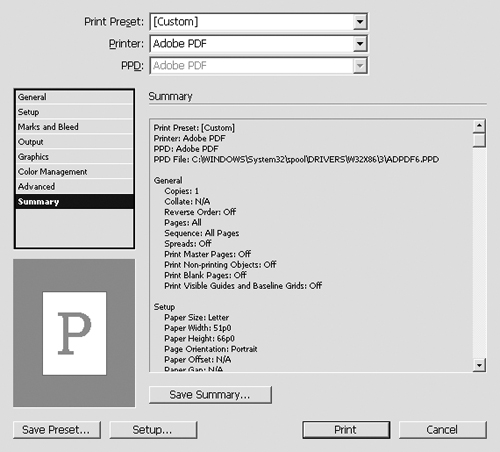
![]() Use the Summary area to see all the print settings applied to a document.
Use the Summary area to see all the print settings applied to a document.
or
Click the Save Summary button to save a text file listing all the print settings.
Creating Printer’s Spreads
When you work on an InDesign document, you view the pages in what are called reader’s spreads. However, when documents are printed, they need to be arranged in what are called printer’s spreads. (This is also called imposing pages in position.)
For example, in an 8-page brochure, page one would be paired up with page eight. Page two would be next to page seven. Manually creating printer’s spreads is a nightmare. Fortunately, you can easily arrange your document into printer’s spreads using the Print Booklet command.
To impose a document into printer’s spreads:
- Choose File > Print Booklet. The Print Booklet dialog box appears
 .
.
 The Print Booklet dialog box lets you create printer’s spreads.
 - Click the Setup category. The Setup controls appear
 .
.
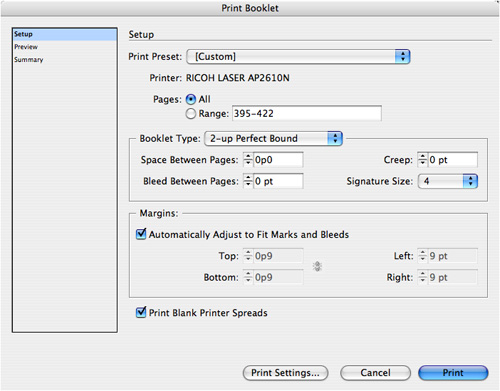 The Setup controls of the Print Booklet dialog box.
 - Choose a print preset from the Print Preset menu
 . If you have no preset available, choose [Current Document Settings] to use whatever printer is chosen in your Print dialog box.
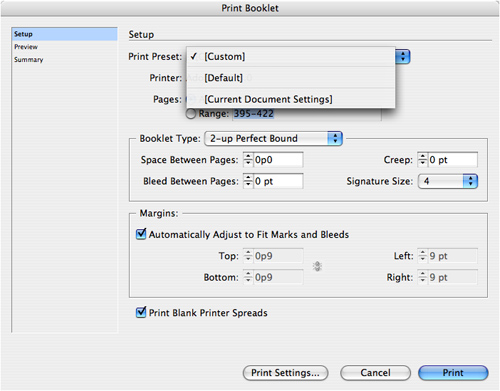 The Print Preset menu lets you choose which print preset should be used.
 - Use the Pages control to choose which pages should be imposed.
- Choose the Booklet Type and Margins controls as explained in the following exercises.
There are different types of booklets. Each one requires separate controls. If you are unsure of which type of booklet you are creating, ask your print shop.
- Choose the orientation and binding for the booklet from the Booklet Type menu
 .
.
 The Booklet Type menu of the Print Booklet dialog box.
 - Depending on the orientation and binding, you may need to set any or all of the following controls:
• Space Between Pages is the amount of space between the pages.
• Bleed Between Pages is the amount of space added around the pages.
• Creep is an adjustment for the thickness of the pages as they are folded.
• Signature size is how many pages are bound together.
You also need to set the margins for the pages that are imposed.
To set the margins:
Choose Automatically Adjust to Fit Marks and Bleeds ![]() to set the amount necessary to fit any printer’s marks and bleeds on the original layout.
to set the amount necessary to fit any printer’s marks and bleeds on the original layout.

![]() Choose Automatically Adjust to Fit Marks and Bleeds to set the booklet margins automatically.
Choose Automatically Adjust to Fit Marks and Bleeds to set the booklet margins automatically.
or
Deselect that option and manually set the margins.
To print blank spreads:
• Choose Print Blank Printer Spreads to include those spreads that don’t contain any items on the pages.
You can gauge if you’re setting things up correctly by checking the Preview in the Print Booklet dialog box.
- Choose Preview from the Print Booklet dialog box. The pages as they will be imposed appear in the preview window
 .
.
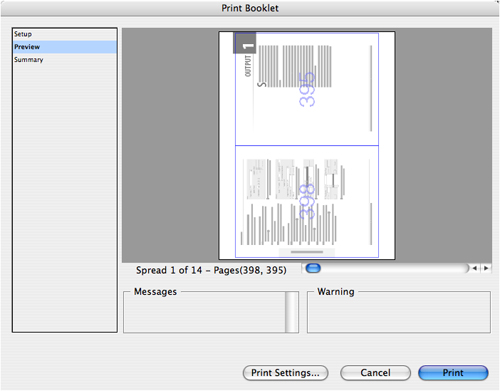 The Preview window of the Print Booklet dialog box shows how the pages will be imposed.
 - Use the page controls to scroll through a preview of all the imposed pages
 .
.
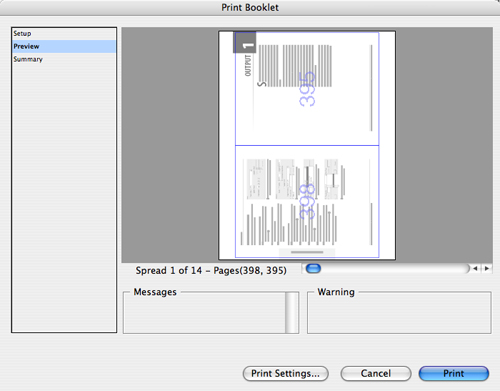 Use the page controls to scroll through previews of the imposed pages.
 - Check the Messages area to see if there is any information that you should know about regarding the imposition
 .
.
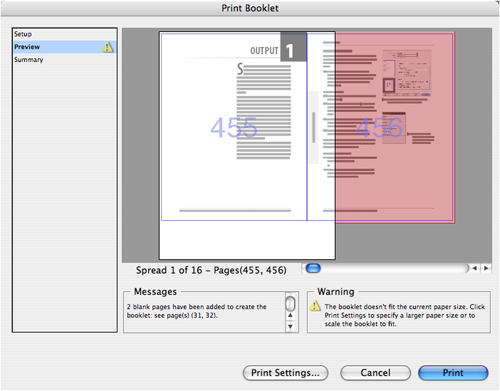 The Messages area of the Print Booklet dialog box gives you information about the imposed document.
 - Check the Warning area to see if there are alerts for any problems in the final imposed document
 .
.
 The Warning area of the Print Booklet dialog box alerts you to any problems that may occur in the imposed document.
You can also see a summary of all the settings for an imposed document.
To see the summary of the imposed settings:
• Choose Summary from the Print Booklet dialog box. The summary appears.
Creating PostScript Files
Instead of sending the InDesign document to a service bureau, you can create a PostScript file that contains all the information necessary to print the file. (This is sometimes called printing to disk.) A standard PostScript file contains all the information necessary to print the file as well as the specific information about the printer.
To create a standard PostScript file:
- Choose File > Print.
- Choose PostScript® File from the Printer menu
 .
.
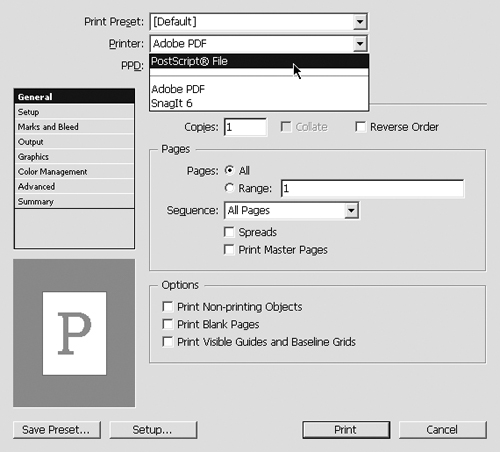 Choose PostScript® File from the Printer menu to create a file that contains all the information necessary to print the document.
 - Choose the type of printer that will print the file.
- Set all the options in the print categories in the Print dialog box.
- Choose a name and location for the file.
- Click Save.
A device-independent PostScript file does not contain any information about the type of printer or output device.
Tip
This lets you create a PostScript file even if you don’t know the type of printer that your document will be printed on.
To create a device-independent PostScript file:
- Choose File > Print.
- Choose Device Independent from the PPD menu
 .
.
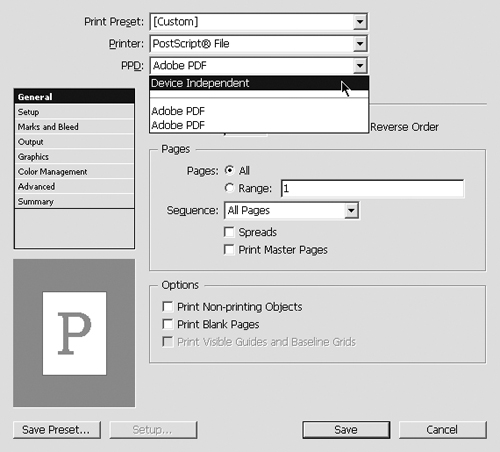 Choose Device Independent from the PPD menu to create a PostScript file that can be printed to any printer.
 - Follow steps 3 through 6 in the previous exercise.
Creating a Preflight Report
When you create an InDesign document, you have two jobs: designer and production manager. As the production manager, you need to know if there could be any problems printing your job. Fortunately, InDesign has a built-in preflight utility that checks all the elements in your document to make sure they print correctly. (The name comes from the list that airline pilots complete before they take off.)
- Choose File > Preflight. InDesign takes a moment to check all the elements of the document and then opens the Preflight dialog box
 .
.
 The Preflight dialog box lets you choose each of the categories for the various aspects of printing a document.
 - Review the information in the Preflight Summary
 .
.
 The Summary area of the Preflight dialog box gives you an overview of the categories checked during a preflight.
 - Click each of the categories in the Preflight dialog box
 . (See the following exercises for details on these categories.)
 The preflight categories let you see the details of the preflight report.
 - Click the Report button to create a report of the preflight status.
or
Click the Package button to copy all the necessary files into a folder that you choose before you print the document.
Your service bureau may ask you to use only Type 1 fonts. The Fonts area lets you make sure that you have used the correct fonts and that they are correctly installed.
To review the fonts information:
- Choose Fonts from the categories on the left of the Preflight dialog box. This opens the Fonts area, which shows the type of font and whether it is installed in the system
 .
.
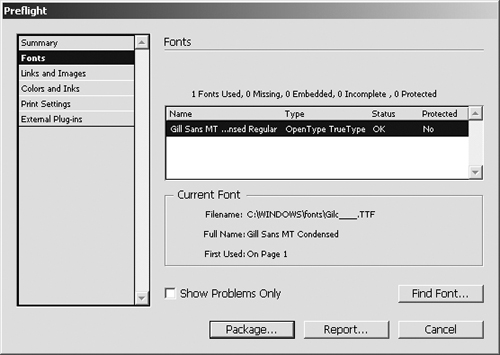 The Fonts area of the Preflight dialog box shows you the status of the fonts used in a document.
 - If you want to replace a nonstandard or missing font, click the Find Font button. This opens the Find Font dialog box that lets you replace fonts.
You also want to make sure that placed graphics are in the correct format and that they aren’t missing or modified.
To review the Links information:
- Choose Links and Images from the categories on the left of the Preflight dialog box. This opens the Links area, which shows the placed images
 .
.
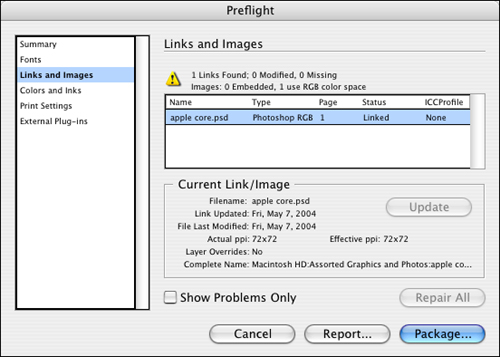 The Links and Images area of the Preflight dialog box shows you the status of the placed images in the document.
 - Choose the modified or missing image.
- If the image is modified, click the Update button.
or
If the image is missing, click the Relink button. This opens the Find dialog box.
- Navigate to choose the missing image.
- Click the Repair All button to have InDesign update all modified images or open the dialog box for all missing images.
You should also check the colors and inks to make sure that the right number of colors print.
To review the Colors and Inks information:
• Choose Colors and Inks from the categories on the left of the Preflight dialog box. This shows the colors used within the document ![]() .
.
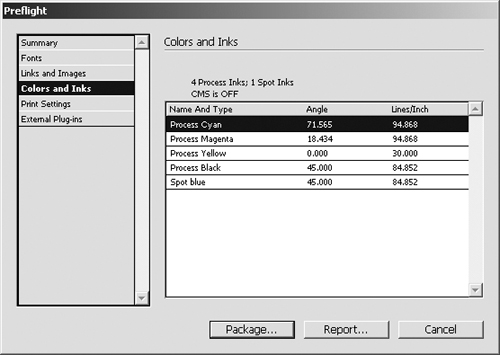
![]() The Colors and Inks area of the Preflight dialog box shows the process and spot color plates in the document.
The Colors and Inks area of the Preflight dialog box shows the process and spot color plates in the document.
You can also look at the Print Settings for a complete list of all the print settings currently applied to the document.
To review the Print Settings information:
• Choose Print Settings from the categories on the left of the Preflight dialog box. This shows the print settings applied to the document ![]() .
.
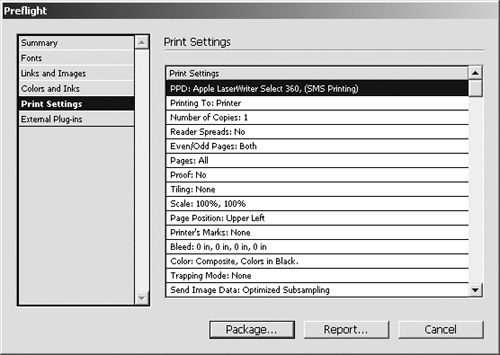
![]() The Print Settings area of the Preflight dialog box shows you the current print settings applied to the document.
The Print Settings area of the Preflight dialog box shows you the current print settings applied to the document.
You can also look to see if any external plug-ins were used in creating the document. You may need to alert your print shop that these plug-ins are necessary for outputting the document.
Tip
You don’t need to worry about the plug-ins unless you have installed any special third-party plug-ins.
To review the external plug-ins information:
• Choose External Plug-ins from the categories on the left of the Preflight dialog box. This shows any third-party plug-ins that have been installed ![]() .
.
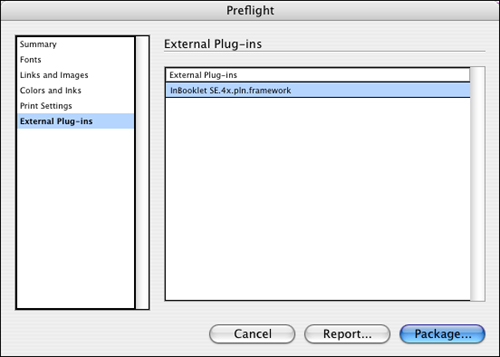
![]() The External Plug-ins area of the Preflight dialog box shows any third-party plug-ins that have been installed.
The External Plug-ins area of the Preflight dialog box shows any third-party plug-ins that have been installed.
Packaging a Document
A package contains everything necessary to print a document. Instead of manually collecting the files, you can let the Package command assemble the files for you.
To package files for printing:
- Choose Fire>Package. InDesign looks through the document and then opens the Printing Instructions dialog box
 .
.
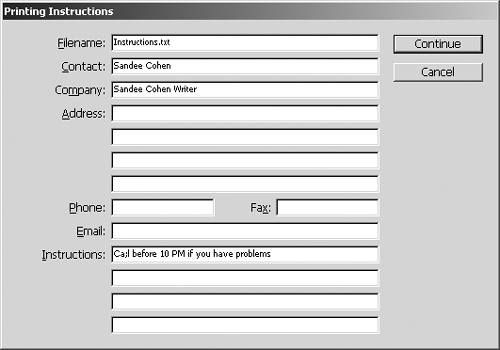 The Printing Instructions dialog box lets you create a text file with contact information and instructions about the document package.
 - Fill out the contact and file information.
- Click Continue. This opens the Create Package Folder dialog box
 .
.
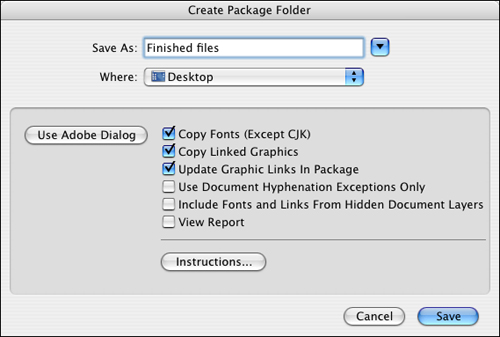 The Create Package Folder dialog box lets you choose which items should be included in the package folder.
 - Name the folder that will hold the files.
- Check the following options for the package:
• Copy Fonts (except CJK) copies the fonts used in the document except double-byte fonts such as those for Chinese, Japanese, and Korean languages.
• Copy Linked Graphics copies placed images that are not embedded in the file.
• Update Graphic Links in Package automatically updates any modified graphics.
• Use Document Hyphenation Exceptions Only limits the hyphenation exceptions to only those added to the document.
• Include Fonts and Links from Hidden Document Layers adds the fonts and graphics from layers that are not visible.
• View Report launches a text editor to open the report created with the document.
- Click Save to assemble all the necessary files in the folder.