
Chapter 14. Using Template Parts to Create Reusable Form Components
In This Chapter
• Save Your Form Template Part
• Add Your Template Part as a Custom Control
• Use Your Template Part as a Control
This chapter explains how to create and leverage form template parts. Form template parts provide an easy way to create common controls, fields, and data connections that may be used across multiple forms.
If many forms in your organization require the same data connections and controls, for example, it makes sense to place all the common items into a form template part. Then, you can leverage the template part to reuse the common items without having to create them each time you need a new form.
Your form template parts actually become custom controls that you may use in your forms just like any other controls. All the steps and scenarios are defined here.
Create a New Template Part
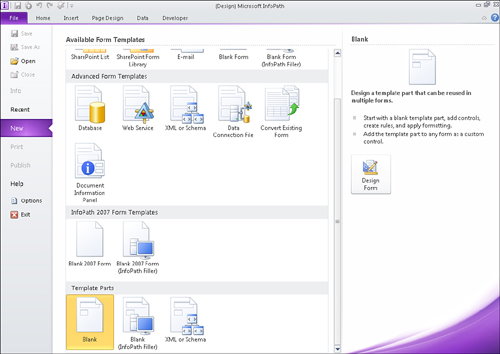
The first step in creating a new template part is selecting the Blank template in the Template Parts section from the File, New menu page, as shown in Figure 14.1.
Figure 14.1. Selecting the Blank template creates a new template part.
Add Common Data Connections
You may only add data connections to receive data and not to submit data. Adding data connections to your template part is the same process as if you were using data connections in a SharePoint form. It is best to leverage data connection files already created and deployed to your SharePoint site. See Chapter 9, “Using Data in SharePoint Forms,” for more information about creating data connections.
Tip
If you do not have data connection files available, it is best to create your data connections in the template part and then convert them to connection files.
Add Common Controls
Add controls to your template part just as you would a SharePoint form. Use appropriate table layouts accordingly to arrange the controls on your template part.
Tip
The size of the template part will be the size of the resultant control on your SharePoint forms. Use space sparingly.
Add Common Fields
Sometimes you need to have fields that are not bound to controls in your template part. Add any additional fields to your main data source just as you would in normal SharePoint forms.
Save Your Form Template Part
Saving your form template part creates a file with a .xtp2 extension. Click File, Save to save your template part. Enter a name and click OK, as shown in Figure 14.2.
Figure 14.2. Saving the form template part creates a .xtp2 file.

Tip
After your template part is ready for primetime, you may want to save it to a SharePoint library to share with your team.
Add Your Template Part as a Custom Control
After you have saved your template part, you may add it as one of the InfoPath controls such that each time you design a new form, your template part is available for use.
To add your template part to InfoPath, follow these steps:
- From InfoPath Designer, expand the Controls menu from the Home top ribbon bar.
- Select Add or Remove Custom Controls, as shown in Figure 14.3, to open the Add or Remove Custom Controls dialog. The dialog appears as shown in Figure 14.4 and allows you to manage your template parts.
Figure 14.3. Selecting Add or Remove Custom Controls opens the custom control dialog.

Figure 14.4. The custom controls dialog allows you to manage your template parts.

- Click the Add button. The Add Custom Control Wizard appears, as shown in Figure 14.5, and steps you through the template part addition.
Figure 14.5. Clicking Add invokes the Add Custom Control Wizard.

- Leave the Template Part option selected and click Next.
- Browse to the xtp2 file you created when saving your template part and click Finish, as shown in Figure 14.6, to add that part as a custom control.
Figure 14.6. Selecting the file determines which template part to add as a custom control.

- Click Close on the confirmation window.
- Click OK on the Add or Remove Custom Controls dialog.
Your form template part is now available in the Controls list, as shown in Figure 14.7, and may be used in SharePoint forms.
Figure 14.7. Adding a template part displays it as an available control to be used in SharePoint forms.

Use Your Template Part as a Control
After you have added your template part as a custom control, you may use it like any other control. Dragging the template part onto your form adds the control to your form, as shown in Figure 14.8. The controls and fields from your template part are added to the form, as well.
Figure 14.8. Dragging your template part onto your form adds the controls and fields.

Tip
In your template part, you should rename the myFields main data source to the name of your template part such that when using it in a form, the fields group is more descriptive.
Change the Name of Your Custom Control
The custom control name defaults to the filename of your template part but often times there are no spaces and it may not be the name you want displayed in the control box.
To modify the custom control name used for your template part, follow these steps:
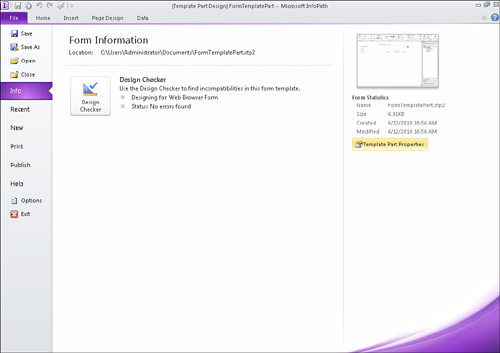
- With your form template part file opened in InfoPath Designer, select File, Info to display the Form Information screen, as shown in Figure 14.9.
Figure 14.9. Select File, Info to display the Form Information screen.
- Click the Template Part Properties button to display the Template Part Properties dialog.
- Enter a new name for the form template control, as shown in Figure 14.10, and click OK. This determines what name appears in the controls box.
Figure 14.10. Entering a name for the template part determines the control name in the controls box.

- Click File, Save to save the changes to your form template part file.
Tip
Use a control name that is descriptive and clear to others if you intend to share your form template part.
Note
You will need to remove the old template part custom control and add the new one to see the name changes.
Change the Icon of Your Custom Control
The custom control icon defaults to the InfoPath template part icon. Having several of these in the Controls list could cause confusion (or just look boring).
To modify the custom control icon that is used for your template part, follow these steps:
- With your form template part file open in InfoPath Designer, select File, Info to display the Form Information screen.
- Click the Template Part Properties button to display the Template Part Properties dialog.
- Click Browse to browse for a new picture file and click Open on the file dialog.
- Click OK on the Template Part Properties dialog.
- Click File, Save to save the changes to your form template part file.