
Chapter 20. PowerShell
In This Chapter
• Access SharePoint 2010 Management Shell
• Browser-Enable Form Templates
• Throttle Data Connection Timeouts
• Throttle the Data Connection Response Size
• Modify Authentication Settings
• Verify and Upload a Form Template
• Upload Multiple Form Templates at Once
• Activate or Deactivate a Form to a Site Collection
• Remove a Form from InfoPath Form Services
This chapter discusses the administrative aspects of InfoPath Form Services through the use of PowerShell. PowerShell is the replacement for the previous STSADM console application. SharePoint 2010 provides a PowerShell Management Console that loads all the SharePoint-related functions into memory, thus providing an easy-to-use command-line interface.
Access SharePoint 2010 Management Shell
You can launch PowerShell and load the SharePoint module or just launch the SharePoint 2010 Management Shell. Launching the SharePoint 2010 Management Shell makes it easier to use PowerShell commands for SharePoint/InfoPath administration.
On any SharePoint server in your farm, select Start, All Programs, Microsoft Sharepoint 2010 Products, and then select the SharePoint 2010 Management Shell, as shown in Figure 20.1. The PowerShell command prompt window loads, as shown in Figure 20.2.
Figure 20.1. Selecting the SharePoint 2010 Management Shell loads PowerShell with the SharePoint module.
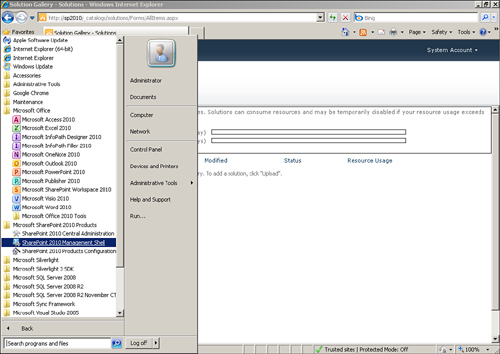
Figure 20.2. Launching the SharePoint 2010 Management Shell loads the PowerShell command prompt window.

From here, you can enter any commands presented in this chapter to facilitate the configuration of InfoPath Form Services.
Browser-Enable Form Templates
From the PowerShell command prompt, enter the following:
Set-SPInfoPathFormsService -AllowUserFormBrowserEnabling $true
-AllowUserFormBrowserRendering $true
Throttle Data Connection Timeouts
Your form will attempt to connect and access data sources based on your configured data connections. If the data source is not accessible, busy, or down, InfoPath Forms Services needs a way to time out the connection such that the form or the browser doesn’t stop responding.
Use the -DefaultDataConnectionTimeout and -MaxDataConnectionTimeout parameters with the Set-SPInfoPathFormsService command to set the timeout values, as shown in Listing 20.1.
Listing 20.1. Data Connection Timeout Command Line
Set-SPInfoPathFormsService -DefaultDataConnectionTimeout 15000 -
MaxDataConnectionTimeout 25000
Tip
The default values are usually acceptable entries and do not need to modified. However, if you have some long-running data processes or connectivity issues, you may want to increase these numbers slightly.
Throttle the Data Connection Response Size
When connecting to data sources, you do not want to overload other systems. Limiting the response size determines how many kilobytes the data connection can process. You can modify the setting by using the MaxDataConnectionReponseSize parameter with the number of kilobytes, as shown in Listing 20.2.
Listing 20.2. Data Connection Timeout Command Line
Set-SPInfoPathFormsService -MaxDataConnectionResponseSize 3000
Tip
The default value of 1500KB is usually a good setting. You do not want to strain other systems or databases. This also helps limit traffic on the network. Only increase this value if you have a large form that submits a great deal of data.
Modify Authentication Settings
Several data authentication options are available that either allow or prohibit certain types of data connectivity, as follows:
• RequireSslForDataConnections: Set this option to true to require SSL encryption when your form uses HTTP authentication (such as when accessing a web service).
• AllowEmbeddedSqlForDataConnection: Set this option to true if you have data connection files which contain SQL database connection information including the username and password.
• AllowUdcAuthenticationForDataConnections: Set this option to true to allow custom forms to access data sources through data connection files.
• AllowUserFormCrossDomainDataConnections: Select this option if your form needs to access data sources on a different domain than SharePoint.
To configure these settings, use the Set-SPInfoPathFormsService command with the desired parameters and settings, as shown in Listing 20.3.
Listing 20.3. Authentication Settings Command Line
Set-SPInfoPathFormsService -RequireSslForDataConnections $true -
AllowEmbeddedSqlForDataConnection $true -
AllowUdcAuthenticationForDataConnections $true -
AllowUserFormCrossDomainDataConnections $true
Configure Session State
When a user is filling out a SharePoint form, InfoPath Form Services uses the SharePoint Server State service to manage user sessions. (You can switch this to View State using PowerShell; see the next section.) Transient data is stored within the session state.
There are several settings involved in the session state configuration:
• MaxPostbacksPerSession: Typically, there shouldn’t be too much chatter between the form and Forms Services. This setting prevents unintended postbacks or “out-of-control” communications.
• MaxUserActionsPerPostback: There should be only a handful of actions per postback. Once again, this is prevent a form process from pegging server resources.
• ActiveSessionTimeout: By default, active sessions are terminated after 1,440 minutes, which essentially is 24 hours. This is more of a cleanup process than anything. Some forms may take a long time to fill out depending on the information required, but one day should be plenty of time.
• MaxSizeOfFormSessionState: This determines how much data can be stored for the active user session. The default is 4096KB, which equates to 4MB. This provides plenty of room to store user session data. Typical forms and user information should only take up several kilobytes if not bytes.
If the user session lasts too long or there too many postbacks to the server, the session is ended based on the configured settings. All form data will be lost, and the user will need to start over. This is done to prevent unintended communication, limit network traffic, and limit system resource utilization.
To configure these settings, use the Set-SPInfoPathFormsService command with the desired parameters and settings, as shown in Listing 20.4.
Listing 20.4. Session State Settings Command Line
Set-SPInfoPathFormsService -MaxPostbacksPerSession 100 -
ActiveSessionTimeout 720
Tip
If forms are constantly being filled out within your organization and are fairly lightweight, you might actually want to reduce some of these values to keep recycling the session state as well as system resources. Another option is to use View State instead, as described in the next section.
Enable View State
View State sessions (or Form View) store session data within the client browser, thus reducing load on the database server. Although this assists in maximizing database performance, there is more bandwidth used in View State than in Session State. The maximum session size allowed in the View State is 40KB. If there is an instance where this limit is passed, the session automatically switches back to Session State.
To configure these settings, use the Set-SPInfoPathFormsService command with the -AllowViewState and -ViewStateThreshold parameters, as shown in Listing 20.5.
Listing 20.5. ViewState State Settings Command Line
Set-SPInfoPathFormsService -AllowViewState $true -ViewStateThreshold
40961
Tip
You can only modify this setting using the PowerShell command line. There are no equivalent options in Central Administration.
Verify and Upload a Form Template
Forms that have code-behind or that require Full Trust permissions cannot be published directly to SharePoint. These forms must be published to a network location and then uploaded to Form Services. Before uploading, you should verify that the form is correct and can be installed.
To verify a form template, use the following command:
Test-SPInfoPathFormTemplate -Path "<<full path to InfoPath form
template>>"
To upload a form to InfoPath Form Services, use the following command:
Install-SPInfoPathFormTemplate -Path "<<full path to InfoPath form
template>>"
Tip
Use the switch parameter -EnableGradualUpgrade with the Install-SPInfoPathFormTemplate to ensure that existing forms are upgraded.
Upload Multiple Form Templates at Once
You may upload multiple form templates by listing out each path separated by a comma and then using the pipe (|) to pass that list into the Install-SPInfoPathFormTemplate command, as shown in Listing 20.6
Listing 20.6. Multiple-Form Upload Command Line
"<<path of form 1>>" , "<<path of form 2>" , "<<path of form 3>>" |
Install-SPInfoPathFormTemplate
Activate or Deactivate a Form to a Site Collection
When you upload a form, it generates and deploys a feature for your form to each site collection in your farm. Using the Enable-SPInfoPathFormTemplate command activates that feature on the site collection you choose. Conversely, using the Disable-SPInfoPathFormTemplate command deactivates the form feature of the selected site collection.
To activate a form to a site collection, use the following command:
Enable-SPInfoPathFormTemplate -Identity "<<name of form template>>" -Site
"<<URL of Site Collection>>"
To deactivate a form from a site collection, use the following command:
Disable-SPInfoPathFormTemplate -Identity "<<name of form template>>"
-Site "<<URL of Site Collection>>"
Remove a Form from InfoPath Form Services
Removing a form deletes the form from InfoPath Forms Services. It is no longer available on any site collection. To remove a form from InfoPath Form Services, use the following command:
Uninstall-SPInfoPathFormTemplate -Identity "<<name of form template>>"
Tip
Removing a form does not always remove the content type it generates. Make sure the form is not being used anywhere in SharePoint. Otherwise, errors will occur when SharePoint tries to access the form template via the content type. (Hint: Remove the content type first as SharePoint will notify if it is being used.)
Quiesce a Form from InfoPath Form Services
Quiescing a form will halt the initiation of new form instances and allow existing user sessions to complete. To quiesce a form from InfoPath Form Services, use the following command:
Stop-SPInfoPathFormTemplate -Identity "<<name of form template>>"
Enable the Web Service Proxy
The InfoPath Form Services web services proxy can be used to access web services without passing the credentials of the form user. A set of credentials for the web service need to be stored within SharePoint’s Secure Store service (SSS), which is the replacement for Single Sign-On (SSO).
A data connection file that your InfoPath form is using as a web service connection simply needs to be modified by adding a UseFormsServiceProxy attribute with a setting of “true” along with an Authentication element that references the Secure Store application ID.
Listing 20.7. UseFormsServiceProxy Attribute
<udc:ServiceUrl UseFormsServiceProxy="true"/>
Listing 20.8. Authentication Element
<udc:Authentication>
<udc:SSO AppId="<<AppID>>" CredentialType="<<credential type>>"/>
</udc:Authentication>
The possible credential types are as follows:
• Basic
• CD
• Digest
• Kerberos
• NTLM
• SQL
To enable the use of the web proxy, use the following command:
Set-SPInfoPathWebServiceProxy -Identity "<<URL of web application>>"
-AllowWebServiceProxy $true
To enable SharePoint forms to use the web proxy, use the following command:
Set-SPInfoPathWebServiceProxy -Identity "<<URL of web application>>"
-AllowForUserForms $true