
Chapter 21. Managing Form Permissions
In This Chapter
• Create Unique Permissions on a Form Library
• Create a Permission Level for Your Form Library
This chapter explores the administrative aspects of managing form permissions within SharePoint. The proper permissions determine who can access the forms and what kind of rights they have.
Users/groups need a permission level that contains the Add Items permission such that they may submit a form or save a list item. The Edit Items permission is required if you need to allow users/groups to edit existing items in the library or list. For general viewing of your forms or list items, the View Items permission is needed.
Create Unique Permissions on a Form Library
The first level of permissions for your forms starts at the site level. When you create a new form library, the library inherits the permissions of the site in which it was created. Therefore, to begin managing permissions of your forms, you first need to break inheritance from the site. To do this, follow these steps:
- Navigate to your form library in SharePoint.
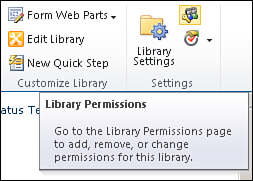
- From the Library ribbon, click the Library Permissions button, as shown in Figure 21.1, to manage the form library’s permissions.
Figure 21.1. Clicking the Library Permissions button allows you to manage the form library’s permissions.
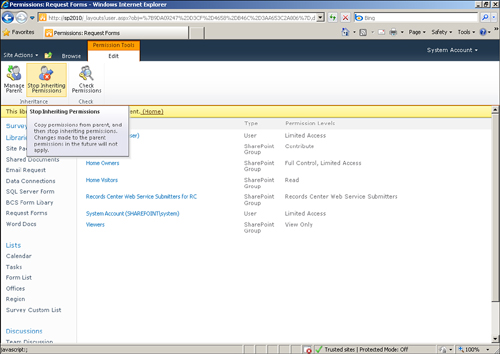
- On the Permissions screen, click Stop Inheriting Permissions from the Edit ribbon to break inheritance from the parent site, as shown in Figure 21.2.
Figure 21.2. Clicking Stop Inheriting Permissions breaks inheritance from the parent site.
Grant Users Permissions
The best practice for managing permissions is to grant the permissions to groups and then add the appropriate users to those groups. This allows you to easily manage who has access to your form library, because you need to worry only about the group access and not each individual user; if the users are in the group, they have that group’s access level.
To grant permissions on your form library after you have broken inheritance, click the Grant Permissions button on the Permission page, as shown in Figure 21.3.
Figure 21.3. Clicking Grant Permissions allows you to add users or groups to your form library.

Select the users within the Users/Groups box, and then select the group they should be added as shown in Figure 21.4. You may also grant the users permissions directly by selecting the Grant Users Permission Directly option.
Figure 21.4. Adding a user to the group grants them the group’s permission.

Tip
Create a new site-level group specifically for your forms library so that you do not need to give users permissions through the main site groups.
Create a Permission Level for Your Form Library
Granting users/groups Contribute rights to your form library is a surefire way to allow them to read, add, and edit items. However, this permission level also allows the users to delete the items which may not be desired. Therefore, I recommend creating a custom permission level that contains only the permissions needed on the form library. The permission level is created in the site but may be applied within your form library permissions.
To create a custom permission level, follow these steps:
- Navigate to your root SharePoint site.
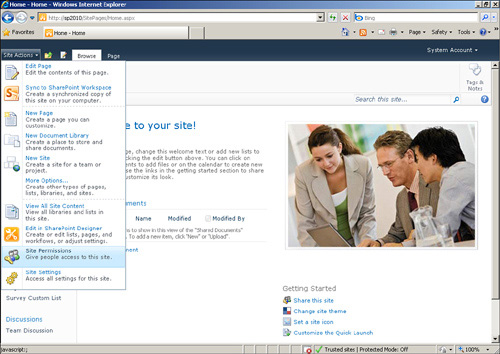
- From the Site Actions menu, select Site Permissions to access the Permissions page of the site, as shown in Figure 21.5.
Figure 21.5. Selecting Site Permissions accesses the Permissions page of the site.
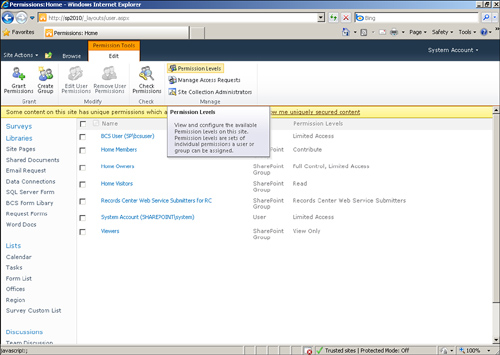
- On the Permissions page, click Permission Levels from the Edit ribbon, as shown in Figure 21.6, to manage the site’s permission levels.
Figure 21.6. Clicking Permission Levels allows you to manage the site’s permission levels.
- Click the Add a Permission Level link at the top of the page. The Add a Permission Level page appears.
- Enter a name for the permission level and select the appropriate permissions, as shown in Figure 21.7.
Figure 21.7. Selecting the permissions configures the custom permission level.

- Click Create.
The permission level is created, and now you may use that to grant users/groups custom permissions without using the system-based permission levels such as Contribute. See the next section for steps on applying this level to your groups.
Edit a Group’s Permission Level
Whether you created a custom permission level from the previous section or need to modify a group’s permissions, you can easily edit the assigned permission levels by following these steps:
- Navigate to your form library.
- Click Library Permissions from the Library ribbon.
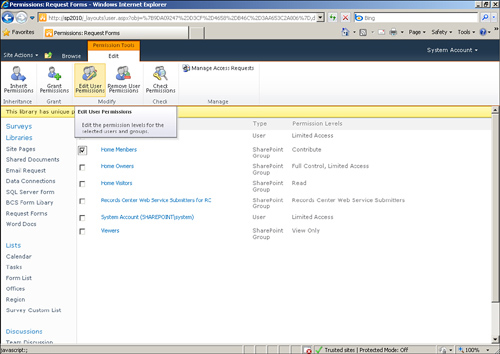
- Select a user or group and click the Edit User Permissions button, as shown in Figure 21.8, to configure the assigned permission levels. The Edit Permissions dialog appears.
Figure 21.8. Clicking the Edit User Permissions button allows you to configure the assigned permission levels.
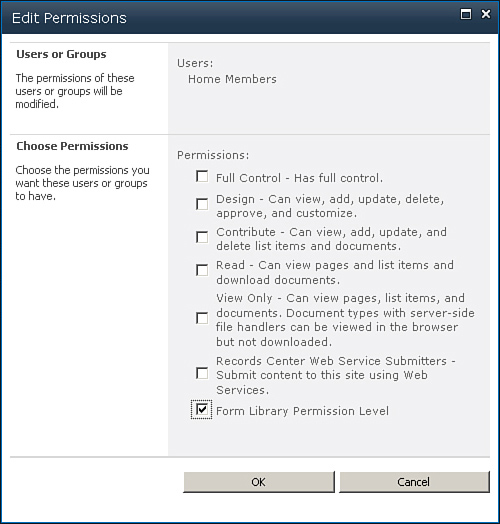
- Select the desired permissions in the Choose Permissions section of the Edit Permissions dialog, as shown in Figure 21.9, to configure the permission levels applied to the selected user/group.
Figure 21.9. Choosing the permissions configures the levels applied to the selected user or group.
- Click OK.
Create a Submit-Only Permission Level
There may be certain cases where you want a user to submit a form but not see any contents of the form library (not even their own submission). Several business scenarios may require this (for example, a suggestion form).
When creating a custom permission level from within SharePoint, selecting Add Items automatically selects View Items. Unchecking View Items unchecks the Add Items. So there seems to be no way to have only the Add Items permission without the View Items permission.
You can, however, achieve this by using code within a console application. The console application should take three arguments: the site collection URL, the name of the permission, and a description. These are the required variables for the permission code as shown in Listing 21.1. The code to perform the creation of the permission is shown in Listing 21.2.
Listing 21.1. Permission Variables
string siteCollectionURL = args[0];
string nameOfPermissionLevel = args[1];
string description = args[2];
Listing 21.2. Creating the Permission
using (SPSite oSiteCollection = new SPSite(siteCollectionURL))
{
using (SPWeb oWebsite = oSiteCollection.OpenWeb())
{
if (!oWebsite.HasUniqueRoleDefinitions)
{
oWebsite.RoleDefinitions.BreakInheritance(true, true);
}
SPRoleDefinition oRoleDefinition = new SPRoleDefinition();
oRoleDefinition.Name = nameOfPermissionLevel;
oRoleDefinition.Description = description;
oRoleDefinition.BasePermissions = SPBasePermissions.AddListItems &
SPBasePermissions.ViewFormPages & SPBasePermissions.UseClientIntegration;
oWebsite.RoleDefinitions.Add(oRoleDefinition);
}
}
Package the required code into a console application and compile the executable. Run the executable on one of your servers in the SharePoint farm. An example command line execution is as follows:
createpermissionlevel.exe "http://sp2010 " "Submit Only" "Allow users to
only submit"
The new permission level is created, and you may now use that to create a Submit-Only permission level. You may also perform the same operation using PowerShell as shown in Listing 21.3.
Listing 21.3. PowerShell Commands for Submit Only Permission Level
$web = get-spweb "http://sp2010"
$newroledef = New-Object "Microsoft.SharePoint.SPRoleDefinition"
$newroledef.Name = "Submit Only"
$newroledef.Description = "Allow users to only submit a form but not view
or edit"
$newroledef.BasePermissions = "AddListItems,ViewFormPages,UseClientInteg
ration"
$web.RoleDefinitions.Add($newroledef)
$web.Update()