11. Making Your Pages Dynamic
Putting the Current Date into a Web Page 262
Customizing a Message for the Time of Day 265
Displaying Dates by Time Zone 266
Converting 24-Hour Time to 12-Hour Time 272
Hiding and Displaying Layers 278
Moving an Object in the Document 281
Effective Web pages are a result of many different factors, including compelling content, good design, and attention to detail, such as how fast the page loads. One of the ways to speed up page loads, while still providing the user with an interesting and interactive experience, is to use JavaScript to make individual page elements update within the user’s browser. In other words, instead of your Web server pushing the page experience to the user, the server pushes the script over the Internet. The script then uses the power of the user’s computer to make the page come alive. Pages with scripts like these can be called dynamic pages.
By moving the processing from the server side to the client (user) side, you get better performance and you can personalize the user experience to some extent.
In this chapter, you’ll learn how to use JavaScript to display the local date and time on your Web pages; customize a greeting by the time of day where your user is; convert between different time formats; and move an object across the user’s page under script control.
Putting the Current Date into a Web Page
JavaScript can determine the current date and time from your computer (which it gets as a number) and then manipulate that figure in many ways. Your script has to handle the conversion from a number the computer uses into a textual date you can understand, however. Listing 11.1 shows how to get the current date, convert it from a number into a standard date, and then write the result to a document window.
Listing 11.1. This script writes the current date to the document window.
window.onload = initDate;
function initDate() {
var dayName = new Array("Sunday", "Monday", "Tuesday", "Wednesday", "Thursday", "Friday", "Saturday");
var monName = new Array("January", "February", "March", "April", "May", "June", "July", "August", "September", "October", "November", "December");
var now = new Date();
var dtString = dayName[now.getDay()] + ", " + monName[now.getMonth()] + " " + now.getDate();
document.getElementById("dtField").innerHTML = dtString;
}
To put the current date into a Web page
1. window.onload = initDate;
When the document loads, call initDate().
2. var dayName = new Array("Sunday", "Monday", "Tuesday", "Wednesday", "Thursday", "Friday", "Saturday");
First, we need to create a new array that contains the days of the week. Make sure to use commas to separate the items in the array; and because they are text strings, each item must be enclosed in quotes. The array gets assigned to the variable dayName.
3. var monName = new Array("January", "February", "March", "April", "May", "June", "July", "August", "September", "October", "November", "December");
In this step, we’re doing the same thing with month names and assigning them to the brilliantly named monName variable.
The last thing to do in this first section is to tell JavaScript to create a new Date object, call it now, and fill it with the current date.
5. var dtString = dayName[now.getDay()] + ", " + monName[now.getMonth()] + " " + now.getDate();
The object dayName[now.getDay()] is read from right to left; getDay() is the JavaScript method that gets the day of the week, and asking now for it gets today’s day of the week. The numerical result references one of the entries in the array dayName.
Next, we concatenate a comma and a space to the text string that we’re building, and then we concatenate the next expression, which is the month name, expressed by the object monName[now.getMonth()]. This gets the month in much the same fashion as getting the day name, and references one of the entries in the array monName.
A space is concatenated next, and we end with the object now.getDate(), which returns the date of the month. All of this is assigned to the dtString variable.
6. document.getElementById("dtField").innerHTML = dtString;
The id dtField is in the HTML page (the HTML is trivial, so we haven’t included it here); it’s within a <span> tag, like so:
<h1>Today is <span id="dtField"> </span>.</h1>
The JavaScript sets the innerHTML property of dtField to the value of dtString. The result is shown in ![]() .
.
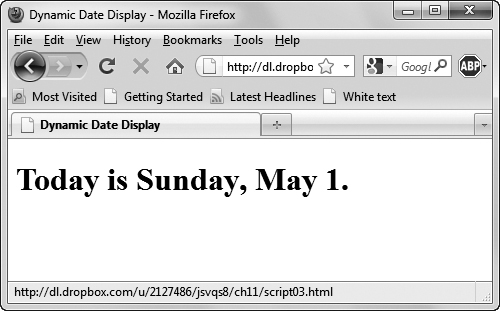
![]() JavaScript dynamically displays the current date in the window.
JavaScript dynamically displays the current date in the window.
Working with Days
You might want to display a different message to your users if it’s a weekend. Listing 11.2 tells you how to do it.
Listing 11.2. This script figures out if it is a weekday or weekend.
window.onload = initDate;
function initDate() {
var now = new Date();
if (now.getDay() > 0 && now.getDay() < 6) {
var dtString = "Sorry, it's a weekday.";
}
else {
  var dtString = "Hooray, it's a weekend!";
}
document.getElementById("dtField").innerHTML = dtString;
}
To figure out if it is a weekend
1. var now = new Date();
Fill the variable now with the current date.
2. if (now.getDay() > 0 && now.getDay() < 6) {
This extracts the numerical day of the week from the now variable and asks if it is greater than 0 (remember that Sunday is 0). Next the line uses the && operator, which is a logical and (i.e., both parts have to be true), and asks if now is less than 6, which is the number for Saturday.
3. var dtString = "Sorry, it's a weekday.";
If the result of the last expression is greater than 0 and less than 6, it has to be between 1 and 5, which is to say, from Monday to Friday, so the script puts a string to that effect into dtString.
4. else {
var dtString = "Hooray, it's a weekend!";
If we failed the test in the step 2, it must be a weekend, and we put a string with the happy news in dtString.
5. document.getElementById("dtField").innerHTML = dtString;
Finally, we set the innerHTML property of dtField to the value of dtString, just as in the previous example ![]() .
.
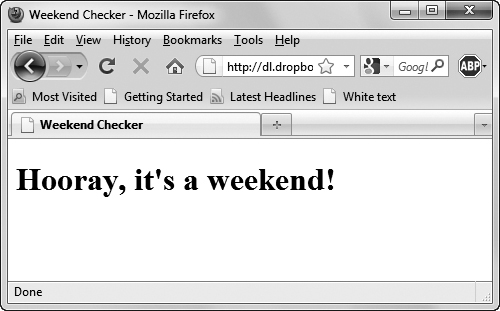
![]() The happy news gets written to the window.
The happy news gets written to the window.
Customizing a Message for the Time of Day
You can take the technique used in the last example and use it again to customize a message for the user, depending on the time of day. This could be used, for instance, as a friendly greeting when a user enters a site. Listing 11.3 shows how it is done, and ![]() shows how we were up writing way past our usual bedtime.
shows how we were up writing way past our usual bedtime.
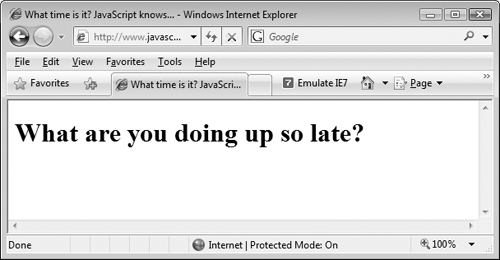
![]() It was definitely too late at night when we wrote this.
It was definitely too late at night when we wrote this.
Listing 11.3. Scripts can be used to check what time of day it is and react appropriately.
window.onload = initDate;
function initDate() {
var now = new Date();
document.getElementById("dtField").innerHTML = timeString(now.getHours());
function timeString(theHour) {
if (theHour < 5) {
  return "What are you doing up so late?";
}
if (theHour < 9) {
return "Good Morning!";
}
if (theHour < 17) {
return "No surfing during working hours!";
}
return "Good Evening!";
}
}
To customize messages for the time of day
• if (theHour < 5) {
return "What are you doing up so late?";
We begin the new code in this script by starting a conditional test. Earlier in this script, the getHours() method extracted theHour from the now variable, and here we test to see if that number is less than 5 (which corresponds to 5 A.M., since numbering in JavaScript starts at midnight).
If it is before 5 A.M., the script scolds the user by writing this message to the document window, as shown in ![]() .
.
The rest of the script repeats the above line, adjusting it for the time of day and writing out a different message. If it is between 5 A.M. and 9 A.M., the script says “Good Morning!”; between 9 A.M. and 5 P.M., it says “No surfing during working hours!”; and after 5 P.M., it says “Good Evening!”
Displaying Dates by Time Zone
By default, the dates and times that are displayed are those on the user’s machine (assuming that they are set correctly). If you want to display a date somewhere else, you need to calculate it based on UTC, Coordinated Universal Time. UTC is essentially a different name for Greenwich Mean Time (GMT); UTC also goes under the names “universal time” (UT) and “world time.” Listing 11.4 shows the HTML for the page; Listing 11.5, with the JavaScript, shows you how to calculate dates in other time zones.
Listing 11.4. The HTML for the time zone script uses classes to tag the different offices with the time zone for that office.
<!DOCTYPE html>
<html>
<head>
<title>Time Zones</title>
<script src="script04.js"></script>
</head>
<body>
<h3>Our office hours are 9:00 am to 5:00 pm, Monday through Friday, at each of our locations. It is now </h3><ul>
<li><span class="tz-8"> </span> in San Francisco</li>
<li><span class="tz-5"> </span> in New York</li>
<li><span class="tz-0"> </span> in London</li>
<li><span class="tz+7"> </span> in Hong Kong</li></ul>
</body>
</html>
To display dates by time zone
1. var allTags = document.getElementsByTagName("*");
Inside the initDate() function, create the allTags variable. The command document.getElementsByTagName("*") is a handy trick—that asterisk tells JavaScript to return an array containing every tag on the page. Then, we can just loop through it looking for things of interest.
Listing 11.5. You can adapt this script to display any time zone you wish.
window.onload = initDate;
function initDate() {
var allTags = document.getElementsByTagName("*");
for (var i=0; i<allTags.length; i++) {
  if (allTags[i].className.indexOf("tz") == 0) {
    showTheTime(allTags[i],allTags[i].className.substring(2));
  }
}
}
function showTheTime(currElem,tzOffset) {
var dayName = new Array("Sunday","Monday","Tuesday","Wednesday","Thursday","Friday","Saturday");
var thatTZ = new Date();
var dateStr = thatTZ.toUTCString();
dateStr = dateStr.substr(0,dateStr.length - 3);
thatTZ.setTime(Date.parse(dateStr));
thatTZ.setHours(thatTZ.getHours() + parseInt(tzOffset));
currElem.innerHTML = showTheHours(thatTZ.getHours()) + showZeroFilled(thatTZ.getMinutes()) + showAmPm(thatTZ.getHours()) + dayName[thatTZ.getDay()];
function showTheHours(theHour) {
  if (theHour == 0) {
    return 12;
}
if (theHour < 13) {
  return theHour;
}
return theHour-12;
}
function showZeroFilled(inValue) {
  if (inValue > 9) {
    return ":" + inValue;
  }
  return ":0" + inValue;
}
function showAmPm(thatTime) {
  if (thatTime < 12) {
    return " AM ";
  }
  return " PM ";
}
}
2. for (var i=0; i<allTags.length; i++) {
if (allTags[i].className.indexOf("tz") == 0) {
showTheTime(allTags[i],allTags[i].className.substring(2));
}
}
We begin a loop so we can walk through the page elements, represented by allTags. The allTags[i].className.indexOf("tz") == 0 bit just means, “does the ith tag have an attribute class that starts with “tz”—if so, call showTheTime().”
The showTheTime() function is passed two parameters: first, the ith tag element, and second, the part of the class attribute (seen in Listing 11.4) that is after the “tz”, represented by substring(2). Yes, we could figure out the second part from the first, but why bother? It makes the showTheTime() function much simpler, as that second parameter turns into the time zone offset.
3. function showTheTime(currElem,tzOffset) {
This function takes in the two parameters that were passed to showTheTime() in the previous step. Inside the function, they’ll be called currElem and tzOffset, respectively.
4. var thatTZ = new Date();
var dateStr = thatTZ.toUTCString();
We create a new date variable, thatTZ. The next line turns that date and time (based on UT) into a string (see Table 11.1 at the end of the chapter), saving the result in dateStr.
5. dateStr = dateStr.substr(0,dateStr.length - 3);
What we’re trying to do in this section is reset thatTZ to be based on UT instead of local time, so that we can then add the passed offset for the desired result. Unfortunately, JavaScript doesn’t make this simple. We now have the universal time in string format, but if we just try to reset the time based on it, it’ll outsmart us, knowing that we really want local time. What we need to do is take the string version of the date and time and strip off the last three characters, which are UTC.
6. thatTZ.setTime(Date.parse(dateStr));
Once we’ve stripped off the last three characters, we can use the parse() method to turn the date into milliseconds and then the setTime() method to set thatTZ to our desired time.
7. thatTZ.setHours(thatTZ.getHours() + parseInt(tzOffset));
Now that we’ve finally got the UT date stored, we need to add the passed number of hours that our desired time is off UT. As the time zone can be anywhere from +12 to -12, the time zone that was passed in can be anything from "-12" to "+12". We use parseInt() to turn that string into a number from -12 to 12, and we then add it to the current UT time. The result gives us our desired value: the correct date and time in that time zone.
8. currElem.innerHTML = showTheHours(thatTZ.getHours()) + showZeroFilled(thatTZ.getMinutes()) + showAmPm(thatTZ.getHours()) + dayName[thatTZ.getDay()];
This looks scary, but all it is doing is building the time value that goes into the document by concatenating the result from all of the other functions and then setting the innerHTML property of currElem, thereby putting the result of the calculation into the document ![]() .
.
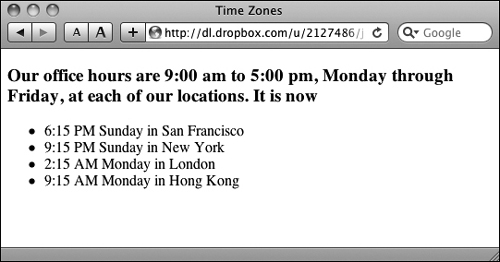
![]() The script calculates the time in each office, based on its time zone.
The script calculates the time in each office, based on its time zone.
The next three functions, showTheHours(), showZeroFilled(), and showAmPm(), are within the showTheTime() function so that they can share variables. As it turns out, they don’t in this task, but they will in the next.
9. function showTheHours(theHour) {
if (theHour == 0) {
return 12;
}
First, set up a function called showTheHours(), which is passed the variable theHour. Then, if theHour is zero, return the result 12 (meaning the hour is 12 A.M.); otherwise continue with the function.
10. if (theHour < 13) {
return theHour;
}
return theHour-12;
If the result of the hour portion of the time is less than 13, then simply put that number into the variable theHour. Otherwise, return theHour minus 12 (which converts hours 13 and higher to their 12-hour-clock counterparts).
11. function showZeroFilled(inValue) {
if (inValue > 9) {
return ":" + inValue;
}
return ":0" + inValue;
}
This function is used to pretty up the output; when the minutes or seconds figure is 9 or under, it pads the figure with a leading zero.
12. function showAmPm(thatTime) {
if (thatTime < 12) {
return " AM ";
}
return " PM ";
}
This function adds AM or PM to the time. If the passed variable thatTime is less than 12, then the returned value of the function is “ AM ”; otherwise it is “ PM ”. Note that the text strings each have a leading and a trailing space so things look nice.
There’s no simple and straightforward way to deal with daylight saving time. Some browsers just don’t handle it correctly. And unfortunately, you’re also at the mercy of computer users knowing how to set up their computers to be aware when it’s happening. Luckily, both Windows and Mac OS X have the ability to automatically set the time based on an Internet time server, which does take daylight saving time into account, so it’s less of a problem than it used to be. The bad news: JavaScript doesn’t have a way to get at that information from the OS, so it can’t tell if you’re in a time and place for it to apply.
It’s easy to add another city to the HTML without touching a single line of JavaScript—and it will all just work.
Converting 24-Hour Time to 12-Hour Time
JavaScript provides the time in 24-hour format, also known as military time. Many people are unfamiliar or uncomfortable with this format, so you’ll want to know how to convert it to 12-hour format. In the next two scripts, you see one way to go about the task, which needs a bit of explanation. Our page (Listings 11.6 for the HTML, 11.7 for the CSS) has two important elements: an h2 tag and a pair of radio buttons. The script will write the time into the former, and the latter lets us switch the time from 24-hour format into 12-hour format ![]() . The JavaScript behind this is in Listing 11.8.
. The JavaScript behind this is in Listing 11.8.
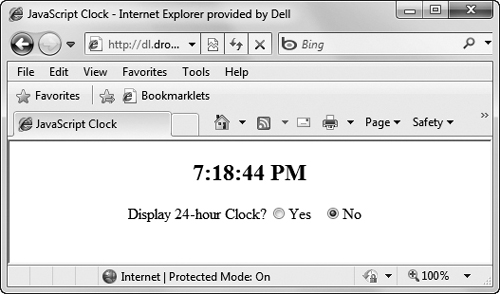
![]() The script in action.
The script in action.
Listing 11.6. This HTML uses ids to identify each radio button.
<!DOCTYPE html>
<html>
<head>
<title>JavaScript Clock</title>
<link href="script05.css" rel="stylesheet">
<script src="script05.js"></script>
</head>
<body>
<div class="centered">
<h2 id="showTime"> </h2>
Display 24-hour Clock?
<input type="radio" name="timeClock" id="show24" checked><label for="show24">Yes</label>
<input type="radio" name="timeClock" id="show12"><label for="show12">No</label>
</div>
</body>
</html>
Listing 11.7. A little bit of style makes the page look better.
body {
background-color: #FFF;
}
.centered {
text-align: center;
}
label {
padding-right: 10px;
}
To convert 24-hour to 12-hour time
1. document.getElementById("showTime").innerHTML = showTheHours(now.getHours()) + showZeroFilled(now.getMinutes()) + showZeroFilled(now.getSeconds()) + showAmPm();
As in the previous task, this may look daunting, but all it is doing is building the time value displayed on the page by concatenating the result of the other functions (covered below). The result gets put into the innerHTML property of showTime.
2. setTimeout(showTheTime,1000);
This bit of code tells the display to update every second.
3. function showTheHours(theHour) {
Next, set up a function called showTheHours, containing the variable theHour.
Listing 11.8. This script converts between 24-hour and 12-hour time.
window.onload = showTheTime;
function showTheTime() {
var now = new Date();
document.getElementById("showTime").innerHTML = showTheHours(now.getHours()) + showZeroFilled(now.getMinutes()) + showZeroFilled(now.getSeconds()) + showAmPm();
setTimeout(showTheTime,1000);
function showTheHours(theHour) {
if (show24Hour() || (theHour > 0 && theHour < 13)) {
  return theHour;
}
if (theHour == 0) {
  return 12;
}
return theHour-12;
}
function showZeroFilled(inValue) {
if (inValue > 9) {
return ":" + inValue;
}
return ":0" + inValue;
}
function show24Hour() {
  return document.getElementById("show24").checked;
}
function showAmPm() {
if (show24Hour()) {
  return "";
}
if ((now.getHours() < 12)) {
  return " AM";
}
return " PM";
}
}
4. if (show24Hour() || (theHour > 0 && theHour < 13)) {
return theHour;
}
if (theHour == 0) {
return 12;
}
return theHour-12;
These conditionals say that if the user wants to show 24-hour time, or if the result of the hour portion of the time is greater than zero but less than 13, then simply return the variable theHour. Remember that the || operator means a logical or, as you first saw in Chapter 1. Otherwise, if theHour is zero, then return with the result 12 (when the hour is 12 A.M.); otherwise return theHour minus 12 (which converts hours 13 and higher to their 12-hour counterparts).
5. function show24Hour() {
return document.getElementById("show24").checked;
This function returns a value based on which radio button the user has selected. If it’s show24, then it should return true; otherwise it returns false.
6. if (show24Hour()) {
return "";
}
if ((now.getHours() < 12)) {
return " AM";
}
return " PM";
The showAmPm() function adds the AM or PM to the 12-hour time. If the function show24Hour is true, it returns nothing and goes to the next function. If the hours portion of the now variable is less than 12, then the value of the function is AM; otherwise it is PM. Again, there is a leading space in the AM or PM text string, so things look nice.
Creating a Countdown
Sooner or later, you’ll want to put a countdown on your pages that tells the user how many days or hours until a particular event. Listings 11.9 (HTML) and 11.10 (JavaScript) let one of the authors know his responsibilities, in no uncertain terms ![]() .
.
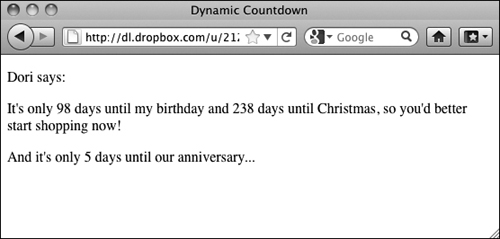
![]() Loading this page gives one of the authors his marching orders.
Loading this page gives one of the authors his marching orders.
To create a countdown
1. var allTags = document.getElementsByTagName("*");
Create a new allTags array, and fill it with every tag on the page.
2. for (var i=0;i<allTags.length; i++) {
if (allTags[i].className.indexOf("daysTill") > -1) {
allTags[i].innerHTML = showTheDaysTill(allTags[i].id);
}
This loop scans through allTags to see if the string daysTill is found in the class attribute of any tags on the page. Remember that a tag could have multiple class attributes (i.e., class="firstClass daysTill somethingElse fourthThing").
If we found daysTill, we call the showTheDaysTill() function, which is passed one parameter: that tag’s id (which stores what date to put up on the page). That function returns a value that is then put into innerHTML.
Listing 11.9. The HTML for the countdown script.
<!DOCTYPE html>
<html>
<head>
<title>Dynamic Countdown</title>
<script src="script06.js"></script>
</head>
<body>
<p>Dori says:</p>
<p>It's only <span class="daysTill" id="bday"> </span> days until my birthday and <span class="daysTill" id="xmas"> </span> days until Christmas, so you'd better start shopping now!</p>
<p>And it's only <span class="daysTill" id="anniv"> </span> days until our anniversary...</p>
</body>
</html>
Listing 11.10. This script counts down the number of days Tom stays out of the doghouse.
window.onload = showDays;
function showDays() {
var allTags = document.getElementsByTagName("*");
for (var i=0;i<allTags.length; i++) {
  if (allTags[i].className.indexOf("daysTill") > -1) {
    allTags[i].innerHTML = showTheDaysTill(allTags[i].id);
  }
}
function showTheDaysTill(thisDate) {
var theDays;
switch(thisDate) {
  case "anniv":
    theDays = daysTill(5,6);
    break;
  case "bday":
    theDays = daysTill(8,7);
    break;
  case "xmas":
    theDays = daysTill(12,25);
    break;
  default:
}
return theDays + " ";
}
function daysTill(mm,dd) {
var now = new Date();
var inDate = new Date(now.getFullYear(),mm-1,dd);
if (inDate.getTime() < now.getTime()) {
  inDate.setYear(now.getFullYear()+1);
}
return (Math.ceil(dayToDays(inDate) - dayToDays(now)));
}
function dayToDays(inTime) {
  return (inTime.getTime() / (1000 * 60 * 60 * 24));
}
}
3. switch(thisDate) {
case "anniv":
theDays = daysTill(5,6);
break;
case "bday":
theDays = daysTill(8,7);
break;
case "xmas":
theDays = daysTill(12,25);
break;
default:
If you don’t remember the switch/case multi-level conditionals, you can review the discussion in Chapter 2. Here, we are using the value of thisDate to test against the three case statements. For the anniv case, we’re setting theDays to May 6 (5,6 is the numerical representation, much like you would write it in the real world); for bday, we’re setting it to August 7; and for xmas, theDays gets set to December 25.
4. return theDays + " ";
The showTheDays() function ends by returning the number of days followed by a space. This is to work around a problem in IE: it eats the spaces in the HTML. If the script doesn’t return a space at the end, the number runs into the word “days”. If you just stuck the word “days” into this function, then there’d need to be a space after that, and so on.
5. function daysTill(mm,dd) {
var now = new Date();
var inDate = new Date(nowgetFullYear(),mm-1,dd);
This step shows the daysTill() function, which receives the dates from the case statements in step 3. Then, we create the now and inDate variables. The latter variable is filled with the current year, but with the month (with 1 subtracted from it to get it right; see the “More Weird Time Stuff” sidebar) and the day that were passed in.
6. if (inDate.getTime() < now.getTime()) {
inDate.setYear(now.getFullYear()+1);
}
We then check that date against today. If that date in this year has already passed, we increment the year, going for next year’s instead.
7. return (Math.ceil(dayToDays(inDate) - dayToDays(now)));
Here, we’re calculating the number of days between inDate and the current date. The Math.ceil() method makes sure that our result is a whole number.
8. function dayToDays(inTime) {
return (inTime.getTime() / (1000 * 60 * 60 * 24));
JavaScript stores dates in milliseconds since January 1, 1970. In order to compare two dates, change this to be the number of days since January 1, 1970. First, get the number of milliseconds in a day by multiplying 1000 (the number of milliseconds in a second) by 60 (number of seconds in a minute), by 60 again (number of minutes in an hour), and then by 24 (number of hours in a day). Dividing the number of milliseconds returned by getTime() by this number gives the number of days since January 1, 1970.
Hiding and Displaying Layers
Although your HTML, CSS, and JavaScript combine to make a single document, it’s sometimes useful to make it appear as if you actually have multiple documents—that is, using a combination of CSS and JavaScript, you can have something like a pop-up window display inside—or on top of—your current HTML page. No, this doesn’t use the obsolete Netscape layer tag; it just appears to be a separate layer so far as the user is concerned.
This requires three documents: the HTML document (Listing 11.11), the CSS style sheet (Listing 11.12), and the JavaScript file (Listing 11.13). We’re using JavaScript to manipulate an image using the id assigned in the HTML, and CSS to set the positioning for our annoying advertisement on the page: in particular, its z-index, which is an indicator of which object is shown on top of another object. The object with the higher-numbered z-index is shown when two objects occupy the same space.
Listing 11.11. The HTML for the advertisement example uses ids to tag the elements we want to manipulate.
<!DOCTYPE html>
<html>
<head>
<title>Layered Divs</title>
<link href="script07.css" rel="stylesheet">
<script src="script07.js"></script>
</head>
<body>
<div id="annoyingAdvert">
This is an incredibly annoying ad of the type you might find on some web sites.
<div id="closeBox">⊗</div>
</div>
<p>Lorem ipsum dolor sit amet, consectetuer adipiscing elit. Aenean lacus elit, volutpat vitae, egestas in, tristique ut, nibh. Donec congue lacinia magna. Duis tortor justo, dapibus vel, vulputate sed, mattis sit amet, leo. Cras purus quam, semper quis, dignissim id, hendrerit eget, ante. Nulla id lacus eget nulla bibendum venenatis. Duis faucibus adipiscing mauris. Integer augue. In vulputate purus eget enim. Nam odio eros, porta vitae, bibendum sit amet, iaculis nec, elit. Cras egestas scelerisque pede. Donec a tellus. Nullam consectetuer fringilla nunc.</p>
<p>Nam varius metus congue ligula. In hac habitasse platea dictumst. In ut ipsum a pede rhoncus convallis. Sed at enim. Integer sed metus quis est egestas vestibulum. Quisque mattis tortor a lorem. Nam diam. Integer consequat lectus. Donec molestie elementum nisl. Donec ligula sapien, volutpat eget, dictum quis, mollis a, odio. Aliquam augue enim, gravida nec, tempor ac, interdum in, urna. Aliquam mauris. Duis massa urna, ultricies id, condimentum ac, gravida nec, dolor. Morbi et est quis enim gravida nonummy. Cum sociis natoque penatibus et magnis dis parturient montes, nascetur ridiculus mus. Mauris nisl quam, tincidunt ultrices, malesuada eget, posuere eu, lectus. Nulla a arcu. Sed consectetuer arcu et velit. Quisque dignissim risus vel elit.</p>
<p>Nunc massa mauris, dictum id, suscipit non, accumsan et, lorem. Suspendisse non lorem quis dui rutrum vestibulum. Quisque mauris. Curabitur auctor nibh non enim. Praesent tempor aliquam ligula. Fusce eu purus. Vivamus ac enim eget urna pulvinar bibendum. Integer porttitor, augue et auctor volutpat, lectus dolor sagittis ipsum, sed posuere lacus pede eget wisi. Proin vel arcu ac velit porttitor pellentesque. Maecenas mattis velit scelerisque tellus. Cras eu tellus quis sapien malesuada porta. Nunc nulla. Nullam dapibus malesuada lorem. Duis eleifend rutrum tellus. In tempor tristique neque. Mauris rhoncus. Aliquam purus.</p>
<p>Morbi felis quam, placerat sed, gravida a, bibendum a, mauris. Aliquam porta diam. Nam consequat feugiat diam. Fusce luctus, felis ut gravida mattis, ante mi viverra sapien, a vestibulum tellus lectus ut massa. Duis placerat. Aliquam molestie tellus. Suspendisse potenti. Fusce aliquet tellus a lectus. Proin augue diam, sollicitudin eget, hendrerit non, semper at, arcu. Sed suscipit tincidunt nibh. Donec ullamcorper. Nullam faucibus euismod augue. Cras lacinia. Aenean scelerisque, lorem sed gravida varius, nunc tortor gravida odio, sed sollicitudin pede augue ut metus. Maecenas condimentum ipsum et enim. Sed nulla. Ut neque elit, varius a, blandit quis, facilisis sed, velit. Suspendisse aliquam odio sed nibh.</p>
</body>
</html>
To display and hide an object
1. var adBox = "annoyingAdvert";
document.getElementById(adBox).style.display = "block";
If you look at Listing 11.11, you’ll see that the layer that we want to show has an id of annoyingAdvert. Listing 11.12 tells that layer it should start off hidden, so that it’s not seen. However, once the page loads, our script tells it to appear by setting the display property to block.
2. document.getElementById("closeBox").onclick = function() {
document.getElementById(adBox).style.display = "none";
}
There’s a reason why annoyingAdvert has that name: you can’t read what’s underneath it ![]() ! We’ll be nice, though, and let the user close the layer (that is, hide it) by clicking what looks like a close widget. Setting the
! We’ll be nice, though, and let the user close the layer (that is, hide it) by clicking what looks like a close widget. Setting the display property to none turns the layer back off again.
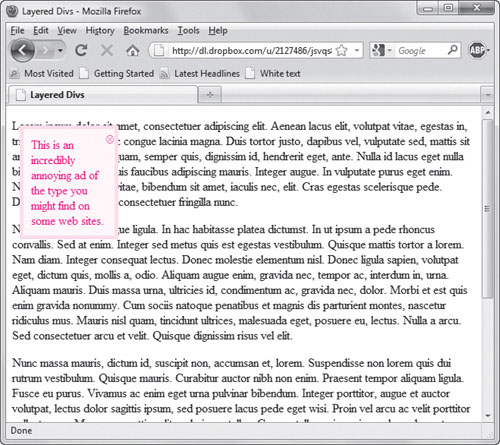
![]() The advertisement starts on the left, looking like a layer that can be closed.
The advertisement starts on the left, looking like a layer that can be closed.
Listing 11.12. The CSS styles the layer to make it look different from the rest of the document.
body {
background-color: #FFF;
}
#annoyingAdvert {
position: absolute;
z-index: 2;
display: none;
width: 100px;
background-color: #FFC;
padding: 10px;
margin: 10px;
border: 5px solid yellow;
}
#closeBox {
position: absolute;
color: red;
font-size: 1.5em;
top: 0;
right: 0;
}
Listing 11.13. The JavaScript shows the layer and then (thankfully) lets you hide it again.
window.onload = initAdvert;
function initAdvert() {
var adBox = "annoyingAdvert";
document.getElementById(adBox).style.display = "block";
document.getElementById("closeBox").onclick = function() {
  document.getElementById(adBox).style.display = "none";
}
}
Moving an Object in the Document
It’s possible to use JavaScript to move an object (an image, or text, or whatever) around your screen. In fact, you can make an object appear to move in three dimensions, so that it looks as though it passes behind other objects in the document. In this example, you’ll see how that annoying advertisement in the previous task can be made even more annoying.
This again requires three documents; however, the HTML and CSS are identical to that in the previous version. Here, we’ll just show the JavaScript file (Listing 11.14). Now, as soon as the user wants to close the advertisement layer, it starts to move away from them. Thankfully, it will stop before it goes off the screen ![]() , allowing them to finally close it!
, allowing them to finally close it!

![]() In this version, it ends up on the right, where you can finally close it.
In this version, it ends up on the right, where you can finally close it.
Listing 11.14. The JavaScript gets the advertisement moving.
window.onload = initAdvert;
function initAdvert() {
var adBox = "annoyingAdvert";
document.getElementById(adBox).style.display = "block";
document.getElementById(adBox).onmouseover = slide;
document.getElementById("closeBox").onclick = function() {
document.getElementById(adBox).style.display = "none";
}
}
function slide() {
var adBox = "annoyingAdvert";
if (nextPos(adBox) <= (document.body.clientWidth-150)) {
document.getElementById(adBox).style.left = nextPos(adBox) + "px";
setTimeout(slide,100);
}
function nextPos(elem) {
return document.getElementById(elem).offsetLeft+1;
}
}
To move an object
1. document.getElementById(adBox).onmouseover = slide;
In order to start the movement, we add an onmouseover event handler to our advertisement, which tells it to trigger the slide() function.
2. if (nextPos(adBox) <= (document.body.clientWidth-150)) {
Before we move the layer, we need to figure out if it’s within the restrictions that we’ve placed on it—that’s done by checking its current position (using the nextPos() function, which we’ll describe below) and comparing it to the width of the document window. If it’s equal to or less than that (minus another 150 pixels, to take the width of the layer itself into account), then we want to move it some more.
3. document.getElementById(adBox).style.left = nextPos(adBox) + "px";
To move the layer (in a way that works cross-browser), we have to change its style.left property. Here, we change it by getting the object’s next position and adding px to the end to put it in the correct format. Changing style.left is all that’s needed to move it to its new location.
4. setTimeout(slide,100);
Here’s where we tell JavaScript to keep on moving, by calling setTimeout() to call slide() again in one hundred milliseconds (one-tenth of a second).
5. function nextPos(elem) {
Two places above needed to get the updated position of an element, and here’s where we’ll do it. All we need is the id of that element.
6. return document.getElementById(elem).offsetLeft+1;
Given the id of the object, we can get the object. And given that, all we need is its offsetLeft property, which is the object’s left position. The offsetLeft property contains a numeric value, so we can just return it, incremented by one.
You might be wondering: if offsetLeft is numeric, why jump through all those hoops to instead change the style.left property? We have to do that because offsetLeft is read-only; that is, you can read its value, but you can’t change it. There aren’t any cross-browser, writeable, numeric positioning elements.
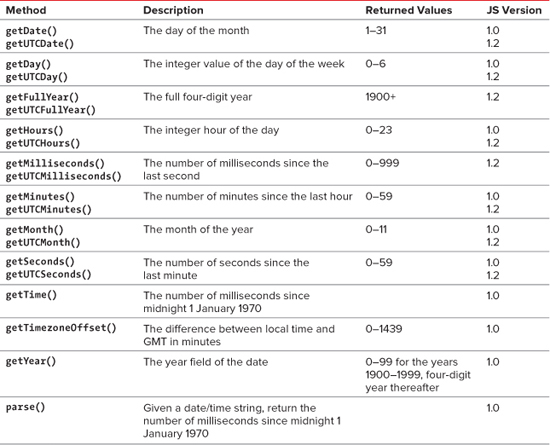
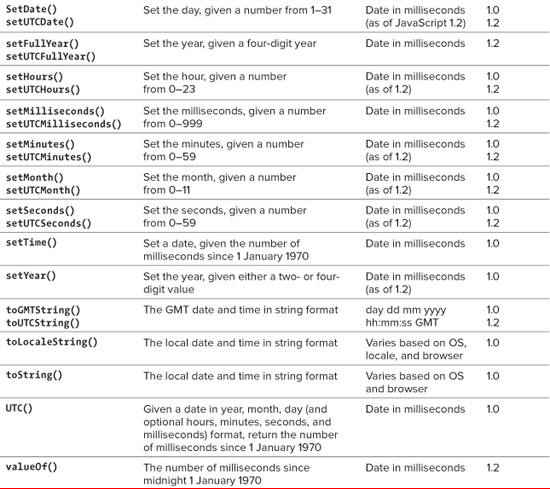
Date Methods
Because you’ll often need to deal with dates, here’s a table of all of the methods of the Date object. In Table 11.1, you’ll see a reference to UTC, which stands for Coordinated Universal Time, which replaced Greenwich Mean Time (GMT) as the world standard for time in 1986. Any of the methods that contain UTC are available only in JavaScript 1.2 or later.