
2. Start Me Up!
Putting Comments in Scripts 29
Redirecting the User with a Link 37
Using JavaScript to Enhance Links 39
Using Multi-Level Conditionals 43
Enough of the warm up; it’s time to get scripting. In this chapter, you’ll learn where to put your scripts in your HTML; how you can leave comments in your scripts so that you can more easily understand them at a later time; and how you can use scripts to communicate with the user. You’ll also see how to make the page automatically change to another page (called redirection). Let’s get to it!
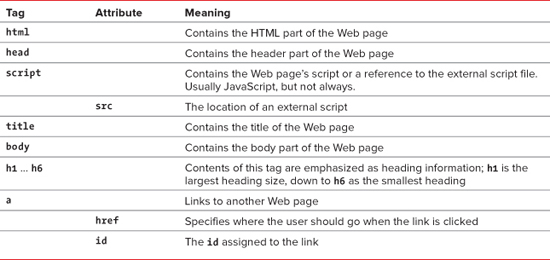
Table 2.1. Just Enough HTML—The Basics
Where to Put Your Scripts
Scripts can be put in one of two places on an HTML page: between the <head> and </head> tags (called a header script), or between the <body> and </body> tags (a body script). Listing 2.1 is an example of a body script.
Listing 2.1. Scripts always need to be enclosed inside the <script> and </script> HTML tags.
<!DOCTYPE html>
<html>
<head>
<title>My first script</title>
</head>
<body>
<h1>
<script>
document.write("Hello, world!");
</script>
</h1>
</body>
</html>
There is an HTML container tag that denotes scripts, which, as you would guess, begins with <script> and ends with </script>.
To write your first script
1. <script>
Here’s the opening script tag. This tells the browser to expect JavaScript instead of HTML.
2. document.write("Hello, world!");
Here’s the first line of JavaScript: It takes the document window and writes “Hello, world!” into it ![]() . Note the semicolon at the end of the line; this tells the browser’s JavaScript interpreter that the line is ending. With rare exceptions, we’ll be using semicolons at the end of each line of JavaScript in this book.
. Note the semicolon at the end of the line; this tells the browser’s JavaScript interpreter that the line is ending. With rare exceptions, we’ll be using semicolons at the end of each line of JavaScript in this book.

![]() The “Hello, world” example is de rigueur in code books. We’d probably lose our union card if we left it out.
The “Hello, world” example is de rigueur in code books. We’d probably lose our union card if we left it out.
3. </script>
This ends the JavaScript and tells the browser to start expecting HTML again.
The language and type attributes of the script tag (which we’re not using here) have been deprecated, which means that the W3C, the standards body responsible, has marked the attributes as ones that will not necessarily be supported in future versions of the standard. There are plenty of older scripts that still use it, though.
Using a semicolon at the end of a JavaScript line is optional, so long as you only have one statement per line. We’ve included them in this book for clarity, and we suggest that you get into the habit of including them in your code for the same reason.
For most of the rest of this book, we’ve left out the <script> tags in our code explanations. As you’ll see from the scripts themselves, they’re still there and still needed, but we won’t be cluttering our explanations with them.
About Functions
Before you get into the next example, you need to learn a bit about functions, which you’ll use often when writing JavaScript. A function is a set of JavaScript statements that performs a task. Every function must be given a name (with one very rare exception, which we’ll discuss much later in this book) and can be invoked, or called, by other parts of the script.
Functions can be called as many times as needed during the running of the script. For example, let’s say that you’ve gotten some information that a user typed into a form, and you’ve saved it using JavaScript (there’s more about this sort of thing in Chapter 6, “Form Handling”). If you need to use that information again and again, you could repeat the same code over and over in your script. But it’s better to write that code once as a function and then call the function whenever you need it.
A function consists of the word function followed by the function name. There are always parentheses after the function name, followed by an opening brace. The statements that make up the function go on the following lines, and then the function is closed by another brace. Here’s what a function looks like:
function saySomething() {
alert("Four score and seven years ago");
}
Notice that the line with alert is indented? That makes it easier to read your code. All of the statements between the first brace and the last one (and you probably noticed that those two lines are not indented) are part of the function. That’s all you need to know for now about functions. You’ll learn more about them in the next and subsequent chapters.
Using External Scripts
The problem with using scripts on the HTML page, as in the last example, is that the script is only available to that particular page. That’s why those kinds of scripts are sometimes called internal scripts. But often, you’ll want multiple HTML pages to share a script. You do this by including a reference to an external script, that is, a separate file that just contains JavaScript. This external file is called a .js file, because whatever it’s called, the file name should end with the suffix .js. Individual pages call the .js file simply by adding a new attribute, src, to the script tag.
This saves a lot of code on every page and, more importantly, makes it easier to maintain your site. When you need to make changes to a script, you just change the .js file, and all HTML pages that reference that file automatically get the benefit of your changes.
In this first example of an external script, Listing 2.2 contains the HTML with the reference to the external file, and Listing 2.3 is the external JavaScript file.
Listing 2.2. The simple HTML puts a reference to the external JavaScript file inside the script tag.
<!DOCTYPE html>
<html>
<head>
<title>My second script</title>
<script src="script02.js"></script>
</head>
<body>
<h1 id="helloMessage">
</h1>
</body>
</html>
Listing 2.3. Your first external JavaScript file.
window.onload = writeMessage;
function writeMessage() {
document.getElementById("helloMessage").innerHTML = "Hello, world!";
}
To use an external script
1. <script src="script02.js">
This line is in Listing 2.2. Adding the src attribute to the script tag causes browsers to look for that file. The resulting Web pages will look just as though the scripts were in their usual place inside the page’s script tags, when really the script resides in the external .js file.
By itself, this line is all we need to do to use an external script. Next, let’s work through what is in that script.
2. window.onload = writeMessage;
Moving to Listing 2.3, the first part of this line, window.onload, is an event handler, which we discussed in Chapter 1. After the equals sign there is the name of a function, writeMessage. In English, this line can be read as “When the window finishes loading, tell the writeMessage function to run.”
3. function writeMessage() {
This line creates the writeMessage() function.
4. document.getElementById ("helloMessage").innerHTML = "Hello, world!";
Refer back to Listing 2.2, and you’ll see that there is an <h1> tag there with an id of helloMessage. You’ll learn more about ids later, but for now, suffice it to say that an id is a unique identifier on a page for whatever it is attached to. In other words, on a given page, there can be only one element with any particular id. That makes it easy for JavaScript to retrieve and modify the element using the getElementById() method. The innerHTML property simply takes the string that is on the right-hand side of the equals sign and drops it directly into the page, just as if we’d written it into the HTML itself. So, reading the JavaScript line from right to left in English, we could say “Take the string ‘Hello, world!’ and put it into the document, inside the element on the page that is named helloMessage.” The result ![]() looks an awful lot like
looks an awful lot like ![]() of “Where to Put Your Scripts.”
of “Where to Put Your Scripts.”

![]() The result of moving your JavaScript to an external file looks eerily unchanged from the previous example. But it’s still a better way of doing things.
The result of moving your JavaScript to an external file looks eerily unchanged from the previous example. But it’s still a better way of doing things.
Browsers that support external JavaScript files include: Microsoft Internet Explorer 4 and later, Netscape 3 and later, and just about every other browser that’s shipped since then, including modern browsers like Firefox, Safari, and Chrome.
Using external JavaScript files is sometimes used to try to hide JavaScript from users. It doesn’t work if the user is technically savvy enough to check their browser cache files—everything that the browser has seen is stored there.
In Listing 2.1 (and much earlier editions of this book), we used a technique for inserting information into the HTML page called document.write(). In this edition, we’ve mostly replaced that approach with setting innerHTML, because it is more versatile. Some people object to the use of the innerHTML property because it hasn’t been blessed by the W3C. But even those people with issues agree that it’s the simplest cross-browser way to work, so that’s what we’re primarily showing in this book. The “official” way to add or change an HTML page is covered in Chapter 10, “Objects and the DOM.”
If you’ve seen functions before, you might be expecting the writeMessage reference in step 2 to instead be writeMessage(). It’s not, because the two mean different things: a function shown with parentheses means that the function is being called, right then and there. When it’s without parentheses (as it is here), we’re assigning it to the event handler, to be run later when that event happens.
Putting Comments in Scripts
It’s a good idea to get into the habit of adding comments to your scripts. You do this by inserting comments that JavaScript won’t interpret as script commands. While your script may seem perfectly clear to you when you write it, if you come back to it a couple of months later it may seem as clear as mud. Comments help to explain why you solved the problem in a particular way. Another reason to comment your script is to help other people who may want to reuse and modify your script.
Listing 2.4 shows examples of two kinds of script comments. The first kind is for longer, multi-line comments. The second example shows how to do single-line comments.
Listing 2.4. Here’s how you can annotate your script with comments, which helps you and others understand your code.
/*
This is an example of a long JavaScript comment. Note the characters at the beginning and ending of the comment.
This script adds the words "Hello, world!" into the body area of the HTML page.
*/
window.onload = writeMessage; // Do this when page finishes loading
function writeMessage() {
// Here's where the actual work gets done
document.getElementById("helloMessage").innerHTML = "Hello, world!";
}
Note that we haven’t included the HTML for this example, as it is (virtually) identical to Listing 2.2. From now on in the book, when the HTML hasn’t changed from a previous example, we won’t be printing it again.
To comment your script
1. /*
This is an example of a long JavaScript comment. Note the characters at the beginning and ending of the comment.
This script adds the words "Hello, world!" into the body area of the HTML page.
For multi-line comments, the /* at the beginning of the line tells JavaScript to ignore everything that follows until the end of the comment.
2. */
This is the end of the comment.
3. window.onload = writeMessage;
// Do this when page finishes loading
function writeMessage() {
// Here's where the actual work gets done
document.getElementById ("helloMessage").innerHTML = "Hello, world!";
}
And here’s the script again, as in the previous example, with single-line comments. As you can see here, single-line comments can be on a line by themselves, or they can follow a line of code. You can’t have any code on the same line after a single-line comment, nor can you have a multi-line comment on the same line as code.
Yes, we’re as tired of seeing this one as you are, but it’s traditional for all code books to start off with the “Hello, world!” example.
So much for tradition.
Alerting the User
One of the main uses of JavaScript is to provide feedback to people browsing your site. You can create an alert window that pops up and gives users the vitally important information that they need to know about your page.
In user interface design, less is generally more. For example, you could get the user’s attention with loud alarm sirens and big animated banners, but that would be just a bit over the top. Instead, Listings 2.5 (HTML, which just calls the external script) and 2.6 (JavaScript) show how to create a nice, tasteful alert window. Now you know why we’re writers, not designers.
Listing 2.5. The HTML for this example includes <script> and <noscript> tags.
<!DOCTYPE html>
<html>
<head>
<title>My JavaScript page</title>
<script src="script04.js"></script>
</head>
<body>
<noscript>
<h2>This page requires JavaScript.</h2>
</noscript>
</body>
</html>
Listing 2.6. Alert dialog boxes help you communicate with the user.
alert("Welcome to my JavaScript page!");
To alert a user
• alert("Welcome to my JavaScript page!");
Yes, that’s all there is to it ![]() . Just put the text that you want to have appear within the
. Just put the text that you want to have appear within the alert() method in straight quotes.
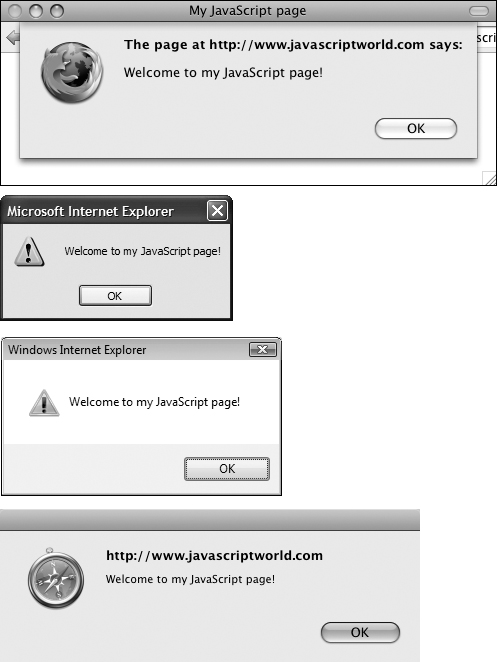
![]() This script only puts up one dialog box; the four shown are examples of how the dialog box looks in, from top to bottom, Firefox 2 on Mac OS X; Microsoft Internet Explorer 6 on XP; Microsoft Internet Explorer 8 on Vista; and Safari 3 for Mac OS X.
This script only puts up one dialog box; the four shown are examples of how the dialog box looks in, from top to bottom, Firefox 2 on Mac OS X; Microsoft Internet Explorer 6 on XP; Microsoft Internet Explorer 8 on Vista; and Safari 3 for Mac OS X.
In most JavaScript alert boxes, you’ll see some indication telling the user that the alert box was put up by a JavaScript command. This is a security feature to keep unscrupulous scripters from fooling hapless users. You can’t code around this. On Safari for Mac OS X, for example, it shows the URL of the site that opened the alert ![]() . Firefox on both Windows and Mac does the same thing. In Internet Explorer 6, the window title is “Microsoft Internet Explorer.” Internet Explorer 7 and later say “Windows Internet Explorer,” an interesting bit of rebranding.
. Firefox on both Windows and Mac does the same thing. In Internet Explorer 6, the window title is “Microsoft Internet Explorer.” Internet Explorer 7 and later say “Windows Internet Explorer,” an interesting bit of rebranding.
You’ll also see the <noscript> tag used here. On non-JavaScript browsers (older browsers and browsers with JavaScript turned off), a message appears saying that this page requires JavaScript.
Confirming a User’s Choice
While it’s useful to give information to a user, sometimes you’ll want to also get information back in return. Listing 2.7 shows how to find out if the user accepts or rejects your question. This script also introduces the idea of conditionals, which is where the script poses a test and performs different actions depending on the results of the test.
Listing 2.7. You can put up different replies, depending on how the user reacts to a prompt.
if (confirm("Are you sure you want to do that?")) {
alert("You said yes");
}
else {
alert("You said no");
}
More about conditionals
Conditionals break down into three parts: the if section, where we do our test; the then section, where we put the part of the script we want to do if the result is true; and an optional else section, which contains the part of the script we want to have happen if the result of the test is not true. The contents of what we’re testing in the if section are in parentheses, and the contents of the other two sections are each contained in braces.
To confirm a choice
1. if (confirm("Are you sure you want to do that?")) {
The confirm() method takes one parameter (the question we want to ask the user) and returns either true or false, depending on the user’s response ![]() .
.

![]() You can capture the result of a user’s action and confirm the result in an alert box, as seen here. The top image asks the user a question, and the result of pressing the OK or Cancel button is shown below.
You can capture the result of a user’s action and confirm the result in an alert box, as seen here. The top image asks the user a question, and the result of pressing the OK or Cancel button is shown below.
2. alert("You said yes");
If the user clicked the OK button, confirm() returns true, and an alert displays, saying, “You said yes”. As you can see, this is the then section of the code, even though there’s no then operator in JavaScript. The braces serve as the delineation of the then area.
This brace ends the part that occurs when confirm() returned a value of true.
4. else {
Here, we begin the section that only happens when the user hits the Cancel button.
5. alert("You said no");
If the user clicked the Cancel button, confirm() returns false, and the message “You said no” is displayed.
6. }
This curly brace ends the entire if/else conditional statement.
Prompting the User
Sometimes, instead of just asking a Yes/No question, you’ll want to get a more specific response. In that case, Listing 2.8 allows you to ask a question (with a default answer) and receive the reply in turn ![]() .
.

![]() You can prompt a user for a text string, then act on that string.
You can prompt a user for a text string, then act on that string.
Listing 2.8. You can use a dialog box to query the user and work with the reply.
var ans = prompt("Are you sure you want to do that?","");
if (ans) {
  alert("You said " + ans);
}
else {
  alert("You refused to answer");
}
To prompt a user for a response
1. var ans = prompt("Are you sure you want to do that?","");
Here, we’re declaring a variable (as discussed in Chapter 1). We use the var keyword to declare variables. In this case, the variable is called ans and assigned the result of the prompt(), i.e., whatever the user types into the prompt dialog.
The prompt() method is passed two pieces of information (officially called parameters), separated by a comma: the question for the user and the default answer. It returns either the user’s response or null; “null” occurs when the user hits Cancel, when there is no default and the user hits OK, or when the user clears the default answer and hits OK. For those browsers where a prompt shows a close box control, using that also returns a null result.
2. if (ans) {
alert("You said " + ans);
}
This conditional uses the variable that we just set. If ans exists (that is, if the user typed in a response), then the script puts up an alert window that says, “You said” (and note the extra space at the end of that text string above) and concatenates (appends to the end) the value of ans.
3. else {
alert("You refused to answer");
}
If ans is null, because the user didn’t enter anything or clicked the Cancel button in the prompt dialog, then the else block of the condition is executed, and the alert pops up.
Using var does two things:
It tells JavaScript to create a variable (that is, to set aside some space in memory for this new object).
It defines the scope of the variable, that is, where JavaScript needs to know about this particular object (see the “What Is Scope?” sidebar). If a variable is created inside a function, other functions don’t have access to it, as it’s local to that function. If it’s created outside any function, it’s global, and everything has access to it. In this script, we’re creating the ans global variable.
In some browsers, if you leave off prompt’s second parameter (the default response), everything works fine. However, in others, the prompt window will appear, displaying a default of “undefined.” The answer is to always include some default, even if it’s an empty string (as shown in Listing 2.8).
Redirecting the User with a Link
You can check for the existence of JavaScript and then seamlessly redirect, or send users to another page, depending on if they have JavaScript turned on. This example shows you how to embed the redirection in a link. We’ll use two HTML pages and one JavaScript file. The first HTML page, Listing 2.9, gives the user the link to click. Listing 2.10 is the JavaScript file, and Listing 2.11 is the HTML page the user is redirected to if they have JavaScript enabled. When users click the link ![]() , they’ll be taken to one of two pages, depending on whether or not they have JavaScript.
, they’ll be taken to one of two pages, depending on whether or not they have JavaScript.
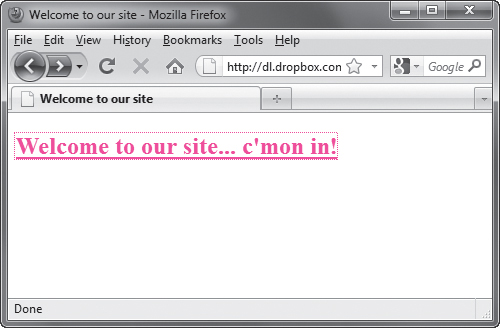
![]() This page has the link that contains the redirection code.
This page has the link that contains the redirection code.
Listing 2.9. This HTML allows you to redirect the user based on a link.
<!DOCTYPE html>
<html>
<head>
<title>Welcome to our site</title>
<script src="script07.js"></script>
</head>
<body>
<h2 class="centered">
<a href="script04.html" id="redirect"> Welcome to our site... c'mon in!</a>
</h2>
</body>
</html>
Listing 2.10. By embedding the redirection inside the code, the user doesn’t even know your script intervened in the link.
window.onload = initAll;
function initAll() {
document.getElementById("redirect"). onclick = initRedirect;
}
function initRedirect() {
  window.location = "jswelcome.html";
  return false;
}
Listing 2.11. This is the HTML for the page the JavaScript-enabled user ends up on.
<!DOCTYPE html>
<html>
<head>
<title>Our site</title>
</head>
<body>
<h1>Welcome to our web site, which features lots of cutting-edge JavaScript</h1>
</body>
</html>
To redirect a user
1. <a href="script04.html" id="redirect">Welcome to our site... c'mon in!</a>
In Listing 2.9, this is the link the user clicks. If users don’t have JavaScript and they click the link, they’ll follow the usual href path and end up on a page that looks like ![]() . If users have JavaScript and they click the link, the script (down in step 4) takes over and loads a new page.
. If users have JavaScript and they click the link, the script (down in step 4) takes over and loads a new page.
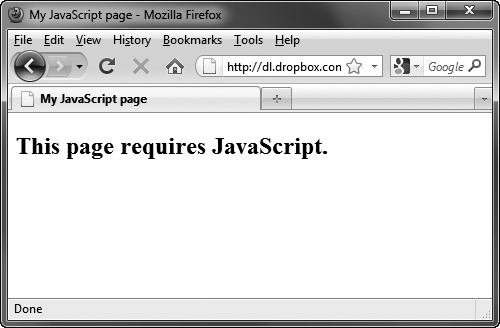
![]() This message gives the user the heave-ho, if you’ve decided that JavaScript is essential to your site.
This message gives the user the heave-ho, if you’ve decided that JavaScript is essential to your site.
2. window.onload = initAll;
Now we’re in Listing 2.10. When the page finishes loading, it triggers the initAll() function.
3. function initAll() {
document.getElementById ("redirect").onclick = initRedirect;
}
This function simply tells the element with the id redirect that it should call the initRedirect() function when a user clicks that link (that is, the link from step 1).
4. function initRedirect() {
window.location = "jswelcome.html";
return false;
}
If this function is called, then it sets window.location (the page loaded in the browser) to a new page. The return false says to stop processing the user’s click, so the href page doesn’t also get loaded.
What’s so cool about this is that we’ve done a redirection without users having any idea that it happened. They’re just on one of two different pages, depending on what they came in with. If they have JavaScript, they end up on a page shown in ![]() .
.
![]() JavaScript-savvy browsers see this page instead.
JavaScript-savvy browsers see this page instead.
On first glance, we might think that we could just set the onclick handler globally—that is, as the page is loading—but we can’t. There’s a chance, particularly for a large and complex page, that the browser will not yet have come across that redirect id, and if that happens, JavaScript won’t be able to assign the onclick handler. Instead, we have to wait until the page has completed loading, and that’s done via onload.
Keep in mind that some users may object to being sent to a different page than the one they saw when they put their mouse over the link.
Using JavaScript to Enhance Links
Sometimes, you may want to perform some sort of action after the user clicks a link, but before the browser loads the new page. A typical example would be when you want to put up an alert before the user goes to a particular page on your site, or to make it clear when the user leaves your site. In this example, we’ll put up an alert dialog before continuing on to the ultimate destination. Listing 2.12 shows the HTML, and Listing 2.13 shows the small amount of changes we need to make to previous scripts.
Listing 2.12. The HTML, as usual, contains an id in the link tag that JavaScript can use.
<!DOCTYPE html>
<html>
<head>
<title>Welcome to our site</title>
<script src="script08.js"></script>
</head>
<body>
<h2 class="centered">
Hey, check out <a href="http://www.pixel.mu/" id="redirect">my cat's Web site</a>.
</h2>
</body>
</html>
Listing 2.13. The link enhancement script.
window.onload = initAll;
function initAll() {
document.getElementById("redirect").onclick = initRedirect;
}
function initRedirect() {
alert("We are not responsible for the content of pages outside our site");
window.location = this;
return false;
}
To enhance links
1. Hey, check out <a href="http://www.pixel.mu/" id="redirect">my cat's Web site</a>.
This line in Listing 2.12 shows the link, with the href for the link’s destination, and the id for the link, which will be used by Listing 2.13. The page is shown in ![]() .
.

![]() Clicking the link will redirect the user to our cat’s Web site.
Clicking the link will redirect the user to our cat’s Web site.
2. alert("We are not responsible for the content of pages outside our site");
This alert appears after the link has been clicked ![]() .
.
![]() If the user has a JavaScript-capable browser, they’ll see this warning message as they leave.
If the user has a JavaScript-capable browser, they’ll see this warning message as they leave.
3. window.location = this;
This line allows us to set the browser window to the location specified by the keyword this, which contains the link. For now, just think of this as a container—if you want to know more, see the “What is ‘this’?” sidebar. When the user reaches their final destination, it looks like ![]() (at least, using our cat’s Web page as the destination).
(at least, using our cat’s Web page as the destination).
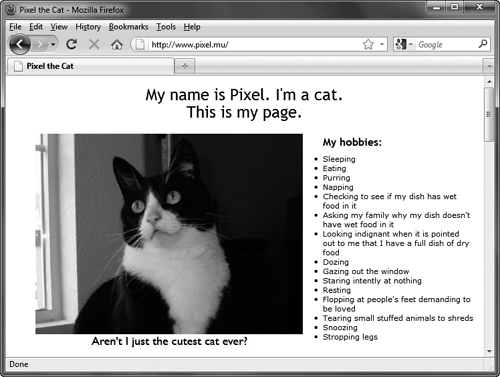
![]() In this case, we’ll admit that we actually are responsible for this cat’s page. (What, you think he does it himself?)
In this case, we’ll admit that we actually are responsible for this cat’s page. (What, you think he does it himself?)
You may have noticed that nowhere in the code does it refer to a particular Web page—that’s part of the power of this. One of the things the this keyword does for us is grab the URL from the HTML link (that is, the value of the a tag’s href attribute). Because we’re using this approach, we don’t have to touch Listing 2.13 if we someday change Listing 2.12 to point to our kid instead of our cat. In fact, we could have links all over our Web site calling this same script, and that one line of code would automatically grab their href values as well.
If that previous tip wasn’t enough, think about it this way: with this approach, your HTML pages can be modified by WYSIWYG editors and people who know nothing about JavaScript—and so long as they only change the HTML pages, they can’t screw up your script.
That wasn’t enough for you either? Here’s another benefit: if the user’s browser doesn’t understand JavaScript, it loads in only the HTML page. When they click the link, it loads just as it normally would: no errors, no confusing “you must have some other browser,” no problems.
This kind of coding style—where the code is separated out from the HTML, so that both are more flexible—is referred to as unobtrusive scripting. If you want to know more about how this fits in with all the other buzzwords you hear about code on the Web, check out the “Just Enough Terminology” sidebar.
Using Multi-Level Conditionals
There are times when you need more than two choices in a conditional test; then and else sometimes just aren’t enough. While you can have nested levels of if, it’s often simpler to just use a switch/case statement instead. The switch/case construct allows you to check a variable against multiple values. As you can see in ![]() , this script returns one of three different Presidential quotes as alert dialogs, depending on which button the user clicks. Listing 2.14 shows the HTML, which is fairly simple. Listing 2.15, the JavaScript, uses the
, this script returns one of three different Presidential quotes as alert dialogs, depending on which button the user clicks. Listing 2.14 shows the HTML, which is fairly simple. Listing 2.15, the JavaScript, uses the switch/case construct to differentiate between presidents.
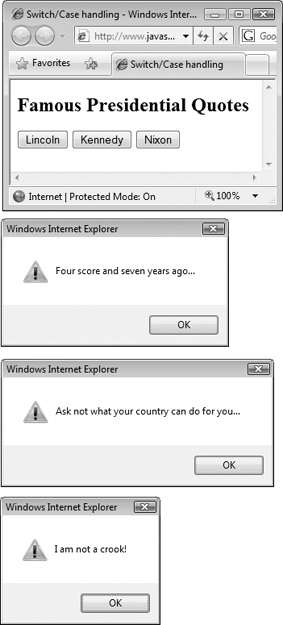
![]() Calling the function with each of the three buttons in the top window results in three different responses, as shown in the three dialog boxes.
Calling the function with each of the three buttons in the top window results in three different responses, as shown in the three dialog boxes.
Listing 2.14. The HTML sets up the page for multi-level conditionals.
<!DOCTYPE html>
<html>
<head>
<title>Switch/Case handling</title>
<script src="script09.js"></script>
</head>
<body>
<h2>Famous Presidential Quotes</h2>
<form action="#">
<input type="button" id="Lincoln" value="Lincoln">
<input type="button" id="Kennedy" value="Kennedy">
<input type="button" id="Nixon"
value="Nixon">
</form>
</body>
</html>
To use a switch/case statement
1. window.onload = initAll;
When the page loads, call the initAll() function.
2. function initAll() {
document.getElementById ("Lincoln").onclick = saySomething;
document.getElementById ("Kennedy").onclick = saySomething;
document.getElementById ("Nixon").onclick = saySomething;
In the function, we set the onclick handler for each of the buttons on the page. Because we set the id attribute along with the value attribute in the HTML, we’re able to use getElementById() to set the event handler. If it existed, it would have been nice to be able to use a getElementByValue() call—then, we wouldn’t have had to set the id attribute.
3. function saySomething() {
This begins the saySomething() function.
4. switch(this.id) {
The id of the this object is used as the parameter to switch(). Its value will decide which of the below case statements gets executed.
Listing 2.15. This type of conditional allows you to check against multiple possibilities.
window.onload = initAll;
function initAll() {
document.getElementById("Lincoln").onclick = saySomething;
document.getElementById("Kennedy").onclick = saySomething;
document.getElementById("Nixon").onclick = saySomething;
}
function saySomething() {
switch(this.id) {
case "Lincoln":
  alert("Four score and seven years ago...");
  break;
case "Kennedy":
  alert("Ask not what your country can do for you...");
  break;
case "Nixon":
  alert("I am not a crook!");
  break;
default:
}
}
5. case "Lincoln":
alert("Four score and seven years ago...");
break;
If the id of the this object is “Lincoln”, this alert appears. Regarding break, if the user clicked Lincoln, we’re in this section of code. However, we’ve done everything we want to do, and so we want to get out of the switch. In order to do that, we need to break out. Otherwise, we’ll execute all of the code below, too. While that continued execution can be handy in certain circumstances, this isn’t one of them.
6. case "Kennedy":
alert("Ask not what your country can do for you...");
break;
If the user clicked Kennedy, we end up in this case block.
7. case "Nixon":
alert("I am not a crook!");
break;
And finally, if the user clicked Nixon, we end up here, popping up another alert and then breaking out of the switch.
8. default:
If you were wondering what would happen if the user’s entry didn’t meet one of the above criteria, you’re in the right place. The default section is where we end up if our switch value didn’t match any of the case values. The default block is optional, but it’s always good coding practice to include it, just in case (so to speak). In this script, there’s no code here to execute, because we shouldn’t ever get here.
9. }
This closing brace ends the switch statement.
A switch statement can be passed other values besides strings. You can use it with a numeric value or even have it evaluate a mathematical result. If its result should be numeric, though, be sure that the case statements match—your case statements would then need to check for numbers, not strings (e.g., 5, not “5”).
Handling Errors
While you may have years of experience working with computers, it’s a good bet that many of your site’s visitors won’t. Consequently, you’ll want to give them meaningful error messages instead of the technobabble that most browsers return if they object to something the user does. Listing 2.16 shows how to use JavaScript’s try/throw/catch commands to produce a friendly, useful error message. We’ve built this into a simple square root calculator.
Listing 2.16. Use this script to have JavaScript gracefully handle errors.
window.onload = initAll;
function initAll() {
var ans = prompt("Enter a number","");
try {
if (!ans || isNaN(ans) || ans<0) {
  throw new Error("Not a valid number");
}
alert("The square root of " + ans + " is " + Math.sqrt(ans));
}
catch (errMsg) {
  alert(errMsg.message);
}
}
To handle errors gracefully
1. var ans = prompt("Enter a number", "");
Here’s an ordinary, everyday prompt, which stores its returned value in the ans variable for later use. In this case, we want the user to enter a number. If they do that successfully, JavaScript displays the square root of whatever they entered.
2. try {
However, if they didn’t enter a number ![]() , we want to be able to catch it gracefully and display something meaningful. Yes, we’ll be polite about it, even though the user entered words when the alert asked for a number. We start off by using the
, we want to be able to catch it gracefully and display something meaningful. Yes, we’ll be polite about it, even though the user entered words when the alert asked for a number. We start off by using the try command. Inside its block of code, we’ll check to see if the user’s entry was valid.

![]() We want a number, but the user could enter anything, like this non-numeric entry.
We want a number, but the user could enter anything, like this non-numeric entry.
3. if (!ans || isNaN(ans) || ans<0) {
throw new Error("Not a valid number");
}
There are three things we care about: no entry at all, or if the user entered something but it was non-numeric, or if the entry was numeric but was a negative number (because the square root of a negative number is an imaginary number, and that’s beyond this example). If !ans is true, that means that the user didn’t enter anything. The built-in isNaN() method checks to see if the parameter it was passed is “Not a Number.” If isNaN() returns true, we know that something invalid was entered. And if ans is less than 0, it’s a negative number. In any of these cases, we want to throw an error; in this case, it says “Not a valid number”. Once an error is thrown, JavaScript jumps out of the try block and looks for a corresponding catch statement. Everything between here and there is skipped over.
4. alert("The square root of " + ans + " is " + Math.sqrt(ans));
If something valid was entered, the square root is displayed ![]() .
.
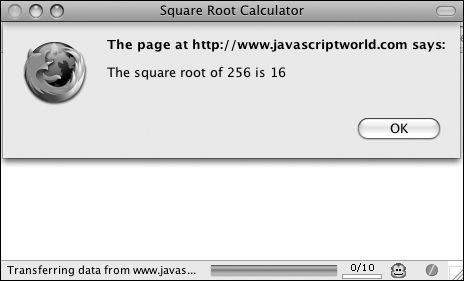
![]() Here’s the result of the script acting on a number.
Here’s the result of the script acting on a number.
5. }
This closing brace ends the try block.
6. catch (errMsg) {
alert(errMsg.message);
}
Here’s the promised and looked-for catch statement. The error is passed in as a parameter, and the message part of the error is displayed ![]() . If no error was thrown, the code inside the catch will never be executed.
. If no error was thrown, the code inside the catch will never be executed.
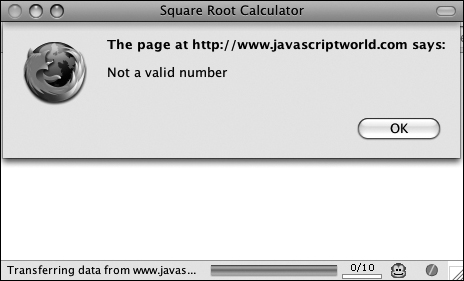
![]() If bad data was entered, let the user know.
If bad data was entered, let the user know.