
13. Introducing Ajax
Getting Data From a Server 349
Previewing Links with Ajax 353
Auto-Completing Form Fields 357
The Web is always changing, and for Web and JavaScript developers the ground shifted under their feet beginning in early 2005. New and immediately popular Web applications appeared, some of them from Google, such as Gmail and Google Maps, and some from others, such as Flickr. The common denominator of all of these new sites was that they acted more like desktop applications, with fast, responsive user interfaces. Instead of the traditional Web application, where the user clicked, waited some number of seconds for the server to respond and refresh the page, and then repeated the process, these new sites were more reactive, updating pages right away, providing superior interaction, and making for a better user experience.
There was something new (actually not so new, as we’ll see) powering these sites, called Ajax. You can use Ajax techniques to make your sites more responsive and attractive, which makes your site’s users happier in the process. Best of all, you don’t have to learn a completely new technology, because Ajax is made from building blocks that you already know (and that we’ve covered earlier in this book).
In this chapter, you’ll learn how to request information from the server in the background and turn it into a form your Ajax application can use; automatically refresh the information from the server; build a cool previewing effect for objects on your page; and build an Ajax application that auto-completes form fields, just like a desktop application. Let’s get to it.
Ajax: Pinning It Down
One of the interesting things about Ajax is that there is some confusion and even a little disagreement as to what Ajax really is. We know that it is important and that it’s very popular; heck, we even changed the name of this book in previous editions to hitch onto Ajax’s popularity. So here is our take on what Ajax is and isn’t, and what we mean when we use the term.
First, a little history: In February 2005, Jesse James Garrett, a founder of Adaptive Path (a Web interface and design shop in San Francisco), coined the term Ajax in an article on their site. He said Ajax was shorthand (but not an acronym) for “Asynchronous JavaScript and XML.” You can read the article for yourself at www.adaptivepath.com/ideas/e000385 ![]() .
.

![]() This is the article that launched a zillion Ajax sites.
This is the article that launched a zillion Ajax sites.
According to Garrett, Ajax was not in itself a new technology, rather a technique that combined several long-standing Web technologies:
• Using HTML and CSS for structure and presentation
• Displaying and manipulating pages using the Document Object Model
• Using the browser’s XMLHttpRequest object to transfer data between the client and the server
• Using XML as the format for the data flowing between the client and server
• And finally, using JavaScript to dynamically display and interact with all of the above
An Ajax application places an intermediary between the user and the server. This Ajax engine (also known as the JavaScript part of a Web page) provides an interface to the user (in concert, of course, with HTML and CSS), and if a user action doesn’t require a request to the server (for example, displaying data that is already local), the Ajax engine responds. This allows the browser to react immediately to many user actions and makes the Web page act with the snappiness we’ve come to expect from our desktop programs. If the user action does require a server call, the Ajax engine performs it asynchronously, that is, without making the user wait for the server response; the user can continue to interact with the application, and the engine updates the page when the requested data arrives. The important part is that the user’s actions don’t come to a screeching halt while waiting for the server.
As the technique evolved, not all of the pieces had to be in place to call something an Ajax application, and this is where the confusion and disagreements set in. In fact, even the authors disagree about this:
Tom says, “I’m fine with just manipulating the page with the DOM, HTML and CSS, and JavaScript and calling it Ajax. There are tons of effects that people are referring to as Ajax, and the whole look of modern sites has changed because of this approach. The change from the static Web to the dynamic Web page, which is sometimes called Web 2.0, owes its look and feel to the Ajax approach, whether or not there’s a server call behind the scenes. Maybe calling it Ajax won’t please the purists, but it’s good enough for me.”
Dori, who’s the real JavaScript programmer in the family, says: “To call it Ajax, you need to transfer some data between the client and server. Otherwise, what’s so new about it?”
Dori’s writing the code, so for the most part in this chapter we’re sticking to her sensibilities as to what an Ajax application is and what it should do. But elsewhere, we’ll show you how to add some great (but still useful, not just flashy) Web 2.0–style eye candy to your sites.
Now, let’s talk a little about what’s not Ajax. Because you can do some cool visual effects on Web pages using Ajax, some people think that Ajax is anything you can do that looks good on a page, leading them to refer to things like interfaces made in Flash as “Ajax.” But just saying it doesn’t make it so. Ajax is not about loading up your sites with cute user interface widgets and adding user interface tweaks that are cool but that change or break behaviors that people are used to with Web pages.
That leads us to problems with Ajax, and they can be significant. For example, to work correctly, an Ajax site needs to be running in a modern browser (for a list, see the back cover of this book). It also requires JavaScript. So what do you do about people using older browsers or who have turned JavaScript off? Or what about disabled users, or people who may be browsing your site with limited-capability handheld devices such as mobile phones or pads? The answer is that you must write your sites to degrade gracefully, meaning that users with less-capable browsers get a subset of your site’s functionality, or, at the minimum, get a meaningful error message explaining why they can’t use your site.
Another potential problem with Ajax applications is that they may break the expected behavior of the browser’s back button. With a static page, users expect that clicking the back button will move the browser to the last page it loaded. But because Ajax-enabled pages are dynamically updated, that might not be a valid expectation. There are solutions for the “back button problem,” and before you dive wholeheartedly into Ajax, you should take the problem and its solutions into account.
Additionally, Ajax is not dependent on specific server-side technologies. There are a number of companies that are using the Ajax boom to try to sell their own server-side solutions, and that’s what they’re in business to do—but there’s no reason why their products are required. So long as what’s on the back end is something that your JavaScript can read (XML, ideally), you’re fine. Just because the guys in the snappy suits (cough IBM cough) want to hitch their buzzword-compliant products to Ajax’s success in order to get you to buy doesn’t mean that you have to fall for it.
Listing 13.1. The HTML for the text and XML file request example.
<!DOCTYPE html>
<html>
<head>
<title>My First Ajax Script</title>
<script src="script01.js"></script>
</head>
<body>
<p>
<a id="makeTextRequest" href="gAddress.txt">Request a text file</a><br>
<a id="makeXMLRequest" href="us-states.xml">Request an XML file</a>
</p>
<div id="updateArea"> </div>
</body>
</html>
Listing 13.2. This JavaScript gets the files from the server.
window.onload = initAll;
var xhr = false;
function initAll() {
  document.getElementById("makeTextRequest").onclick = getNewFile;
  document.getElementById("makeXMLRequest").onclick = getNewFile;
}
function getNewFile() {
  makeRequest(this.href);
  return false;
}
function makeRequest(url) {
if (window.XMLHttpRequest) {
  xhr = new XMLHttpRequest();
}
else {
if (window.ActiveXObject) {
  try {
    xhr = new ActiveXObject("Microsoft.XMLHTTP");
  }
  catch (e) { }
}
}
if (xhr) {
  xhr.onreadystatechange = showContents;
  xhr.open("GET", url, true);
  xhr.send(null);
}
else {
  document.getElementById("updateArea").innerHTML = "Sorry, but I couldn't create an XMLHttpRequest";
}
}
function showContents() {
if (xhr.readyState == 4) {
  if (xhr.status == 200) {
if (xhr.responseXML && xhr.responseXML.childNodes.length > 0) {
  var outMsg = getText(xhr.responseXML.getElementsByTagName("choices")[0]);
}
else {
  var outMsg = xhr.responseText;
}
}
else {
  var outMsg = "There was a problem with the request " + xhr.status;
}
document.getElementById("updateArea").innerHTML = outMsg;
}
function getText(inVal) {
if (inVal.textContent) {
  return inVal.textContent;
}
return inVal.text;
}
}
Reading Server Data
We begin our exploration of Ajax with the basics: using the XMLHttpRequest object to retrieve and display information from a server.
To get the job done, we’ll use Listings 13.1 (HTML) and 13.2 (JavaScript). There are two possible files that can be read: the plain text file that is shown in Listing 13.3 and the XML file that is Listing 13.4.
To request server data
1. var xhr = false;
In Listing 13.2, the xhr variable is one that you’ll be seeing a lot of in this chapter. It’s an XMLHttpRequest object (or it will be later, after it’s initialized). At this point, we just need to create it outside any functions in order to make it globally available.
2. function initAll() {
document.getElementById("makeTextRequest").onclick = getNewFile;
document.getElementById("makeXMLRequest").onclick = getNewFile;
}
When the page is first loaded, it knows to call the initAll() function. Here, we set two onclick handlers so that when a user clicks either of the links, the getNewFile() function is triggered.
3. function getNewFile() {
makeRequest(this.href);
return false;
}
Someone’s clicked a link, so it’s time to do something. Here, that something is to call makeRequest()—but that function needs to know which file was requested. Thankfully, we know that that information is tucked away in this.href, so we can pass it along. When we come back, we know we’re done, so we return a value of false, telling the browser that no, we don’t really want to load up a new Web page.
4. if (window.XMLHttpRequest) {
xhr = new XMLHttpRequest();
}
Now, we’re inside makeRequest(), and it’s here that things get interesting. Modern browsers support a native XMLHttpRequest object as a property of window. So, we check to see if that property exists, and if it does, we create a new XMLHttpRequest object.
5. if (window.ActiveXObject) {
try {
xhr = new ActiveXObject("Microsoft.XMLHTTP");
}
catch (e) { }
}
However, there’s a browser that supports XMLHttpRequest that doesn’t have a native version of the object, and that’s Microsoft Internet Explorer (versions 5.5 and 6). In that case, we have to check to see if the browser supports ActiveX. If it does, we then check (using a try/catch error check) to see if we can create an XMLHttpRequest object based on ActiveX. If we can, great.
Listing 13.3. The requested text file.
Four score and seven years ago our fathers brought forth on this continent, a new nation, conceived in Liberty, and dedicated to the proposition that all men are created equal.
Now we are engaged in a great civil war, testing whether that nation, or any nation so conceived and so dedicated, can long endure. We are met on a great battle-field of that war. We have come to dedicate a portion of that field, as a final resting place for those who here gave their lives that that nation might live. It is altogether fitting and proper that we should do this.
But, in a larger sense, we can not dedicate -- we can not consecrate -- we can not hallow -- this ground. The brave men, living and dead, who struggled here, have consecrated it, far above our poor power to add or detract. The world will little note, nor long remember what we say here, but it can never forget what they did here. It is for us the living, rather, to be dedicated here to the unfinished work which they who fought here have thus far so nobly advanced. It is rather for us to be here dedicated to the great task remaining before us -- that from these honored dead we take increased devotion to that cause for which they gave the last full measure of devotion -- that we here highly resolve that these dead shall not have died in vain -- that this nation, under God, shall have a new birth of freedom -- and that government of the people, by the people, for the people, shall not perish from the earth.
6. if (xhr) {
xhr.onreadystatechange = showContents;
xhr.open("GET", url, true);
xhr.send(null);
}
Either way, we should have a new xhr object, and if we do, we need to do something (in fact, three somethings) with it. Here are the three things that we always do with xhr:
• Set the xhr’s onreadystatechange event handler. Any time the xhr.readyState property changes its value, this handler is triggered.
• We call open() and pass in three parameters: an HTTP request method (e.g., "GET", "POST", or "HEAD"), a URL to a file on the server, and a Boolean telling the server if the request is asynchronous (that is, if we’re sitting around waiting for it).
• And finally, we send() the request we just created. If we were requesting a POST, the parameters would be passed here.
7. else {
document.getElementById("updateArea").innerHTML = "Sorry, but I couldn't create an XMLHttpRequest";
}
If we end up here, we couldn’t create an XMLHttpRequest for some reason, and there’s nothing else that can be done.
8. if (xhr.readyState == 4) {
if (xhr.status == 200) {
Now we’re down in the showContents() function. The readyState property can have one of several values (see Table 13.1), and every time the server changes its value, the showContents() function is triggered. However, we don’t actually want to do anything (at least not here) until the request is finished, so we start off by checking to see if readyState is 4. If it is, we’re good to go, and we can check to see what the request returned.
Table 13.1. readyState Property Values
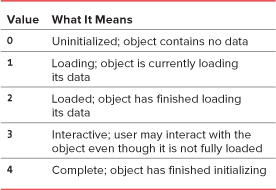
The first thing to check is the request’s status, which will be a result code returned by the server (servers routinely return these codes behind the scenes for every file served, although browsers only show them to you if there’s an error). A status code of 200 means that everything’s fine. The status here is the same status that is returned by any server call; for instance, if you ask for a file that doesn’t exist you’ll get a 404 error from the Web server.
9. if (xhr.responseXML && xhr.responseXML.childNodes.length > 0) {
var outMsg = getText(xhr.responseXML.getElementsByTagName("choices")[0]);
}
else {
var outMsg = xhr.responseText;
}
If we’re here, that means that everything is fine, and we want to look at what the server actually gave us. There were two different types of files we could be reading, so we need to check what type of data we got back. The responseXML property contains the data if it’s XML. However, it sometimes contains a value even when the data that came in isn’t XML. If responseXML.childNodes.length is greater than zero (that is, it contains more than just a dummy object), then we know that we’ve got a properly formatted DOM object back, and we can use commands we’ve seen before (such as getElementsByTagName()) to traverse its nodes. In fact, we’ll use just that approach here, and pass its result to the getText() function. The value it returns gets saved in outMsg.
If what we got back isn’t valid XML, then it’s our text file. In that case, we want to put xhr’s responseText property into outMsg.
10. else {
var outMsg = "There was a problem with the request " + xhr.status;
}
If what we got back had a status other than 200, we’ve got a problem, so we set outMsg to say that and append the status error so we can try to figure out what the problem is.
11. document.getElementById("updateArea").innerHTML = outMsg;
And finally, we take outMsg and dump it onto the screen, as shown in ![]() .
.
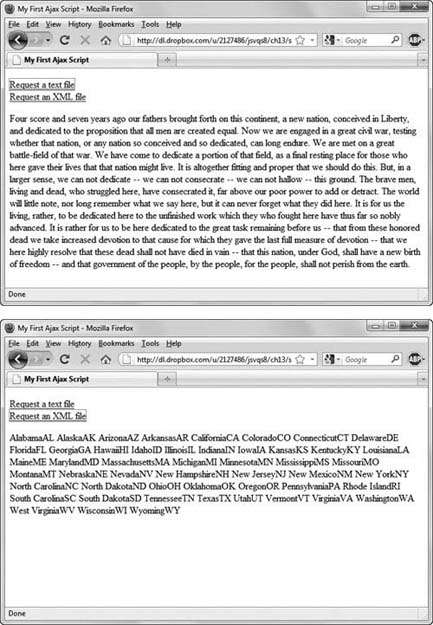
![]() By clicking the appropriate link, you can fetch either a text file of the Gettysburg Address (top) or an XML file of U.S. states and their abbreviations (bottom).
By clicking the appropriate link, you can fetch either a text file of the Gettysburg Address (top) or an XML file of U.S. states and their abbreviations (bottom).
12. if (inVal.textContent) {
return inVal.textContent;
}
return inVal.text;
Here’s getText(); all it does is look to see if whatever came in has a textContent property. If it does, it gets returned; if not, we return its text property instead.
Listing 13.4. This is the XML file that is requested.
<?xml version="1.0"?>
<choices xml:lang="EN">
<item><label>Alabama</label><value>AL</value></item>
<item><label>Alaska</label><value>AK</value></item>
<item><label>Arizona</label><value>AZ</value></item>
<item><label>Arkansas</label><value>AR</value></item>
<item><label>California</label><value>CA</value></item>
<item><label>Colorado</label><value>CO</value></item>
<item><label>Connecticut</label><value>CT</value></item>
<item><label>Delaware</label><value>DE</value></item>
<item><label>Florida</label><value>FL</value></item>
<item><label>Georgia</label><value>GA</value></item>
<item><label>Hawaii</label><value>HI</value></item>
<item><label>Idaho</label><value>ID</value></item>
<item><label>Illinois</label><value>IL</value></item>
<item><label>Indiana</label><value>IN</value></item>
<item><label>Iowa</label><value>IA</value></item>
<item><label>Kansas</label><value>KS</value></item>
<item><label>Kentucky</label><value>KY</value></item>
<item><label>Louisiana</label><value>LA</value></item>
<item><label>Maine</label><value>ME</value></item>
<item><label>Maryland</label><value>MD</value></item>
<item><label>Massachusetts</label><value>MA</value></item>
<item><label>Michigan</label><value>MI</value></item>
<item><label>Minnesota</label><value>MN</value></item>
<item><label>Mississippi</label><value>MS</value></item>
<item><label>Missouri</label><value>MO</value></item>
<item><label>Montana</label><value>MT</value></item>
<item><label>Nebraska</label><value>NE</value></item>
<item><label>Nevada</label><value>NV</value></item>
<item><label>New Hampshire</label><value>NH</value></item>
<item><label>New Jersey</label><value>NJ</value></item>
<item><label>New Mexico</label><value>NM</value></item>
<item><label>New York</label><value>NY</value></item>
<item><label>North Carolina</label><value>NC</value></item>
<item><label>North Dakota</label><value>ND</value></item>
<item><label>Ohio</label><value>OH</value></item>
<item><label>Oklahoma</label><value>OK</value></item>
<item><label>Oregon</label><value>OR</value></item>
<item><label>Pennsylvania</label><value>PA</value></item>
<item><label>Rhode Island</label><value>RI</value></item>
<item><label>South Carolina</label><value>SC</value></item>
<item><label>South Dakota</label><value>SD</value></item>
<item><label>Tennessee</label><value>TN</value></item>
<item><label>Texas</label><value>TX</value></item>
<item><label>Utah</label><value>UT</value></item>
<item><label>Vermont</label><value>VT</value></item>
<item><label>Virginia</label><value>VA</value></item>
<item><label>Washington</label><value>WA</value></item>
<item><label>West Virginia</label><value>WV</value></item>
<item><label>Wisconsin</label><value>WI</value></item>
<item><label>Wyoming</label><value>WY</value></item>
</choices>
Because of the way that Ajax works, when you are doing your development and testing, the files that you’re reading must reside on a server; they can’t just be local files.
Back in step 5, we said that IE 5.5 and 6 used an ActiveX control to create the XMLHttpRequest object. Thankfully, IE versions 7 and up have a native object, so that’s no longer required. However, this means that you always have to check for the existence of a native object first—if you check for window.ActiveXObject first, that will be true for IE7+, and then you’ll be going down the wrong path. A considerable amount of older, pre-IE7 Ajax code has this problem.
If it matters deeply to your code which version of Microsoft’s ActiveX object you actually get, here’s a code snippet for you to use instead:
if (window.ActiveXObject) {
try {
xhr = new ActiveXObject("Msxml2.XMLHTTP");
}
catch (e) {
try {
xhr = new ActiveXObject("Microsoft.XMLHTTP");
}
catch (e) { }
}
This approach attempts to use the IE6 version (Msxml2.XMLHTTP) of the XMLHttpRequest object first and only falls back to the older version if it can’t find it. However, the Microsoft.XMLHTTP version should always give you the latest version available on the PC, so we’ll just be using that in this chapter—because eventually, the older code will be going away.
One drawback of Ajax calls is that they can be cached; that is, it looks like your application is contacting the server and getting new data, but it’s really just looking at stuff it read previously. If that’s the case, setting the headers of the request can help. Adding one or more of these can help force recalcitrant servers to fork over the goods:
xhr.setRequestHeader("If-Modified-Since", "Wed, 15 Jan 1995 01:00:00 GMT");
xhr.setRequestHeader("Cache-Control","no-cache");
xhr.setRequestHeader("Cache-Control","must-revalidate");
xhr.setRequestHeader("Cache-Control","no-store");
xhr.setRequestHeader("Pragma","no-cache");
xhr.setRequestHeader("Expires","0");
You can force the call to return XML data by overriding the MIME type:
xhr.overrideMimeType("text/xml");
However, this may cause problems with certain browsers and configurations, so use it with care.
Listing 13.5. This simple HTML page will be much more impressive with the addition of some JavaScript.
<!DOCTYPE html>
<html>
<head>
<title>My Second Ajax Script</title>
<link rel="stylesheet" href="script02.css">
<script src="script02.js"></script>
</head>
<body>
<div id="pictureBar"> </div>
</body>
</html>
Listing 13.6. Only a little bit of CSS, but it’s needed to make the page look good.
img {
border-width: 0;
margin: 5px;
}
Parsing Server Data
Now that we have data from the server, we need to find the exact information we need and make sure that it is in a format that our Ajax application can use. To do that, we’ll first need to examine the information. Because the data is a nicely structured XML document, our script walks the XML document tree to find and extract the particular data we need and store it in variables. Then, if needed, the script can reformat the data for later use.
The HTML and CSS that are in Listings 13.5 and 13.6 couldn’t be much simpler, so we’re only going to look at the code in the JavaScript file, Listing 13.7. For this task, the XML file is data about photographs stored on Flickr; a portion of the XML can be seen in Listing 13.8.
To parse information from the server
1. xhr.onreadystatechange = showPictures;
xhr.open("GET", "flickrfeed.xml", true);
Every time readyState changes, we want to call the showPictures() function. The file name we want to read off the server is flickrfeed.xml. Both those values are set here.
2. var tempDiv = document.createElement("div");
var tempText = document.createElement("div");
Down in showPictures() is where the real work is done. We start by creating variables to store two elements: tempDiv and tempText, both of which are temporary div placeholders.
3. var allImages = xhr.responseXML.getElementsByTagName("content");
The response back from the server contained XML, so we’re taking that response and looking for every content node. If you take a look at the XML in Listing 13.8, you’ll see that there’s a lot of stuff there that we don’t care about at all—in fact, all we want is what’s in the <a> tags (and really, only half of those). Here, we’ve started to narrow down to just what we want.
4. for (var i=0; i<allImages.length; i++) {
Now we need to loop through all the nodes that we found to get the actual data we want.
5. tempText.innerHTML = getPixVal(allImages[i]);
tempDiv = tempText.getElementsByTagName("p");
Because we’ve got XML data, we can use its textContent (or text, as the case may be) property to get the text of the node via a function we’ll call getPixVal(). Given that, we want to find all the paragraphs inside it—and there should be two of them.
Listing 13.7. The additional JavaScript in this script allows you to parse the data you previously requested.
window.onload = initAll;
var xhr = false;
function initAll() {
if (window.XMLHttpRequest) {
xhr = new XMLHttpRequest();
}
else {
if (window.ActiveXObject) {
try {
xhr = new ActiveXObject("Microsoft.XMLHTTP");
}
catch (e) { }
}
}
if (xhr) {
xhr.onreadystatechange = showPictures;
xhr.open("GET", "flickrfeed.xml", true);
xhr.send(null);
}
else {
alert("Sorry, but I couldn't create an XMLHttpRequest");
}
}
function showPictures() {
var tempDiv = document.createElement("div");
var tempText = document.createElement("div");
if (xhr.readyState == 4) {
if (xhr.status == 200) {
var allImages = xhr.responseXML.getElementsByTagName("content");
for (var i=0; i<allImages.length; i++) {
tempText.innerHTML = getPixVal(allImages[i]);
tempDiv = tempText.getElementsByTagName("p");
var theText = tempDiv[1].innerHTML;
theText = theText.replace(/240/g,"75");
theText = theText.replace(/180/g,"75");
theText = theText.replace(/_m/g,"_s");
document.getElementById("pictureBar").innerHTML += theText;
}
}
else {
alert("There was a problem with the request " + xhr.status);
}
}
function getPixVal(inVal) {
return (inVal.textContent) ? inVal.textContent : inVal.text;
}
}
6. var theText = tempDiv[1].innerHTML;
theText = theText.replace(/240/g,"75");
theText = theText.replace(/180/g,"75");
theText = theText.replace(/_m/g,"_s");
As previously mentioned, we only want half the <a> nodes, so we winnow out the ones here that we don’t want. In a file with information about 20 photos, there will be 20 <content> nodes, each of which contains two paragraphs. Each <content> node contains the photographer’s name (linked to their Flickr page), followed by an image that links to the Flickr-hosted version. We want just the latter, so we can just take the innerHTML from the second item in the tempDiv array, which gives us the <a> inside the paragraph (and the <img> tag it contains, as well).
Next, we’re using regular expressions to tweak the results. Flickr has sent us the tags for the medium-sized version of the image, but we only want the thumbnail version. Because our images are either 240 wide by 180 tall or 180 wide by 240 tall (that is, they’re either horizontal or vertical), and we know the thumbnails are always 75 × 75, we just find any use of the numbers 240 or 180 in the text and change them to 75. We finish up by changing the image name itself; Flickr gives the medium-sized version a name that ends with _m, while the small version ends with _s, so we can just swap one for the other.
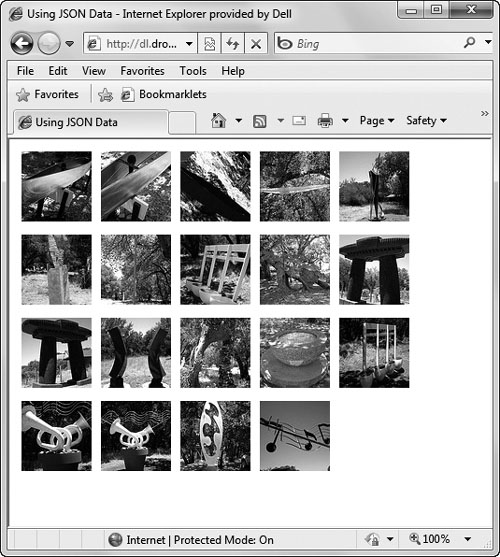
7. document.getElementById("pictureBar").innerHTML += theText;
Inside the loop, we take the now-modified node that we want and then append it onto the HTML page’s pictureBar. The end result is as we see it in ![]() , where every thumbnail image on the page is a link back to the full-sized version.
, where every thumbnail image on the page is a link back to the full-sized version.

![]() These thumbnail images were read from Flickr.
These thumbnail images were read from Flickr.
8. return (inVal.textContent) ? inVal.textContent : inVal.text;
Here’s the entire contents of the getPixVal() function—fundamentally, it’s identical to the getText() function seen in Listing 13.2, except that it uses an alternate syntax (covered back in Chapter 2’s “There’s No One Right Way” sidebar).
While you can’t read a data file that’s stored on another server (see the “Getting Your Data” sidebar for more about why that’s the case), you can always have your HTML file load information from another server. Here, your Web page, no matter where it is, is able to display images from Flickr’s servers.
One of the best things about the Web 2.0 dot-coms is that they understand that people want access to data—and not just their own data, but other people’s data (when they’ve agreed to make it public) as well. For instance, it’s possible to search Flickr for all the photographs containing the tags “Hawaii” and “sunset,” and then get the result as an XML file. Combine that with this script or the next, and you’ll always have new and lovely photos on your page.
Listing 13.8. This is an edited and shortened version of the XML file that Flickr provides; the original was approximately 500 lines long!
<?xml version="1.0" encoding="utf-8" standalone="yes"?>
<feed xmlns="http://www.w3.org/2005/Atom"
xmlns:dc="http://purl.org/dc/elements/1.1/" xmlns:flickr="urn:flickr:" xmlns:media="http://search.yahoo.com/mrss/">
<title>Content from Paradise Ridge Sculpture Grove</title>
<link rel="self" href="http://api.flickr.com/services/feeds/photoset.gne?set=72157600976524175&nsid=23922109@N00&lang=en-us" />
<link rel="alternate" type="text/html" href="http://www.flickr.com/photos/dorismith/sets/72157600976524175"/>
<id>tag:flickr.com,2005:http://www.flickr.com/photos/23922109@N00/sets/72157600976524175</id>
<icon>http://farm2.static.flickr.com/1335/882568164_72eee9b41f_s.jpg</icon>
<subtitle>The <a href="http://www.paradiseridgewinery.com/">Paradise Ridge Winery</a> not only has great wines, but they also have a sculpture garden. We visited on 22 July 2007.</subtitle>
<updated>2007-07-24T05:19:08Z</updated>
<generator uri="http://www.flickr.com/">Flickr</generator>
<entry>
<title>IMG_0045.JPG</title>
<link rel="alternate" type="text/html" href="http://www.flickr.com/photos/dorismith/882590644/in/set-72157600976524175/"/>
<id>tag:flickr.com,2005:/photo/882590644/in/set-72157600976524175</id>
<published>2007-07-24T05:19:08Z</published>
<updated>2007-07-24T05:19:08Z</updated>
<dc:date.Taken>2007-07-22T13:42:49-08:00</dc:date.Taken>
<content type="html"><p><a href="http://www.flickr.com/people/dorismith/">Dori Smith</a> posted a photo:</p><p><a href="http://www.flickr.com/photos/dorismith/882590644/" title="IMG_0045.JPG"><img src="http://farm2.static.flickr.com/1063/882590644_5a4a0d89f3_m.jpg" width="240" height="180" alt="IMG_0045.JPG"/></a></p>
</content>
<author>
<name>Dori Smith</name>
<uri>http://www.flickr.com/people/dorismith/</uri>
</author>
<link rel="enclosure" type="image/jpeg" href="http://farm2.static.flickr.com/1063/882590644_5a4a0d89f3_m.jpg" />
<category term="winery" scheme="http://www.flickr.com/photos/tags/" />
<category term="sonomacounty" scheme="http://www.flickr.com/photos/tags/" />
<category term="sculptures" scheme="http://www.flickr.com/photos/tags/" />
<category term="dorismith" scheme="http://www.flickr.com/photos/tags/" />
<category term="paradiseridge" scheme="http://www.flickr.com/photos/tags/" />
<category term="paradiseridgesculptures" scheme="http://www.flickr.com/photos/tags/" />
</entry>
<entry>
<title>IMG_0032.JPG</title>
<link rel="alternate" type="text/html" href="http://www.flickr.com/photos/dorismith/882568164/in/set-72157600976524175/"/>
<id>tag:flickr.com,2005:/photo/882568164/in/set-72157600976524175</id>
<published>2007-07-24T05:15:14Z</published>
<updated>2007-07-24T05:15:14Z</updated>
<dc:date.Taken>2007-07-22T13:35:09-08:00</dc:date.Taken>
<content type="html"><p><a href="http://www.flickr.com/people/dorismith/">Dori Smith</a> posted a photo:</p><p><a href="http://www.flickr.com/photos/dorismith/882568164/" title="IMG_0032.JPG"><img src="http://farm2.static.flickr.com/1335/882568164_72eee9b41f_m.jpg" width="240" height="180" alt="IMG_0032.JPG" /></a></p>
</content>
<author>
<name>Dori Smith</name>
<uri>http://www.flickr.com/people/dorismith/</uri>
</author>
<link rel="enclosure" type="image/jpeg" href="http://farm2.static.flickr.com/1335/882568164_72eee9b41f_m.jpg" />
<category term="winery" scheme="http://www.flickr.com/photos/tags/" />
<category term="sonomacounty" scheme="http://www.flickr.com/photos/tags/" />
<category term="sculptures" scheme="http://www.flickr.com/photos/tags/" />
<category term="dorismith" scheme="http://www.flickr.com/photos/tags/" />
<category term="paradiseridge" scheme="http://www.flickr.com/photos/tags/" />
<category term="paradiseridgesculptures" scheme="http://www.flickr.com/photos/tags/" />
</entry>
</feed>
Refreshing Server Data
Our Ajax application has fetched information from the server and then parsed the data and acted upon it. Now we’ll show you how to make the application retrieve a new version of the data from the server, which automatically refreshes the page. Listing 13.9 contains the necessary JavaScript.
To refresh server information
1. function getPix() {
xhr.open("GET", "flickrfeed.xml", true);
xhr.onreadystatechange = showPictures;
xhr.send(null);
setTimeout(getPix,5 * 1000);
}
Where the previous script did the xhr call inside initAll(), this script pushes it down into its own function, getPix(). There’s one addition: the setTimeout() afterwards. Five seconds after the script has grabbed a random image, it goes and gets another.
Listing 13.9. Use this script to automatically refresh server information.
window.onload = initAll;
var xhr = false;
function initAll() {
if (window.XMLHttpRequest) {
xhr = new XMLHttpRequest();
}
else {
if (window.ActiveXObject) {
try {
xhr = new ActiveXObject("Microsoft.XMLHTTP");
}
catch (e) { }
}
}
if (xhr) {
getPix();
}
else {
alert("Sorry, but I couldn't create an XMLHttpRequest");
}
}
function getPix() {
xhr.open("GET", "flickrfeed.xml", true);
xhr.onreadystatechange = showPictures;
xhr.send(null);
setTimeout(getPix, 5 * 1000);
}
function showPictures() {
var tempText = document.createElement("div");
if (xhr.readyState == 4) {
if (xhr.status == 200) {
var allImages = xhr.responseXML.getElementsByTagName("content");
var randomImg = Math.floor(Math.random() * allImages.length);
tempText.innerHTML = getPixVal(allImages[randomImg]);
var thisImg = tempText.getElementsByTagName("p")[1];
document.getElementById("pictureBar").innerHTML = thisImg.innerHTML;
}
else {
alert("There was a problem with the request " + xhr.status);
}
}
function getPixVal(inVal) {
return (inVal.textContent) ? inVal.textContent : inVal.text;
}
}
2. var randomImg = Math.floor(Math.random() * allImages.length);
tempText.innerHTML = getPixVal(allImages[randomImg]);
var thisImg = tempText.getElementsByTagName("p")[1];
Instead of looping as we did in the previous task, this time we only want a single, random image. We start by calculating a random number between zero and one less than the number of images, using Math.random() and Math.floor() as we did back in Chapter 4 in “Displaying a Random Image.” We use that random number as an index into the allImages array, getting our precise node from the getPixVal() function.
3. document.getElementById("pictureBar").innerHTML = thisImg.innerHTML;
Now that we’ve got our single image, we put that into our Web page ![]() .
.

![]() The script fetches one image after another.
The script fetches one image after another.
You might wonder why this script bothers to read from the same XML file every time—after all, if the file isn’t changing, why not just keep the data in variables after the first time through? If you keep in mind the technique referred to in the previous sidebar (“Getting Your Data”), you’ll then realize that the XML file could be changing at any point. Say your server-side program grabs a new version of the XML file every few minutes—why should anyone have to wait to see the latest pictures? This way, your site’s visitors always get the latest possible version.
If you take the approach just mentioned, you’re likely to run into the Ajax drawback covered earlier in this chapter: caching. Different browsers (and different versions, and different platforms) all have their own unique caching peculiarities, most of which are solved by modifying the headers as discussed earlier. Another solution many recommend is to change the GET to a POST. But here’s what we’ve found that works: instead of the order they’re seen in Listing 13.2, we’ve swapped the order of open() and onreadystatechange in Listing 13.9, as shown above in step 1.
Listing 13.10. The trick to your JavaScript is adding the remote script tag to this HTML page.
<!DOCTYPE html>
<html>
<head>
<title>Using JSON Data</title>
<link rel="stylesheet" href="script02.css">
<script src="script04.js"></script>
<script src="http://api.flickr.com/services/feeds/photoset.gne?nsid=23922109@N00&set=72157600976524175&format=json"></script>
</head>
<body>
<div id="pictureBar"> </div>
</body>
</html>
Listing 13.11. Our JavaScript file can be short because most of the work is being done by the remote server.
window.onload = initAll;
var imgDiv = "";
function initAll() {
document.getElementById("pictureBar").innerHTML = imgDiv;
}
function jsonFlickrFeed(flickrData) {
for (var i=0; i<flickrData.items.length; i++) {
  imgDiv += "<img src='";
  imgDiv += flickrData.items[i].media.m.replace(/_m/g,"_s");
  imgDiv += "' alt='" + flickrData.items[i].title + "'>";
}
}
Getting Data From a Server
As mentioned in the earlier sidebar “Getting Your Data,” Ajax limits from where you can read data. After all, you don’t want everyone in the world reading any file you have, right? But there are some cases where a company may want people to read files and then be able to create their own content on their own sites. For instance, Flickr (as seen in the previous examples) lets your server get their XML files, and what you do next is only up to your imagination.
But sometimes you don’t have that kind of access to a server—so Flickr has made files available in another format: JavaScript Object Notation, known as JSON (pronounced like the name Jason). The neat trick here is in the HTML file, Listing 13.10; the JavaScript file (Listing 13.11) just takes advantage of it.
To read and parse server data
1. <script src="http://api.flickr.com/services/feeds/photoset.gne?nsid=23922109@N00&set=72157600976524175&format=json"></script>
Remember how we said earlier that a script can only read files from the same server on which it resides? That’s still true—but there’s nothing that says that you can’t call a script file that itself is on another server. In this case, the script is on the api.flickr.com machine, and therefore, it can read in data from that server.
2. document.getElementById("pictureBar").innerHTML = imgDiv;
Back over in the JavaScript file, this single line of code puts all the images onto the page when it loads, as seen in ![]() .
.
![]() Not only do the images come from Flickr’s servers, but so does the data used to create the page.
Not only do the images come from Flickr’s servers, but so does the data used to create the page.
3. function jsonFlickrFeed(flickrData) {
By now, you’re surely wondering where all the code is that sets up the images, and here’s the other part of the slick functionality: it’s mostly in the data file itself (Listing 13.12). What JSON gets you is a data file that contains code that JavaScript recognizes. In this case, the data file says that it’s expecting to find a function named jsonFlickrFeed(), so here we’ve created one. Whatever name we give the parameter coming in is where the data itself is stored.
4. for (var i=0; i<flickrData.items.length; i++) {
imgDiv += "<img src='";
imgDiv += flickrData.items[i].media.m.replace(/_m/g,"_s");
imgDiv += "' alt='" + flickrData.items[i].title + "'>";
}
Because we have the data in a format that JavaScript already understands, we don’t have much work to do. Here, we loop through all the images in the items array, building one large text string that will (in step 2, above) be displayed on the screen. Each element in items has a variety of information about an image, but all we want is the URL, which is stored in media.m. And once again, a little bit of regular expression magic turns our medium-sized image into a thumbnail.
Listing 13.12. An excerpt of the JSON file—note that it’s about half the size of the XML file, while including all the same data.
jsonFlickrFeed({
"title": "Content from Paradise Ridge Sculpture Grove",
"link": "http://www.flickr.com/photos/dorismith/sets/72157600976524175",
"description": "The <a href="http://www.paradiseridgewinery.com/">Paradise Ridge Winery</a> not only has great wines, but they also have a sculpture garden. We visited on 22 July 2007.",
"modified": "2007-07-24T05:19:08Z",
"generator": "http://www.flickr.com/",
"items": [
{
"title": "IMG_0045.JPG",
"link": "http://www.flickr.com/photos/dorismith/882590644/in/set-72157600976524175/",
"media": {"m":"http://farm2.static.flickr.com/1063/882590644_5a4a0d89f3_m.jpg"},
"date_taken": "2007-07-22T13:42:49-08:00",
"description": "<p><a href="http://www.flickr.com/people/dorismith/">Dori Smith</a> posted a photo:</p> <p><a href="http://www.flickr.com/photos/dorismith/882590644/" title="IMG_0045.JPG"><img src="http://farm2.static.flickr.com/1063/882590644_5a4a0d89f3_m.jpg" width="240" height="180" alt="IMG_0045.JPG" /></a></p> ",
"published": "2007-07-24T05:19:08Z",
"author": "[email protected] (Dori Smith)",
"author_id": "23922109@N00",
"tags": "winery sonomacounty sculptures dorismith paradiseridge paradiseridgesculptures"
},
{
"title": "IMG_0032.JPG",
"link": "http://www.flickr.com/photos/dorismith/882568164/in/set-72157600976524175/",
"media": {"m":"http://farm2.static.flickr.com/1335/882568164_72eee9b41f_m.jpg"},
"date_taken": "2007-07-22T13:35:09-08:00",
"description": "<p><a href="http://www.flickr.com/people/dorismith/">Dori Smith</a> posted a photo:</p> <p><a href="http://www.flickr.com/photos/dorismith/882568164/" title="IMG_0032.JPG"><img src="http://farm2.static.flickr.com/1335/882568164_72eee9b41f_m.jpg" width="240" height="180" alt="IMG_0032.JPG" /></a></p> ",
"published": "2007-07-24T05:15:14Z",
"author": "[email protected] (Dori Smith)",
"author_id": "23922109@N00",
"tags": "winery sonomacounty sculptures dorismith paradiseridge paradiseridgesculptures"
}
]
})
If you’re wondering why JSON sounds slightly familiar, we introduced it when covering Object Literals in Chapter 10. The JSON format itself is a subset of the object literal. And if JSON doesn’t sound familiar, you might want to go back and review that section to learn more.
You won’t always use exactly the URL that’s in step 1; in fact, if you do, you’ll just get the same results shown on this page. Flickr allows you to put in many combinations of tags, sets, and groups so that you’ll get personalized results. Go to Flickr, find the Web page that matches what you want in your images file, and find the feed directions on that page. Once you’ve got that, just add &format=json to the end of the URL, and you should be set.
Another name for the function in step 3 is a callback. So long as you put your code into a correctly named callback function, it will run—but give it a name that’s even slightly off and nothing at all will happen.
Previewing Links with Ajax
There’s a handy and great-looking visual effect that many sites use, where, when you hover the mouse pointer over a link, the first few lines of the page that is the link’s destination appear in a floating window under the cursor ![]() . This turns out to be a fairly easy-to-create Ajax application. You’ll find the HTML in Listing 13.13, the CSS in Listing 13.14, and the JavaScript in Listing 13.15.
. This turns out to be a fairly easy-to-create Ajax application. You’ll find the HTML in Listing 13.13, the CSS in Listing 13.14, and the JavaScript in Listing 13.15.
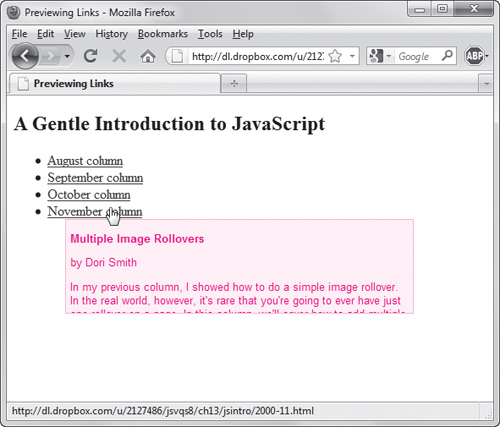
![]() When you hover over a link, this script reads the HTML file on the server and gives you an overlay containing a preview of the first few lines of the file.
When you hover over a link, this script reads the HTML file on the server and gives you an overlay containing a preview of the first few lines of the file.
Listing 13.13. This HTML builds the page for the preview example.
<!DOCTYPE html>
<html>
<head>
<title>Previewing Links</title>
<link rel="stylesheet" href="script05.css">
<script src="script05.js"></script>
</head>
<body>
<h2>A Gentle Introduction to JavaScript</h2>
<ul>
<li><a href="jsintro/2000-08.html"> August column</a></li>
<li><a href="jsintro/2000-09.html"> September column</a></li>
<li><a href="jsintro/2000-10.html"> October column</a></li>
<li><a href="jsintro/2000-11.html"> November column</a></li>
</ul>
<div id="previewWin"> </div>
</body>
</html>
To use Ajax to preview links
1. var allLinks = document.getElementsByTagName("a");
for (var i=0; i< allLinks.length; i++) {
allLinks[i].onmouseover = getPreview;
}
Here’s our initAll() function, which simply plows through all the links on the page and adds an onmouseover event handler to each. This (as you’ll see, below) will read the destination page and display a preview for the (possible) visitor.
2. if (evt) {
var url = evt.target;
}
else {
evt = window.event;
var url = evt.srcElement;
}
xPos = parseInt(evt.clientX);
yPos = parseInt(evt.clientY);
Here in getPreview(), the first thing we need to do is figure out what file we want to read, and that’s done by looking at the event’s properties. Depending on which browser your visitor is using, the URL is in either evt.target or window.event.srcElement. Once we’ve got that, we can grab the x and y positions of the mouse for later use.
3. function hidePreview() {
document.getElementById("previewWin").style.visibility = "hidden";
}
If we’re going to show a preview, we’ll need to hide it again, right? Here’s hidePreview(), and all it does is set the preview window back to its hidden level of visibility.
4. var prevWin = document.getElementById("previewWin");
if (xhr.readyState == 4) {
Having used Ajax to read the file, we’re now down in the showContents() function. We store the previewWin element for later use in prevWin, and when xhr.readyState is 4, it’s time to show off.
Listing 13.14. This CSS styles the preview pop-up.
#previewWin {
background-color: #FF9;
width: 400px;
height: 100px;
font: .8em arial, helvetica, sans-serif;
padding: 5px;
position: absolute;
visibility: hidden;
top: 10px;
left: 10px;
border: 1px #CC0 solid;
clip: auto;
overflow: hidden;
}
#previewWin h1, #previewWin h2 {
font-size: 1.0em;
}
Listing 13.15. The JavaScript that allows the server request and the appearance of the pop-up.
window.onload = initAll;
var xhr = false;
var xPos, yPos;
function initAll() {
var allLinks = document.getElementsByTagName("a");
for (var i=0; i< allLinks.length; i++) {
  allLinks[i].onmouseover = getPreview;
}
}
function getPreview(evt) {
if (evt) {
  var url = evt.target;
}
else {
  evt = window.event;
  var url = evt.srcElement;
}
xPos = parseInt(evt.clientX);
yPos = parseInt(evt.clientY);
if (window.XMLHttpRequest) {
xhr = new XMLHttpRequest();
}
else {
if (window.ActiveXObject) {
try {
xhr = new ActiveXObject("Microsoft.XMLHTTP");
}
catch (e) { }
}
}
if (xhr) {
xhr.onreadystatechange = showContents;
xhr.open("GET", url, true);
xhr.send(null);
}
else {
alert("Sorry, but I couldn't create an XMLHttpRequest");
}
}
function hidePreview() {
  document.getElementById("previewWin").style.visibility = "hidden";
}
function showContents() {
var prevWin = document.getElementById("previewWin");

if (xhr.readyState == 4) {
if (xhr.status == 200) {
  prevWin.innerHTML = xhr.responseText;
}
else {
  prevWin.innerHTML = "There was a problem with the request " + xhr.status;
}
prevWin.style.top = yPos+2 + "px";
prevWin.style.left = xPos+2 + "px";
prevWin.style.visibility = "visible";
prevWin.onmouseout = hidePreview;
}
}
5. if (xhr.status == 200) {
prevWin.innerHTML = xhr.responseText;
}
else {
prevWin.innerHTML = "There was a problem with the request " + xhr.status;
}
prevWin.style.top = yPos+2 + "px";
prevWin.style.left = xPos+2 + "px";
prevWin.style.visibility = "visible";
prevWin.onmouseout = hidePreview;
If everything’s fine, then xhr.status is 200 and the data we want to put into prevWin.innerHTML is in xhr.responseText. If not, we put the error message there instead.
Once that’s done, it’s simply a matter of figuring out where to place the preview window, and that’s where those x and y mouse coordinates come in handy. It’s a pop-up, so we put it just below and to the right (2 pixels over and 2 down) of the cursor position that triggered this call.
Lastly, we set prevWin to be visible, and we let JavaScript know that prevWin should be hidden when the cursor moves off the preview.
The data being read is in HTML format. Putting xhr.responseText into innerHTML tells the browser that when the preview window displays, it should interpret the HTML as, well, HTML. If you wanted something else to display (say, for instance, that you wanted to see the actual source of the page), you could modify what’s in innerHTML before displaying the preview.
Ajax requires that the file being read reside on the same server—but it doesn’t require that it be in the same directory. If the page you’re reading in is in a different directory, and the page contains relative links, then those links will not work. If your pages refer to a particular CSS file, or images, or JavaScript, you won’t be able to preview those particular parts of the file. The same solution applies here as well: modify prevWin.innerHTML before displaying it.
Listing 13.16. This simple HTML provides the form field that will be auto-completed.
<!DOCTYPE html>
<html>
<head>
<title>Auto-fill Form Fields</title>
<link rel="stylesheet" href="script06.css">
<script src="script06.js"></script>
</head>
<body>
<form action="#">
Please enter your state:<br>
<input type="text" id="searchField" autocomplete="off"><br>
<div id="popups"> </div>
</form>
</body>
</html>
Auto-Completing Form Fields
A first-rate way to help your site’s visitors is to lessen the drudgery of data entry into fields. Helping them fill out forms that have a large number of choices saves them time and effort, and additionally helps provide your site with valid data.
For this example, Listing 13.16 (HTML), Listing 13.17 (CSS), and Listing 13.18 (JavaScript) automatically show a list of U.S. states that match the letters the user types into a form field ![]() . As the user continues typing, the list shrinks until there is only one state left; this is then automatically put into the entry field, and the list goes away.
. As the user continues typing, the list shrinks until there is only one state left; this is then automatically put into the entry field, and the list goes away.
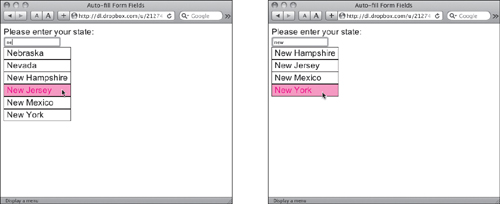
![]() As you type, the number of possible choices narrows.
As you type, the number of possible choices narrows.
To build auto-completing form fields
1. Please enter your state:<br>
<input type="text" id="searchField" autocomplete="off"><br>
<div id="popups"> </div>
Here’s the bit of HTML that we care about. It’s the one tricky (and non-standards-compliant) part: that autocomplete attribute. It tells browsers not to do any auto-completion on this field, as we’ll be handling it with the script. While it isn’t part of any W3C recommendations, autocomplete, like XMLHttpRequest itself, has excellent cross-browser support.
2. document.getElementById("searchField").onkeyup = searchSuggest;
In order to grab and process each keystroke, we need an event handler, and here’s ours, set in initAll().
3. xhr.onreadystatechange = setStatesArray;
xhr.open("GET", "us-states.xml", true);
xhr.send(null);
Unlike those photographs earlier in this chapter, the names of the United States aren’t likely to change. We can read the XML file (Listing 13.3) in once, initialize our array, and safely assume that our list will still be valid at the end of this session.
Listing 13.17. The CSS here styles the search field and the pop-up menu.
body, #searchfield {
font: 1.2em arial, helvetica, sans-serif;
}
.suggestions {
background-color: #FFF;
padding: 2px 6px;
border: 1px solid #000;
}
.suggestions:hover {
background-color: #69F;
}
#popups {
position: absolute;
}
#searchField.error {
background-color: #FFC;
}
Listing 13.18. This JavaScript handles the server request and the pop-up display.
window.onload = initAll;
var xhr = false;
var statesArray = new Array();
function initAll() {
document.getElementById("searchField").onkeyup = searchSuggest;
if (window.XMLHttpRequest) {
xhr = new XMLHttpRequest();
}
else {
if (window.ActiveXObject) {
try {
xhr = new ActiveXObject("Microsoft.XMLHTTP");
}
catch (e) { }
}
}
if (xhr) {
xhr.onreadystatechange = setStatesArray;
xhr.open("GET", "us-states.xml", true);
xhr.send(null);
}
else {
alert("Sorry, but I couldn't create an XMLHttpRequest");
}
}
function setStatesArray() {
if (xhr.readyState == 4) {
if (xhr.status == 200) {
if (xhr.responseXML) {
  var allStates = xhr.responseXML.getElementsByTagName("item");
  for (var i=0; i<allStates.length; i++) {
    statesArray[i] = allStates[i].getElementsByTagName("label")[0].firstChild;
  }
}
}
else {
alert("There was a problem with the request " + xhr.status);
}
}
}
function searchSuggest() {
var str = document.getElementById("searchField").value;
document.getElementById("searchField").className = "";
if (str != "") {
  document.getElementById("popups").innerHTML = "";
for (var i=0; i<statesArray.length; i++) {
  var thisState = statesArray[i].nodeValue;
if (thisState.toLowerCase().indexOf(str.toLowerCase()) == 0) {
var tempDiv = document.createElement("div");
tempDiv.innerHTML = thisState;
tempDiv.onclick = makeChoice;
tempDiv.className = "suggestions";
document.getElementById("popups").appendChild(tempDiv);
}
}
var foundCt = document.getElementById("popups").childNodes.length;
if (foundCt == 0) {
   document.getElementById("searchField").className = "error";
}
if (foundCt == 1) {
  document.getElementById("searchField").value = document.getElementById("popups").firstChild.innerHTML;
  document.getElementById("popups").innerHTML = "";
}
}
}
function makeChoice(evt) {
  if (evt) {
    var thisDiv = evt.target;
  }
  else {
    var thisDiv = window.event.srcElement;
  }
  document.getElementById("searchField").value = thisDiv.innerHTML;
  document.getElementById("popups").innerHTML = "";
}
4. if (xhr.responseXML) {
var allStates = xhr.responseXML.getElementsByTagName("item");
for (var i=0; i<allStates.length; i++) {
statesArray[i] = allStates[i].getElementsByTagName("label")[0].firstChild;
}
}
Here’s where we read that file in, looking at each item node, finding the label node inside, and then storing label’s firstChild—the name of the state itself. Each of them goes into a slot in the statesArray array.
5. var str = document.getElementById("searchField").value;
document.getElementById("searchField").className = "";
When you start typing in the field, you’ll end up here, in the searchSuggest() event handler function. We start off by getting the value of searchField, which is whatever has been typed so far. Next, we clear that field’s class attribute.
6. if (str != "") {
document.getElementById("popups").innerHTML = "";
If nothing’s been entered, we don’t want to do anything, so there’s a check here to make sure that the user’s entry has a value before we start popping up possibilities. If there’s something there, we then blank out the previous list of possibilities.
7. for (var i=0; i<statesArray.length; i++) {
var thisState = statesArray[i].nodeValue;
Now, we loop through the list of states, storing the current state we’re looking at in thisState.
8. if (thisState.toLowerCase().indexOf(str.toLowerCase()) == 0) {
We want to see if what they’ve entered so far is part of a state name—but that alone isn’t sufficient; we also have to make sure that what they’ve entered is at the beginning of the name. If you type in Kansas, you don’t want to see a drop-down box asking if you want Arkansas or Kansas, after all. And so long as we’re doing that check, we’ll also force the comparison to be lowercase on both sides before checking indexOf().
If indexOf() returns 0—that is, the entered string was found starting at position 1 of thisState—then we know we have a hit.
9. var tempDiv = document.createElement("div");
tempDiv.innerHTML = thisState;
tempDiv.onclick = makeChoice;
tempDiv.className = "suggestions";
document.getElementById("popups").appendChild(tempDiv);
Because this state is a possibility, we want to add it to the list that will display. That’s done by creating a temporary div, setting its innerHTML to the name of the state, adding an onclick handler and className, and then appending the whole to the popups div. Adding each state as a separate div allows us to manipulate each using JavaScript and CSS.
10. var foundCt = document.getElementById("popups").childNodes.length;
When we’ve looped through all the states, we’re done setting up the popups—but how many do we have? We calculate that, the foundCt, here.
11. if (foundCt == 0) {
document.getElementById("searchField").className = "error";
}
If foundCt is 0, they’ve entered something unexpected. We let them know that by setting the className to “error”, which causes the entry field to display with a pale yellow background (based on a CSS style rule in Listing 13.17).
12. if (foundCt == 1) {
document.getElementById("searchField").value = document.getElementById("popups").firstChild.innerHTML;
document.getElementById("popups").innerHTML = "";
}
If foundCt is 1, however, we know that they’ve got a unique hit, so we can then put that state into the entry field. If they’ve typed in ca, they shouldn’t have to type in lifornia also; we already know which state they want. We give them the full state by using the single div in popups to fill in the entry field, and then we blank out the popups div.
13. function makeChoice(evt) {
if (evt) {
var thisDiv = evt.target;
}
else {
var thisDiv = window.event.srcElement;
}
document.getElementById("searchField").value = thisDiv.innerHTML;
document.getElementById("popups").innerHTML = "";
}
Another way the user can enter a state name is to click one from the pop-up list. In that case, the makeChoice() event handler function is called. First, we figure out which state the user clicked by looking at the target of the event, and that gives us a particular div. Looking at the innerHTML for that div gives us the state name, and we put that into the entry field. And finally, we clear out the pop-up list of possibilities.
You can see an example of this technique when you’re using Google Instant. As you type into the usual Google search field, a pop-up list appears with suggested search ideas. As you type, the search suggestions are continually filtered in the list.
You may have noticed that this task and the last spent a lot more time and effort making things look good than actually demonstrating Ajax, XML, and server-side technologies. That’s because much of what has come to be known (or at least thought of by some) as Ajax involves not just the underlying technology but also the way the technology works. How to make that all much simpler is covered in the next few chapters.