
14. Toolkits, Frameworks, and Libraries
Updating a Page with jQuery 368
Here’s what we didn’t tell you earlier: writing JavaScript applications can be difficult. They often require a great deal of knowledge of working with the DOM, CSS, JavaScript, and server resources. Since this is a book for beginning scripters, we’ve shown you how to do some easy things so you can see that learning these techniques is well within your reach. But many books have been written that are completely devoted to showing intermediate-to-advanced scripters how to create JavaScript applications, and our chapters are no substitute for that kind of in-depth exploration.
Does that mean that you can’t make good use of JavaScript on your sites, even though you’re not yet a total scripting wizard? Not at all! This chapter shows you how to take advantage of JavaScript toolkits: prewritten, already-programmed libraries and frameworks of functions that make it easy for you to bring the power of scripting to your projects.
There are many toolkits available for download, and most of them are free. For this book, we’re using jQuery (jquery.com), a freely downloadable, open-source set of utilities and controls that help you build interactive Web applications. We think it’s one of the best. In the next couple of chapters, we’ll show you how to use jQuery to enable the user to drag and drop page elements; add menus and calendars; create overlays and sort table data; and in general, add cool (and useful!) effects to your pages.
Listing 14.1. This line of HTML introduces the jQuery library to our page.
<!DOCTYPE html>
<html>
<head>
<title>Welcome to jQuery!</title>
<script src="http://ajax.googleapis.com/ajax/libs/jquery/1/jquery.js"></script>
<script src="script01.js"></script>
</head>
<body>
<h1 id="welcome"> </h1>
</body>
</html>
Listing 14.2. This is a very small amount of jQuery code, and it’s just a start.
$(document).ready(function() {
   alert("Welcome to jQuery!");
});
Adding jQuery
In order for your site to use any JavaScript framework, you’ll need to make some changes. With jQuery, there are only a few modifications that you’ll need to make.
To add jQuery to your page
1. <script src="http://ajax.googleapis.com/ajax/libs/jquery/1/jquery.js"></script>
Listing 14.1 includes the one line of HTML needed to bring in the jQuery library.
2. $(document).ready(function() {
alert("Welcome to jQuery!");
});
The JavaScript file, Listing 14.2, is where you’ll notice that things have changed a little. No need to panic; there’s really no difference between that code and
window.onload = function() {
alert("Welcome to jQuery!");
};
which you’ve seen many times before ![]() . Here’s what’s changed:
. Here’s what’s changed:
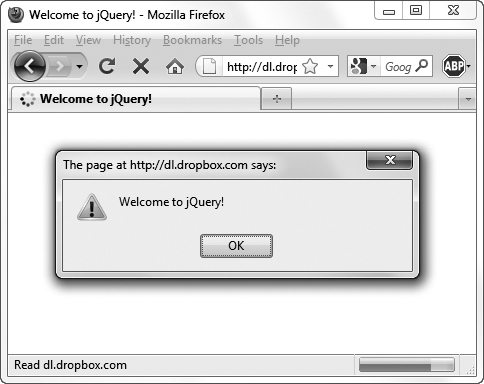
![]() Here’s your welcome to the wonderful world of jQuery.
Here’s your welcome to the wonderful world of jQuery.
• $() The dollar sign is what people often notice first about jQuery-based code. That’s partly because it’s not commonly used in vanilla JavaScript, and partly because it’s ubiquitous in jQuery. Most lines of jQuery-enabled code start with a $, and this one’s no exception. The $ is simply a function name—one that’s valid, although uncommon—that jQuery uses to access, well, everything.
• document Because we need to get to everything through $, we shouldn’t be surprised that document itself (usually the top-most element) is the first thing we get.
• ready() Where previously we checked onload to see if the page was completely loaded, we can now depend on jQuery’s ready() function to handle the job. The only difference is that whereas onload is an event handler (and so must be assigned a function), ready() is a function that’s passed a parameter.
No, there isn’t an extra right parenthesis at the end of step 2—that’s where the ready() function ends.
Although jQuery is one of the lightest-weight JavaScript frameworks available, there’s a way to make it even lighter: change step 1 to download jquery.min.js instead. That’s a version of the code that’s compressed for maximum speed.
Updating a Page with jQuery
Much of what you’ve learned in this book so far is how to update your pages dynamically—and of course, jQuery can do that, too. This example is similar to the previous task, but here we’ll update the page itself instead of just popping up an alert ![]() .
.
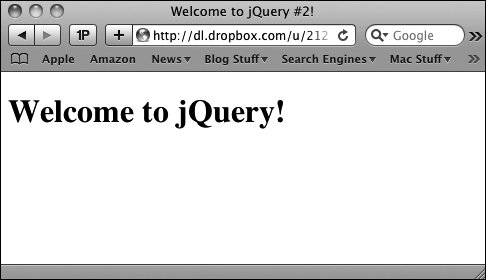
![]() By now, you should be feeling properly welcomed by jQuery.
By now, you should be feeling properly welcomed by jQuery.
To update a page using jQuery
• $("#welcome").append("Welcome to jQuery!");
The HTML for this task is similar enough to the previous that it’s not worth showing, so all that matters is this one line in Listing 14.3.
Here again, just as with document, we get $ to get an element from our page; now, it’s the #welcome element. And all we want to do with that element is set its innerHTML, which we do with jQuery’s append() function.
If you’re thinking that #welcome looks CSS-like, you’re right. One of the reasons for jQuery’s popularity is that its selectors are very much like those in CSS, which makes it easy for designer-types to get up to speed.
Listing 14.3. This line of jQuery code lets us modify the DOM of our page.
$(document).ready(function() {
$("#welcome").append("Welcome to jQuery!");
});
Listing 14.4. This HTML page lets the user choose what color to make the header.
<!DOCTYPE html>
<html>
<head>
<title>Welcome to jQuery #3!</title>
<link rel="stylesheet" href="script03.css">
<script src="http://ajax.googleapis.com/ajax/libs/jquery/1/jquery.js"></script>
<script src="script03.js"></script>
</head>
<body>
<h1 id="colorMe">Pick a color</h1>
<p>
<a id="red">Red</a>
<a id="green">Green</a>
<a id="blue">Blue</a>
</p>
</body>
</html>
Listing 14.5. A lot of the work is being done by the CSS.
a {
display: block;
padding: 10px;
float: left;
margin: 10px;
font-weight: bold;
background-color: silver;
}
a:hover {
color: white;
background-color: gray;
}
.red {
color: red;
}
.green {
color: green;
}
.blue {
color: blue;
}
Interacting with jQuery
Now that you’ve seen the basics, it’s time to start showing off some of jQuery’s real strengths. Listing 14.4 (HTML), Listing 14.5 (CSS), and Listing 14.6 (JavaScript) demonstrate how easy it is to add a little user interaction.
The page shows three button-like links: red, green, and blue. When the user clicks one, the “Pick a color” page header turns the selected color ![]() .
.
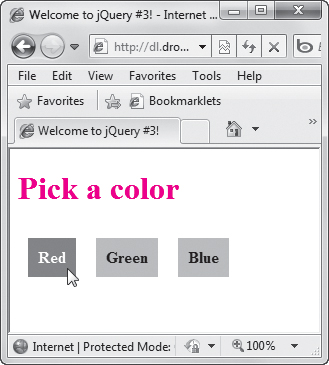
![]() Click the Red button to see the red header.
Click the Red button to see the red header.
To add user interaction
1. $("a").click(function(event) {
This line uses jQuery to say that, for every link (that is, anchor element) in the document, do the following when it’s clicked by the user.
2. $("#colorMe").
As you might expect by now, this gets the element on the page with the id colorMe.
3. attr("class",
When passed two parameters, this function sets a given attribute of the element to a given value. The first parameter is the attribute name, and the second is its new value. Here, we’re going to set the element’s class attribute.
4. $(this).attr("id"));
The element $(this) is just like the this element that we’re used to seeing, where its value depends on the context in which it’s being used. Here, because the context is an onclick handler, we know we’ve got the link that was clicked.
Given that element, we want its id, which will be red, green, or blue. We get that by passing attr() just one parameter: the attribute name. That value is then stored as the new value for the header’s class, and CSS takes over from there, automatically updating the header’s color.
5. event.preventDefault();
This is an HTML link that was clicked, after all, so we have to remember to tell the browser that the click has already been handled. With jQuery, that’s done by telling the event object to prevent the default from occurring.
Listing 14.6. But the real changes are done in a few lines of jQuery code.
$(document).ready(function() {
$("a").click(function(event) {
$("#colorMe").attr("class", $(this).attr("id"));
event.preventDefault();
});
});
Listing 14.7. With more of the work being done by jQuery, we don’t need as much CSS.
a {
display: block;
padding: 10px;
float: left;
margin: 10px;
font-weight: bold;
color: white;
background-color: gray;
}
.red {
color: red;
}
.green {
color: green;
}
.blue {
color: blue;
}
Listing 14.8. But it still doesn’t take much jQuery to handle this task.
$(document).ready(function() {
$("a").hover(function() {
$(this).css({
"color": $(this).attr("id"),
"background-color": "silver"
});
});
$("a").mouseout(function() {
$(this).css({
"color": "white",
"background-color": "gray"
});
});
$("a").click(function(event) {
$("#colorMe").attr("class", $(this).attr("id"));
event.preventDefault();
});
});
Interacting and Updating
If the previous example didn’t have enough updating and interaction for you, here’s a little more. Now the text of the buttons will also change color ![]() , letting your users know just what they’re letting themselves in for.
, letting your users know just what they’re letting themselves in for.
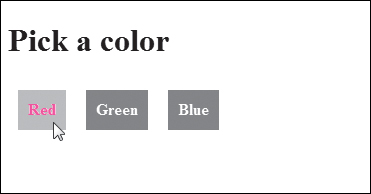
![]() When users hover over the button, they now get a hint as to what will happen.
When users hover over the button, they now get a hint as to what will happen.
As you might guess, the HTML is sufficiently similar to the previous example that we don’t need to duplicate it; Listing 14.7 (CSS) and Listing 14.8 (JavaScript) contain everything that matters.
To add further interaction and updates
1. $("a").hover(function() {
We can’t update our buttons with just CSS, so we need jQuery to do the work. Its hover() function does the equivalent of a mouseover.
2. $(this).css(
When we’re over the object in question, we know we want to change some of its attributes. Because the attributes we want to change are all CSS-related, we can use the css() function.
3. {
"color": $(this).attr("id"),
"background-color": "silver"
);
We’re modifying more than one attribute here, so we need to pass a list of object literals: that is, a series of name and value pairs inside a pair of braces {} and separated by commas, where each name and value are separated by a colon.
When this list is passed to css(), the element’s color and background-color styles are reset to the passed values.
4. $("a").mouseout(function() {
Here’s the other half of the hover(): the mouseout(). When the user moves the cursor off the button, we want them to return to their normal colors.
5. {
"color": "white",
"background-color": "gray"
);
And here’s our normal white-on-gray button color scheme again.
You might be wondering if the mouseout() section is really needed—after all, if the values being reset are static, can’t it just be done in CSS? Sadly, the answer is no—once hover() modifies the buttons, they stay those colors until they’re reset via jQuery.
Auto-Completing Fields
At the end of the last chapter, you may recall that we needed a great deal of code to keep users from entering invalid state names. Here, you’ll see how jQuery turns lengthy code into one-liners. Listing 14.9 has the HTML, and Listing 14.10 our JavaScript.
To use jQuery to handle auto-completing fields
1. var stateList = "Alabama*Alaska*Arizona*Arkansas*California*Colorado*Connecticut*Delaware*Florida*Georgia*Hawaii*Idaho*Illinois*Indiana*Iowa*Kansas*Kentucky*Louisiana*Maine*Maryland*Massachusetts*Michigan*Minnesota*Mississippi*Missouri*Montana*Nebraska*Nevada*New Hampshire*New Jersey*New Mexico*New York*North Carolina*North Dakota*Ohio*Oklahoma*Oregon*Pennsylvania*Rhode Island*South Carolina*South Dakota*Tennessee*Texas*Utah*Vermont*Virginia*Washington*West Virginia*Wisconsin*Wyoming*";
We need a list of states, and this time, we’ll just hard-code it into a variable, stateList. Here are all 50 states, separated by asterisks.
Listing 14.9. This HTML page brings in the big guns to do its work.
<!DOCTYPE html>
<html>
<head>
<title>Auto-fill Form Fields</title>
<link rel="stylesheet" href="http://ajax.googleapis.com/ajax/libs/jqueryui/1/themes/base/jquery-ui.css">
<script src="http://ajax.googleapis.com/ajax/libs/jquery/1/jquery.js"></script>
<script src="http://ajax.googleapis.com/ajax/libs/jqueryui/1/jquery-ui.js"></script>
<script src="script05.js"></script>
</head>
<body>
<div class="ui-widget">
<label for="searchField">Please enter your state:</label>
<input id="searchField">
</div>
</body>
</html>
Listing 14.10. And jQuery makes short work out of what used to be a lengthy task.
$(function(){
var stateList = "Alabama*Alaska*Arizona*Arkansas*California*Colorado*Connecticut*Delaware*Florida*Georgia*Hawaii*Idaho*Illinois*Indiana*Iowa*Kansas*Kentucky*Louisiana*Maine*Maryland*Massachusetts*Michigan*Minnesota*Mississippi*Missouri*Montana*Nebraska*Nevada*New Hampshire*New Jersey*New Mexico*New York*North Carolina*North Dakota*Ohio*Oklahoma*Oregon*Pennsylvania*Rhode Island*South Carolina*South Dakota*Tennessee*Texas*Utah*Vermont*Virginia*Washington*West Virginia*Wisconsin*Wyoming*";
$("#searchField").autocomplete({
source: stateList.split("*")
});
});
2. $("#searchField").autocomplete({
Whenever the user types into the searchField input field, do the following.
3. source: stateList.split("*")
The autocomplete() function has one element that needs a value, source. The source element needs to be passed an array, and all we have to do to provide that is split() our stateList on every asterisk. Given that array, jQuery does all the work for us ![]() .
.
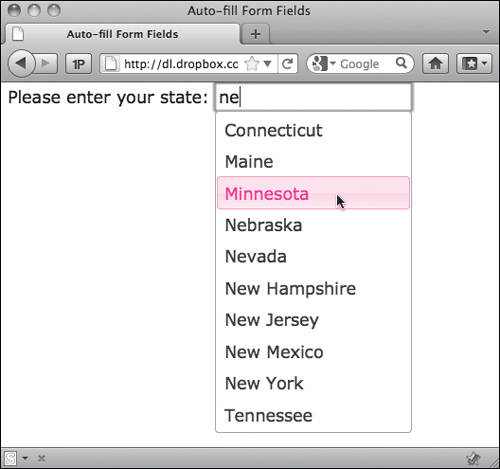
![]() This menu lets users choose a state by typing, by clicking, or by arrowing down the list.
This menu lets users choose a state by typing, by clicking, or by arrowing down the list.
There are a few things this example doesn’t do that the earlier one did. For instance, this one doesn’t limit its matches to the beginnings of state names. On the other hand, this one does something big that the earlier one didn’t: it lets users select a state from the drop-down menu by using their arrow keys.
You may be wondering where all the page styling came from, including that of the drop-down menu. They are all included courtesy of jQuery UI—which is the subject of the next chapter.