
15. Designing with jQuery
Web development began to require the use of JavaScript frameworks around the same time that Web design began to frequently feature certain user interface elements (such as elements that slide their way on and off screen and the ubiquitous “yellow fade”). That’s not entirely coincidental, and one of the main reasons for jQuery’s success is its sidekick, jQuery UI. As you might guess from the name, jQuery uses jQuery UI to handle common user interface elements.
In this chapter, we’ll be talking about that Web 2.0 look and feel: both how it’s created and why it’s used. While demonstrating these elements, we’ll give a further introduction to the advantages and uses of jQuery and jQuery UI. You’ll learn how to highlight elements, create accordion-like menus, and display modal dialogs (with accompanying visual effects). We’ll finish off with smarter tables, including both zebra-striping (for ease of reading) and sorting by any column.
Highlighting New Elements
The “yellow fade” has become almost a cliché of Web design: when something new materializes on the page, viewers expect to see it appear with a yellow background, which then slowly fades to white (or whatever the site’s usual background color is). It’s a handy way to let visitors know that something has changed without the overhead of having to keep track of what’s new versus newer versus newest.
It’s also a good introduction to jQuery UI, as you’ll be able to see how much can be done with only a few lines of code.
To highlight an element’s display
1. <script src="http://ajax.googleapis.com/ajax/libs/jquery/1/jquery.js"></script>
<script src="http://ajax.googleapis.com/ajax/libs/jqueryui/1/jquery-ui.js">
</script>
<script src="script01.js"></script>
In order for Listing 15.1 (our HTML page) to be jQuery UI-savvy, it needs to have access to two files: jquery.js and jquery-ui.js. The third file needed is our own local script file, which here is called script01.js.
2. $(document).ready(function() {
In Listing 15.2, we start our JavaScript routines. This looks different from other code we’ve used elsewhere, in that we’re not starting off with document.onload—or are we?
Actually we still are; this is just jQuery’s way of saying virtually the same thing.
Listing 15.1. Adding jQuery to a page starts with adding a couple of <script> tags.
<!DOCTYPE html>
<html>
<head>
<title>Show/Hide Text</title>
<script src="http://ajax.googleapis.com/ajax/libs/jquery/1/jquery.js"></script>
<script src="http://ajax.googleapis.com/ajax/libs/jqueryui/1/jquery-ui.js"></script>
<script src="script01.js"></script>
</head>
<body>
<a href="#" id="textToggle">show/hide text</a><br>
<div id="bodyText">Lorem ipsum dolor sit amet, consectetuer adipiscing elit. Nulla viverra aliquet mi. Cras urna. Curabitur diam. Curabitur eros nibh, condimentum eu, tincidunt at, commodo vitae, nisi. Duis nulla lectus, feugiat et, tincidunt nec, iaculis vehicula, tortor. Sed tortor felis, viverra vitae, posuere et, ullamcorper a, leo. Suspendisse euismod libero at orci. Pellentesque odio massa, condimentum at, pellentesque sed, lacinia quis, mauris. Proin ultricies risus cursus mi. Cras nibh quam, adipiscing vel, tincidunt a, consequat ut, mi. Aenean neque arcu, pretium posuere, tincidunt non, consequat sit amet, enim. Duis fermentum. Donec euaugue. Mauris sit amet ligula.</div>
</body>
</html>
Listing 15.2. This JavaScript (using jQuery and jQuery UI) makes highlighting a new page element easy.
$(document).ready(function() {
$("#bodyText").hide();
$("#textToggle").toggle(
function() {
  $("#bodyText").show("slow");
  $("#bodyText").effect("highlight", {}, 2000);
},
function() {
  $("#bodyText").hide();
}
);
});
If you remember, the dollar sign, $, is jQuery’s way of referring to itself (as opposed to some other JavaScript object). We’re passing jQuery the document object, which, as you might guess, is the current document. We’re then using a method built into jQuery called ready(), which is automatically triggered when JavaScript is ready to start handling events. Everything you want to happen when the document loads must be passed into $(document).ready(). In this case, we’re passing in an anonymous function, shown in the rest of the steps.
3. $("#bodyText").hide();
One of jQuery’s most useful features is the way you tell it what object you want to do something with—it’s virtually just like CSS. With CSS, if we want a rule to hide an element with an id of bodyText, we might write something like this:
#bodyText { display:none; }
And as you can see, that CSS is much shorter than the equivalent JavaScript command:
document.getElementById("bodyText").style.display = "none";
The line of code in this step does the same thing as both the standard JavaScript and the CSS rule above: it tells the browser not to display this particular element, as seen in ![]() . It uses jQuery’s built-in
. It uses jQuery’s built-in hide() method, which needs no parameters.
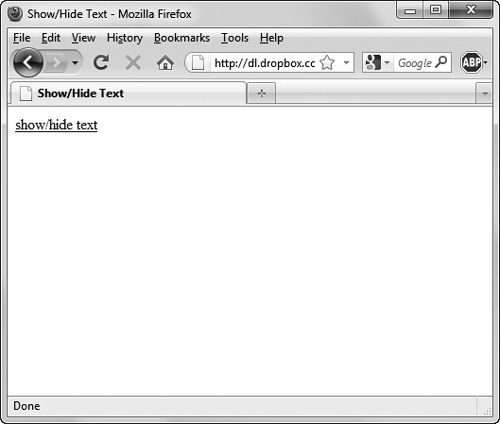
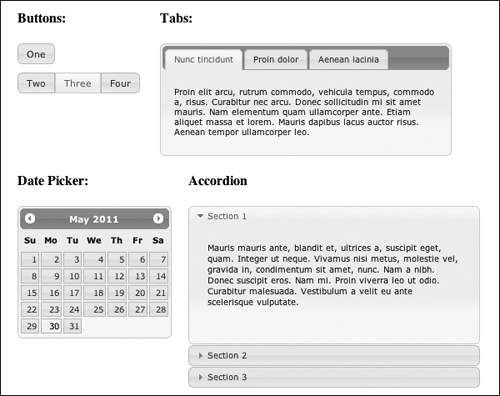
![]() Not much is going on here when this page first loads.
Not much is going on here when this page first loads.
Here, we want to call another method built into jQuery: toggle(). Unlike the code in the previous step (which is run when the document loads), this line is triggered by a particular event—it runs whenever the element with the id of textToggle is clicked.
The toggle() method is passed two functions as parameters, each of which contains the code for one of toggle()’s two states. The toggle() method remembers its current state, so when it’s triggered it automatically switches to the other state (i.e., runs the code in the other function).
5. function() {
$("#bodyText").show("slow");
$("#bodyText").effect("highlight", {}, 2000);
},
Here’s the first function passed to toggle(). We start by letting jQuery find the element with the id of bodyText; that’s the bit that’s going to be displayed when show() is called. The show() method is passed one parameter: the string "slow", which tells jQuery to slowly make the new element visible.
Once that’s done, jQuery UI’s effect() method is called and passed three parameters:
• "highlight": the effect we want.
• {}: the options desired on that effect. The yellow fade technique is so prevalent that yellow is the default color, so we don’t need to modify any options here.
• 2000: the speed at which we want the effect to display. This is set in milliseconds, so we’re saying that we want the fade out to last two seconds. ![]() shows the brief fade, and
shows the brief fade, and ![]() shows the final result.
shows the final result.
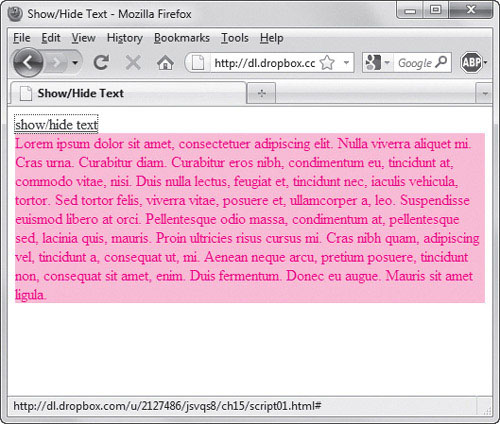
![]() But click on the link, and text appears with a brief yellow highlight that then fades out.
But click on the link, and text appears with a brief yellow highlight that then fades out.
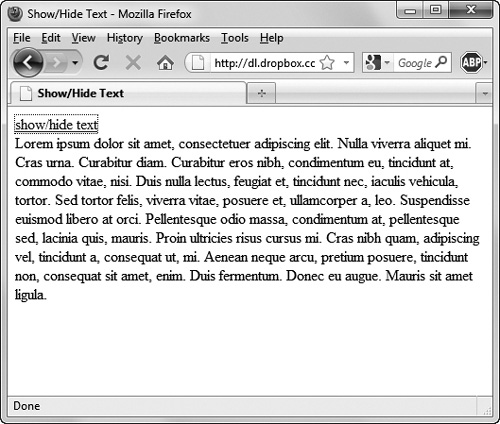
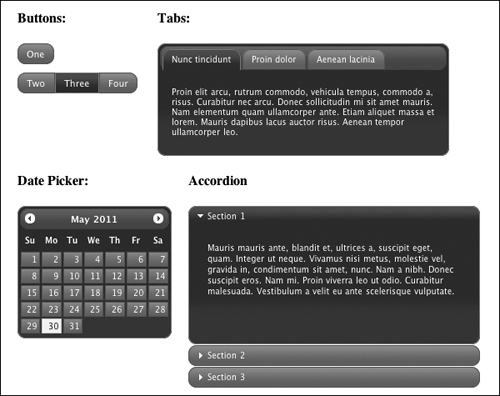
![]() Here’s the final display of the page.
Here’s the final display of the page.
6. function() {
$("#bodyText").hide();
}
Here’s the alternate state of the toggle, and all it does is tell the bodyText element to hide again, just as we did at the beginning of the code.
If we wanted the text to slowly disappear (in the same way that it slowly appeared), we could pass "slow" as a string to hide() in the last step. And if we took out the "slow" parameter being passed into show(), the element would display immediately instead of slowly.
Did you notice the one reference above to jQuery UI? If not, well, that’s one of jQuery’s best features: the two work together so smoothly that you can miss what’s part of what. In this example, only the effect() method is part of jQuery UI.
If you’re now wondering why jQuery doesn’t just include its UI elements, keep in mind that many of the frameworks it uses are behind the scenes—and there’s no reason to always have the overhead of including the UI effects when they’re not going to be used.
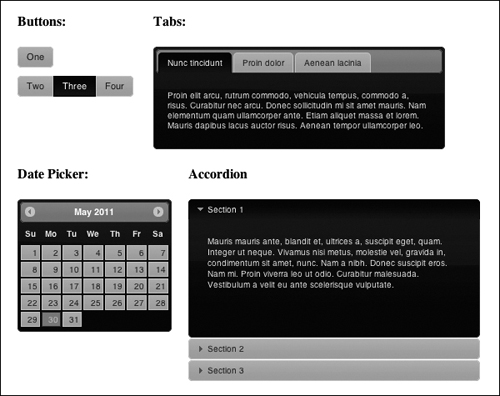
Creating Accordion Menus
One way to choose a framework is to pick a common thing you want to add to a site, and then see how much that framework helps you to accomplish that task. Here, we want an accordion menu—a type of menu where, when one section is opened, any others automatically close. Similar to a tabbed interface, it’s a common design element.
To create accordion menus
1. <link rel="stylesheet" href="http://ajax.googleapis.com/ajax/libs/jqueryui/1/themes/cupertino/jquery-ui.css">
<link rel="stylesheet" href="script02.css">
Listing 15.3 needs two CSS files: Cupertino (one of jQuery UI’s built-in themes) and ours (script02.css, seen in Listing 15.4) that adds on the little bit of CSS needed to make things look just the way we want.
Listing 15.3. The links in this outline will, via jQuery, be seen in a browser as an accordion menu.
<!DOCTYPE html>
<html>
<head>
<title>Accordion Menus</title>
<link rel="stylesheet" href="http://ajax.googleapis.com/ajax/libs/jqueryui/1/themes/cupertino/jquery-ui.css">
<link rel="stylesheet" href="script02.css">
<script src="http://ajax.googleapis.com/ajax/libs/jquery/1/jquery.js"></script>
<script src="http://ajax.googleapis.com/ajax/libs/jqueryui/1/jquery-ui.js"></script>
<script src="script02.js"></script>
</head>
<body>
<h1>Shakespeare's Plays</h1>
<div id="tabs">
<ul id="theMenu">
<li><a href="menu1.html" class="menuLink">Comedies</a>
<ul>
<li><a href="pg1.html">All's Well That Ends Well</a></li>
<li><a href="pg2.html">As You Like It</a></li>
<li><a href="pg3.html">Love's Labour's Lost</a></li>
<li><a href="pg4.html">The Comedy of Errors</a></li>
</ul>
</li>
<li><a href="menu2.html" class="menuLink">Tragedies</a>
<ul>
<li><a href="pg5.html">Anthony & Cleopatra</a></li>
<li><a href="pg6.html">Hamlet</a></li>
<li><a href="pg7.html">Romeo & Juliet</a></li>
</ul>
</li>
<li><a href="menu3.html" class="menuLink">Histories</a>
<ul>
<li><a href="pg8.html">Henry IV, Part 1</a></li>
<li><a href="pg9.html">Henry IV, Part 2</a></li>
</ul>
</li>
</ul>
</div>
</body>
</html>
Listing 15.4. While we’ve done similar menus previously, using jQuery means a lot less CSS.
#theMenu {
width: 400px;
}
ul li a.menuLink {
display: block;
padding-left: 30px;
}
2. $(document).ready(function() {
Here we are now in Listing 15.5. As before, if we want something to run when the page loads, it needs to be inside this function.
Listing 15.5. And with jQuery, it needs even less JavaScript.
$(document).ready(function() {
$("#theMenu").accordion({
animated: false,
autoHeight: false,
header: ".menuLink"
});
});
3. $("#theMenu").accordion({
In Listing 15.3, our menu is structured as an outline, using unordered list items as the contents of each menu. Here’s an example of the simplicity of jQuery: all Listing 15.5 needs to do is take the id from the top-level ul (in this case, theMenu) and then apply the built-in accordion() method to it.
4. animated: false,
autoHeight: false,
header: ".menuLink"
We need to set a few options, and that’s done right inside accordion(). They are:
• animated: if you want menu items to display with an animated effect, set this to the name of the desired effect (e.g., "slide", "easeslide").
• autoHeight: forces the accordion area to always have a fixed height (based on the largest area needed).
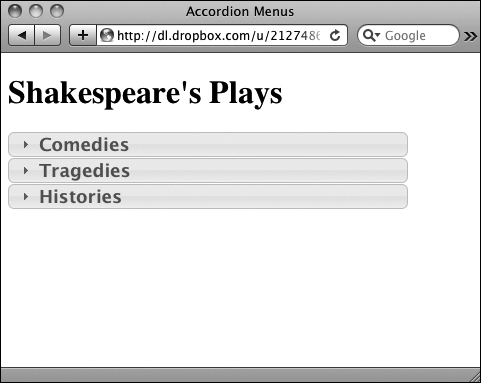
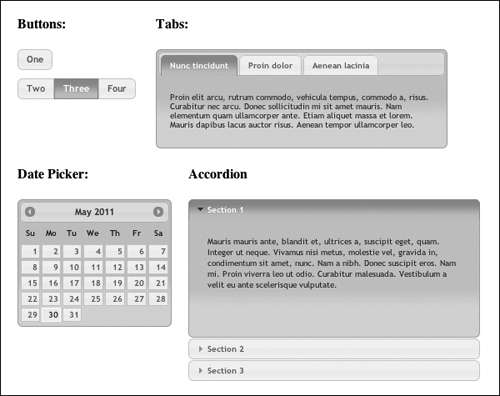
• header: how jQuery can identify the headers for each menu. Here, they all have the class "menuLink", and clicking on one of the headers gives a page that looks like ![]() .
.
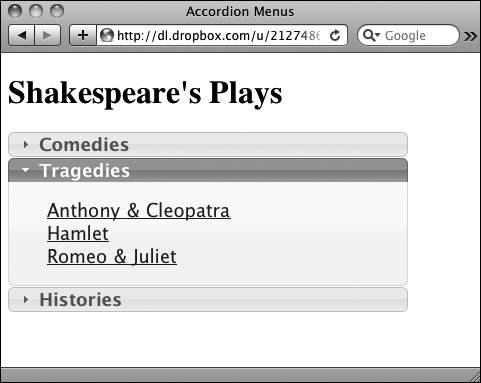
![]() When clicked, the accordion menu closes one sub-menu and opens another.
When clicked, the accordion menu closes one sub-menu and opens another.
There are additional options for accordion() besides the ones above—those are only where we wanted to override the default. If we’d wanted the accordion to open when the user hovered the mouse over a menu label (versus only when the user clicks a menu label), all we’d do is add this to the last step: event: "mouseover".
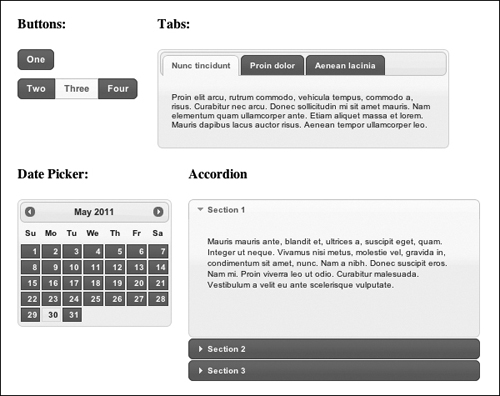
If you want your accordion to start off collapsed, add active: false to the list of options ![]() . If you want the page to load with the accordion open to something other than the first menu item, use
. If you want the page to load with the accordion open to something other than the first menu item, use active: 2 (or 3, or whatever the case might be).
![]() If we want the accordion menu to start off closed, that’s also an option.
If we want the accordion menu to start off closed, that’s also an option.
Don’t like the Cupertino theme, and wondering what other options might be available? Be sure to check out the “Pick a Theme, Any Theme” sidebar.
Creating Smarter Dialogs
Another common design element in modern sites is dialogs that don’t look like the usual prompt(), alert(), or confirm() ones we learned about back in Chapter 2. Instead, they look more like the dialogs you see in applications, such as modal dialogs, that is, dialogs that force you to respond to them before you can go back to the Web page. Once again, jQuery makes it straightforward to accomplish a task.
To create smarter dialogs
1. <link rel="stylesheet" href="http://ajax.googleapis.com/ajax/libs/jqueryui/1/themes/redmond/jquery-ui.css">
We’re using another one of jQuery UI’s built-in themes here, Redmond. Here’s where Listing 15.6 loads it into our page.
Listing 15.6. Again, we only need a few <script> tags added here to start off our jQuery changes.
<!DOCTYPE html>
<html>
<head>
<title>Modal Dialog</title>
<link rel="stylesheet" href="http://ajax.googleapis.com/ajax/libs/jqueryui/1/themes/redmond/jquery-ui.css">
<script src="http://ajax.googleapis.com/ajax/libs/jquery/1/jquery.js"></script>
<script src="http://ajax.googleapis.com/ajax/libs/jqueryui/1/jquery-ui.js"></script>
<script src="script03.js"></script>
</head>
<body>
<div id="example" title="This is a modal dialog">
So long as you can see this dialog,<br>
you can't touch the page below
</div>
<h1>Welcome to my page</h1>
<div id="bodyText">Lorem ipsum dolor sit amet, consectetuer adipiscing elit. Nulla viverra aliquet mi. Cras urna. Curabitur diam. Curabitur eros nibh, condimentum eu, tincidunt at, commodo vitae, nisi. Duis nulla lectus, feugiat et, tincidunt nec, iaculis vehicula, tortor. Sed tortor felis, viverra vitae, posuere et, ullamcorper a, leo. Suspendisse euismod libero at orci. Pellentesque odio massa, condimentum at, pellentesque sed, lacinia quis, mauris. Proin ultricies risus cursus mi. Cras nibh quam, adipiscing vel, tincidunt a, consequat ut, mi. Aenean neque arcu, pretium posuere, tincidunt non, consequat sit amet, enim. Duis fermentum. Donec euaugue. Mauris sit amet ligula.</div>
</body>
</html>
Listing 15.7. This tiny bit of jQuery code handles the modal dialog.
$(document).ready(function() {
$("#example").dialog({
   modal: true,
   resizable: false,
   overlay: {
     opacity: 0.4,
     background: "black"
   },
buttons: {
  "OK": function() {
    $(this).dialog("close");
  }
}
});
});
2. $("#example").dialog({
modal: true,
resizable: false,
overlay: {
opacity: 0.4,
background: "black"
},
We want a draggable modal dialog on the page, and the little bit of custom code we need is shown in Listing 15.7. This code runs when the page first loads, finding the example element and using it as the basis of a dialog. That dialog is modal (because of the line modal: true) and is not resizable (because of the line resizable: false).
We’ve also added an overlay; as you can see in ![]() , the page behind the dialog is darkened to show that it’s inaccessible. That’s done with the
, the page behind the dialog is darkened to show that it’s inaccessible. That’s done with the overlay options, where both the opacity and the background overlay color are set.

![]() This modal dialog box can be dragged around the browser window, but you can’t get to what’s below it until it’s closed.
This modal dialog box can be dragged around the browser window, but you can’t get to what’s below it until it’s closed.
3. buttons: {
"OK": function() {
$(this).dialog("close");
}
}
This dialog has a single button that says “OK,” and when it’s clicked, the dialog closes. If you want more buttons or more actions to take place when the dialog is clicked, they would go here.
By default, dialogs are both resizable and draggable. If you want yours to be resizable as well, all you have to do is remove the resizable: false line in step 2.
By this point in the book, you’ve no doubt noticed that we aren’t professional Web designers. If you’re in the same situation, you’ll appreciate the number of professional themes jQuery UI makes freely available ![]() .
.
![]() Some of the many themes available: Base, Dark Hive, Hot Sneaks, Humanity, Le Frog, Overcast, South Street, and Vader. Not to mention Cupertino and Redmond, shown elsewhere in this chapter. And of course, they all look even better in color!
Some of the many themes available: Base, Dark Hive, Hot Sneaks, Humanity, Le Frog, Overcast, South Street, and Vader. Not to mention Cupertino and Redmond, shown elsewhere in this chapter. And of course, they all look even better in color!
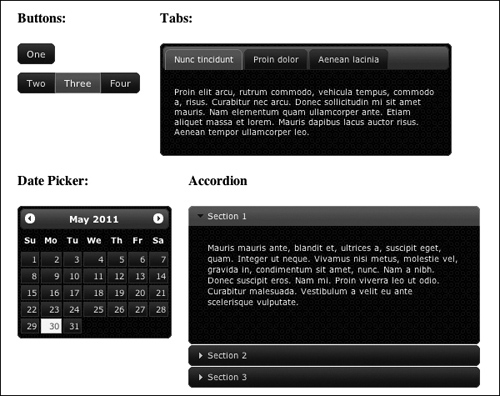
Dark Hive
Humanity
Le Frog
Overcast
South Street
Vader
• version# is the version of jQuery UI (not jQuery) you want to use
• themeName is any of the increasing number of available themes (current count: 25). You can find a list of the current names and locations at http://blog.jqueryui.com.
Striping Tables
If your site has a lot of tabular data, you should add stripes to your tables—without them, the information can be difficult to read and understand. Unfortunately, there’s still no way to use CSS to stripe table rows that works in all commonly used browsers. It used to be the case that using JavaScript to stripe table rows was so difficult that most people didn’t bother. With jQuery, it’s nice and simple, as seen in ![]() .
.

![]() This list of albums, with its alternating stripes, is easy to read.
This list of albums, with its alternating stripes, is easy to read.
Listing 15.8. The HTML for a very standard table, without any inline style or inline script.
<!DOCTYPE html>
<html>
<head>
<title>Striped Tables</title>
<link rel="stylesheet" href="script04.css">
<script src="http://ajax.googleapis.com/ajax/libs/jquery/1/jquery.js"></script>
<script src="script04.js"></script>
</head>
<body>
<h1>Beatles Discography</h1>
<table>
<thead>
<tr>
<th>Album</th>
<th>Year</th>
<th>Label</th>
</tr>
</thead>
<tr>
<td>Please Please Me</td>
<td>1963</td>
<td>Parlophone</td>
</tr>
<tr>
<td>With The Beatles</td>
<td>1963</td>
<td>Parlophone</td>
</tr>
<tr>
<td>A Hard Day's Night</td>
<td>1964</td>
<td>Parlophone</td>
</tr>
<tr>
<td>Beatles for Sale</td>
<td>1964</td>
<td>Parlophone</td>
</tr>
<tr>
<td>Help!</td>
<td>1965</td>
<td>Parlophone</td>
</tr>
<tr>
<td>Rubber Soul</td>
<td>1965</td>
<td>Parlophone</td>
</tr>
<tr>
<td>Revolver</td>
<td>1966</td>
<td>Parlophone</td>
</tr>
<tr>
<td>Sgt. Pepper's Lonely Hearts Club Band</td>
<td>1967</td>
<td>Parlophone</td>
</tr>
<tr>
<td>Magical Mystery Tour</td>
<td>1967</td>
<td>Capitol</td>
</tr>
<tr>
<td>The Beatles</td>
<td>1968</td>
<td>Apple</td>
</tr>
<tr>
<td>Yellow Submarine</td>
<td>1969</td>
<td>Apple</td>
</tr>
<tr>
<td>Abbey Road</td>
<td>1969</td>
<td>Apple</td>
</tr>
<tr>
<td>Let It Be</td>
<td>1970</td>
<td>Apple</td>
</tr>
</table>
</body>
</html>
To create zebra-striped tables
1. $("tr").mouseover(function() {
$(this).addClass("over");
});
Listing 15.8 (our HTML file) and Listing 15.9 (our CSS file) don’t have anything new or original. The only thing that might be a little curious is that the CSS file sets rules for table rows with the class set to "over" and "even", but nowhere in the HTML is either of those ever set up. That’s because it’s all done in the JavaScript file, Listing 15.10.
This section of code acts as a rollover: whenever the mouse is over a row, the mouseover for that tr is triggered. That tells jQuery to add a class of "over" to that row, and our CSS tells the browser that it should now display that row in a different color (as shown in ![]() ).
).
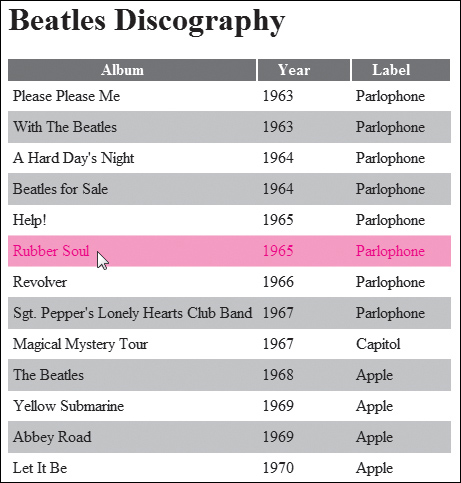
![]() Hovering over any row highlights that row.
Hovering over any row highlights that row.
2. $("tr").mouseout(function() {
$(this).removeClass("over");
});
Here’s where that’s turned off again: when the mouse moves off the row, its mouseout is triggered, and the class attribute of "over" is removed.
3. $("tr:even").addClass("even");
Yes, this is really all there is to adding zebra-striping. Because jQuery understands the concept of odd and even rows, we can tell it to just set all even rows to have a class attribute of "even". And because our CSS has a rule that applies to tr.even, every other row is automatically colored, without us ever having to touch a bit of HTML.
It’s worth pointing out that no special jQuery routines were needed to create this functionality—not even jquery-ui.js. The only script that was brought in was the always-required jquery.js.
Listing 15.9. A small bit of CSS, which will be enabled via jQuery.
table {
border-collapse: collapse;
}
tr.even {
background-color: #C2C8D4;
}
tr.over {
background-color: #8797B7;
}
td {
border-bottom: 1px solid #C2C8D4;
padding: 5px;
}
th {
border-right: 2px solid #FFF;
color: #FFF;
padding-right: 40px;
padding-left: 20px;
background-color: #626975;
}
th.sortUp {
background: #626975 url(jquery/images/asc.gif) no-repeat right center;
}
th.sortDown {
background: #626975 url(jquery/images/desc.gif) no-repeat right center;
}
Listing 15.10. Here’s all the code necessary to add striping to your tables.
$(document).ready(function() {
$("tr").mouseover(function() {
  $(this).addClass("over");
});
$("tr").mouseout(function() {
  $(this).removeClass("over");
});
$("tr:even").addClass("even");
});
Listing 15.11. You need to add very little to your HTML to add sorting to your tables.
<!DOCTYPE html>
<html>
<head>
<title>Sorted Tables</title>
<link rel="stylesheet" href="script04.css">
<script src="http://ajax.googleapis.com/ajax/libs/jquery/1/jquery.js"></script>
<script src="jquery/jquery.tablesorter.js"></script>
<script src="script05.js"></script>
</head>
<body>
<h1>Beatles Discography</h1>
<table id="theTable">
<thead>
<tr>
<th>Album</th>
<th>Year</th>
<th>Label</th>
</tr>
</thead>
<tr>
<td>Please Please Me</td>
<td>1963</td>
<td>Parlophone</td>
</tr>
<tr>
<td>With The Beatles</td>
<td>1963</td>
<td>Parlophone</td>
</tr>
<tr>
<td>A Hard Day's Night</td>
<td>1964</td>
<td>Parlophone</td>
</tr>
<tr>
<td>Beatles for Sale</td>
<td>1964</td>
<td>Parlophone</td>
</tr>
<tr>
<td>Help!</td>
<td>1965</td>
<td>Parlophone</td>
</tr>
<tr>
<td>Rubber Soul</td>
<td>1965</td>
<td>Parlophone</td>
</tr>
<tr>
<td>Revolver</td>
<td>1966</td>
<td>Parlophone</td>
</tr>
<tr>
<td>Sgt. Pepper's Lonely Hearts Club Band</td>
<td>1967</td>
<td>Parlophone</td>
</tr>
<tr>
<td>Magical Mystery Tour</td>
<td>1967</td>
<td>Capitol</td>
</tr>
<tr>
<td>The Beatles</td>
<td>1968</td>
<td>Apple</td>
</tr>
<tr>
<td>Yellow Submarine</td>
<td>1969</td>
<td>Apple</td>
</tr>
<tr>
<td>Abbey Road</td>
<td>1969</td>
<td>Apple</td>
</tr>
<tr>
<td>Let It Be</td>
<td>1970</td>
<td>Apple</td>
</tr>
</table>
</body>
</html>
Sorting Tables
While it’s nice enough to have a table that’s striped, sometimes you want a site that allows user interaction. Maybe the user wants to be able to sort the columns in a different order—instead of having the years increase, they want them to decrease. Or maybe they want to sort by name. Or maybe by name in reverse order. Or... you get the idea.
Here’s the one example where jQuery doesn’t contain this functionality out of the box—so instead, we’ll have to use a plug-in. This one’s called, meaningfully enough, tablesorter.
To create sortable tables
1. <script src="jquery/jquery.tablesorter.js"></script>
Listing 15.11, our HTML file, is virtually identical to Listing 15.8. There are only two changes: we added this line to bring in the new jquery.tablesorter.js routine, and we’ve added an id of theTable to the table itself.
2. th.sortUp {
background: #626975 url(jquery/images/asc.gif) no-repeat right center;
}
th.sortDown {
background: #626975 url(jquery/images/desc.gif) no-repeat right center;
}
Let’s take a quick look back at Listing 15.9, where we previously skipped covering these two rules. Here, they’re put to work, telling the browser that, whether the user wants to sort up or down, we want the table header to display an appropriately pointed arrow.
3. $("#theTable").tablesorter({
Here’s our big change to the JavaScript code in Listing 15.12: telling jQuery that we want users to be able to sort the contents of the table. That’s done with the code in this step and the next. We select the element with the id of theTable (as mentioned in step 1) and run the tablesorter() method on it.
Listing 15.12. And just a few lines of code, and our jQuery-enabled table is sortable and striped.
$(document).ready(function() {
$("tr").mouseover(function() {
$(this).addClass("over");
});
$("tr").mouseout(function() {
$(this).removeClass("over");
});
$("#theTable").tablesorter({
sortList:[[1,0]],
cssAsc: "sortUp",
cssDesc: "sortDown",
widgets: ["zebra"]
});
});
4. sortList:[[1,0]],
cssAsc: "sortUp",
cssDesc: "sortDown",
widgets: ["zebra"]
This is jQuery, so there must be several possible options in how we want our table to display. The ones we’re using here are:
• sortList:[[1,0]]: we want the table to be sorted in a particular way when the page first loads (as in ![]() ), and here’s where that’s defined. Count your columns starting with zero; the column you want is the first parameter. Here we want our table to be sorted by the second column, so we pass a 1 (remember, JavaScript is zero-relative!). The second parameter is which way we want to sort: 0 is up, 1 is down.
), and here’s where that’s defined. Count your columns starting with zero; the column you want is the first parameter. Here we want our table to be sorted by the second column, so we pass a 1 (remember, JavaScript is zero-relative!). The second parameter is which way we want to sort: 0 is up, 1 is down.
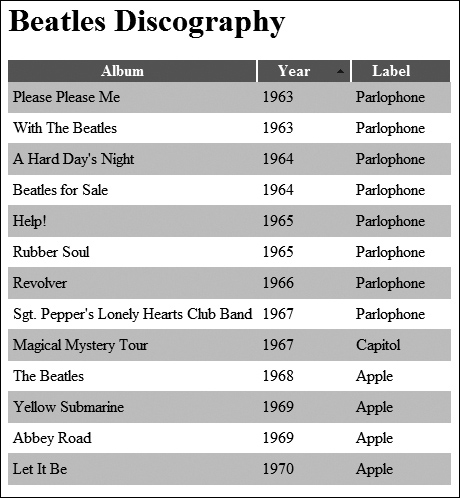
![]() When the sortable table initially loads, it’s sorted by year, increasing—and you know that because of the upward arrow to the right of the Year label.
When the sortable table initially loads, it’s sorted by year, increasing—and you know that because of the upward arrow to the right of the Year label.
• cssAsc: "sortUp": when the user chooses to sort up, we want a new CSS rule to apply to this th cell. This will automatically assign a class of "sortUp" when that’s what the user wants, which will then show an upwards-pointing arrow to the right of the label.
• cssDesc: "sortDown": we want the user to know when they’re sorting downwards instead, and clicking on the th cell again changes the class to "sortDown", which displays a downwards-pointing arrow to the right of the label ![]() . Because you might want to sort on any column, not just the one the Web developer decided to make the default, all a user has to do is click on a different
. Because you might want to sort on any column, not just the one the Web developer decided to make the default, all a user has to do is click on a different th cell, and the results immediately change ![]() without you having to add any more code.
without you having to add any more code.
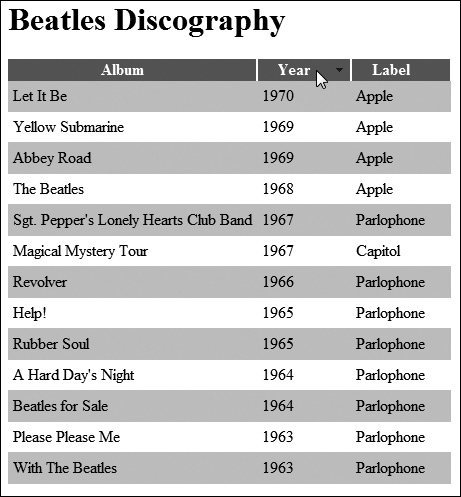
![]() Click the Year label, and the table re-sorts itself in decreasing order and changes the arrow to point down.
Click the Year label, and the table re-sorts itself in decreasing order and changes the arrow to point down.
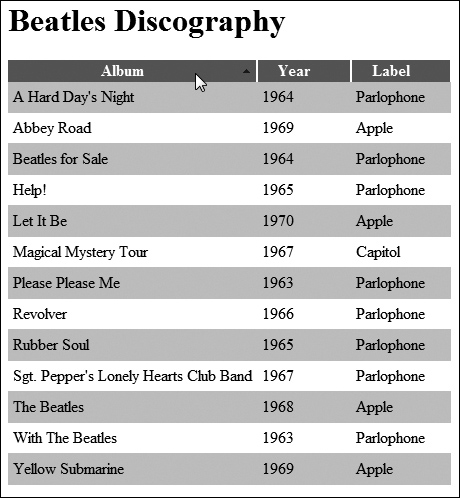
![]() Click on any other label (such as Album, shown here), and that column becomes the sort field.
Click on any other label (such as Album, shown here), and that column becomes the sort field.
• widgets: ["zebra"]: with tablesorter(), zebra-striping is a thrown-in freebie widget. Just say that you want to add the zebra widget, and you’ve got stripes.
This chapter is only a quick introduction to some of the many features available through jQuery UI. You can learn more about what else is possible at http://jqueryui.com.