
The camera plugin provides access to the device's camera in order to take pictures. This plugin also allows you to pick images from the device's image library.
In order to use the camera in our Apache Cordova project, we need to use the following cordova plugin add command:
> cordova plugin add https://git-wip-us.apache.org/repos/asf/cordova-plugin-camera.git
In order to access the camera demo, you need to click on the camera list item. You will be introduced to the Camera page. You can click on the Get Picture button in order to select whether to get a picture from the device's gallery or the device's camera. If you choose the Camera menu item, the default camera application of the device will be launched for you to capture a picture. If you choose the Gallery menu item, the device's gallery will be opened for you to pick an image. After getting the image from the camera or the gallery, you will be able to view the image on the Camera page, as shown in the following screenshot:
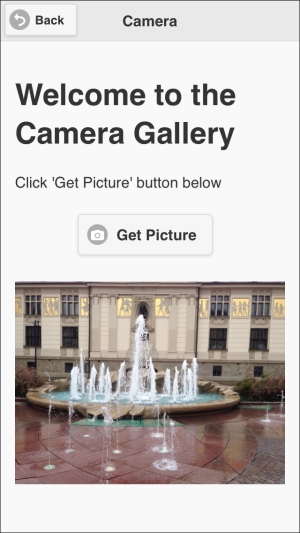
A selected image is shown on the camera page
The following code snippet shows the "camera" page:
<div data-role="page" id="camera">
    <div data-role="header">
        <h1>Camera</h1>
        <a href="#" data-role="button" data-rel="back" data-icon="back">Back</a>
    </div>
    <div data-role="content">
        <h1>Welcome to the Camera Gallery</h1>
        <p>Click 'Get Picture' button below</p>
        <div class="center-wrapper">
            <input type="button" id="getPicture" data-icon="camera" value="Get Picture"
                   class="center-button" data-inline="true"/>
        </div>
        <br/>

        <div style="width: 100%;">
            <img id="imageView" style="width: 100%;"></img>
        </div>

        <div data-role="popup" id="pictureTypeSelection">
            <ul data-role="listview" data-inset="true" style="min-width:210px;">
                <li data-role="divider" data-theme="a">Get Picture From</li>
                <li><a id="pictureFromGallery" href="#">Gallery</a></li>
                <li><a id="pictureFromCamera" href="#">Camera</a></li>
            </ul>
        </div>
    </div>
</div>
As shown in the preceding "camera" page code snippet, it contains the following:
- A page header that includes a back button
- Page content that includes the following main elements:
"getPicture": This button is used to get a picture"imageView": This is used in order to display the selected or captured image"pictureTypeSelection": This div element is a pop up that will be displayed to allow the user to select whether to get a picture from the camera or from the gallery
The following code snippet shows the page view controller JavaScript object that includes the action handlers of the page (camera.js):
(function() {
    var cameraManager = CameraManager.getInstance();

    $(document).on("pageinit", "#camera", function(e) {
        e.preventDefault();
        $("#imageView").hide();

        $("#getPicture").on("tap", function(e) {
            e.preventDefault();

            $("#pictureTypeSelection").popup("open");
        });

        $("#pictureFromGallery").on("tap", function(e) {
            e.preventDefault();
            $("#pictureTypeSelection").popup("close");

            getPhoto(true);
        });

        $("#pictureFromCamera").on("tap", function(e) {
            e.preventDefault();
            $("#pictureTypeSelection").popup("close");

            getPhoto(false);
        });
    });

    function getPhoto(fromGallery) {
        var callback = {};

        callback.onSuccess = onSuccess;
        callback.onError = onError;

        cameraManager.getPicture(callback, fromGallery);
    }

    function onSuccess(fileURI) {
        $("#imageView").show();
        $("#imageView").attr("src", fileURI);
    }

    function onError(message) {
        console.log("Camera capture error");
    }
})();
The "pageinit" event handler registers the following event handlers:
"getPicture"tap event handler: This opens the"pictureTypeSelection"pop up to allow the user to select the way to get a picture"pictureFromGallery"tap event handler: This closes the currently opened"pictureTypeSelection"pop up and callsgetPhoto(true)to pick a photo from the device's gallery"pictureFromCamera"tap event handler: This closes the currently opened"pictureTypeSelection"pop up and callsgetPhoto(false)to capture a photo using the device's camera
The getPhoto(fromGallery) method can get a photo (from the gallery or using the camera) by calling cameraManager.getPicture(callback, fromGallery) and specifying the following parameters:
- The
callbackobject that contains the following attributes: - The
fromGalleryparameter informscameraManager.getPicture()to get the photo from the device's gallery if it is set totrue, and iffromGalleryis set tofalse, then it informscameraManager.getPicture()to get the photo using the device's camera
The following code snippet shows the camera manager JavaScript object that interacts with the Apache Cordova Camera API (CameraManager.js):
var CameraManager = (function () {
  var instance;

  function createObject() {
      var fileManager = FileManager.getInstance();

      return {
          getPicture: function (callback, fromGallery) {
              var source = Camera.PictureSourceType.CAMERA;

              if (fromGallery) {
                  source = Camera.PictureSourceType.PHOTOLIBRARY;
              }

              navigator.camera.getPicture(callback.onSuccess,
                                          callback.onError,
                                          {
                                              quality: 80,
                                              destinationType: Camera.DestinationType.FILE_URI,
                                              sourceType: source,
                                              correctOrientation: true
                                          });
          }
    };
  };

  return {
    getInstance: function () {
      if (!instance) {
          instance = createObject();
      }

      return instance;
    }
  };
})();
As you can see, CameraManager is a singleton object that has a single method as highlighted in the preceding code. The getPicture(callback, fromGallery) function uses the Cordova navigator.camera.getPicture() method to get a picture.
The navigator.camera.getPicture(cameraSuccess, cameraError, [cameraOptions]) function has the following parameters:
cameraSuccess: This callback will be called if the operation succeeds. It receives a parameter that represents a file URI, or a native URI, or a Base-64 encoded string based on the specifiedcameraOptionsparameter. InCameraManager,cameraSuccessis set tocallback.onSuccess.cameraError: This parameter will be called if the operation fails. InCameraManager,cameraErroris set tocallback.onError. Note thatCameraErrorreceives a string that represents the error description.cameraOptions: This is an optional parameter that holds the camera's configuration.
The cameraOptions parameter has many attributes. The attributes in the following table are used by our CameraManager object:
We are now done with the Camera functionality in our Cordova Exhibition app. However, before exploring the compass functionality, note that the navigator.camera.getPicture() function's CameraOptions parameter has also the attributes shown in the following table:
The navigator.camera object has also the method shown in the following table: