
In this chapter, we will continue to deep dive into Apache Cordova. You will learn how to create your own custom Cordova plugin on the three most popular mobile platforms: Android (using the Java programming language), iOS (using the Objective-C programming language), and Windows Phone 8 (using the C# programming language).
Before going into the details of the plugin, it is important to note that developing custom Cordova plugins is not a common scenario if you are developing Apache Cordova apps. This is because the Apache Cordova core and community custom plugins already cover many of the use cases that are needed to access device's native functions. So, make sure of two things:
- You are not developing a custom plugin that already exists in the Apache Cordova core plugins, which were illustrated in the previous two chapters.
- You are not developing a custom plugin whose functionality already exists in other good Apache Cordova custom plugin(s) that have been developed by the Apache Cordova development community. Building plugins from scratch can consume precious time from your project; otherwise, you can save time by reusing one of the available good custom plugins.
Another thing to note is that developing custom Cordova plugins is an advanced topic. It requires you to be aware of the native programming languages of the mobile platforms, so make sure you have an overview of Java, Objective-C, and C# (or at least one of them) before reading this chapter. This will be helpful in understanding all the plugin development steps (plugin structuring, JavaScript interface definition, and native plugin implementation).
Now, let's start developing our custom Cordova plugin. It can be used in order to send SMS messages from one of the three most popular mobile platforms (Android, iOS, and Windows Phone 8). Before we start creating our plugin, we need to define its API. The following code listing shows you how to call the sms.sendMessage method of our plugin, which will be used in order to send an SMS across platforms:
var messageInfo = {
    phoneNumber: "xxxxxxxxxx",
    textMessage: "This is a test message"
};

sms.sendMessage(messageInfo, function(message) {
    console.log("success: " + message);
}, function(error) {
    console.log("code: " + error.code + ", message: " + error.message);
});
The sms.sendMessage method has the following parameters:
messageInfo: This is a JSON object that contains two main attributes:phoneNumber, which represents the phone number that will receive the SMS message, andtextMessage, which represents the text message to be sent.successCallback: This is a callback that will be called if the message is sent successfully.errorCallback: This is a callback that will be called if the message is not sent successfully. This callback receives anerrorobject as a parameter. The error object hascode(the error code) andmessage(the error message) attributes.
In addition to the Apache Cordova CLI utility, you can use the plugman utility in order to add or remove plugin(s) to/from your Apache Cordova projects. However, it's worth mentioning that plugman is a lower-level tool that you can use if your Apache Cordova application follows a platform-centered workflow and not a cross-platform workflow. If your application follows a cross-platform workflow, then Apache Cordova CLI should be your choice.
If you want your application to run on different mobile platforms (which is a common use case if you want to use Apache Cordova), it's recommend that you follow a cross-platform workflow. Use a platform-centered workflow if you want to develop your Apache Cordova application on a single platform and modify your application using the platform-specific SDK.
Besides adding and removing plugins to/from a platform-centered workflow, the Cordova projects plugman can also be used:
- To create basic scaffolding for your custom Cordova plugin
- To add and remove a platform to/from your custom Cordova plugin
- To add user(s) to the Cordova plugin registry (a repository that hosts the different Apache Cordova core and custom plugins)
- To publish your custom Cordova plugin(s) to the Cordova plugin registry
- To unpublish your custom plugin(s) from the Cordova plugin registry
- To search for plugin(s) in the Cordova plugin registry
In this section, we will use the plugman utility to create the basic scaffolding of our custom SMS plugin. In order to install plugman, you need to make sure that Node.js is installed on your operating system. Then, to install plugman, execute the following command:
> npm install -g plugman
After installing plugman, we can start generating our initial custom plugin artifacts using the plugman create command as follows:
> plugman create --name sms --plugin_id com.jsmobile.plugins.sms --plugin_version 0.0.1
It is important to note the following parameters:
--name: This specifies the plugin name (in our case,sms)--plugin_id: This specifies an ID for the plugin (in our case,com.jsmobile.plugins.sms)--plugin_version: This specifies the plugin version (in our case, 0.0.1)
The following are two parameters that the plugman create command can accept as well:
--path: This specifies the directory path of the plugin--variable: This can specify extra variables such as author or description
After executing the previous command, we will have initial artifacts for our custom plugin. As we will be supporting multiple platforms, we can use the plugman platform add command. The following two commands add the Android and iOS platforms to our custom plugin:
> plugman platform add --platform_name android
> plugman platform add --platform_name ios
In order to run the plugman platform add command, we need to run it from the plugin directory. Unfortunately, for Windows Phone 8 platform support, we need to add it manually later to our plugin.
Now, let's check the initial scaffolding of our custom plugin code. The following screenshot shows the hierarchy of our initial plugin code:
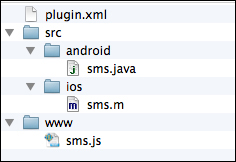
Hierarchy of our initial plugin code
As shown in the preceding screenshot, there is one file and two parent directories. They are as follows:
plugin.xmlfile: This contains the plugin definition.srcdirectory: This contains the plugin native implementation code for each platform. For now, it contains two subdirectories:androidandios. Theandroidsubdirectory containssms.java. This represents the initial implementation of the plugin inAndroid.iossubdirectory containssms.m, which represents the initial implementation of the plugin in iOS.wwwdirectory: This mainly contains the JavaScript interface of the plugin. It containssms.js, which represents the initial implementation of the plugin's JavaScript API.
We will need to edit these generated files (and maybe, refactor and add new implementation files) in order to implement our custom SMS plugin. The details of our SMS plugin definition, JavaScript interface, and native implementations will be illustrated in detail in the upcoming sections.
First of all, we need to define our plugin structure. In order to do so, we need to define our plugin in the plugin.xml file. The following code listing shows our plugin.xml code:
<?xml version='1.0' encoding='utf-8'?>
<plugin id="com.jsmobile.plugins.sms" version="0.0.1"
    xmlns="http://apache.org/cordova/ns/plugins/1.0"
    xmlns:android="http://schemas.android.com/apk/res/android">

    <name>sms</name>
    <description>A plugin for sending sms messages</description>
    <license>Apache 2.0</license>
    <keywords>cordova,plugins,sms</keywords>

    <js-module name="sms" src="www/sms.js">
        <clobbers target="window.sms" />
    </js-module>

    <platform name="android">
        <config-file parent="/*" target="res/xml/config.xml">
            <feature name="Sms">
                <param name="android-package" value="com.jsmobile.plugins.sms.Sms" />
            </feature>
        </config-file>

        <config-file target="AndroidManifest.xml" parent="/manifest">
            <uses-permission android:name="android.permission.SEND_SMS" />
        </config-file>

        <source-file src="src/android/Sms.java"
                     target-dir="src/com/jsmobile/plugins/sms" />
    </platform>

    <platform name="ios">
        <config-file parent="/*" target="config.xml">
            <feature name="Sms">
                <param name="ios-package" value="Sms" />
            </feature>
        </config-file>

        <source-file src="src/ios/Sms.h" />
        <source-file src="src/ios/Sms.m" />

        <framework src="MessageUI.framework" weak="true" />
    </platform>

    <platform name="wp8">
        <config-file target="config.xml" parent="/*">
            <feature name="Sms">
                <param name="wp-package" value="Sms" />
            </feature>
        </config-file>

        <source-file src="src/wp8/Sms.cs" />
    </platform>

</plugin>
The
plugin.xml file defines the plugin structure and contains a top-level element <plugin> , which contains the following attributes:
The <plugin> element contains the following subelements:
<name>: This element represents the plugin name; in our case, it issms.<description>: This element represents the plugin description; in our case, it is"A plugin for sending sms messages".<licence>: This element represents the plugin license; in our case, it is Apache 2.0.<keywords>: This element represents the keywords of the plugin; in our case, it iscordova,plugins,sms.<js-module>: This element represents the plugin JavaScript module, and it corresponds to a JavaScript file. It has anameattribute that represents the JavaScript module name (in our case,"sms"). It also has ansrcattribute that represents the JavaScript module file. Thesrcattribute references a JavaScript file in theplugindirectory that is relative to theplugin.xmlfile (in our case,"www/sms.js"). The<clobbers>element is a subelement of<js-module>. It has atargetattribute, whose value, in our case, is"window.sms". The<clobbers target="window.sms" />element mainly inserts thesmsExportJavaScript object that is defined in thewww/sms.jsfile and exported usingmodule.exports(thesmsExportobject will be illustrated in the Defining the plugin's JavaScript interface section) into thewindowobject aswindow.sms. This means that our plugin users will be able to access our plugin's API using thewindow.smsobject (this will be shown in detail in the Testing our Cordova plugin section).
A <plugin> element can contain one or more <platform> element(s). A <platform> element specifies a platform-specific plugin's configuration. It has mainly one attribute name that specifies the platform name (android, ios, wp8, bb10, wp7, and so on). The <platform> element can have the following sub-elements:
<source-file>: This element represents the native platform source code that will be installed and executed in the plugin-client project. The<source-file>element has the following two main attributes:src: This attribute represents the location of the source file relative toplugin.xml.target-dir: This attribute represents thetargetdirectory (that is relative to the project root) in which the source file will be placed when the plugin is installed in the client project. This attribute is mainly needed in Java platform (Android), because a file under thex.y.zpackage must be placed underx/y/zdirectories. For iOS and Windows platforms, this parameter should be ignored.
<config-file>: This element represents the configuration file that will be modified. This is required for many cases; for example, in Android, in order to send an SMS from your Android application, you need to modify the Android configuration file for asking to have the permission to send an SMS from the device. The<config-file>element has two main attributes:<framework>: This element specifies a platform-specific framework that the plugin depends on. It mainly has thesrcattribute to specify the frameworknameandweakattributes to indicate whether the specified framework should be weakly linked.
Given this explanation for the <platform> element and getting back to our plugin.xml file, you will notice that we have the following three <platform> elements:
- Android (
<platform name="android">) performs the following operations:- It creates a
<feature>element for our SMS plugin under the root element of theres/xml/config.xmlfile to register our plugin in the Android project. In Android, the<feature>element'snameattribute represents the service name, and its"android-package"parameter represents the fully qualified name of the Java plugin class:<feature name="Sms"> <param name="android-package" value="com.jsmobile.plugins.sms.Sms" /> </feature> - It modifies the
AndroidManifest.xmlfile to add the<uses-permission android:name="android.permission.SEND_SMS" />element (to have permission to send an SMS in Android platform) under the<manifest>element. - Finally, it specifies the plugin's implementation source file,
"src/android/Sms.java", and itstargetdirectory,"src/com/jsmobile/plugins/sms"(we will explore the contents of this file in the Developing Android code section).
- It creates a
- iOS (
<platform name="ios">) performs the following operations:- It creates a
<feature>element for our SMS plugin under the root element of theconfig.xmlfile to register our plugin in the iOS project. In iOS, the<feature>element'snameattribute represents the service name, and its"ios-package"parameter represents the Objective-C plugin class name:<feature name="Sms"> <param name="ios-package" value="Sms" /> </feature>
- It specifies the plugin implementation source files:
Sms.h(the header file) andSms.m(the methods file). We will explore the contents of these files in the Developing iOS code section. - It adds
"MessageUI.framework"as a weakly linked dependency for our iOS plugin.
- It creates a
- Windows Phone 8 (
<platform name="wp8">) performs the following operations:- It creates a
<feature>element for our SMS plugin under the root element of theconfig.xmlfile to register our plugin in the Windows Phone 8 project. The<feature>element'snameattribute represents the service name, and its"wp-package"parameter represents the C# service class name:<feature name="Sms"> <param name="wp-package" value="Sms" /> </feature> - It specifies the plugin implementation source file,
"src/wp8/Sms.cs"(we will explore the contents of this file in the Developing Windows Phone 8 code section).
- It creates a
This is all we need to know in order to understand the structure of our custom plugin; however, there are many more attributes and elements that are not mentioned here, as we didn't use them in our example. In order to get the complete list of attributes and elements of plugin.xml, you can check out the plugin specification page in the Apache Cordova documentation at http://cordova.apache.org/docs/en/3.4.0/plugin_ref_spec.md.html#Plugin%20Specification.
As indicated in the plugin definition file (plugin.xml), our plugin's JavaScript interface is defined in sms.js, which is located under the www directory. The following code snippet shows the sms.js file content:
var smsExport = {};

smsExport.sendMessage = function(messageInfo, successCallback, errorCallback) {
    if (messageInfo == null || typeof messageInfo !== 'object') {
        if (errorCallback) {
            errorCallback({
                code: "INVALID_INPUT",
                message: "Invalid Input"
            });
        }

        return;
    }

    var phoneNumber = messageInfo.phoneNumber;
    var textMessage = messageInfo.textMessage || "Default Text from SMS plugin";

    if (! phoneNumber) {
        console.log("Missing Phone Number");

        if (errorCallback) {
            errorCallback({
                code: "MISSING_PHONE_NUMBER",
                message: "Missing Phone number"
            });
        }

        return;
    }

    cordova.exec(successCallback, errorCallback, "Sms", "sendMessage", [phoneNumber, textMessage]);
};

module.exports = smsExport;
The smsExport object contains a single method, sendMessage(messageInfo, successCallback, errorCallback). In the sendMessage method, phoneNumber and textMessage are extracted from the messageInfo object. If a phone number is not specified by the user, then errorCallback will be called with a JSON error object, which has a code attribute set to "MISSING_PHONE_NUMBER" and a message attribute set to "Missing Phone number". After passing this validation, a call is performed to the cordova.exec() API in order to call the native code (whether it is Android, iOS, Windows Phone 8, or any other supported platform) from Apache Cordova JavaScript.
It is important to note that the cordova.exec(successCallback, errorCallback, "service", "action", [args]) API has the following parameters:
successCallback: This represents the success callback function that will be called (with any specified parameter(s)) if the Cordovaexeccall completes successfullyerrorCallback: This represents the error callback function that will be called (with any specified error parameter(s)) if the Cordovaexeccall does not complete successfully"service": This represents the native service name that is mapped to a native class using the<feature>element (insms.js, the native service name is"Sms")"action": This represents the action name to be executed, and an action is mapped to a class method in some platforms (insms.js, the action name is"sendMessage")[args]: This is an array that represents the action arguments (insms.js, the action arguments are[phoneNumber, textMessage])
Finally, the smsExport object is exported using module.exports. Do not forget that our JavaScript module is mapped to window.sms using the <clobbers target="window.sms" /> element inside <js-module src="www/sms.js"> element, which we discussed in the plugin.xml file. This means that in order to call the sendMessage method of the smsExport object from our plugin-client application, we use the sms.sendMessage() method.
In the upcoming sections, we will explore the implementation of our custom Cordova plugin in Android, iOS, and Windows Phone 8 platforms.