The word photography comes from the Greek words phos and graphis, which mean “light” and “paintbrush”—or, in other words, drawing with light. Before you take a picture with the iPhone camera, you must assess the light around you. Whether it’s light coming from the sun, light coming from a reflection of the sun off of a surface, or light coming from light bulbs indoors, the iPhone camera will use that light to determine both the shutter speed and the ISO speed (a reading dependent upon how sensitive the sensor is to the light). The results can range from incredibly sharp to a noisy blur. Using the light to get the best-exposed image possible takes some practice and skill. In this chapter you will learn some of the tricks of the trade for drawing with light with your iPhone camera.
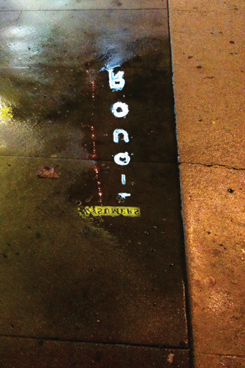
One thing many people never notice when walking around is reflections on surfaces of the world around them. Usually these reflections are not obvious. You have to look out for them. In Figure 6.1, the reflection of the sign in the puddle could have been missed because it could be seen only from a certain angle. In fact, you had to move around the puddle to get the reflection in its entirety.
But it doesn’t need to rain for you to find reflections. Reflections occur on many different types of surfaces—from the obvious, such as those found on water, to the subtle, such as those on plastic. They transform what’s being reflected into something akin to a painting or drawing, depending on what the surface that’s reflecting is like.
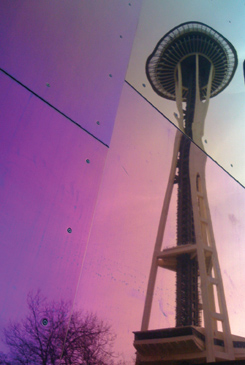
Reflections change the light from harsh and direct to soft and diffused. They can also drastically change the color of what’s being reflected. In Figure 6.2, the background colors of the Seattle Space Needle reflection are changed to mysterious hues and tones, which depend on the color of the sheet metal. When surfaces are piecemeal, like the sheet metal in this image, each part of the frame can vary. Changes in the placement of the reflection can also occur, as you can see where the sheet metal pieces come together. You can see the misplacement of the Space Needle where the pieces of sheet metal meet in the top-right corner of the frame. You can also see that the top of the Needle rolls a bit so that there are bulges in the circle that it forms.
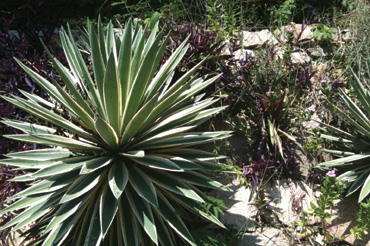
In an experiment done with the iPhone camera, I took a picture of a cactus in the sun and a picture of another cactus in the shade. Both pictures were taken at about the same time in Acapulco, Mexico, where the sun is pretty powerful. Unlike portraits, where shade is the best spot to take a photo (because you don’t get any shadows on the face), many plants are best photographed in the sun because the shadows add depth to them, sometimes making them look three-dimensional. Figure 6.3 shows the cactus that was shot in the sun, and Figure 6.4 shows the cactus that was shot in the shade. The former looks fuller and multidimensional. The leaves also look sharper, even more dangerous than the latter’s. Finally, one of the most important reasons why the cactus in the sunlight looks lush is because it has more color tones than the cactus in the shade. The color tones are doubled when you account for the tones formed by the shadow on the leaves.

When you shoot in the sun, it’s best to make sure the sun is behind you, as mentioned in Chapter 3. This ensures that your sky is blue if the weather is clear and that clouds will be visible if there are any. Another type of direct lighting situation occurs when the sun is coming in at an angle in photographs taken outside. If you’re photographing subjects outside, having the sun come in at an angle will keep direct sunlight from getting into their eyes, which causes them to squint. Figure 6.5 shows a model being photographed in a scene lit with the sun coming in at an angle.

On cloudy days, you can get some very compelling images. The iPhone camera does well on cloudy days because the intensity of the light is muted, and it’s spread around more evenly than on sunny days, when you can get harsh shadows and blown highlights. The quality of the images depends upon how cloudy it is and how much sun gets through. Figures 6.6 and 6.7 show two examples. In Figure 6.6, enough light is coming through the clouds to make the picture sharp and with good contrast. Figure 6.7 shows an image taken later in the day, when the sky was cloudy, leaving just enough light to make the dog sharp, but not enough light to see details in the fur.


As I mentioned before, the iPhone does not do well when you take pictures in indoor light. If you’re photographing indoors, take your subject where there is direct sunlight coming through.
When you shoot subjects directly under the light, you’ll get blown highlights on the head. Figure 6.8 shows this happening inside a subway car. However, it’s not a photo to toss away, because the woman has an interesting look on her face.

Even though you might think there is adequate light indoors, the iPhone doesn’t. It will adjust the ISO upward so that you get noise. However, you still can take a sharp photo and then use a de-noise app, such as NoiseBlaster (discussed in Chapter 4), to get an almost perfect photo. Figures 6.9 and 6.10 show how different a photo can be in quality when lit with indoor light versus when shot outdoors in indirect sunlight.


It’s too bad that the iPhone adjusts the ISO speed upward when you take a photo in low light. Although it does make the image sharper, an increase in noise is almost unavoidable. This is because the iPhone will automatically set the ISO speed to 1016 for photos taken at night. The high ISO setting will still occur if you keep your camera steady by using a camera holder.
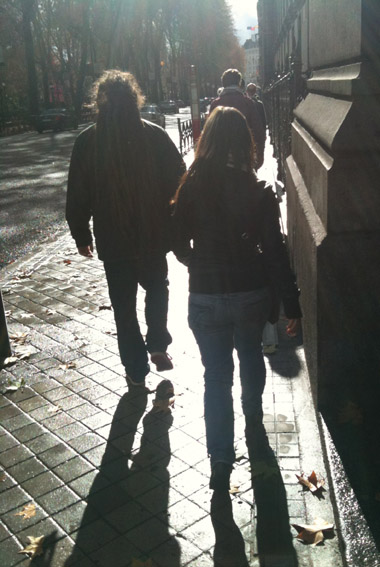
The difference in quality of night photos varies with the distance your subjects/objects are from the lens and how much (man-made) light you have around you. If subjects/objects are far away, much detail in them will be missed, as shown with the people and monument in Figure 6.11. If subjects/objects are closer, more details show up, as shown in Figure 6.12, but still far fewer than you’ll get during the day under the right conditions.
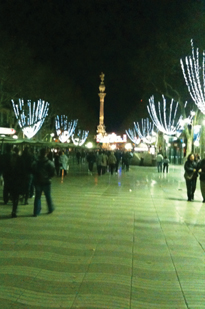
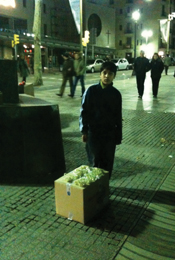
Figure 6.12. You can see some details in this image of a boy selling grapes in Spain on New Year’s Eve.
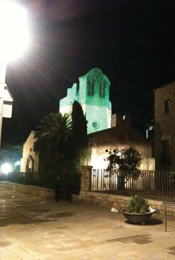
Even if there is abundant man-made light in a given scene at night, the iPhone will still set the ISO high (at 1016), producing not only noise, but also many areas of blown highlights, as shown in Figure 6.13.
You might wonder if you can pick up trails from cars with an iPhone camera. The answer is yes, you can. If you photograph moving cars in the evening, holding your camera very still, you can get movement blur with a sharp background, as shown in Figure 6.14. The best time to get trails so you do get a sharp background is a few minutes after dusk, a time when there is still some light to keep the background sharp.

Night Camera Fever
Night Camera is a so-so app that will sharpen your night photos. It does so by adding considerable noise; however, the sharpening power of this tool is outstanding. The app is great for sharpening photos you’re going to send around the Internet. Three things happen with a photo when it’s taken with Night Camera or after you’ve selected a photo from the Camera Roll to process. The first is that the resolution is dropped considerably from the normal resolution of an iPhone photo. The second is that if you’re taking a picture in landscape mode, it will convert it to portrait mode, causing a loss of resolution because it adds black space above and below your photo. You’ll have to crop with a crop app or in post-processing on your computer after you download the photo. The third is that it takes several seconds after you take the photo for Night Camera to process it, which makes it more difficult to take several photos in a row when the app is being used. See Figures 6.15 and 6.16 for a comparison of images taken with and without Night Camera.