
One of the main goals of this book is to help you realize your own version of a ROM customization. In the dictionary of modders, the act of modifying a version of Android in order to produce one's own ROM customization is often referred to with the verb to cook and the word kitchen.
"Cooking one's own ROM" means to modify the stock version of Android installed on one's device, with the aim of creating a new one.
For this reason, all the tools that might help to make the development of a ROM customization easier are called Chef toolkit.
As discussed in the previous chapters, it is indeed possible to create one's own ROM version starting from the source code, but this is not always possible, as some device manufacturers do not release their source code. In all those cases, we need to act on the system partitions, often directly on the binaries that build the internal core, both on the application framework and on the filesystem utilities.
In the next paragraphs, we will learn how to cook a ROM starting from binary images, beginning from the environment and analyzing the development tools that will help us carry out our first ROM customization.
Before we can start developing the ROM, we most certainly need to prepare an adequate environment on our computer. Android can be used with basically all the most recent operating systems, from Windows, to Linux, to OS X.
We always refer to Ubuntu, as we did in the previous chapters when we dealt with compiling Android from the source code. Therefore, all you need to start is a computer with a recent version of Ubuntu installed on it. Besides that, we suggest to also install a good text editor for developers—it could either be VIM from the command line, or graphic editors such as ATOM, SublimeText, and so on. We will mostly work from the console, using different scripts and tools in order to finalize our first custom ROM.
One of the chef's most important tools is undoubtedly the Kitchen. Although we are stealing our analogies from the world of cooking, we are actually focusing on the preparation of our first Android customization—the first step is obtaining the system binary images.
We refer to as the Android Kitchen the set of tools that are usually used, such as the scripts to be used in a shell, and which help the developer perform automated tasks, such as decompressing and editing the system images that build a ROM, decompiling APK packets, sometimes adding the root privileges to the ROM, and so on.
Of course, many different kitchens exist online, each one with its own peculiarities. We will study some of them and we will try to perform simple actions in order to get our first custom ROM ready to be flashed onto our device.
One of the most popular Android Kitchens is
dsixda. The project is formally "retired," but it has been forked by lots of users and the development is still ongoing. It's open source and you can download it or fork it and contribute to the project starting from https://github.com/dsixda/Android-Kitchen.
The dsixda kitchen is based on a suite of Bash scripts and tools to provide an easy method to perform the most common cooking operations:
- Add Busybox
- Add root permissions
- Customize the boot screen
These are just few of the possible operations available in its console menu. This kitchen is compatible with Windows, Linux, and OS X. We are going to use it with our trusted Ubuntu. Once you have downloaded the kitchen (https://github.com/dsixda/Android-Kitchen/archive/0.224.zip), uncompress it into a folder, enter the folder, and run the following:
$: ./menu
This command will fire up the main menu, as shown in the following screenshot:

The dsixda kitchen manipulates two specific partitions—system and boot-respectively compressed in system.img and boot.img files. In the following sections, we will dig into extracting these partitions and customizing them.
Many other different tools could come in handy for the developer, of course strictly depending on one's specific needs. A hexadecimal editor would certainly be very useful for the analysis of binary images, while simple graphics editing software would help when it comes to modifying icons or other graphical aspects of the ROM, as well as for preparing the whole environment for compiling the Linux kernel, and possibly Android applications to add to the ROM.
We usually prepare the environment as if we had to compile Android from the source together with the Linux kernel, so that we definitely have all the necessary tools to build our custom ROM.
Working with an Android system, it's quite common to need to manipulate DEX files. DEX stands for Dalvik Executable and these files are used by Android Virtual Machine. To easily manipulate these files, you can use APKTool by Ryszard Wiśniewski and Connor Tumbleson. The tools are open source and you can download them at http://ibotpeaches.github.io/Apktool/.
APKTool is written in Java, so you need a JVM to use it. Once you have the APKTool jar file in place, fire up a terminal and run the following:
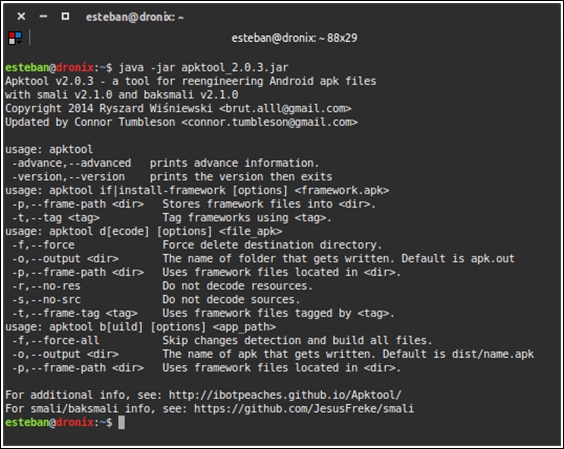
$: java –jar apktool_2.0.3.jar
Replace the version with yours, if necessary. The following screenshot shows the initial help menu of the tool:
APKTool is based on two other tools—smali
and baksmali, to assemble and disassemble the files. It requires an initial setup to work properly: framework-res.apk position. You must specify where APKTool must look to obtain this file. framework-res.apk is part of the Android system and can be extracted from a running Android device, using our trusted ADB:
~$ adb pull /system/framework/framework-res.apk .
The previous command will copy the APK from the Android device into the current folder. Once we have the file in place, we can tell APKTool where to find it:
~$ apktool if {path to framework-res.apk}
Now that everything is configured, we can try to decompile and customize an APK, using the following command:
~$ apktool d myapk.apk path_destination_decompilation
The APK content will be placed in the destination folder we specified and we can edit any file we want. After all our modifications, we can recompress the folder into an APK file with the following command:
~$ apktool b path_decompiled_files new_apk_mod.apk
Once the new APK is ready, we can copy it to the device with a file transfer app or using ADB push, as we saw in the previous chapters.