
In the previous chapter, we created and deployed our first custom version of Android. We created a version for a commercial smartphone, the Google Nexus 6, and a more hard-core version for a development board, the Udoo Quad. We learned about more development tools, such as ADB and Fastboot. We focused on the debugging tools, mastering the serial connection, and the boot sequence.
In this chapter, we will dive into the system—from the kernel customization to the boot sequence. You will learn how to retrieve the proper source code for Google devices, how to set up the build environment, how to build your first custom version of the Linux kernel, and deploy it to your device. You will learn about:
- Toolchain overview
- How to configure the host system to compile your own Linux kernel
- How to configure the Linux kernel
- Linux kernel overview
- Android boot sequence
- The
Initprocess
In Chapter 1, Understanding the Architecture, we learned how Android has been designed and built around the Linux kernel. One of the reasons to choose the Linux kernel was its unquestioned flexibility and the infinite possibilities to adjust it to any specific scenario and requirement. These are the features that have made Linux the most popular kernel in the embedded industry.
Linux kernel comes with a GPL license. This particular license allowed Google to contribute to the project since the early stages of Android. Google provided bug fixing and new features, helping Linux to overcome a few obstacles and limitations of the 2.6 version. In the beginning, Linux 2.6.32 was the most popular version for the most part of the Android device market. Nowadays, we see more and more devices shipping with the new 3.x versions.
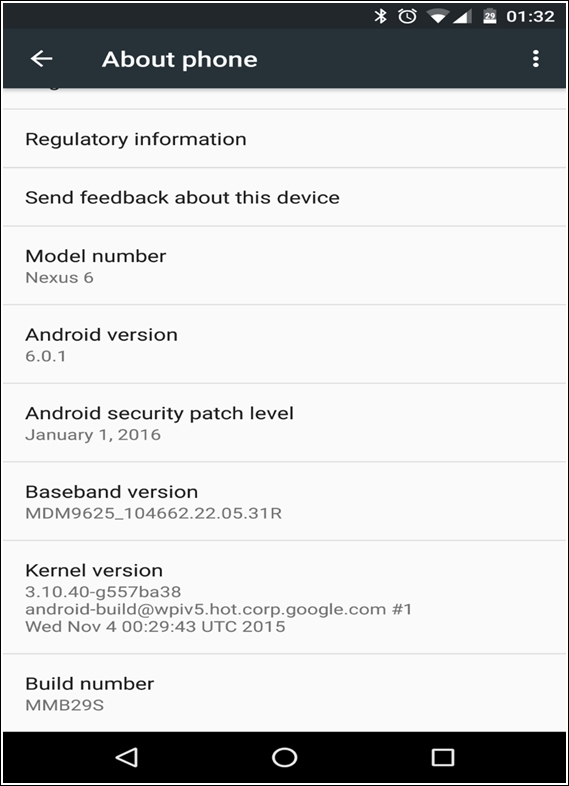
The following screenshot shows the current build for the official Google Motorola Nexus 6, with kernel 3.10.40:
The Android version we created in the previous chapters was equipped with a binary version of the Linux kernel. Using an already compiled version of the kernel is the standard practice: as we have seen, AOSP provides exactly this kind of experience.
As advanced users, we can take it a step further and build a custom kernel for our custom Android system. The Nexus family offers an easy entry into this world as we can easily obtain the kernel source code we need to build a custom version. We can also equip our custom Android system with our custom Linux kernel and we will have a full-customized ROM, tailored for our specific needs.
In this book, we are using Nexus devices on purpose—Google is one of the few companies that formally make available the kernel source code. Even if every company producing and selling Android devices is forced by law to release the kernel source code, very few of them actually do it, despite all the GPL license rules.
Google provides the kernel source code and binary version for every single version of Android for every single device of the Nexus family.
The following table shows where the binary version and the source code are located, ordered by device code name:
|
Device |
Binary location |
Source location |
Build configuration |
|---|---|---|---|
|
shamu |
device/moto/shamu-kernel |
kernel/msm |
shamu_defconfig |
|
fugu |
device/asus/fugu-kernel |
kernel/x86_64 |
fugu_defconfig |
|
volantis |
device/htc/flounder-kernel |
kernel/tegra |
flounder_defconfig |
|
hammerhead |
device/lge/ hammerhead-kernel |
kernel/msm |
hammerhead_defconfig |
|
flo |
device/asus/flo-kernel/kernel |
kernel/msm |
flo_defconfig |
|
deb |
device/asus/flo-kernel/kernel |
kernel/msm |
flo_defconfig |
|
manta |
device/samsung/manta/kernel |
kernel/exynos |
manta_defconfig |
|
mako |
device/lge/mako-kernel/kernel |
kernel/msm |
mako_defconfig |
|
grouper |
device/asus/grouper/kernel |
kernel/tegra |
tegra3_android_defconfig |
|
tilapia |
device/asus/grouper/kernel |
kernel/tegra |
tegra3_android_defconfig |
|
maguro |
device/samsung/tuna/kernel |
kernel/omap |
tuna_defconfig |
|
toro |
device/samsung/tuna/kernel |
kernel/omap |
tuna_defconfig |
|
panda |
device/ti/panda/kernel |
kernel/omap |
panda_defconfig |
|
stingray |
device/moto/wingray/kernel |
kernel/tegra |
stingray_defconfig |
|
wingray |
device/moto/wingray/kernel |
kernel/tegra |
stingray_defconfig |
|
crespo |
device/samsung/crespo/kernel |
kernel/samsung |
herring_defconfig |
|
crespo4g |
device/samsung/crespo/kernel |
kernel/samsung |
herring_defconfig |
As in Chapter 4, Moving to real-world hardware, we are going to work with the Motorola Nexus 6, code name Shamu.
Both the kernel binary version and the kernel source code are stored in a git repository. All we need to do is compose the proper URL and clone the corresponding repository.
In this section, we are going to obtain the kernel as a binary, prebuilt file. All we need is the previous table that shows every device model, with its codename and its binary location that we can use to compose the download of the URL. We are targeting Google Nexus 6, codename shamu with binary location:
device/moto/shamu-kernel
So, to retrieve the binary version of the Motorola Nexus 6 kernel, we need the following command:
$ git clone https://android.googlesource.com/device/moto/shamu-kernel
The previous command will clone the repo and place it in the shamu-kernel folder. This folder contains a file named zImage-dtb—this file is the actual kernel image that can be integrated in our ROM and flashed into our device.
Having the kernel image, we can obtain the kernel version with the following command:
$ $ dd if=kernel bs=1 skip=$(LC_ALL=C grep -a -b -o $'x1fx8bx08x00x00x00x00x00' kernel | cut -d ':' -f 1) | zgrep -a 'Linux version'
Output:

The previous screenshot shows the command output: our kernel image version is 3.10.40 and it has been compiled with GCC version 4.8 on October the the twenty-second at 22:49.
As for the binary version, the previous table is critical also to download the kernel source code. Targeting the Google Nexus 6, we create the download URL using the source location string for the device codename shamu:
kernel/msm.git
Once we have the exact URL, we can clone the GIT repository with the following command:
$ git clone https://android.googlesource.com/kernel/msm.git
Git will create an msm folder. The folder will be strangely empty—that's because the folder is tracking the master branch by default. To obtain the kernel for our Nexus 6, we need to switch to the proper branch.
There are a lot of available branches and we can check out the list with the following command:
$ git branch -a
The list will show every single branch, targeting a specific Android version for a specific Nexus device. The following screenshot shows a subset of these repositories:

Now that you have the branch name, for your device and your Android version, you just need to checkout the proper branch:
$ git checkout android-msm-shamu-3.10-lollipop-release
The following screenshot shows the expected command output:
