
In the olden days of the web, users of traditional backend systems would spend their time crunching data in list and form-based interfaces. Pick an item from a list of customer orders, then navigate to a detail form, rinse, and repeat. The trouble is that we're talking about thousands of entries in a list, and lots of detail in the forms. The chances are that in our customer order example, we might even need sub-forms to show all of the information that is available, and each time we move to another screen we're refreshing the whole page and getting all of that data all over again.
That's fine; it's how the web works. But in a data processing scenario, where your users are going back and forth throughout the day, there's a real benefit in optimizing the speed at which screens appear and data is refreshed. The Ext JS grid plays a key part in this, as we've seen, by bringing AJAX-powered paging and sorting of GridViews into play, to replace the old-style static lists.
Now we're going to take a look at the other part of the puzzle—Ext JS Window and dialog support. These classes allow developers to present any kind of information to their users, without forcing the users to navigate to another screen. By popping up as an overlay on top of the current page, a window, or dialog can present detailed data in the form of grids, tree, images, and text. We can also use them in a simplified form to show informational alerts or to quickly capture user data.
In this chapter, we'll talk about the main Ext.Window class and the Ext.MessageBox subclass, both of which have extensive applications in our enhanced user interface. While the Window itself is designed to be a flexible, multipurpose component, the MessageBox is a more specialized solution. It is used in a similar way to standard JavaScript pop ups such as alert and prompt, albeit with many more behavioral and presentational options available for it.
Ext.Window is another fully-blown Ext.Container, giving it a wealth of underlying settings which will be familiar from the other parts of the Ext JS framework. It also hints at the types of interfaces that we can build in a Window, given that we can set the internal layout of a Container to a range of different options.
We're also going to cover some extra classes which help us to manipulate multiple Windows: Ext.WindowGroup and Ext.WindowManager. In advanced applications, we can use more than one window to present drill-down views of information, or we can allow the user to view more than one record at once in separate windows. Window groups assist with these applications, giving us the power to act upon many windows at once.
Despite the fact that dialogs build on Ext.Window, we're going to address dialogs first. That's because the dialogs abstract away many of the powerful options of Ext.Window, making it a cut-down version of the superclass.
As previously mentioned, dialogs can be likened to the prompt and alert functions that are available in most browser implementations of JavaScript. Although the appearance of those pop ups is controlled by the browser and operating system, and their behavior is limited to the most common cases, these restrictions don't apply to the Ext JS dialogs.
Note
Although the dialog class is actually Ext.MessageBox, Ext JS provides a shorthand version - Ext.Msg. This shorthand version can make your code a little more concise, but it's up to you which one you use, as they're both functionally equivalent.
Let's take a look at the ready-made pop ups that Ext JS makes available.
We've talked about how Ext provides a replacement for the JavaScript alert, so let's have a look at that first:
Ext.Msg.alert('Hey!', 'Something happened.'),
The first thing to notice is that Msg.alert takes two parameters, whereas the standard alert takes only one. The first allows you to specify a title for the alert dialog, and the second specifies the body text. The previous code results in a messagebox like this:
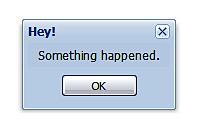
As you can see, it performs very much the same function as a standard alert but with that familiar Ext JS look and feel. We can also convey a little bit more information by using the title bar. Showing Msg.alert doesn't temporarily halt script execution in the same way that a normal alert will; be conscious of this when using the Ext version. Later, we'll look at ways to use callbacks to replicate that halt functionality should you need it.
Note
You can only use a single Ext.MessageBox at a time. If you try to pop up two boxes at the same time, the first will be replaced by the second. So in some cases, you'll want to check for the presence of an existing dialog in case you inadvertently overwrite the message it is presenting.
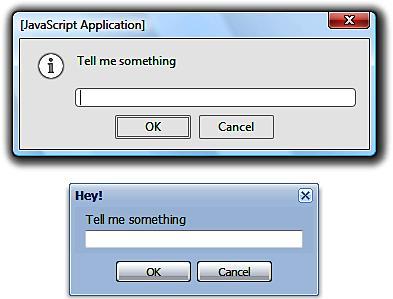
Let's take a look at another replacement, the Ext.Msg.prompt. This allows the capture of a single line of text in the same way that the JavaScript prompt does. However, instead of simply returning a value, it gives you a few more options. Here's a comparison of doing the same thing with each method:
var data = prompt('Tell me something'),
Ext.Msg.prompt('Hey!', 'Tell me something', function(btn, text){
if (btn == 'ok'){
var data = text;
}
}, this, false, ''),
Again, Msg.prompt allows you to pass a title as the first argument, and the body text is the second. The third argument is a callback function that will be called when a button—either OK or Cancel—is clicked in the prompt. The callback has two arguments: the button that was clicked and the text that was provided by the user; you can use these as demonstrated in the example code.
Note the other three options that come after the callback function. They are scope, multiline, and initial value, respectively. The multiline argument is interesting—accepting a boolean value, it allows a more flexible capture of text than the standard prompt.
Our final replacement messagebox is for the confirm pop up, which allows the user to choose between confirming an action or rejecting it. The code should be pretty familiar by now:
Ext.Msg.confirm('Hey!', 'Is this ok?', function(btn, text){
if (btn == 'yes'){
// go ahead and do more stuff
} else {
// abort, abort!
}
});
Again we're using the title, body text, and callback arguments that we saw in the Msg.prompt, so there are no surprises here. An interesting difference between this and the standard confirm is that whereas the standard confirm gives the options OK and Cancel, the Ext JS one gives the user the choice of Yes and No. This is arguably a better default, particularly when you use a question in the body text of the confirm messagebox.
There's a fourth standard messagebox which is included with Ext JS one that isn't just a replacement for a basic JavaScript pop up. This is the progress dialog. Ext.Msg.progress isn't designed to be used independently like the other Ext messageboxes, and doesn't need user input. In fact, if you trigger it like this:
Then you're going to be waiting for a while, because you'll get a modal dialog which never progresses anywhere. The first two arguments are the title and body text as in the previous examples, while the third is the text that will appear in the progress bar.
So, if we don't want to be stuck with an eternal progress bar, how can we get things moving? The Ext.Msg.updateProgress method is provided just for this purpose. Here's an example which illustrates its use:
var count = 0;
var interval = window.setInterval(function() {
count = count + 0.04;
Ext.Msg.updateProgress(count);
if(count >= 1) {
window.clearInterval(interval);
Ext.Msg.hide();
}
}, 100);
This is a very contrived example, in which we're calling updateProgress every 100 milliseconds via a timer, and incrementing the progress using the count variable every time. The first argument to updateProgress is a value between zero and one, with zero representing start and one representing finish, the second allows you to update the progress bar text, and the third lets you change the body text. Updating the text can be handy if you'd like to provide additional feedback to the user, even if this is just to show a percentage representation—"x% complete"—of the current progress.
Back in our example code, note that you must also call Ext.Msg.hide in order to clear the progress dialog from the screen—updateProgress doesn't handle this for you, even if you set the current progress to a value of greater than one.
The four included messageboxes, alert—prompt, confirm, and progress—are the foundation of the Ext JS dialog support, but we can also weak their functionality to support some custom scenarios.
The four methods for creating messageboxes that we've just covered are essentially shortcuts to a fifth method: Ext.Msg.show. This method takes a configuration object as its single argument, and the configuration options within this object allow the creation of a messagebox that supports all of the features available via our shortcut methods. The simplest example of this method is:
Ext.Msg.show({
msg: 'AWESOME.'
});
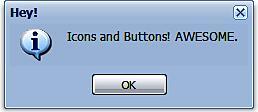
This is closer replication of the JavaScript alert than the standard Ext JS one—but it's not as functional. Something a little better would be:
Ext.Msg.show({
title: 'Hey!',
msg: 'Icons and Buttons! AWESOME.',
icon: Ext.MessageBox.INFO,
buttons: Ext.MessageBox.OK
});
Now we've got our title back as well as our button, but there's an icon as well.
The means of configuring buttons and icons is interesting: pass in one of the constants that Ext JS provides, and you'll get a pre-configured button or CSS class that shows an icon. Here's the list of the icon constants:
And the button constants:
Ext.Msg.CANCELExt.Msg.OKExt.Msg.OKCANCELExt.Msg.YESNOExt.Msg.YESNOCANCEL
This variety of ready-made options provides you with a fair bit of flexibility when it comes to the appearance of your messageboxes, but we can go further. As mentioned, the icon constants are simply strings representing CSS class names. For example, Ext.Msg.QUESTION provides the ext-mb-question string. This ties in to the Ext JS stylesheets and provides the styles for a question icon. The logical conclusion is that we can provide our own strings in place of these constants, allowing full customization of the icon areas.
The button constants are a bit less flexible, and contain object literals specifying how the dialog buttons should be displayed. For example, Ext.Msg.YESNOCANCEL contains the following (represented in JavaScript Object Notation for easy reading):
{ cancel:true, yes: true, no:true }
This is specifying that all of the yes, cancel, and no buttons should be included. You can use this to selectively turn off particular buttons, but you can't change the order or add new buttons in this manner. This means that providing custom button definitions in this way is of limited use.
Note
In addition to accepting the Ext.Msg button constants, the show method options will also accept a standard Ext JS button configuration object.
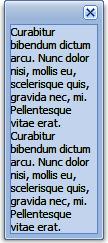
However, we can tweak the dialog in other ways. It's possible to supply Ext.Msg.show with width and height options to restrict the dimensions of your pop up. This could be handy in a situation where you have a long message to display and would like to prevent it from stretching to one long line across the screen.
The show configuration object also allows us to use the cls option to specify a CSS class to apply to the container of the dialog. A developer could use this to target any child objects of the container by using custom CSS rules, potentially paving the way for multiple dialogs that have totally different appearances. Do you need to provide a bright-pink pop up for your users? This configuration option allows you to do this.
So far, the configuration options for Ext.Msg.show have addressed appearance, but there are a few options that can also adjust behavior. If we use the progress property, then we can replicate the standard Ext JS progress dialog:
Ext.Msg.show({progress:true});
By using this in tandem with other options such as title and msg, you can create a custom progress dialog.
Similarly, the prompt and multiline options allow the creation of a custom input pop up:
Ext.Msg.show({prompt:true, multiline:true});
Here, we create a pop up that accepts multiple lines of input. But by omitting the multiline value or setting it to false, we can limit the pop up to a single line. Again, using the other configuration options for Ext.Msg.show allows us to expand this sample code into a fully-featured input dialog.
Another option that changes the default behavior of a pop up is modal. This option allows you to specify whether the user can interact with the items behind the pop up. When set to true, a semi-transparent overlay will prevent interaction.
As we have discussed earlier, the Ext.Msg pop ups don't block script execution in the same way as standard JavaScript pop ups. This means that we need to use a callback to trigger code after the dialog is dismissed. We can do this using show's fn configuration option, which gets called with two arguments: the ID of the button that has been clicked, and the text entered into the text field in the dialog (where the dialog includes an input field). Obviously, for a simple alert prompt, you're not going to receive any text back, but this function does provide a consistent means of consuming callbacks across the whole range of dialogs that you can build using Ext.Msg.show.
We briefly touched on the fact that the Ext.Msg messageboxes are actually customized Ext.Windows. If you think we're able to tweak Ext.Msg a lot…wait till you see what Ext.Window can let us do.
Any computer user will be familiar with the concept of windows; an informational panel that appears on the screen to provide more data on the current user's actions. We can replicate this concept using the Ext.Window class, a powerful component that supports many advanced scenarios.
We can open a window using a very minimal amount of code:
var w = new Ext.Window({height:100, width: 200});
w.show();
Running this gives you an empty pop up window that in itself is…well, completely useless; but it does show off a few of the interesting default features of an Ext.Window. Straight out of the box, without any configuration, your window will be draggable, resizable, and will have a handy close icon in the upper right corner of the dialog box. It's still not a very impressive demonstration, however, because our window doesn't actually show anything.
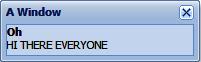
The easiest way to populate a window is with plain old HTML. Here's an extended example that demonstrates this feature:
var w = new Ext.Window({
height: 150, width: 200,
title: 'A Window',
html: '<h1>Oh</h1><p>HI THERE EVERYONE</p>'
});
w.show();
We've added two new configuration options here. First, a title option that allows you to set the text in the title bar of the window, and second, an html option that accepts a string of raw HTML that will be displayed in the window.
The use of this approach is immediately apparent—we can go back to basics and inject whatever HTML we require directly into the content area of the window. This allows us to tweak our window right down to the markup level, and provide lots of CSS hooks for styling. Even so, it's not the truly integrated experience that we've come to expect from Ext JS. However, another configuration option lets us take a more familiar approach.
Remember that Window is a subclass of Panel, and Panel has all kinds of interesting tricks up its sleeve. The items configuration option accepts an array of configuration objects or component instances:
var w = new Ext.Window({
items:[
{ xtype: 'textfield', fieldLabel: 'First Name'},
new Ext.form.TextField({fieldLabel: 'Surname'})
]
});
w.show();
In the above example we have added two textfields, the first one using "lazy" xtype initialization, and the second one using standard object initialization. These two items will be added to the window's internal panel, but the manner in which they are displayed can be controlled based on the window's layout property.
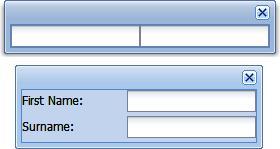
Ext JS defines a number of layout models within the Ext.layout package, and each of these layouts is used with a panel to allow the components within it to be arranged in a specific manner. In our previous example, we showed how we can add a couple of textboxes to a Window, but we can also enhance the appearance of the window simply by using the appropriate layout. In this case, we need Ext.layout.FormLayout, which provides support for field labels and the general spacing and positioning you'd expect from an edit form:
var w = new Ext.Window({
layout: 'form',
items:[
{ xtype: 'textfield', fieldLabel: 'First Name'},
new Ext.form.TextField({fieldLabel: 'Surname'})
]
});
w.show();
We use the layout configuration option to specify that we want to use a form layout, and immediately the difference in appearance becomes clear. In the next figure, the first dialog box does not use a layout, and the second one does.
This is not a feature of Ext.Window; it comes straight from the Panel superclass. But the fact that Window supports this feature is extremely important for an application developer—especially when you consider how long it would take to create a rich form using our previous HTML injection technique. The other layouts within the Ext.layout package provide many more approaches to windows design, expanding the scenarios that a window can support.
In addition to the various ways of filling the window's content area, we also have a great deal of flexibility when it comes to the appearance and behavior of each pop up. There are many configuration options provided by the Ext.Window's superclass hierarchy, which starts with Ext.Panel, while also having a wealth of options of its own.
In our very first window example, I demonstrated how we get a number of great features for free—resizing, dragging, and a close button. Windows with strict layouts aren't really meant to be resized, so we can prevent this behavior with the configuration option resizable set to false. Dragging is often just a matter of preference, and in most cases there's little harm in leaving it enabled. That said, there are times when it's simply not necessary functionality, so I prefer to disable it by using the draggable option set to false.
var w = new Ext.Window({
height:50,
width: 100,
closable: false,
draggable: false,
resizable: false
});
w.show();
When using a form window, it's often preferable to have text buttons explaining that different actions will, for example, either save a record, or cancel any changes that have been made, and in such cases, the close icon can be disabled by having the closable option set to false. There's a second option that gives a little bit more control over this behavior: closeAction can be set to either hide or close, with hide simply causing the window to vanish, but not destroying it, and close actually removing the window from the DOM. This is an important difference if you think you're going to be re-using the window later, as simply hiding and re-showing it is more efficient than re-creating the window every time.
With the default functionality under control, we can begin to review the ways we can further tweak and augment the features of the Ext.Window. We've already demonstrated the use of the height and width options that set the fixed dimensions of the window and crop any content that exceeds these dimensions dimensions.
We do have another option. The autoHeight and autoWidth config settings, which are both booleans, allow you to fill your window with components without having to to worry about ensuring that your height and width values are absolutely correct. This is a really useful tool during development, when it's unlikely that you know the exact dimensions of whatever you're creating; just set autoHeight and autoWidth to true and forget about it. Even better, these options can be used separately, so that you can set your width, but have the height automatically calculated. This is useful if you're putting dynamic content into a window, because you will need to make sure that it doesn't stretch the window off the sides of your screen.
The most pervasive example of a windowing system is the computer desktop, with multiple windows representing applications or elements of the filesystem. In such systems, users are allowed to hide windows for later use, or minimize them; they're also able to expand windows to fill the screen, or maximize it (also referred to as maximizing the window). These are familiar terms, and are of course supported by Ext.Window via the maximizable and minimizable boolean configuration options.
These features are disabled by default, but they are fully-featured and work in much the same way as their desktop equivalents. When set to true, new icons appear in the upper right of the window that are similar in appearance to the ones on the Windows operating system. Maximizable allows the window to be expanded to fill the whole of the browser viewport, as expected, but minimizable is a little trickier. Ext JS doesn't know where you want the window to vanish to—on the Windows operating system it would be the task bar, but for other operating systems it could be somewhere else. So you've got to provide the minimize functionality yourself. Ext only gives you the icon and a minimize event that must be handled in a manner appropriate to your application. Later in this chapter, we'll provide a brief example on how this can be achieved using the events available for the Ext.Window class.
Ext JS windows support another means of cutting down the real-estate of your window, and this is built right into the framework. The collapsible boolean adds another button to the upper right of the window and allows the user to shrink it down to cause only the title bar to be shown. A second click expands the window back to its original state.
We can also use the expandOnShow configuration to specify that a hidden window will always be expanded to its full dimensions when it is shown. This is useful for windows that have been previously hidden and need to be brought back to the user's attention.
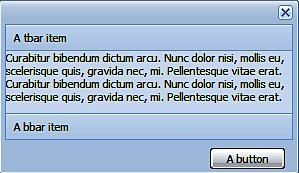
As well as the standard title bar and body content area, we also have the ability to add further content areas to a window. Some of these areas can be fully customized, and some are a little bit more restrictive, but together they provide yet another method for creating functional windows.
Every window has the built-in capability to add toolbars to the top and the bottom. These toolbars can include any valid toolbar items, be it buttons, menus, or text. In addition, we can use the footer element to contain some further buttons via the buttons configuration option.
Depending on your requirements, you may choose to use one or more of these content areas to provide tools to allow your users to manipulate and consume the information within the window. A typical example would be to create a window with a form layout, which then includes the Save and Cancel buttons within the footer. This reflects the typical style of a data entry form, and will be positioned automatically by Ext JS with little configuration being required.
When our windows are on-screen, we have a range of methods that we can use to change their position, appearance, and behavior. In fact, we've already used one of these methods in our examples—show—which is used to display the window in the first place. Although we've always used show in its most simple form, it can take up to three arguments—all of which are optional.
myWin.show('animTarget', function() { alert('Now Showing'), }, this);
Firstly, we can specify an element, or the ID of an element, to form the starting point from which the window should animate when opening. This cosmetic effect can also be specified using the animateTarget configuration option. The second argument is a callback function, fired when the rendering of the window is complete, and the third argument is simply the scope for the callback. It turns out the show method isn't so basic after all!
The obvious companion to show is hide. Indeed, it takes the same arguments, and will cause the window to vanish from the screen for later use. If you're sure that you don't want to use the window later then it's probably better to use the close method, which will remove it from the DOM and destroy it.
The functionality delivered by the close and hide methods has already been demonstrated—it is provided by the window's close icon. There are a few more methods that allow programmatic control over items, that we've already covered, such as the minimize and maximize methods. This basic functionality is augmented by the restore method, which is used after maximize to return the window to its previous dimensions, and toggleMaximize, which is simply a shortcut to switch between maximize and restore. And in terms of setting the window back to its defaults we can also use the center method, which sets the window in the middle of the browser's viewport.
We can further manipulate the position of our windows: alignTo allows a developer to programmatically move a window to next to a specified element. This method has three parameters:
The element to align to—as a string or full element
The position to align with—as detailed in the
Element.alignTodocumentation, and briefly discussed in: Chapter 10—EffectsA positioning offset, specified as an
[x,y]array
This method is useful when you have an application with a dynamic workspace—you need to ensure that your windows appear in the correct place in relation to other items being displayed. A useful compliment to this feature is the anchorTo method, which takes the same arguments and allows a window to remain anchored to another element, even when the browser window has been resized or scrolled.
While many of the Ext.Window methods simply give a developer access to existing functionality via their code, there are a few additional ones that provide for advanced scenarios or for features that would be laborious to code by hand.
Pretty much all of the actions we've covered so far have their own events that serve as hooks for your custom code. Minimize is one which we've explicitly mentioned earlier, because you have to handle this event if you want the minimize icon to do anything. Ideally, you'd expect the window to be stored in some kind of 'taskbar'-style area for later retrieval.
var w = new Ext.Window({
height: 50,
width: 100,
minimizable: true
});
w.on('minimize', doMin);
w.show();
In the above example, we're creating a new window, which we set as minimizable, and then add an event listener for the minimize event. We then show the window on the screen. Our doMin event handling function looks like this:
function doMin() {
w.collapse(false);
w.alignTo(document.body, 'bl-bl'),
}
We simply tell our window to collapse down to the title bar (passing in a parameter of false simply indicates that we don't want to animate the collapse) and then use the alignTo method, which we've discussed previously. With the parameters we've chosen, the window's bottom left will be aligned to the bottom left of the document body—just like the first window in a taskbar would be.
Of course, with further windows, you'd end up with an overlapping stack in the bottom-left; not ideal for a real world application. However, it does show how the minimize event can be handled, and can be used as an alternative to the collapse method.
State handling with windows is a relatively simple process. Windows are fully integrated with the standard Ext JS state management facilities via the stateful configuration flag. Assuming that we want to track the position, minimize status, size and z-order of a window through page refreshes and user sessions, we can use code such as this:
var w = new Ext.Window({
stateful: true,
stateevents:['resize'] // track the resize event
});
We use the stateevents option to set an array of window events, which will cause the component to save its state. Unlike state handling with the TreeNodes in: Chapter 8—Ext JS Does Grow On Trees, we don't need to hook into the beforestatesave event this time around. The window component will look after itself, and automatically set its configuration to reflect its previous state.
In a rich Internet application, it can be desirable to allow the user to have many windows open simultaneously, reviewing a variety of information without having to navigate to separate pages. Ext JS allows for this: you can create any number of non-modal windows and manipulate them as you see fit. However, we face a problem when using a multitude of windows—how do we manage them as a group? For example, the users may wish to clear their workspace by minimizing all open windows. We can achieve this functionality, and more, by using a window group.
When you create an Ext.Window, it will automatically be assigned to a default Ext.WindowGroup which, by default, can always be referred to via the Ext.WindowMgr class. However, you can create as many additional WindowGroups as your application requires, assigning windows to them via the manager configuration option.
Why would your application require a method of grouping windows? Well, multiple windows are affected by z-order, in that they can be stacked on top of each other. We can use WindowMgr.bringToFront to bring a particular window to the top of the stack, perhaps if it has been updated with new information and we want to draw the user's attention to this. In some situations, this would be the same as using Ext.Window.toFront. However, the WindowMgr approach will respect the z-order grouping of individual WindowGroups, and so is a safer method when building a large application with many windowing options.
The grouping and z-ordering of windows is a confusing topic, so let's put these advanced features into a real-world context.
We're going to build a very basic simulation of a customer service application. Our user will be the supervisor of a live chat system, where customers who are online can ask questions and get answers straight away. The supervisor will take some of these questions, but they also monitor the status of other agents who are dealing with customer sessions. We'll only be interested in the windowing aspect of this application, so it's going to be filled with a lot of dummy data to illustrate our point.
Here's a screenshot of the a simple application developed to support this:
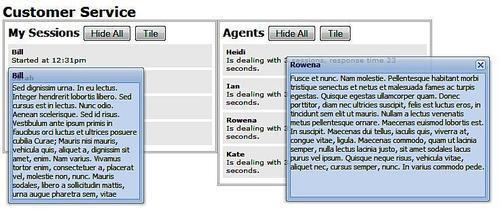
The lists have deliberately been left plain to avoid the need for extra JavaScript code—an application such as this could really benefit from grids or data views displaying the sessions and agents, but we really don't need them just to demonstrate our windowing code.
We're going to use a JavaScript object literal to structure our example. Here's the shell:
var customerService = {
sessionsGroup : null,
agentsGroup : null,
init : function() {
}
};
Ext.onReady(customerService.init, customerService);
We have a couple of local variables that will hold our window groups, and an empty init function that gets called, with the customerService object as its scope, from the Ext.onReady statement. Now that we've got our JavaScript skeleton, we need to take a look at the markup that is going to power our customer service app:
<div id="mySessions">
<h2>My Sessions
<button id="hideSessions">Hide All</button>
<button id="tileSessions">Tile</button>
</h2>
<div id="s-p1">
<h3>Bill</h3>
<p>Started at 12:31pm</p>
<div class="content"></div>
</div>
</div>
<div id="agents">
<h2>Agents
<button id="hideAgents">Hide All</button>
<button id="tileAgents">Tile</button>
</h2>
<div id="a-h1">
<h3>Heidi</h3>
<p>Is dealing with 3 sessions...</p>
<div class="content"></div>
</div>
</div>
This is the HTML that will go straight into the body of our document. We've got two main containers—mySessions and agents—which then contain h2 tags with a few buttons, and some div tags. For example, within mySessions, we have the div #s-p1, containing an h3, a paragraph, and another div with the content class. The #s-p1 div is one of many that could appear within mySessions, with these divs being named as #s-xxx, with xxx being a unique identifier for that session.
Within agents, we have a similar structure with slightly different IDs—for example, the agent divs are named as #a-xxx. The various IDs in the HTML are extremely important for our JavaScript, as they'll be used to hook up event handlers, as we'll see in a moment. Let's take a look at our full init function (note that each code snippet will build on what came before).
init : function() {
var s = Ext.select;
var g = Ext.get;
this.sessionsGroup = new Ext.WindowGroup();
this.agentsGroup = new Ext.WindowGroup();
s('#mySessions div').on('click', this.showSession, this);
s('#agents div').on('click', this.showAgent, this);
}
The first two lines of this block of code are just shortcuts to clean up our code—we're storing references to the Ext functions in a variable with a smaller name. Nothing fancy. The next two lines see us creating two distinct window groups—one that will hold our session information window, and one for the agent information windows.
The next few lines make more sense given the HTML we discussed previously. We use our shortcut to Ext.select to add event listeners to all of the divs within #mySessions—handled by the showSession function—and within #agents—handled by showAgent. The third argument to the on function ensures that we maintain scope when the handlers are called. Let's take a look at the showSession function:
showSession : function(e){
var target = e.getTarget('div', 5, true);
var sessionId = target.dom.id + '-win';
var win = this.sessionsGroup.get(sessionId);
if(!win) {
win = new Ext.Window({
manager: this.sessionsGroup,
id: sessionId,
width: 200,
height: 200,
resizable: false,
closable: false,
title: target.down('h3').dom.innerHTML,
html: target.down('.content').dom.innerHTML
});
}
win.show();
win.alignTo(target);
}
There's a lot happening here. The first line ensures that our target variable contains the session div that was clicked on, regardless of whether it was actually one of the session's child elements that was clicked. We then store a unique sessionId by taking the ID of the target session div and appending -win to it. Finally, we check if the session window group already has a reference to the window that we're about to create, by looking it up using the unique sessionId.
If the window doesn't exist then we need to create it. Most of the configuration options shown will be familiar from earlier in this chapter, but take note of our explicit assignment of the sessionsGroup as the managing group for this window. We're also using the sessionId as the ID for the window rather than relying on the automatically-generated ID that will be used by default. With the title and html options, we're using the Ext.Element DOM traversal facilities to assign the text of the session div's h3 and div.content elements respectively.
We're now sure that the win variable holds a valid reference to a window, so we can go ahead and show the window. After we do so, we want to align it with the div that was clicked to show it, so the window's alignTo function is called. That's a whistle-stop tour of the showSession function. The showAgent function is almost identical, but refers to agentsGroup rather than sessionsGroup. Together these two functions make sure that our session and agent windows pop up successfully, so it's now time to take a look at how our WindowGroups can be used to manage them as a unit.
We can add two lines to our init function that use window groups to perform a clearout of our customer service workspace:
g('hideSessions').on('click', this.sessionsGroup.hideAll);
g('hideAgents').on('click', this.agentsGroup.hideAll);
We can add event listeners to our hideSessions and hideAgents buttons that are directly handled by the hideAll functions of the sessionsGroup and agentsGroup. This short code snippet allows us to hide all of the agent or session windows with a click on the associated button. In a similar vein, we're going to add a couple more event listeners to our other buttons that will cause our windows to be tiled across the screen—organised into an easy overview:
g('tileAgents').on('click', this.tileAgents, this);
g('tileSessions').on('click', this.tileSessions, this);
This time the events are handled by tileAgents and tileSessions that look like this:
tileAgents : function(e) {
this.sessionsGroup.hideAll();
this.tile(this.agentsGroup);
},
tileSessions : function(e) {
this.agentsGroup.hideAll();
this.tile(this.sessionsGroup);
}
Again, we call the hideAll function to make sure that the other set of windows is cleared from the screen. When we've prepared the workspace, we can then pass the relevant window group to the tile function:
tile : function(group) {
var previousWin = null;
group.each(function(win){
if(previousWin) {
if(win.getEl().getWidth() + previousWin.getEl().getRight() > Ext.getBody().getWidth()) {
win.alignTo(document.body, 'tl-tl', [0, previousWin.getEl().getHeight()]);
} else {
win.alignTo(previousWin.getEl(), 'tl-tr'),
}
} else {
win.alignTo(document.body, 'tl-tl'),
}
previousWin = win;
});
}
The key here is the WindowGroup.each function, which allows us to loop through every window assigned to the group and perform further actions and calculations. In this case, if it's our first iteration, then we align the window to document.body. For further iterations, the windows are aligned to the previous window in the loop, taking care to add a vertical offset if the window would have pushed off the rightmost side of the screen.
hideAll and each are useful ways of manipulating multiple windows. In this example, we've shown how two distinct groups of windows can be handled with very little coding overhead.
For me, the Ext.Window is one of the most fundamental aspects of a rich Ext JS application. Many of the other big components within the framework, such as the grid and tree, can display information in an easily-consumable and browsable manner, but the chances are that if you need to display or manipulate a record with a lot of information, need and do so without disrupting the user's workflow by navigating to a different page, you're going to want to use a window.
The great thing is that Window is flexible enough to slot straight into any application you may want to build with it. For ultimate power, simply fill it with custom HTML, or to create an integrated experience use Ext components. The fact is that the window subclasses panel provides you with the ability to construct complex pop ups by using the most suitable Ext.layout—be that of a form, or an accordion, or whatever—and have it look and feel the same as the rest of your application.
Although windows and dialogs will most likely have a place in your application, they should be used with care. There's a tendency to identify a requirement for displaying extra information and simply popping it up in the user's face; it could be that a less disruptive interface would be more suitable. Ultimately, Window and Msg sit alongside the other parts of Ext JS as tools that can be easily integrated into any application that requires them.