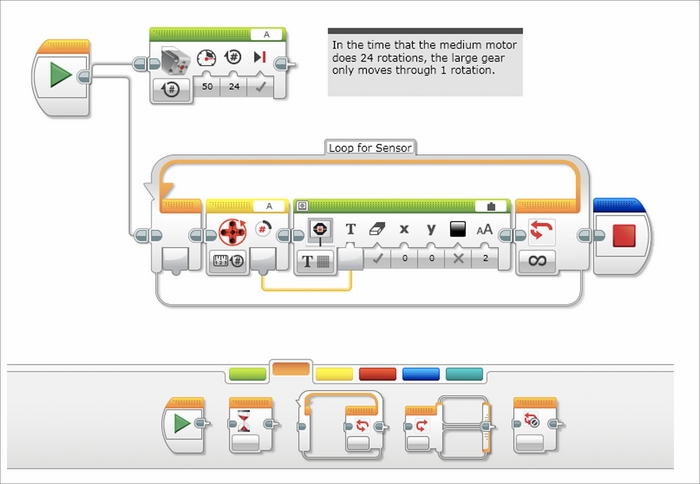
In the following screenshot, you can see that we can have parallel commands in our program. Our primary command will be to rotate the medium motor. You can decide how many turns to rotate your medium motor for. Although in our original program the blocks are connected by touching each other, you can also connect the blocks with wires as you would a real instrument. If you click on the Sequence Plug Exit of a block, a wired space between blocks will open up. You can drag this wire to the next command block, such as the Loop block we will add in a moment.

This also allows you to make your code two dimensional. One important aspect of visual programming is being able to view your entire code on the screen at one time. You can also split the wires to run parallel threads in your program. In this case, the wires run to both the Medium Motor block and the Loop block. When the program executes, both of these branches will run at the same time.

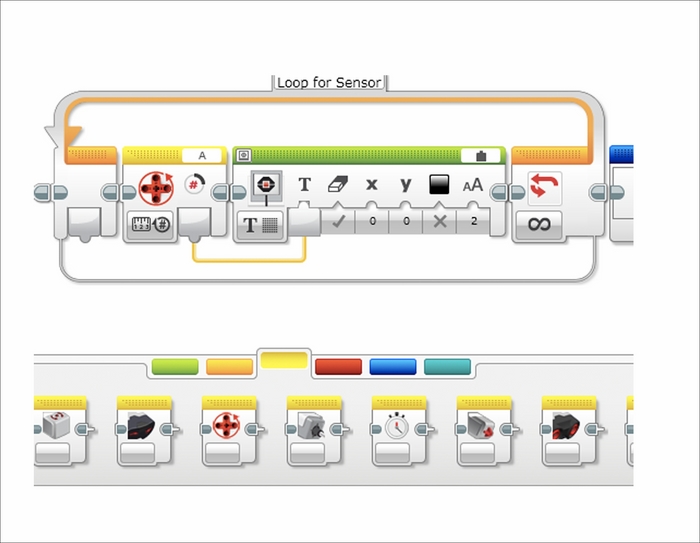
For your other parallel command, grab a Loop block from the Orange Flow Control tab of the Programming Palette. A Loop block continuously repeats itself and runs the command blocks that are inside the loop.
The following steps describe how to set up the blocks inside of the loop:
- Inside the loop, you want to put a Motor Rotation Sensor block from the Yellow Sensor tab of the Programming Palette.
- To the right of the Motor Rotation Sensor block put a Display block from the Green Action tab of the Programming Palette.
- On the Display block, you need to click on the tab on the left of the block to allow a text input from the Motor Sensor block.
- In the upper right-hand corner of the Display block, click on the Text Window—which now says MINDSTORMS—and switch it to Wired.
- You then draw a wire from the output of the Motor Rotation Sensor block to the text input of the Display block.
- Make sure that your Motor Sensor block has port A selected. The tab on the Motor Sensor block should have the number of rotations selected.
- On the Display block, you may also notice that the Eraser icon is selected. This will clear the display each time the loop is run.
When you run this program, you will see the number of rotations of the medium motor displayed on the screen. Since the bottom thread is an infinite loop, you will need to stop the program manually.