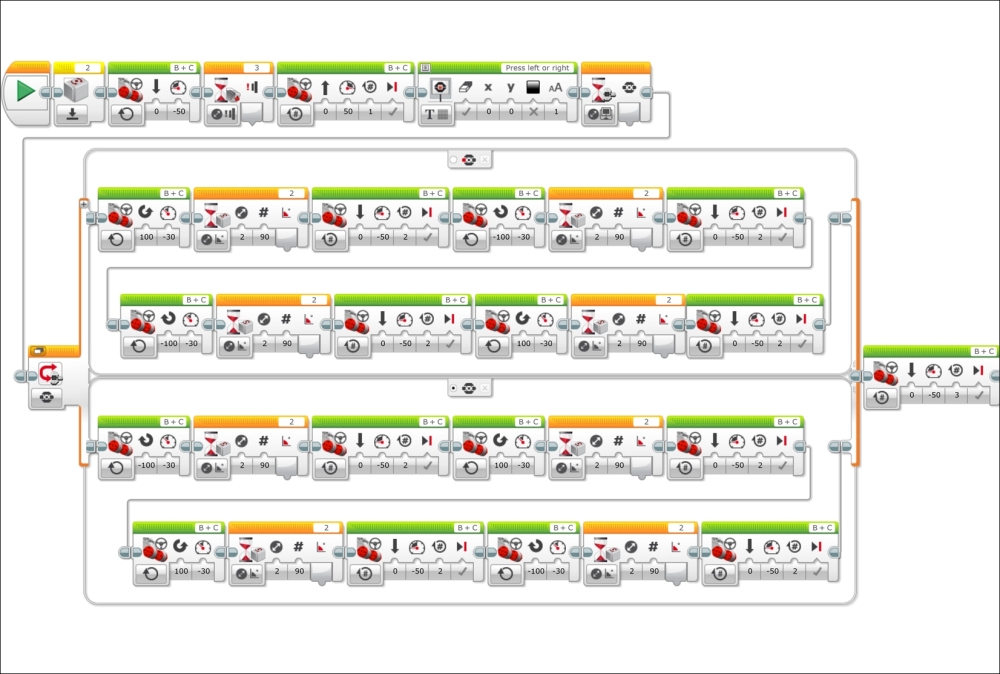
In this section, we will program the robot to move forward until it encounters an unknown obstacle with the Touch Sensor and then attempt to steer around the obstacle. An obstacle such as a table or chair leg would be ideal. We will program the robot to take input from the brick buttons. The program we will initially write is inefficient and repetitive. It is actually a good example of how you shouldn't write a program. We will first simplify the code using the EV3 version of a subroutine or function that is called My Block. You can think of a My Block as a small program within a large program. It is called a My Block because it is a block that you create.
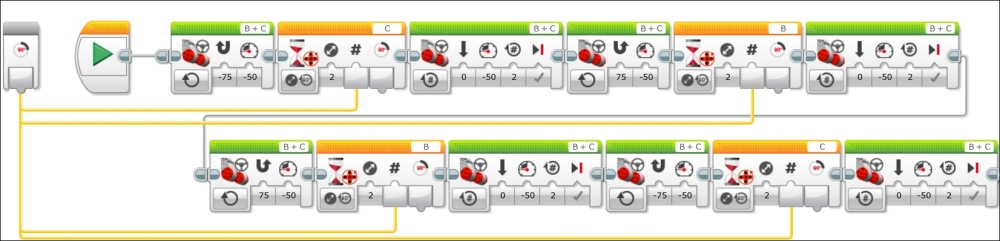
At the beginning, the robot will move forward until the Wait block is triggered by a change in state of the Touch Sensor. We will then program the robot to move back for one rotation of the wheels and display the following message onto the brick screen: Press left or right. The next Wait block will wait for the user to press one of the brick buttons on the EV3 brick. This will be followed by a case structure or Switch Flow block.
The Switch Flow block has two cases, one if the left brick button is depressed and the other if the right brick button is depressed. Note that the default case of the case structure is actually the second case. So the right button does not actually have to be pushed. If any button other than the left button is pushed, the second case will be chosen. The user will determine if they want the robot to avoid the obstacle by taking a detour around the left side or around the right side of the obstacle. Each case contains 11 blocks. The following command blocks inside the case, we can see the robot will turn until the Motor Rotation Wait block tells it to stop. The robot will then move forward, turn, and repeat. The sequence is quite long. You should also note that we alternate between using the rotation sensor on port B and port C. This is because, while turning, one of the wheels travels farther than the other. We want to use the outside wheel to keep track of the quantity of our motion. Later in the chapter, we will explore a trick to get around this.
At this point, we can download and execute the code and the robot should be able to steer around a small rigid object.
We can now simplify the code using a My Block or subroutine. Select all of the blocks inside one branch of the case structure. To select several blocks, you should click and drag a box around the blocks you want to select. You will know the blocks have been selected because they will be highlighted with a light blue perimeter. Then, from the pull down menus, navigate to Tools | My Block Builder, as you can see in the following screenshot:

The My Block Builder screen will pop up and ask you to name the My Block, which is akin to naming a subroutine. You can also write a description and select an icon. You can also design an icon. We will name this My Block LeftTurn. I have chosen a rotation sensor as the visual icon, as shown in the following screenshot:
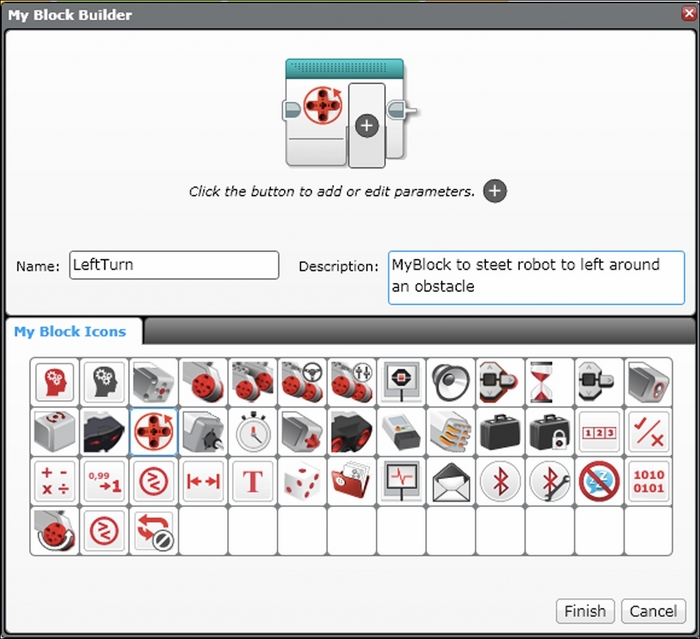
You might also notice that the My Block can be modified to accept parameters. Do not press the Finish button yet. It is not possible to alter the parameter setup of My Block once you have created it. In our program, input parameters will be useful, so we can make quick changes to the maximum amount of rotations the Motor Rotation sensor Wait block has to wait for without needing to use a variable. You can see in the following screenshot that I have chosen a slider to alter this parameter and set the limits to 0 and 1000 degrees of rotation for the sensor. Note that My Block can also be created in such a way that it accepts wires for the input and output parameters. Some advance planning for the My Block creation is needed because, as mentioned earlier, it is not possible to alter the parameter setup of My Block once you have created it.

In the preceding screenshot, you can see that I have chosen a rotation icon for the input parameter, which I call Angle. You can choose Parameter Icons by clicking on the third tab of the My Block Builder screen.
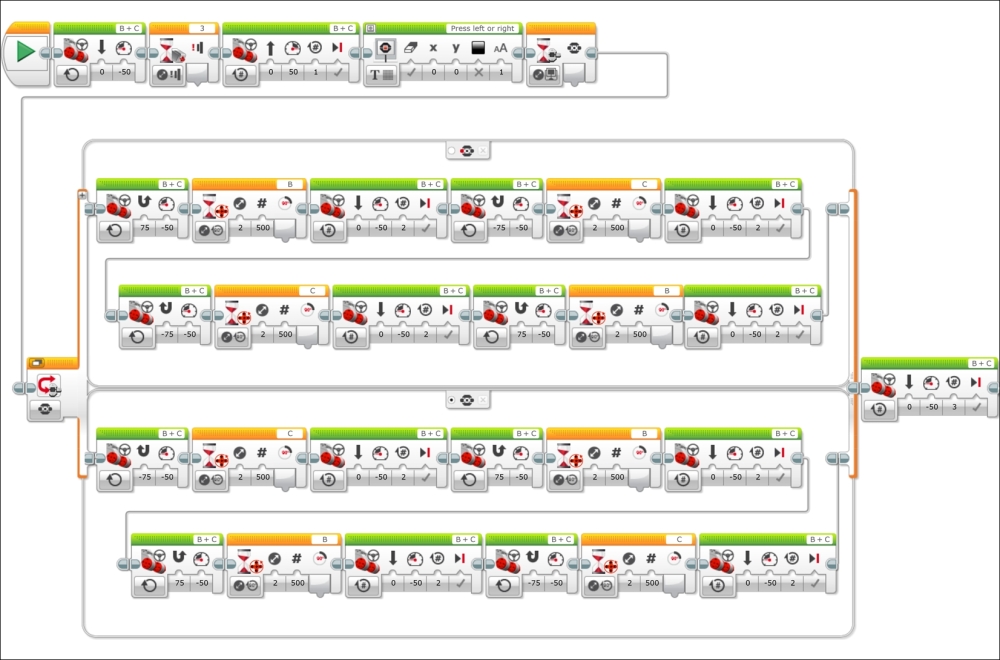
You should do the same for the other branch of the case structure (or switch), but instead, name that My Block TurnRight. At this point, we can clean up the code by deleting a lot of the empty space that has been created inside the Switch block, as you can see in the following screenshot:

After you have defined a My Block, you can find it in the Programming Palette under the commands in the light blue programming blocks tab. Before we run this program, we need to make some small changes inside My Block. If you double-click on My Block, you can see what is under the hood. If you are using input and output parameters, you will need to connect the wires from those parameters to the blocks inside My Block. In this base, I have drawn wires from the input parameter to all of the Wait Motor Rotation sensor blocks:
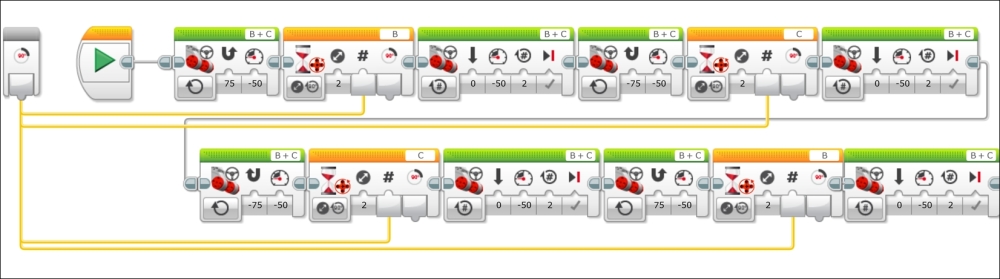
Here, I have done the same thing for the My Block TurnRight:
We can now download and execute this simplified code. After this Motor Rotation sensor-driven solution, you can now try to make My Blocks for the Gyro version of this program, which you will find in the following screenshot: