
Some variation of the whiteboard tool is found in virtually every synchronous classroom platform. Roughly the synchronous equivalent of a traditional flip chart, whiteboards allow trainers and participants to post ideas on a shared space. Images and content can be placed on prepared whiteboards (often in the form of PowerPoint slides) and then marked up ("annotated") using a variety of drawing tools.
It's a mistake to think of the whiteboard simply as a flip chart, however. That is truly minimizing the potential of the tool. When thoughtfully designed, whiteboard exercises can be truly interactive and collaborative.
Collaborative whiteboard exercises can make the program seem to move more quickly for participants and can help to minimize lecture. They are also great for engaging kinesthetic learners (people who take in information by being physically engaged with some task).
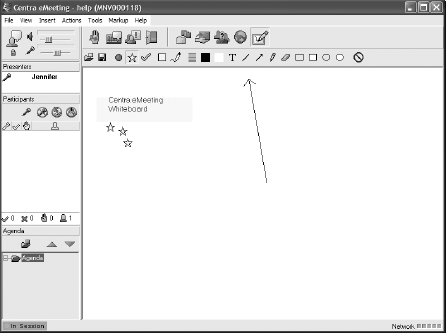
Here are some basic ideas to help the instructional designer create collaborative exercises using the whiteboard. (See Figure 4.1.) More detailed examples are provided at the end of this chapter.
You can use the whiteboard for anything you would use a flip chart or marker board for in a traditional classroom setting. For example, you can capture expectations at the beginning of a class and revisit them at the end of a program.
Content changes and additions can be captured and used to revise the program. In many programs, participants or trainers make pertinent points that should be captured for future scripts or slides. If these ideas are captured on the whiteboard, the recordings can be reviewed later on and the new ideas can be incorporated.
You can capture participants' ideas flip-chart style. Design screens with minimal text (two or three words or perhaps just a graphic) and a white background. Engage the participants in a discussion and capture their ideas on the whiteboard.
Whiteboards can often be archived for reuse in asynchronous applications or emailed to class participants. Participants often want to receive a copy of the results of effective whiteboard collaborations.
Content can be highlighted as it is discussed, which makes lectures more meaningful. There are a variety of annotation tools available, so plan which ones you would like to use and how you would like to use them.
Ask experienced participants to take turns annotating the whiteboard (that is, scribing comments they think are important) while you are moderating a discussion. Besides keeping them busy, it is interesting to see what points the participants find interesting.
Icebreakers and games can also be created using the whiteboard. Break away from the content and start to have fun! Crossword puzzles, hangman, and Jeopardy™ games can all be very engaging and useful when trying to reinforce concepts.
Use the whiteboard as a polling tool. Ask participants to graphically vote on which bullet point on a screen they think is most important by using a specific annotation tool (maybe a star, checkmark, or pointer).

Not all whiteboards are the same. Each product has its own variation and conceptualization of how the tool works most effectively. Before designing exercises, it is important to thoroughly understand the intricacies of the specific tool you are using. Here are some questions you should ask before designing collaborative whiteboard exercises.
How many people can write on the whiteboard at once? This is probably the biggest differentiator between different whiteboard types and the characteristic that will most affect your exercise design. Some vendors feel that only the trainer should be able to write on the whiteboard. Others allow the trainer to select one participant at a time to use the tools. Still others allow potentially everyone in the class to annotate at the same time.
Is all uploaded content available on the whiteboard? Sometimes you need to make a decision while assembling course content about which screens should be whiteboard screens. (I always attempt to make ALL of my screens whiteboard compatible.) Other platforms automatically make any web-ready content (PowerPoint, gifs, and jpgs) available on the whiteboard.
What tools are available for whiteboard drawings? Squares, circles, pointers, stars, lines, "typed" text, and highlighters are all examples of common whiteboard tools. Some products allow users to change font and line colors. One fun feature found in a few platforms gives every participant a custom pointer tool.
Can you save whiteboards created during the event? Some trainers find it useful to save the results of collaborative whiteboard exercises and distribute them to participants or other interested parties after the event is over. The whiteboards may be saved as a common file type (.bmp,.jpg,.gif), or the vendor may have a proprietary file format that can only be used within that application. Vendors that don't support this suggest that you watch recordings to review the results.
Can graphics be pasted or imported to the whiteboard? This allows for some creativity during the program. Instead of having all whiteboard slides prepared ahead of time, engaging graphics can be imported based on the current class personality. Sometimes participants may be able to import graphics as well. This can be the basis for some fun, engaging interactions, but participants must be warned to be careful about the nature of the graphical content they decide to share.
Is the snapshot feature available? It can be very useful to capture a picture of an application and paste it onto the whiteboard so it can be explained in more detail.
If you return to a slide that you have written on, will the comments still be there? In a traditional classroom, trainers often capture information on flip charts and return to them later in the program. Some whiteboard variations allow you to do this as well. For example, if the trainer writes on Slide #2, every time he or she returns to that slide during the program the annotations will still be there.
Can drawings and graphics be moved once they are placed on the whiteboard? If they can, you have an "object-oriented" whiteboard. Being able to move or erase individual whiteboard additions can make for some interesting exercises!
Keep the following tips in mind when designing and facilitating whiteboard interactions:
Plan what drawing tools you want to use for each exercise. Give thought to colors, fonts, and shapes. Using these tools effectively will maximize the visual impact of the exercise.
Be very clear in the instructions about who should be writing on the whiteboard and what he or she is supposed to accomplish. If you are allowing one participant at a time to write, how will that participant be selected? If multiple people are participating, how will that be facilitated?
Implement ground rules. When providing exercise instructions, make sure participants understand the following guidelines (and add whatever additional guidelines you feel are necessary):
Participants should be sensitive about the content of any graphics that they import to the whiteboard.
The "Clear Whiteboard" tool should only be used by the trainer!
Don't worry about spelling mistakes, bad handwriting, or writing outside the lines. The point is to be creative.
The rest of this chapter contains five detailed examples of whiteboard exercises. PowerPoint is the graphic medium used unless otherwise indicated. Sometimes, an assistant trainer, or producer, can be very helpful in facilitating these exercises. Because of this, instructions have been included for the trainer, producer, and participants.
Before designing comparable exercises for your initiatives, make sure you consider the software variations of your specific platform and test the exercises in a realistic setting. You may need to make accommodations for your particular synchronous platform.
In general, trainer and producer (assistant trainer) instructions will be available in a leader guide. Participant instructions will be delivered by the trainer verbally and be supported by screen instructions and participant guide references when appropriate. A sample leader guide is located in Appendix E, and a sample participant guide is located in Appendix F.
At the end of each exercise, there is room for you to take notes on how you may be able to customize the interaction for your specific projects. Make sure you keep track of the new ways you find to use the tools to collaborate online.
Design Considerations and Exercise Set-Up
Estimate the number of participants in the class and create a grid containing 8, 9, 12, 16, or 20 squares to match the approximate number of participants.
If participants' names are known prior to the class, the names should be typed into the grid ahead of time in order to save time. If a list of names is not available, the grid boxes should be numbered.
Consider the example of a new hire training program. The exercise steps might look like this:
Whiteboard tools are provided to each participant.
Each participant is assigned a spot on the grid.
Participants are instructed to use the text or drawing tools in their assigned grid space to let the trainer know at least one expectation of this program. To encourage creativity, text or illustrations are acceptable.
Participants should indicate they have completed the exercise by clicking "Yes."
After about two minutes, the trainer should debrief the expectations exercise by asking a few participants to explain their responses in depth.

If using numbers in the grid, the participants need to be assigned spaces. If your synchronous platform assigns numbers to participants when they raise their hands, ask everyone to raise his or her hand and leave it raised. Tell them that the number next to their names corresponds to the numbers in the grid. Ask participants to click "Yes" or "OK" to verify that they know where they need to write. (Another way to assign spaces is to have the producer type a set of participant initials in each grid box as the trainer verbally assigns each space.)
Ensure that everyone is given permission to write on the whiteboard.
Give participants one minute to capture their thoughts about what they expect to accomplish during this session.
Take two to four minutes to debrief the exercise, indicating which expectations should be met during the program. (Make the debriefing fun by commenting on illustrations, use of color, and so forth.)
Save the whiteboard results so you can review them at the end of the program.
At the end of the program, take several minutes to verify that you met the expectations.
The producer can assist by:
Typing participants' names in the grid if there is no other way to assign numbers.
Assigning whiteboard permissions.
Saving the whiteboard at the end of the exercise or taking notes on the participants' expectations.
Assisting participants with whiteboard tools.
Directions to participants should be concise and easy to understand. Verbally instruct participants on what they will be doing. Consider including exercise instructions in the participant guide.
Using the whiteboard tools, communicate your expectations on the grid. You may type text or create a drawing illustrating your expectations.
When you are finished, use any remaining time to review the expectations of your peers.
Ask three participants to select someone else's annotation and explain what it means to the rest of the class.
This same type of exercise can be accomplished using a group chat area.
More than twenty boxes in a grid becomes too much. Consider using chat or a combination of chat and whiteboard techniques.
How can YOU use this exercise, or a variation, in your program?
The screen should contain between six and twelve phrases, numbers, or pictures. There should be some obvious relationships, and some less obvious relationships, among the items.
Consider the example of an underwriting claims training program. The exercise steps might look like this:
Participants are presented with a screen containing pictures of the following items: a bicycle, a volcano, a jewelry pendant, a construction worker, a person working at a computer, and a house with a family standing in front of it.
Ask for up to three volunteers to use the whiteboard line tool to connect two items and then explain the connection. They may or may not be related to content. For example: A person may ride a bicycle on a volcano path or the person working at the computer may be processing a claim for volcano damages.
Ask for up to three more volunteers to use the whiteboard tools to connect three or four items and then explain the connection. For example: The people in front of the house may be filing a claim with the underwriter sitting at the computer for a lost pendant or the construction worker may be fixing the home that was damaged after a recent volcano.

Explain to the class that the screen contains up to twelve concepts and illustrations that have various relationships to one another. Some items may have multiple relationships. Phrases may be connected to other phrases or to illustrations. For example, a picture of an apple might be related to the word "fruit" and the word "red" and a picture of a "pie."
In series, ask participants to select an item or phrase and connect that item to as many other items as possible. They will be asked to explain the connections verbally, while the trainer draws lines connecting the items and indicates with text what those connections were.
After the first participant is done, the trainer clears the whiteboard annotations to prepare for the next participant, who selects a different starting point and makes as many connections as he or she can. Duplicates are OK, as long as the starting point is different.
Note
Note: If you have more participants than you need to complete this exercise, make a note to include the extra participants first in the next exercise.
Debrief using a "Seven Degrees of Separation" technique. Say, "We've identified a lot of different relationships here. Let me show you how these two seemingly unrelated items are connected. Then use four or more steps to connect them. For example: The word 'RED'> a picture of an 'APPLE'> a picture of a 'PIE'> a picture of a 'CIRCLE' (Think about the word 'PI'—We tricked you!). Hence, we connected RED to CIRCLE."
The producer can assist by:
Drawing lines and typing connections on the whiteboard.
Keeping track of how many connections were identified by each participant.
Directions to participants should be concise and easy to understand. Verbally instruct participants on what they will be doing. Consider including exercise instructions in the participant guide.
Be creative! As long as you can support your connection, and the class buys in, it counts.
Make this into a contest. The participant who makes the most connections from a single starting point wins!
Turn the idea around. Ask participants to come up with ways seemingly unrelated items might be related. The first one to come up with the connection in the fewest number of steps wins.
Ask a participant to add another item to the whiteboard and encourage the rest of the class to try to make additional connections.
How can YOU use this exercise, or a variation, in your program?
Have a series of application screens (for example, three data-entry screens required to input a new customer into the system) pasted onto whiteboard slides ahead of time.
Create a short scenario for each screen. These scenarios should contain information necessary to complete the screen, but not in any logical order. Some information may be buried or not provided. The scenarios, when brought together, should complete an entire larger transaction.
Include these scenarios along with the screen shots in the participant guide.
Consider the example of a training program that teaches how to enroll a new customer into the system. The exercise steps might look like this:
Screen one requires customer demographic data. Using the whiteboard tools, circle a field on the screen. Ask a participant to review the scenario and tell you what specific data from that scenario should be in that field. "Type" the answer into the field using the whiteboard text tools.
Circle another field and ask a different participant to use the whiteboard tools to type the correct data, based on the scenario, into the field.
Repeat as appropriate, then move to the next screen.

Assign each participant one of the participant guide scenarios. (For larger classes you may need to assign two participants per scenario. Not everyone may be able to participate.)
Ask for a volunteer to use the whiteboard tools to fill in the screen capture using the information provided in the scenario. Remember to assign whiteboard permissions as necessary.
Follow up by asking the participant what he or she thinks will happen next in the transaction.
The producer can assist by:
Having the application ready to launch in case participants need additional demonstrations.
Grabbing "snapshots" of screens for additional exercises.
Directions to participants should be concise and easy to understand. Verbally instruct participants on what they will be doing. Consider including exercise instructions in the participant guide.
Write down questions about the scenario as you review it.
Ask other participants why they made certain decisions.
If participants reach mastery faster than expected, "snapshot" additional screen captures and paste them onto the whiteboard and do an advanced round. Participants can provide each other with data to complete the screens.
If participants have trouble with a particular concept, follow up the exercise with an application sharing demonstration.
For a more advanced group, consider creating a breakout room exercise for two participants that brings them through a series of screens.
How can YOU use this exercise, or a variation, in your program?
Participants need to complete a prework assignment that informs them of a process, for example, how to deal with difficult employees.
Participants should complete a short questionnaire around the topic prior to class, for example: "Think of a difficult employee...
What characteristics make you classify him or her as difficult?
What have you done to fix the problem?
How did he or she respond?
How does his or her behavior affect the people around you?
Have participants send the answers to these questions to the trainer before the class begins.
Create a slide that contains the sample questions and room for one set of responses.
Pick a participant at random and have him or her write responses to the prework questions on the whiteboard.
Ask participants to help solve this person's problem by applying the process learned during prework. They should think about the process and apply it to the specifics presented by the randomly selected participant. The focus at this point is on the process, not on each participant's prework.
When the class is finished, debrief the exercise by going through the formal process and applying it to the presented problem. Comment on how well (or not) the participants applied the process.
Directions to participants should be concise and easy to understand. Verbally instruct participants on what they will be doing. Consider including exercise instructions in the participant guide.
Make sure you complete all prework and the questionnaire.
Ask participants who do not submit prework responses ahead of time to attend a different session.
How can YOU use this exercise, or a variation, in your program?
A question and a series of response options are recorded on a slide for the audience. For example: "Of the following meals, which do you think is most important?"
Breakfast
Lunch
Dinner
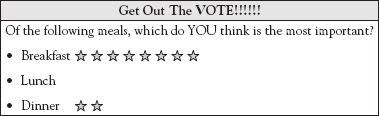
Grant everyone whiteboard permission and ask participants to indicate their choice using a graphical representation. Some platforms offer stars, check marks, or pointers.
Some participants may feel so strongly about one choice that they "vote" several times. Or if they are split between choices, they may vote for multiple choices. This should be encouraged. The idea of this exercise is to give the group a visual of which choice is the most important to them. Exuberance adds to the experience.
Directions to participants should be concise and easy to understand. Verbally instruct participants on what they will be doing. Consider including exercise instructions in the participant guide.
Use the whiteboard tools to vote for your choice. If you feel strongly, let the group know! This is not a "one man, one vote" situation.
This can be more visually effective than polling because the trainer can annotate the votes, for example, by drawing a circle around the most popular selection and a square around the least popular selection. The trainer may ask a question such as, "Why do you think choice #1 received the most votes?" The trainer can capture those opinions on the whiteboard to add emphasis to the voting results.
How can YOU use this exercise, or a variation, in your program?