
Working with the InfoPath 2007 Forms Designer
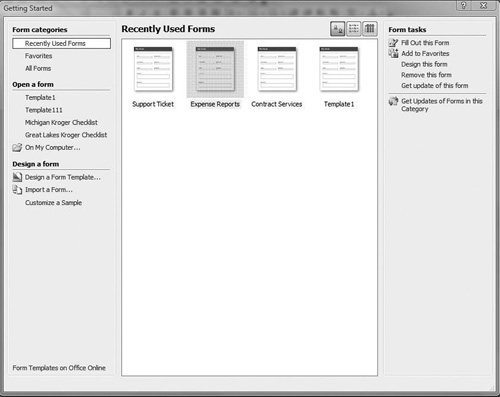
Designing a simple form with InfoPath is easy. When InfoPath is first launched, the Getting Started dialog box as shown in Figure 9.1 appears. In this dialog box, you can design a new form, import a form, or customize one of the sample forms included. Another use of this dialog box is to select one of the recently used forms. By clicking on the form, you can then fill it out, add it to your favorites, and then design, remove, or get updates of the form. If you double-click on the form, it opens in design mode.
As a form designer, you’ll use a familiar table layout to design the form. As stated before, the UI is the familiar UI from the Office 2003 suite, so locating the formatting options is simple. A Design Tasks pane also is available to point out the necessary steps in designing the form as shown in Figure 9.2. The task pane is a Quick Launch point to common tasks needed in designing a form. If the task pane does not appear when InfoPath is loaded, click View > Task Pane.
Figure 9.2. Design Tasks task pane.

The following sections walk you through importing a template from Word or Excel and starting with a blank template.
Importing in a Template
If you already have forms existing in your office, you probably are not very anxious to spend time re-creating them. Hopefully by this point in the chapter, however, you realize numerous benefits to creating the forms in Office InfoPath, such as decreasing duplication of efforts, process management, and so on. Because there are so many benefits to moving to an InfoPath solution, Microsoft has provided a feature in InfoPath that allows you to import into InfoPath forms previously created using Word or Excel. To import the forms, Word 2007 and Excel 2007 must be installed on the PC. The forms can be created in a previous version, but the 2007 version of the client must be present on the machine. If there are additional forms created in other formats, check Office Marketplace for additional form template converters.
When using the Import Wizard, the first option is the type of document—Word or Excel—as shown in Figure 9.3.
Figure 9.3. Import Wizard.

Each importer has custom options that can be set. Figure 9.4 and Figure 9.5 represent the options available for Excel and Word, respectively. Notice you can select what you want to import as well as determine what will be converted.
Figure 9.4. Excel workbook Import Options dialog box.

Figure 9.5. Word document Import Options dialog box.


Starting From Scratch
If you don’t have an existing form to import, you need to start from scratch. When designing a new form template, you have two options in the Design a Form Template dialog box (see Figure 9.6): Form Template or Template Part. A template part is a reusable control or section to be used within form templates. Template parts are described in more detail in the following section.

If you choose the Form Template option, you have five data source choices to base the template on: Blank, Web Service, Database, XML or Schema, or Connection Library. Defining the data source allows you to initially set up a data connection the form can use to receive or submit data. The concepts of data sources and data connections will be described in more detail later in the chapter. If you select Web Service, Database, XML or Schema, or Connection Library, after clicking OK, you are prompted to define the data source. The Enable browser-compatible features only option at the bottom of Figure 9.6 is recommended if you know this form will be used with Forms Services. By checking this box at the beginning, the unsupported options will be unavailable and will save you valuable time in reengineering the form later. If you do not check this box, when you are designing the form, you can make the form browser compatible by going to the Tools menu, selecting Form Options, selecting the category Compatibility, and then checking the box to Design a form template that can be opened in a browser or InfoPath.
Exercise: Creating a Service Request Form
|
The examples in this chapter will build a service request form for a facilities management department for a school district. All of the exercises within this chapter and Chapter 10, “Workflow and Process Management,” will build on this scenario. Before beginning the exercises, you need to create a Facilities Management team site and a Form Library called Service Requests. If you are using the portal created in Chapter 2, “Creating Corporate Portal Sites,” the URL will be http://portal/fm for the team site and http://portal/fm/Service%20Requests for the Service Requests Form Library. If you need a refresher on creating a team site, see Chapter 2. For a refresher on creating a Form Library, see Chapter 3, “Lists, Document Libraries, and Content Types.” The service request form will contain four fields: name, date requested, category, and request details.
|


To aid in the design process, InfoPath provides two features: the Preview button and Design Checker. Both of these features help you see what the users will see, as well as ensure there are no errors in the form.
Preview Button
The Preview button as shown in Figure 9.9 allows you to view and interact with the form as if you were the user who will be filling out the form. You can check data connections and drop-down choices to ensure everything is rendering correctly.

Design Checker
The Design Checker allows you to check the form’s compatibility with either InfoPath 2003 or the browser. Because this chapter describes creating forms to be used with InfoPath Forms Services, this discussion of the Design Checker focuses on browser compatibility. For more information on additional functionality of the Design Checker, see http://office.microsoft.com/en-us/infopath/HA012304821033.aspx.
The Design Checker returns different items: errors and messages. Errors represent items that will not be supported in either browser. Errors need to be fixed for the form to load in the browser. MESSAGES represent items that may cause your form to not render correctly. Messages should be checked and fixed if they interfere with the experience of the user. A sample error and message in the Design Checker are shown in Figure 9.10. The error is represented by the X icon, and the message is represented by the I icon.
Figure 9.10. Design Checker.


| If a form’s compatibility settings are changed, the Design Checker runs immediately to check for any errors or messages. After the compatibility settings are set, the InfoPath grays out options that are not supported in the browser; however, it doesn’t gray out messages. To ensure proper rendering of the form, be sure to run the Design Checker after completing the design of the form and also test the form in the browser. To run the Design Checker, in the Design Tasks task pane, select Design Checker. Any errors or messages will appear. |
Creating Reusable Pieces With Template Parts
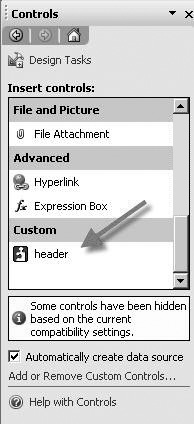
If your company is like most companies, there will be sections of your templates you want to reuse. For example, you might collect name, address, e-mail, and phone number information in several of your templates or a header with your company logo or footer with the legal notice containing your privacy policy. You could re-create this each time it’s needed, but that would be a waste of time. You could copy and paste it, but if the controls being used contain things such as data validation, rules, default values, or data connections, these settings won’t be copied. InfoPath solves this issue with a piece of functionality called template parts. Template parts are reusable components that can contain the layout, controls, rules, data validation, conditional formatting, and data connections. After a template part has been created and added, the control is available for the users in the Custom controls section of the Controls task pane as shown in Figure 9.11.
Figure 9.11. Template part in Controls task pane.
However, the following features are not available in template parts:
Views. Views allow the form designer to determine how the form is presented. For example, a common view to add is a print view, which removes the extra form details that you do not want printed. Template parts cannot contain views; they can be used in the views of a form. For more information about views, see the “Views” section later in the chapter.
Data connections for submitting data. The template part cannot contain data connections for submitting the data. Data connections for submitting data allow the data entered in a form to be submitted to an external data source such as a Web service (possibly a database), a document library in SharePoint, an e-mail message, or a hosting application. The ability to use a data connection to submit data will be described in more detail in the “Configuring Submit Options” section of this chapter.
Publishing features. The template cannot be configured to be published. Publishing is the act of making the form available in SharePoint, via e-mail, in a network location, or as an installable form template that the users can fill out. Publishing will be described in more detail later in the section “Publishing an InfoPath Form to a WSS Form Library.”
Background pictures. The template part can contain a background image, such as a watermark or company logo.
For a complete list of unsupported features, visit http://office.microsoft.com/en-us/infopath/HA101477621033.aspx?pid=CH101638151033.
Exercise: Creating and Adding a Template Part
|
This exercise walks you through creating a header with the company logo and branding as a template part.
|

After a template part has been installed and is being used, you can update the template part by locating it on your PC and opening it in design mode. After you make the necessary change and save the template part, it needs to be reinstalled using steps 10 through 19 in the preceding “Creating and Adding a Template Part” exercise. When it has been reinstalled, open a form using the template part, and a warning icon appears as shown in Figure 9.13.

By right-clicking on the tab of the template part, you can select Update to update all instances of the template part, even instances in other views.